Page 86 of 140
8-7
8
14 Engine oilChange.
Check ATV for oil leakage, and correct if neces-
sary.√ √√√
15Engine oil filter ele-
mentClean or replace if necessary.√√√
16 Engine oil strainerClean.√√√
17 Final gear oilChange.
Check ATV for oil leakage, and correct if neces-
sary.√√
18*Moving parts and
cablesLubricate.√√√√
19*Drive select lever
safety system cableCheck operation and adjust or replace if neces-
sary.√√√
20*Throttle leverCheck operation.
Check throttle lever free play, and adjust if neces-
sary.
Lubricate cable and lever housing.√√√√√
21*Front and rear brake
switchesCheck operation and correct if necessary.√√√√√
22*Lights and switchesCheck operation and correct if necessary.
Adjust headlight beams.√√√√√ NO. ITEMCHECK OR MAINTENANCE
JOBINITIAL EVERY
Whichev-
er comes
firstmonth136612
km
(mi)320
(200)1300
(800)2500
(1600)2500
(1600)5000
(3200)
hours 20 80 160 160 320U1P066E0.book Page 7 Thursday, August 5, 2010 4:15 PM
Page 90 of 140

8-11
8
TIPIf a torque wrench is not available when installing
the spark plug, a good estimate of the correct
torque is 1/4–1/2 turn past finger tight. However,
the spark plug should be tightened to the specified
torque as soon as possible.3. Install the spark plug cap.EBU2329GEngine oil and oil filter element The engine oil level should be checked before
each ride. In addition, the oil must be changed and
the oil filter element cleaned at the intervals speci-
fied in the periodic maintenance and lubrication
chart.
To check the engine oil level
1. Place the ATV on a level surface.
2. Check the engine oil level on a cold engine.
TIPIf the engine was started before checking the oil
level, be sure to warm up the engine sufficiently,
and then wait at least ten minutes until the oil set-
tles for an accurate reading.3. Remove the engine oil filler cap, and then
wipe the engine oil dipstick off with a clean
rag.
4. Insert the dipstick into the filler hole (without
screwing it in), and then remove it again to
check the oil level.TIPThe engine oil should be between the minimum
and maximum level marks.
Tightening torque:
Spark plug:
18 Nm (1.8 m·kgf, 13 ft·lbf)
U1P066E0.book Page 11 Thursday, August 5, 2010 4:15 PM
Page 91 of 140

8-12
8
5. If the engine oil is at or below the minimum
level mark, add sufficient oil of the recom-
mended type to raise it to the correct level.
NOTICE: Be sure the engine oil is at the
correct level, otherwise engine damage
may result.
[ECB00851]
6. Insert the dipstick into the oil filler hole, and
then tighten the engine oil filler cap.To change the engine oil (with or without oil fil-
ter element cleaning)
1. Place the ATV on a level surface.
2. Start the engine, warm it up for several min-
utes, and then turn it off.
3. Place an oil pan under the engine to collect
the used oil.
4. Remove the engine oil filler cap, and then re-
move the engine oil drain bolt to drain the oil
from the crankcase. NOTICE: When remov-
ing the engine oil drain bolt, the compres-
sion spring, oil strainer and O-ring will fall
out. Take care not to lose these parts.
[ECB00311]
1. Engine oil filler cap
2. Engine oil dipstick
3. Maximum level mark
4. Minimum level markU1P066E0.book Page 12 Thursday, August 5, 2010 4:15 PM
Page 97 of 140
8-18
8
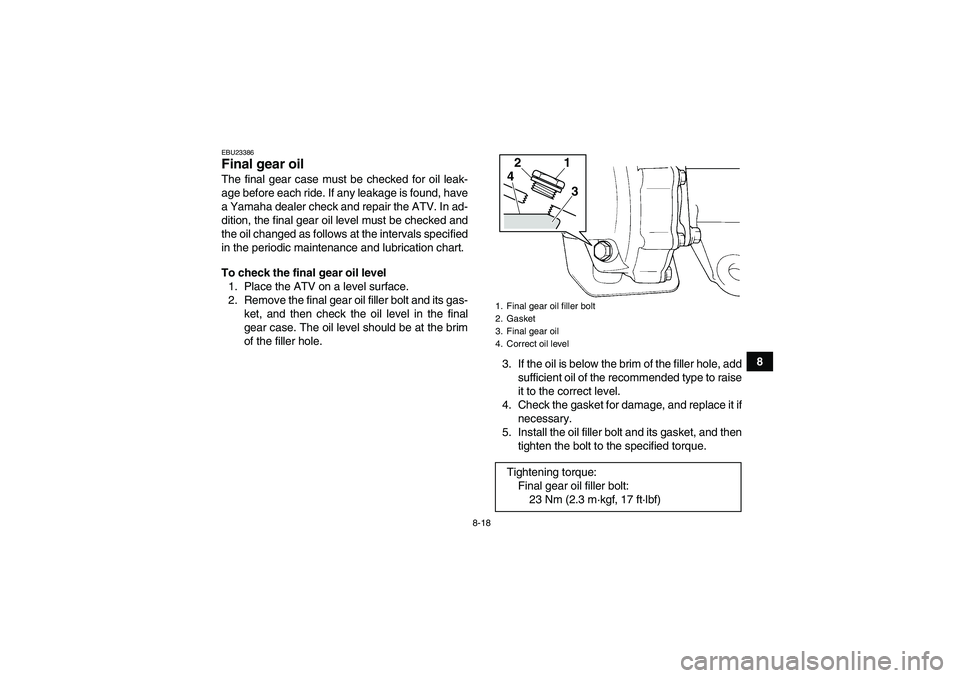
EBU23386Final gear oil The final gear case must be checked for oil leak-
age before each ride. If any leakage is found, have
a Yamaha dealer check and repair the ATV. In ad-
dition, the final gear oil level must be checked and
the oil changed as follows at the intervals specified
in the periodic maintenance and lubrication chart.
To check the final gear oil level
1. Place the ATV on a level surface.
2. Remove the final gear oil filler bolt and its gas-
ket, and then check the oil level in the final
gear case. The oil level should be at the brim
of the filler hole.
3. If the oil is below the brim of the filler hole, add
sufficient oil of the recommended type to raise
it to the correct level.
4. Check the gasket for damage, and replace it if
necessary.
5. Install the oil filler bolt and its gasket, and then
tighten the bolt to the specified torque.
1. Final gear oil filler bolt
2. Gasket
3. Final gear oil
4. Correct oil levelTightening torque:
Final gear oil filler bolt:
23 Nm (2.3 m·kgf, 17 ft·lbf)
1
2
4
3
U1P066E0.book Page 18 Thursday, August 5, 2010 4:15 PM
Page 98 of 140
8-19
8To change the final gear oil
1. Place the ATV on a level surface.
2. Remove the final gear case guard by remov-
ing the bolts.
3. Place an oil pan under the final gear case to
collect the used oil.
4. Remove the final gear oil filler bolt, the final
gear oil drain bolt, and their gasket to drain the
oil from the final gear case.5. Install the drain bolt and its new gasket, and
then tighten the bolt to the specified torque.
6. Refill with the recommended final gear oil to
the brim of the filler hole as shown. NOTICE:
Be sure no foreign material enters the final
gear case.
[ECB00421]
1. Final gear case guard
2. Bolt
1. Final gear oil drain bolt
2. GasketTightening torque:
Final gear oil drain bolt:
23 Nm (2.3 m·kgf, 17 ft·lbf)
1
1
2
U1P066E0.book Page 19 Thursday, August 5, 2010 4:15 PM
Page 109 of 140
8-30
8
�Use only the recommended quality brake fluid,
otherwise the rubber seals may deteriorate,
causing leakage and poor braking performance.�Refill with the same type of brake fluid. Mixing
fluids may result in a harmful chemical reaction
and lead to poor braking performance.�Be careful that water does not enter the brake
fluid reservoir when refilling. Water will signifi-
cantly lower the boiling point of the fluid and may
result in vapor lock.�Brake fluid may deteriorate painted surfaces or
plastic parts. Always clean up spilled fluid imme-
diately.�As the brake pads wear, it is normal for the brake
fluid level to gradually go down. However, if the
brake fluid level goes down suddenly, have a
Yamaha dealer check the cause.EBU24281Changing the brake fluid Have a Yamaha dealer change the brake fluid at
the intervals specified in the TIP after the periodic
maintenance and lubrication chart. In addition,have the oil seals of the brake master cylinder and
calipers as well as the brake hoses replaced at the
intervals listed below or whenever they are dam-
aged or leaking.
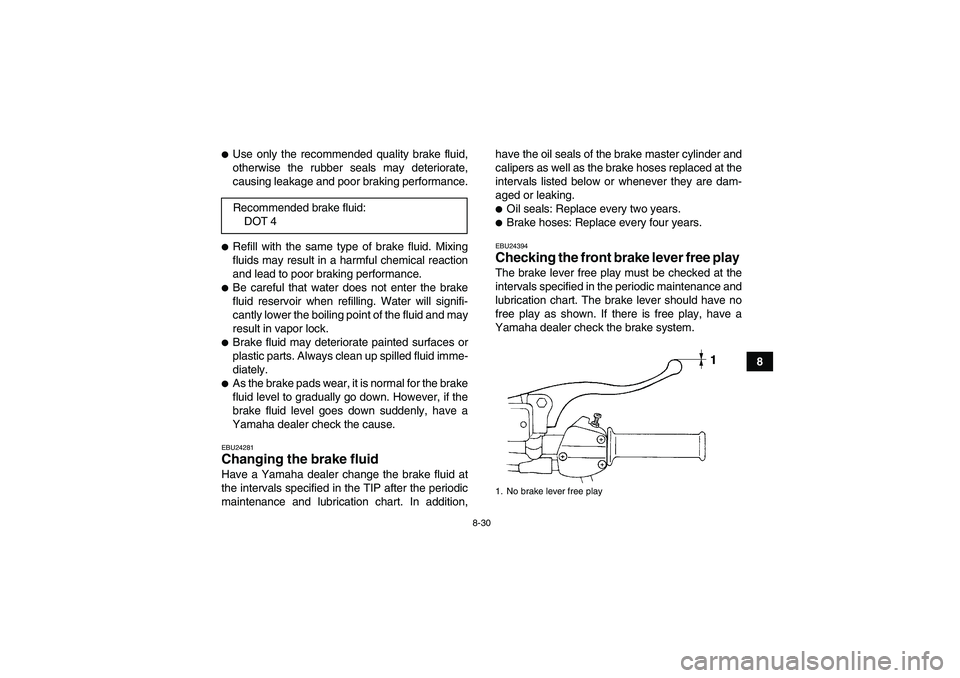
�Oil seals: Replace every two years.�Brake hoses: Replace every four years.EBU24394Checking the front brake lever free play The brake lever free play must be checked at the
intervals specified in the periodic maintenance and
lubrication chart. The brake lever should have no
free play as shown. If there is free play, have a
Yamaha dealer check the brake system. Recommended brake fluid:
DOT 41. No brake lever free play
U1P066E0.book Page 30 Thursday, August 5, 2010 4:15 PM

