2011 VOLKSWAGEN TRANSPORTER window
[x] Cancel search: windowPage 178 of 486
Fitting the opaque shades to the side windows
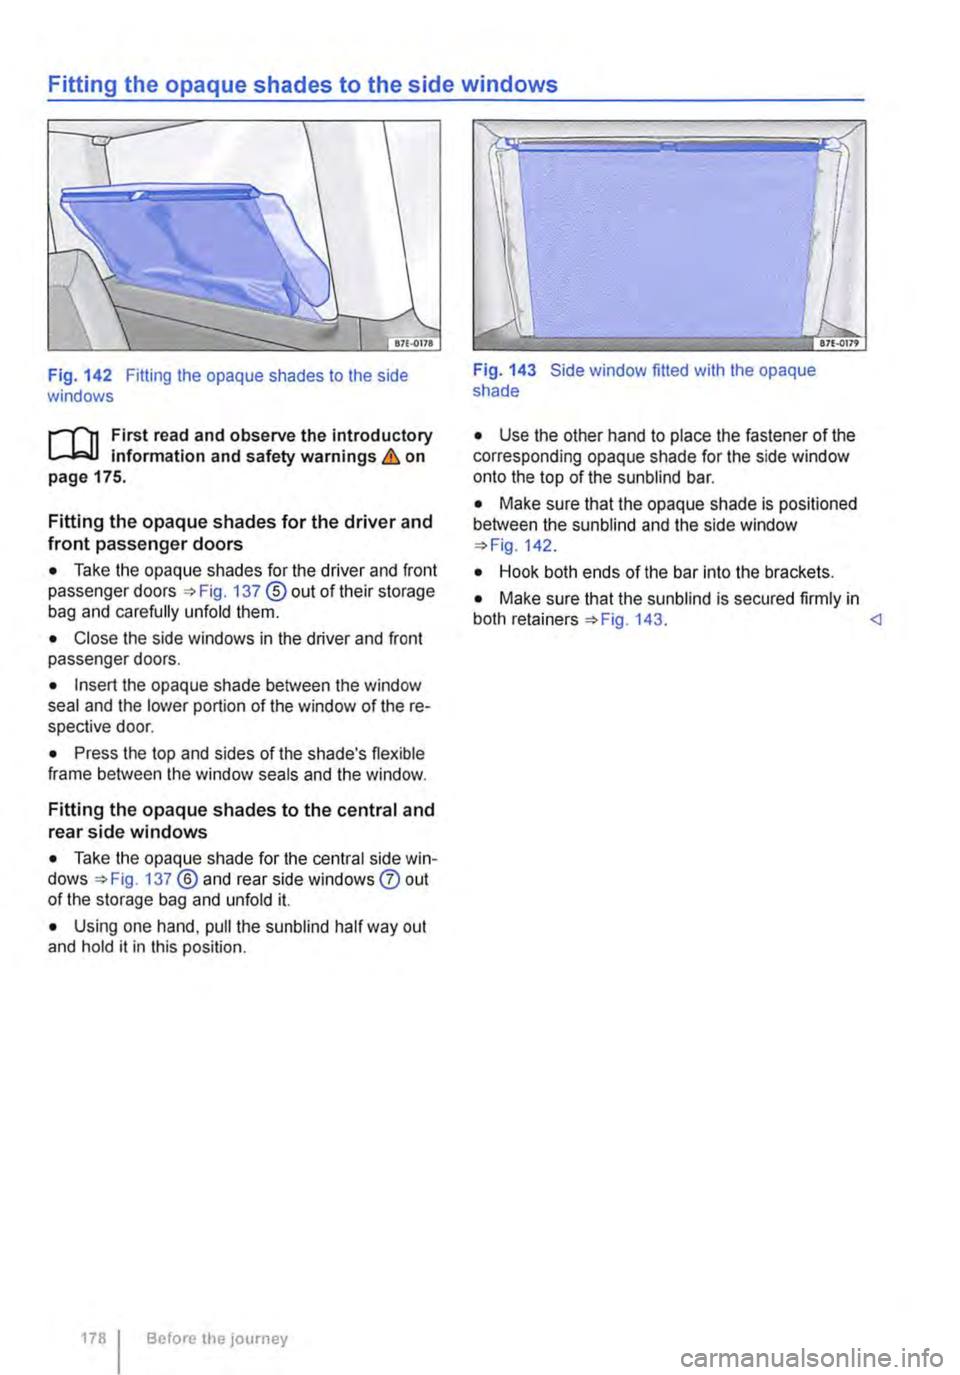
Fig. 142 Fitting the opaque shades to the side windows
rl'"'n First read and observe the introductory L-lc.l.l information and safety warnings & on page 175.
Fitting the opaque shades for the driver and front passenger doors
• Take the opaque shades for the driver and front passenger doors =>Fig. 137 ®out of their storage bag and carefully unfold them.
• Close the side windows in the driver and front passenger doors.
• Insert the opaque shade between the window seal and the lower portion of the window of the re-spective door.
• Press the top and sides of the shade's flexible frame between the window seals and the window.
Fitting the opaque shades to the central and rear side windows
• Take the opaque shade for the central side win-dows =>Fig. 137 ®and rear side windows 0 out of the storage bag and unfold it.
• Using one hand, pull the sunblind half way out and hold it in this position.
178 Before the journey
Fig. 143 Side window fitted with the opaque shade
• Use the other hand to place the fastener of the corresponding opaque shade for the side window onto the top of the sunblind bar.
• Make sure that the opaque shade is positioned between the sun blind and the side window =>Fig. 142.
• Hook both ends of the bar into the brackets.
• Make sure that the sunblind is secured firmly in both retainers=> Fig. 143. <1
Page 179 of 486
Removing and stowing the opaque shades
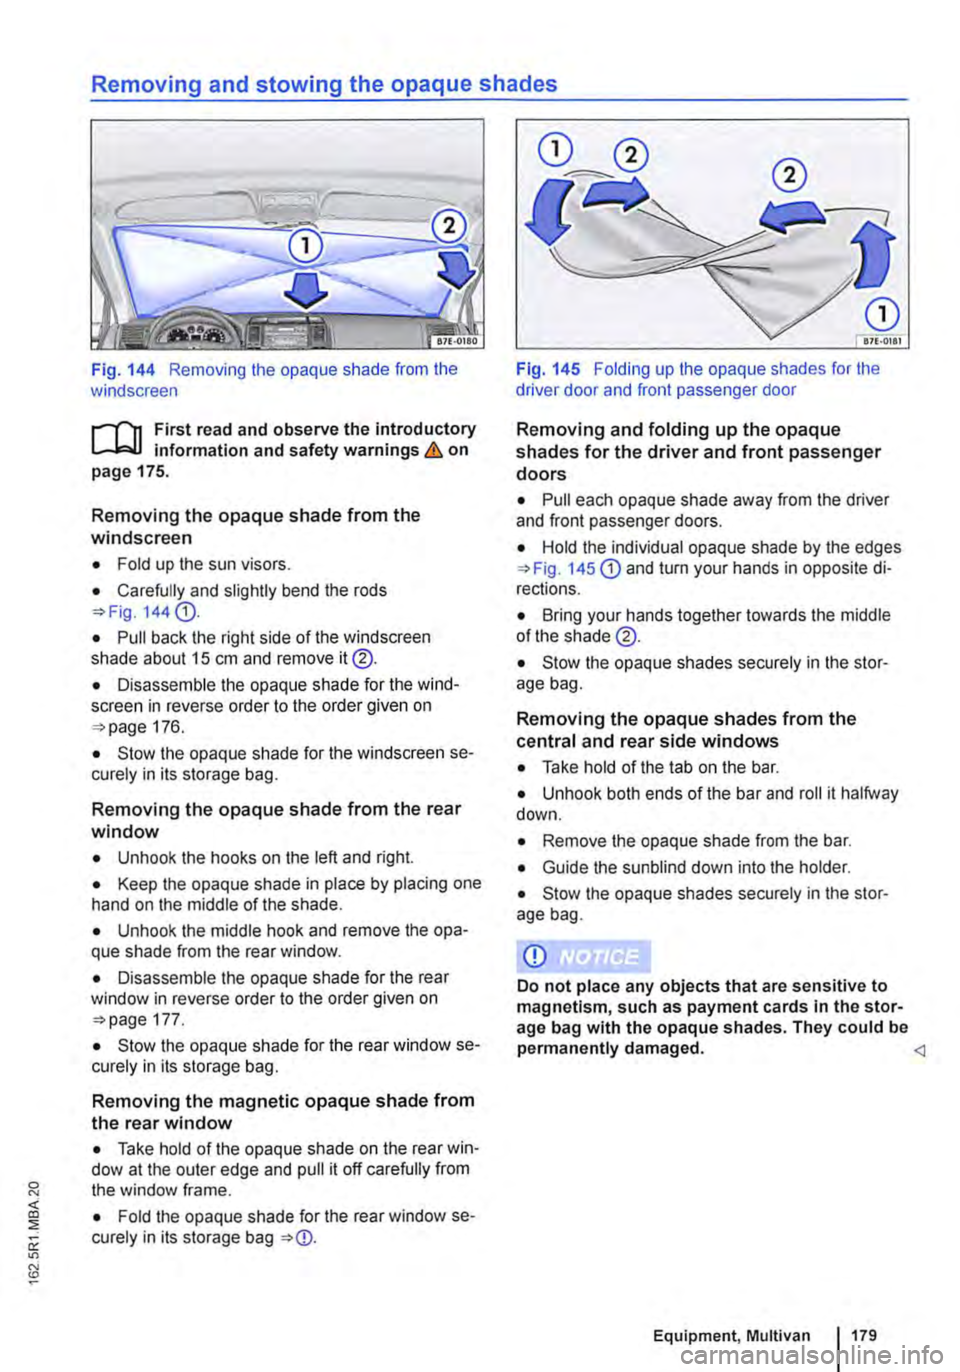
Fig. 144 Removing the opaque shade from the windscreen
,....-("n First read and observe the introductory L-.lc.l.l information and safety warnings & on page 175.
Removing the opaque shade from the windscreen
• Fold up the sun visors.
• Carefully and slightly bend the rods =>Fig. 144 G).
• Pull back the right side of the windscreen shade about 15 cm and remove it@.
• Disassemble the opaque shade for the wind-screen in reverse order to the order given on =>page 176.
• Stow the opaque shade for the windscreen se-curely in its storage bag.
Removing the opaque shade from the rear window
• Unhook the hooks on the left and right.
• Keep the opaque shade in place by placing one hand on the middle of the shade.
• Unhook the middle hook and remove the opa-que shade from the rear window.
• Disassemble the opaque shade for the rear window in reverse order to the order given on =>page 177.
• Stow the opaque shade for the rear window se-curely in its storage bag.
Removing the magnetic opaque shade from the rear window
• Take hold of the opaque shade on the rear win-dow at the outer edge and pull it off carefully from the window frame.
• Fold the opaque shade for the rear window se-curely in its storage bag =>CD.
Fig. 145 Folding up the opaque shades for the driver door and front passenger door
Removing and folding up the opaque shades for the driver and front passenger doors
• Pull each opaque shade away from the driver and front passenger doors.
• Hold the individual opaque shade by the edges =>Fig. 145 CD and turn your hands in opposite di-rections.
• Bring your hands together towards the middle of the shade @.
• Stow the opaque shades securely in the stor-age bag.
Removing the opaque shades from the central and rear side windows
• Take hold of the tab on the bar.
• Unhook both ends of the bar and roll it halfway down.
• Remove the opaque shade from the bar.
• Guide the sun blind down into the holder.
• Stow the opaque shades securely in the stor-age bag.
Equipment, Multivan 179
Page 181 of 486
anchor points should be fitted to the vehicle floor by a specialist workshop in accordance with Volks-
wagen AG guidelines.
These additional seats must also have seat belt anchor points and suitable seat belts.
The Volkswagen Commercial Vehicles dealership can provide you with more Information on retrofit-ting seats.
Additional Information and warnings:
• Sitting correctly and safely =>page 61
• Child seats (accessories) =>page 96
A WARNING
Assuming an Incorrect sitting position In the vehicle can Increase the risk of severe or fa-tal injuries during a sudden driving or brak-Ing manoeuvre, In the event of a collision or accident, or If the alrbags are triggered.
• The number of vehicle occupants must never exceed the number of seats with seat belts In the vehicle.
• All vehicle occupants must assume a cor-rect sitting position before setting off and maintain this position throughout the trip. This also applies to the fastening of seat belts.
• Always secure children In the vehicle in an authorised restraint system which is suita-ble for their height and weight=> page 61.
• Always keep your feet In the footwell while the vehicle is In motion. Never place your feet on the seat or dash panel, for example, and never ride with your feet out the window. When you are sat like this, the alrbag and seat belt cannot provide optimal protection and could actually Increase the risk of injury during an accident.
A WARNING
The seats of the 2-seat arrangement are not suitable for the attachment of child seats of any kind.
• Never use a child seat on the 2-seat ar-rangement.
A WARNING
Children who are not strapped In or who are not strapped In properly could sustain severe or fatal injuries while the vehicle Is In motion.
• Never use a rear-facing child seat on the front passenger seat.
• Children up to the age of 12 should always be transported on the single seats In the pas-senger compartment but not on the 2-seat ar-rangement.
• Always secure children In the vehicle In an authorised restraint system suitable for their height and weight.
• Always fasten children's seat belts cor-rectly and ensure that they assume a correct sitting position.
• Adjust the seat backrest to an upright po-sition If a child seat Is to be used on this seat.
• Do not allow children to sit with their heads or any other body parts In the side air-bag's deployment zone.
• Make sure that the seat belt Is correctly routed.
• Never allow children or babies to be trans-ported on someone's lap, or held In some-one's arms.
• Only ever fasten one child Into each child seat.
• Read and follow the Instructions by the manufacturer of the child seat.
Page 211 of 486
• Stowage page 1 50
• Cleaning and caring for the interior 388
A WARNING
Loose objects may be flung through the vehi-cle interior in the event of a sudden driving or braking manoeuvre. This can cause serious injury and can also lead to loss of control of the vehicle.
• Do not stow any pets or any hard, heavy or sharp objects in the vehicle's open stow-age compartments, in the luggage net, on the dash panel, on the shelf behind the rear seats or in items of clothing and bags in the vehicle interior.
• Always keep stowage compartments closed while the vehicle is in motion.
A WARNING
Objects in the driver footweli can hinder ped-al operation. This can lead to loss of control of the vehicle and increase the risk of serious injury.
• Please ensure that all pedals can always be operated without any hindrance.
• The foot mats must always be properly se-cured in the footwell.
• No additional foot mats or other floor cov-erings should be placed over the fitted foot mat.
• Ensure that no objects can enter the driv-er footwell while the vehicle is in motion.
• If there are any objects in the footwell, re-move them when the vehicle is parked.
A WARNING
Improper use of the stowage compartments can cause serious injury.
• Never fill stowage compartments beyond their capacity.
A WARNING (Continued)
• Always take care when closing stowage compartments that nobody is within their functional area.
A WARNING
Cigarette lighters in the vehicle could be damaged or accidentally lit. This could lead to serious burns and other injuries.
• Before adjusting the seats always make sure that there is no lighter on or near the moveable parts of the seat.
• Before closing stowage areas or compart-ments always ensure that there is no lighter in the way.
• Never stow lighters in stowage areas or compartments or on other surfaces in the ve-hicle. Cigarette lighters may self-ignite on high-temperature surfaces, especially in sum-mer.
CD
• Hard objects on the shelf can chafe against the wires of the heating element in the rear win-dow and cause damage.
• Do not store any heat-sensitive objects, food or medicines inside the vehicle. Hot and cold temperatures could damage them or ren-der them unusable.
• Objects stored in the vehicle that are made from transparent materials, such as glasses, magnifying glasses or transparent suction cups on the windows, can concentrate the sun's rays and thus cause damage to the vehi-cle.
m Always ensure that the ventilation openings L!J between the rear window and the stowage area are uncovered to allow stale air to escape from the vehicle.
Page 214 of 486
A wARNING
Always use the luggage net carefully, observ-ing the instructions. Risk of injury.
• Heavy, pointed or sharp items which are not stowed securely can cause injury in the event of sudden braking manoeuvres or acci-dents.
Stowage compartment in the headliner
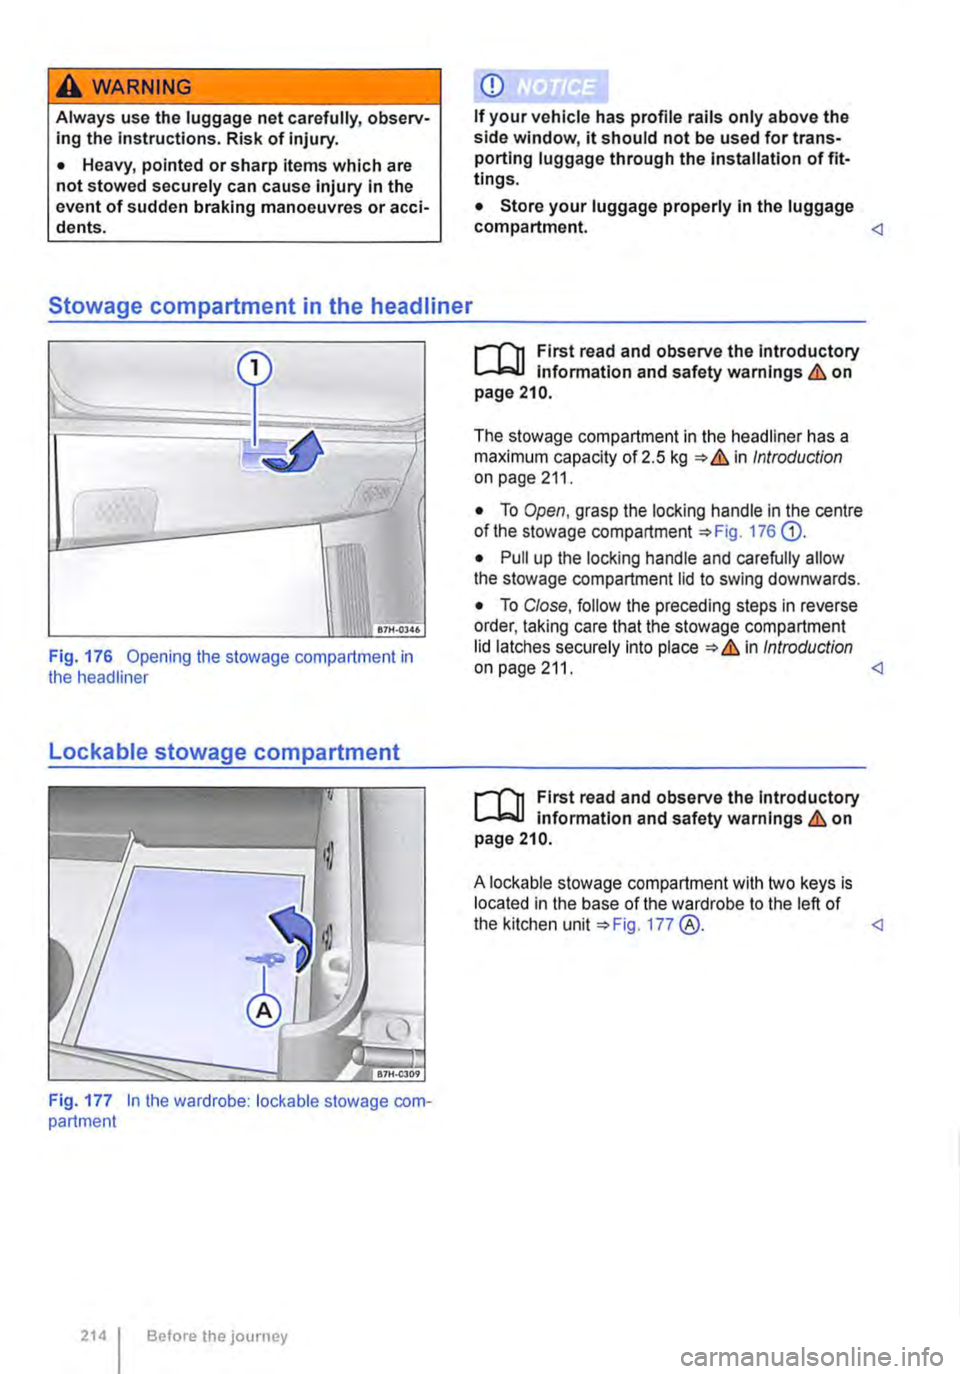
Fig. 176 Opening the stowage compartment in the headliner
Lockable stowage compartment
Fig. 177 In the wardrobe: lockable stowage com-partment
214 Before the journey
CD
If your vehicle has profile rails only above the side window, it should not be used for trans-porting luggage through the Installation of fit-tings.
• Store your luggage properly In the luggage compartment. <1
r-I'n First read and observe the Introductory L-Wl Information and safety warnings & on page 210.
The stowage compartment in the headliner has a maximum capacity of 2.5 kg & in Introduction on page 211.
• To Open, grasp the locking handle in the centre of the stowage compartment 176 G).
• Pull up the locking handle and carefully allow the stowage compartment lid to swing downwards.
• To Close, follow the preceding steps in reverse order, taking care that the stowage compartment lid latches securely into place & in Introduction on page 211.
r-I'n First read and observe the introductory L-Wl information and safety warnings & on page 210.
A lockable stowage compartment with two keys is located in the base of the wardrobe to the left of the kitchen unit 177 @. <1
Page 215 of 486
Drink holder, California
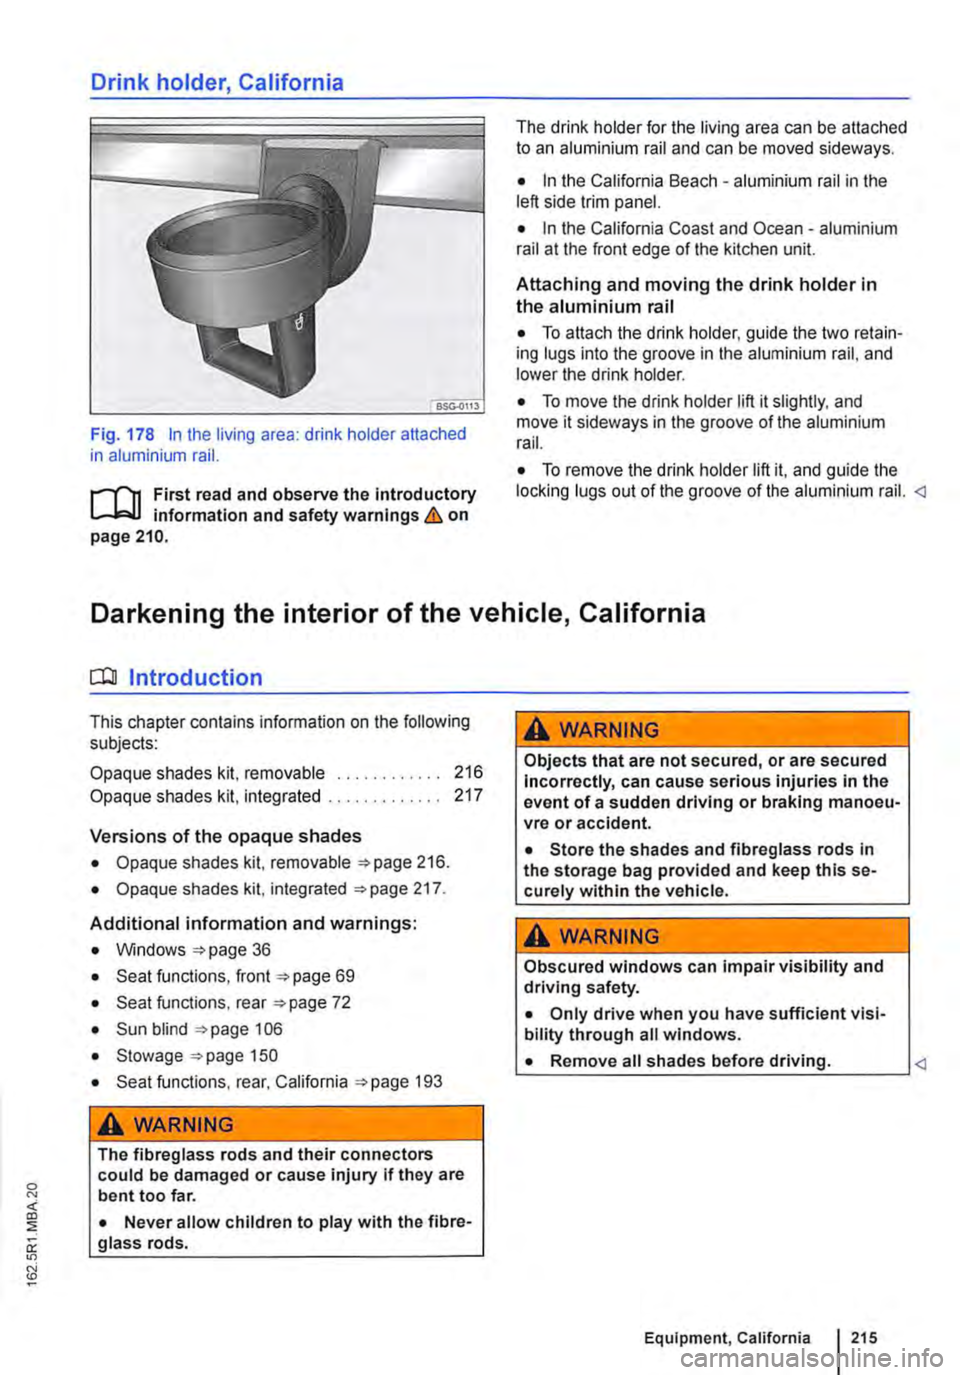
Fig. 178 In the living area: drink holder attached in aluminium rail.
.--m First read and observe the introductory information and safety warnings & on page 210.
The drink holder for the living area can be attached to an aluminium rail and can be moved sideways.
• In the California Beach -aluminium rail in the left side trim panel.
• In the California Coast and Ocean -aluminium rail at the front edge of the kitchen unit.
Attaching and moving the drink holder in the aluminium rail
• To attach the drink holder, guide the two retain-ing lugs into the groove in the aluminium rail, and lower the drink holder.
• To move the drink holder lift it slightly. and move it sideways in the groove of the aluminium rail.
• To remove the drink holder lift it, and guide the locking lugs out of the groove of the aluminium rail.
CC!J Introduction
This chapter contains information on the following subjects:
Opaque shades kit, removable
Opaque shades kit, integrated
Versions of the opaque shades
• Opaque shades kit, removable =>page 216.
• Opaque shades kit, integrated =>page 217.
Additional information and warnings:
• Windows =>page 36
• Seat functions, front =>page 69
• Seat functions, rear =>page 72
• Sun blind =>page 106
• Stowage =>page 150
• Seat functions, rear, California =>page 193
A WARNING
216 217
The fibreglass rods and their connectors could be damaged or cause injury if they are bent too far.
• Never allow children to play with the fibre-glass rods.
A WARNING
Objects that are not secured, or are secured Incorrectly, can cause serious injuries in the event of a sudden driving or braking manoeu-vre or accident.
• Store the shades and fibreglass rods in the storage bag provided and keep this se-curely within the vehicle.
A WARNING
Obscured windows can impair visibility and driving safety.
• Only drive when you have sufficient visi-bility through all windows.
• Remove all shades before driving.
Page 216 of 486
Opaque shades kit, removable
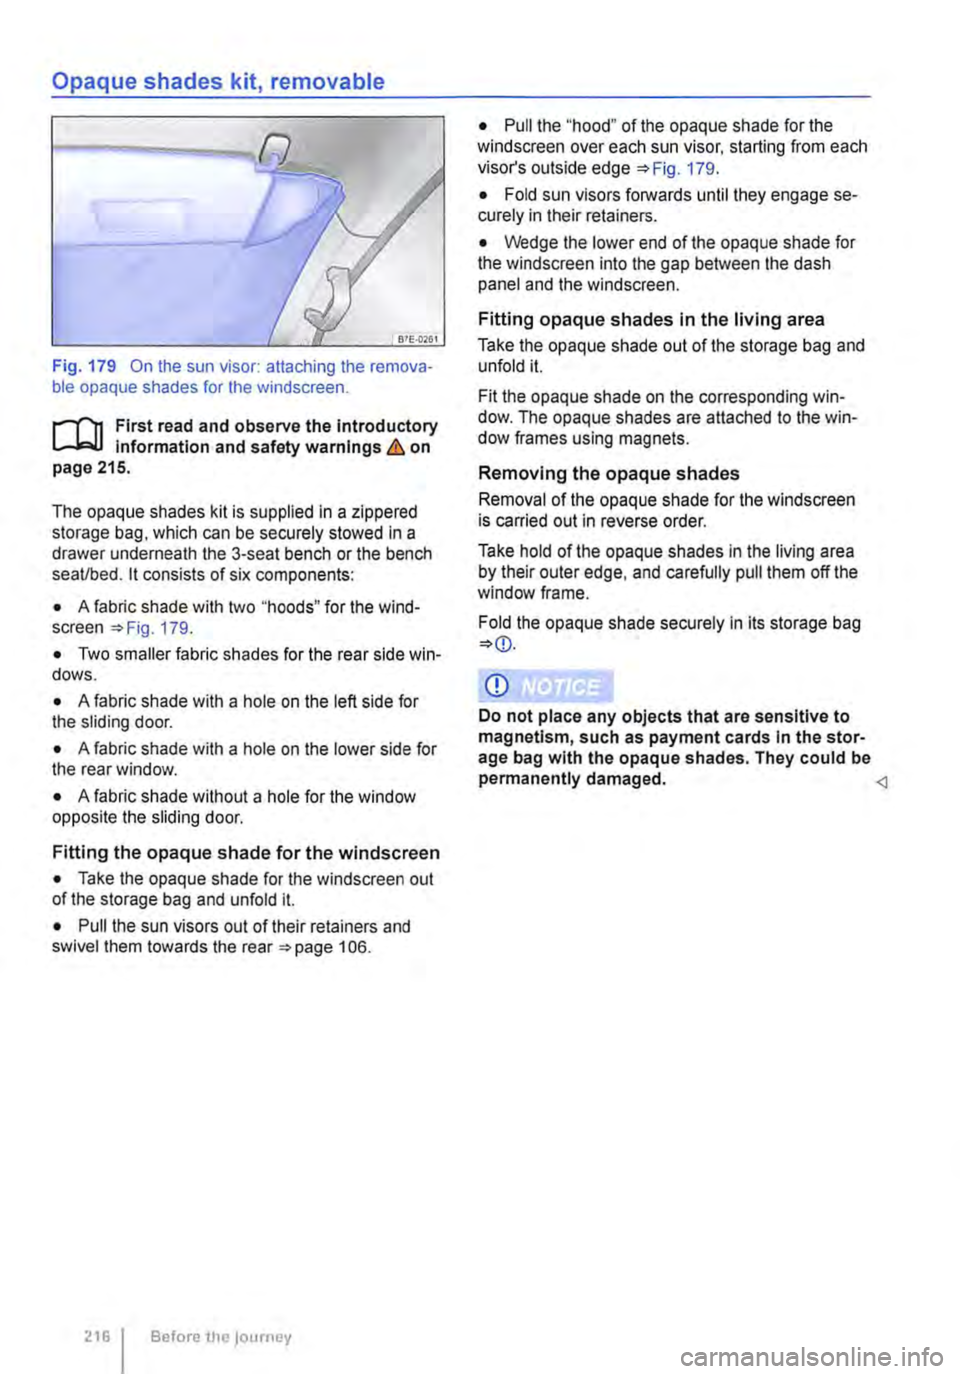
Fig. 179 On the sun visor: attaching the remova-ble opaque shades for the windscreen.
r-1"!1 First read and observe the introductory L-J,:.U Information and safety warnings & on page 215.
The opaque shades kit is supplied in a zippered storage bag, which can be securely stowed in a drawer underneath the 3-seat bench or the bench seaVbed. it consists of six components:
• A fabric shade with two "hoods" for the wind-screen =>Fig. 179.
• Two smaller fabric shades for the rear side win-dows.
• A fabric shade with a hole on the left side for the sliding door.
• A fabric shade with a hole on the lower side for the rear window.
• A fabric shade without a hole for the window opposite the sliding door.
Fitting the opaque shade for the windscreen
• Take the opaque shade for the windscreen out of the storage bag and unfold it.
• Pull the sun visors out of their retainers and swivel them towards the rear =>page 106.
216 Before the journey
• Pull the "'hood" of the opaque shade for the windscreen over each sun visor, starting from each visor's outside edge 179.
• Fold sun visors forwards until they engage se-curely in their retainers.
• Wedge the lower end of the opaque shade for the windscreen into the gap between the dash panel and the windscreen.
Fitting opaque shades in the living area
Take the opaque shade out of the storage bag and unfold it.
Fit the opaque shade on the corresponding win-dow. The opaque shades are attached to the win-dow frames using magnets.
Removing the opaque shades
Removal of the opaque shade for the windscreen is carried out in reverse order.
Take hold of the opaque shades in the living area by their outer edge, and carefully pull them off the window frame.
Fold the opaque shade securely in its storage bag
Q)
Do not place any objects that are sensitive to magnetism, such as payment cards in the stor-age bag with the opaque shades. They could be permanently damaged.
Page 217 of 486
Opaque shades kit, integrated
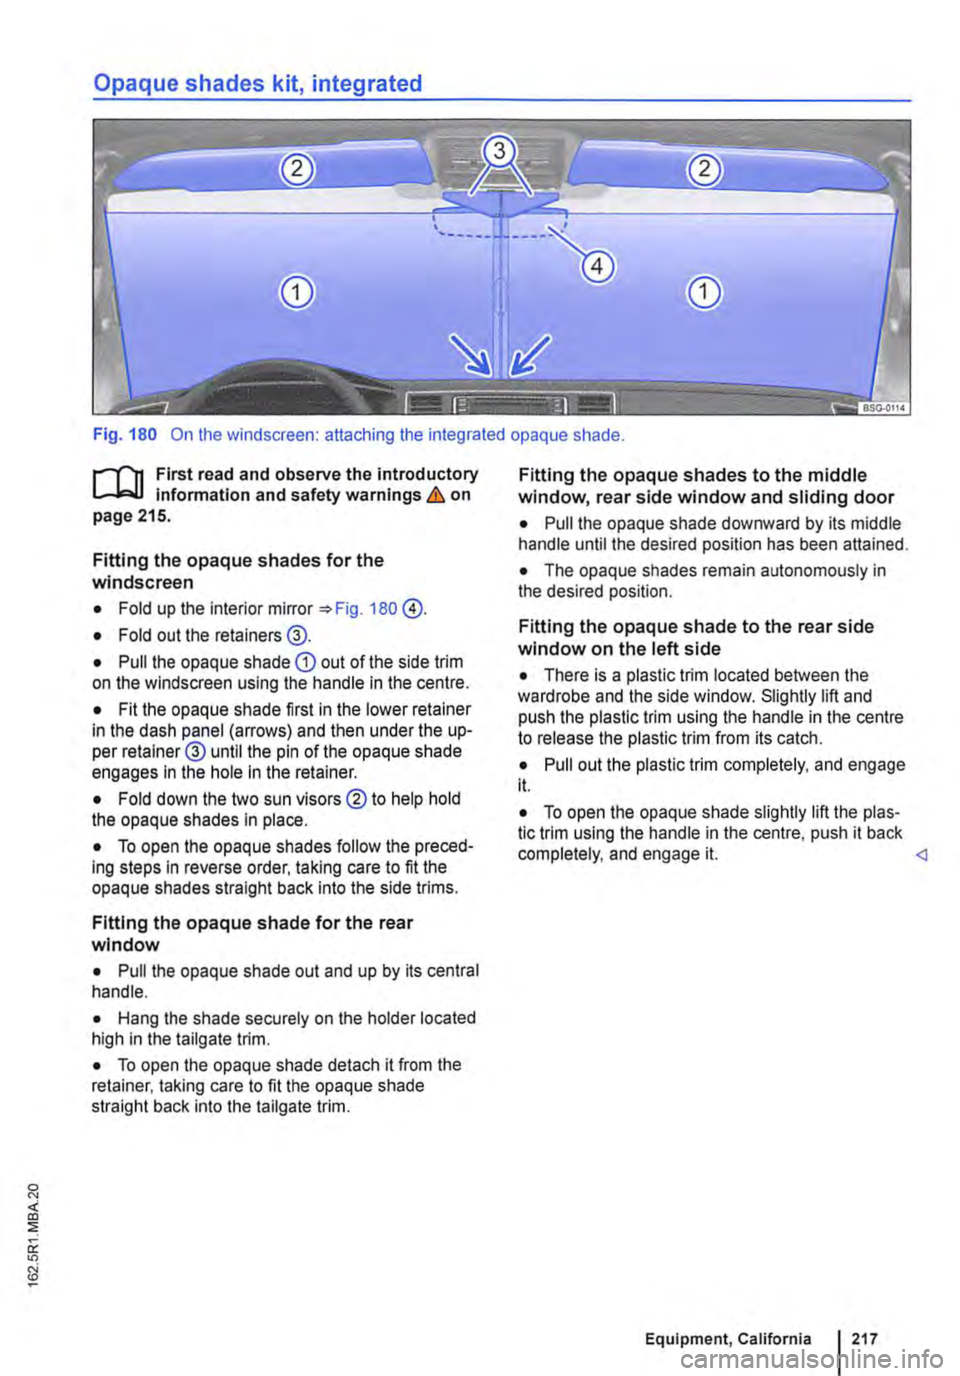
Fig. 180 On the windscreen: attaching the integrated opaque shade.
f""""'('n First read and observe the introductory L-W.I information and safety warnings & on page 215.
Fitting the opaque shades for the windscreen
• Fold up the interior mirror 180 @.
• Fold out the retainers@.
• Pull the opaque shade CD out of the side trim on the windscreen using the handle in the centre.
• Fit the opaque shade first in the lower retainer in the dash panel (arrows) and then under the up-per retainer@ until the pin of the opaque shade engages In the hole in the retainer.
• Fold down the two sun visors ®to help hold the opaque shades in place.
• To open the opaque shades follow the preced-ing steps in reverse order, taking care to fit the opaque shades straight back Into the side trims.
Fitting the opaque shade for the rear window
• Pull the opaque shade out and up by its central handle.
• Hang the shade securely on the holder located high in the tailgate trim.
• To open the opaque shade detach it from the retainer, taking care to fit the opaque shade straight back into the tailgate trim.
Fitting the opaque shades to the middle window, rear side window and sliding door
• Pull the opaque shade downward by its middle handle until the desired position has been attained.
• The opaque shades remain autonomously in the desired position.
Fitting the opaque shade to the rear side window on the left side
• There is a plastic trim located between the wardrobe and the side window. Slightly lift and push the plastic trim using the handle in the centre to release the plastic trim from its catch.
• Pull out the plastic trim completely, and engage it.
• To open the opaque shade slightly lift the plas-tic trim using the handle in the centre, push it back completely, and engage it.