2011 VOLKSWAGEN TRANSPORTER battery
[x] Cancel search: batteryPage 254 of 486
Cleaning the cooker and sink
Clean the surfaces of the gas cooker and sink with commercially available non-abrasive cleaning Remove the pan supports from atop the burners to clean the surface of the gas cooker.
When cleaning the gas cooker, make sure that you do not damage or bend the heat sensors on the burners.
The gas burners should be cleaned with a brush at regular intervals.
CD
Abrasive sponges and cleaning agents can scratch and otherwise damage surfaces.
CD
Cleaning products that contain solvents, e.g. acetone, paint thinner, attack the material and can cause damage. <1
Cleaning the display of the central control panel
CD r-l'n First read and observe the Introductory L-l.::JJ information given on page 252. Do not use solvents such as turpentine or pet-
When cleaning the display, use an anti-static cloth or anti-static agent in order to prevent the build up of static charge on the display, which could render the display symbols unrecognizable
rol to clean the display, as these will damage lt.
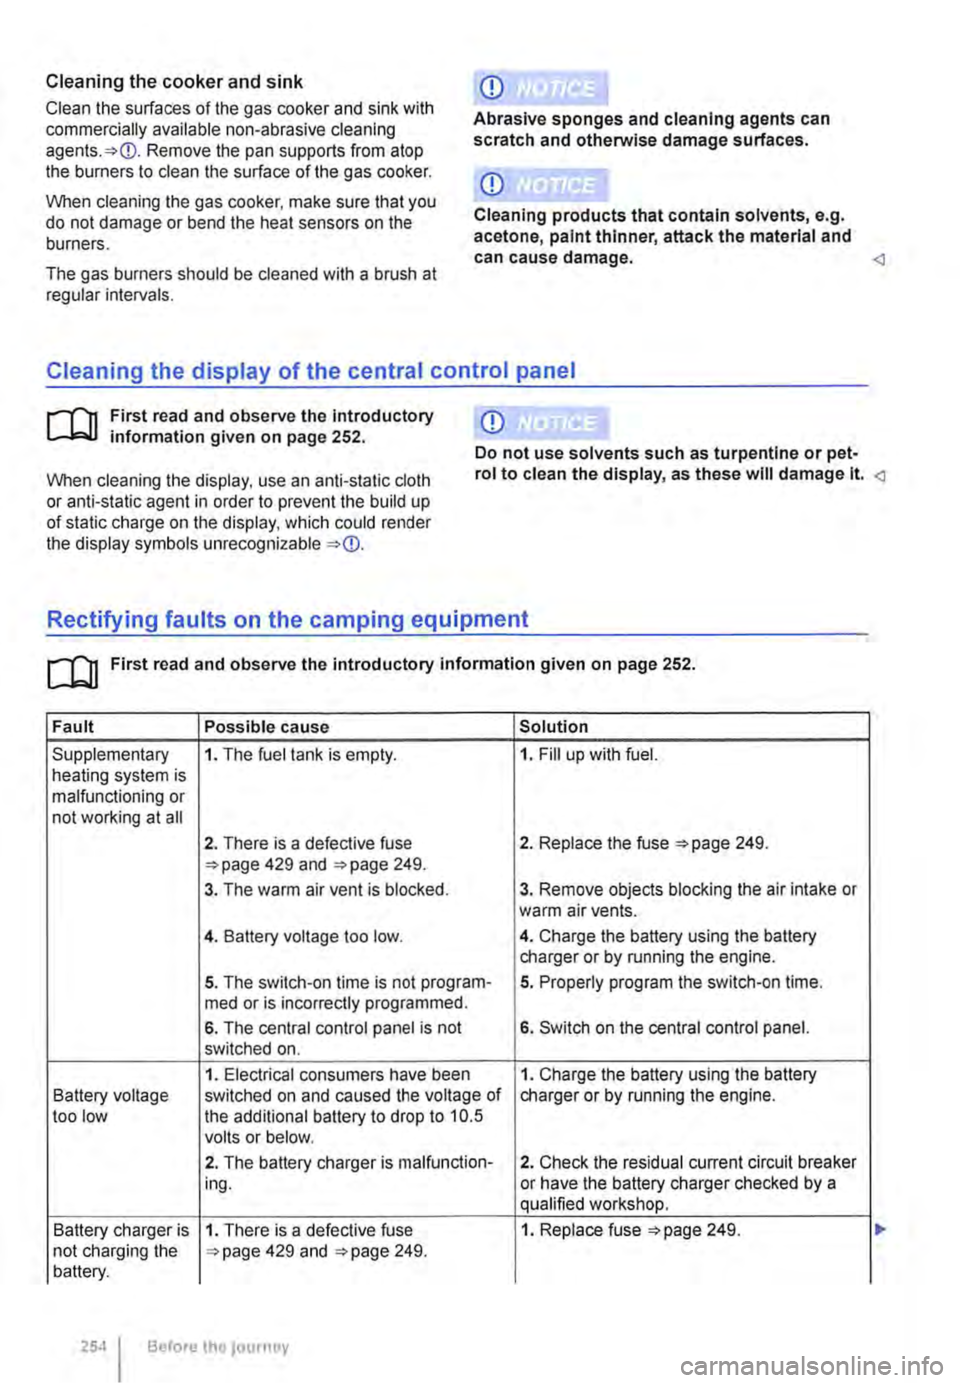
[]J First read and observe the introductory information given on page 252.
Fault Possible cause Solution
Supplementary 1. The fuel tank is empty. 1. Fill up with fuel. heating system is malfunctioning or not working at all
2. There is a defective fuse 2. Replace the fuse 249. 429 and 249.
3. The warm air vent is blocked. 3. Remove objects blocking the air intake or warm air vents.
4. Battery voltage too low. 4. Charge the battery using the battery charger or by running the engine.
5. The switch-on time is not program-5. Properly program the switch-on time. med or is incorrectly programmed.
6. The central control panel is not 6. Switch on the central control panel. switched on.
1. Electrical consumers have been 1. Charge the battery using the battery Battery voltage switched on and caused the voltage of charger or by running the engine. too low the additional battery to drop to 10.5 volts or below.
2. The battery charger is malfunction-2. Check the residual current circuit breaker ing. or have the battery charger checked by a qualified workshop.
Battery charger is 1. There is a defective fuse 1. Replace fuse =>page 249. not charging the 429 and 249. battery.
254 Before the journey
Page 255 of 486

Fault Possible cause Solution
2. The feed plug is not connected prop-2. Check the connection between the vehi-erly. cle and the mains.
3. Mains power failure. 3. Inform the electricity company if necessa-ry.
4. The residual current circuit breaker 4. Switch the residual current circuit breaker has tripped. back on.
Problem with the 1. The waste water tank is full. 1. Drain the waste water tank in a suitable waste water sys-location. tem
2. The water level sensor for the waste 2. Have the water level sensor checked by a water tank is malfunctioning. qualified workshop.
Problem with the 1. The fresh water tank is empty. 1. Fill the fresh water tank. fresh water sys-tem
2. The water level sensor for the fresh 2. Have the water level sensor checked by a water tank is malfunctioning. qualified workshop.
Refrigerator box 1. There is a defective fuse 1. Replace fuse 249. does not cool. 429 and 249.
2. Battery voltage too low. 2. Charge the battery using the battery charger or by running the engine.
3. The central control panel is not 3. Switch on the central control panel. switched on.
The electric pop-1. The central control panel is not 1. Switch on the central control panel. up roof does not switched on. open or close or does not open or close fully.
2. The ignition is not switched on. 2 Switching on the ignition
3. The overheating protection on the 3. Wait a few minutes before you attempt to hydraulic pump is activated. open or close the pop-up roof.
4. Battery voltage too low. 4. Charge the battery using the battery charger or by running the engine.
5. There is a defective fuse 5. Replace fuse 249. 429 and 249.
6. There is a temporary malfunction. 6. Press the button for 5 seconds.
7. The electrical system for the pop-up 7. Close the electric pop-up roof manually roof is malfunctioning. 221 and have the electrical system checked by a qualified workshop.
8. The child proof lock has been activa-8. Wait at least 7 minutes before you again led due to the electric pop-up roof hav-attempt to open or close the electric pop-up ing been opened and closed repeatedly roof. within a short period of time.
Technical data, living area
cu First read and observe the Introductory information given on page 252.
Supplementary heating system
I
Maximum heating output: 2.5 kW
Fuel consumption: 0.3 lfh
Equipment, California I 255
<3
Page 266 of 486

A WARNING (Continued)
• Never leave the vehicle in driving mode N. The vehicle will roll downhill irrespective of whether or not the engine is running.
CD
If the handbrake is not applied when the vehi-cle Is stationary and the brake pedal is released when then selector lever Is In position P, the vehicle may move a few centimetres forwards or backwards.
Changing gear with Tiptronic
Fig. 222 Selector lever in Tiptronic position (left-hand drive). The controls are mirrored for right-hand drive vehicles.
r--T'n First read and observe the introductory L-lc:J.I Information and safety warnings & on page 260.
With a DSG® dual clutch gearbox, Tip-
Ironic allows the gears to be shifted up
and down manually.
m If the lever is moved accidentally to N when l!J driving, take your foot off the accelerator. Wait for the engine revs in the neutral position be-fore selecting a position again.
m If the selector lever is left in any position oth-L!J er than P for long periods when the engine is switched off, the vehicle battery discharges.
Operating Tiptronic with the selector lever
• Push the selector lever from position D to the right into the Tiptronic gate & in osG® dual clutch gearbox: selecting a gear on page 265.
• Gently push the selector lever forwards G or back 8 to shift gear up or down 222.
CD
• When accelerating, the gearbox automati-cally shifts up to the next gear shortly before the maximum permitted engine speed Is reached.
• When shifting down a gear manually, the gearbox will not change gear until the engine can no longer be overrevved.
r--T'n First read and observe the introductory L-lc:J.I information and safety warnings & on page 260.
The gearbox changes the forward gears up and down automatically.
2661 While driving
Driving down hills
The steeper the gradient, the lower the gear you will need. Lower gears increase the braking effect of the engine. Never allow the vehicle to roll down mountains or hills in the neutral position N. ,..
Page 270 of 486
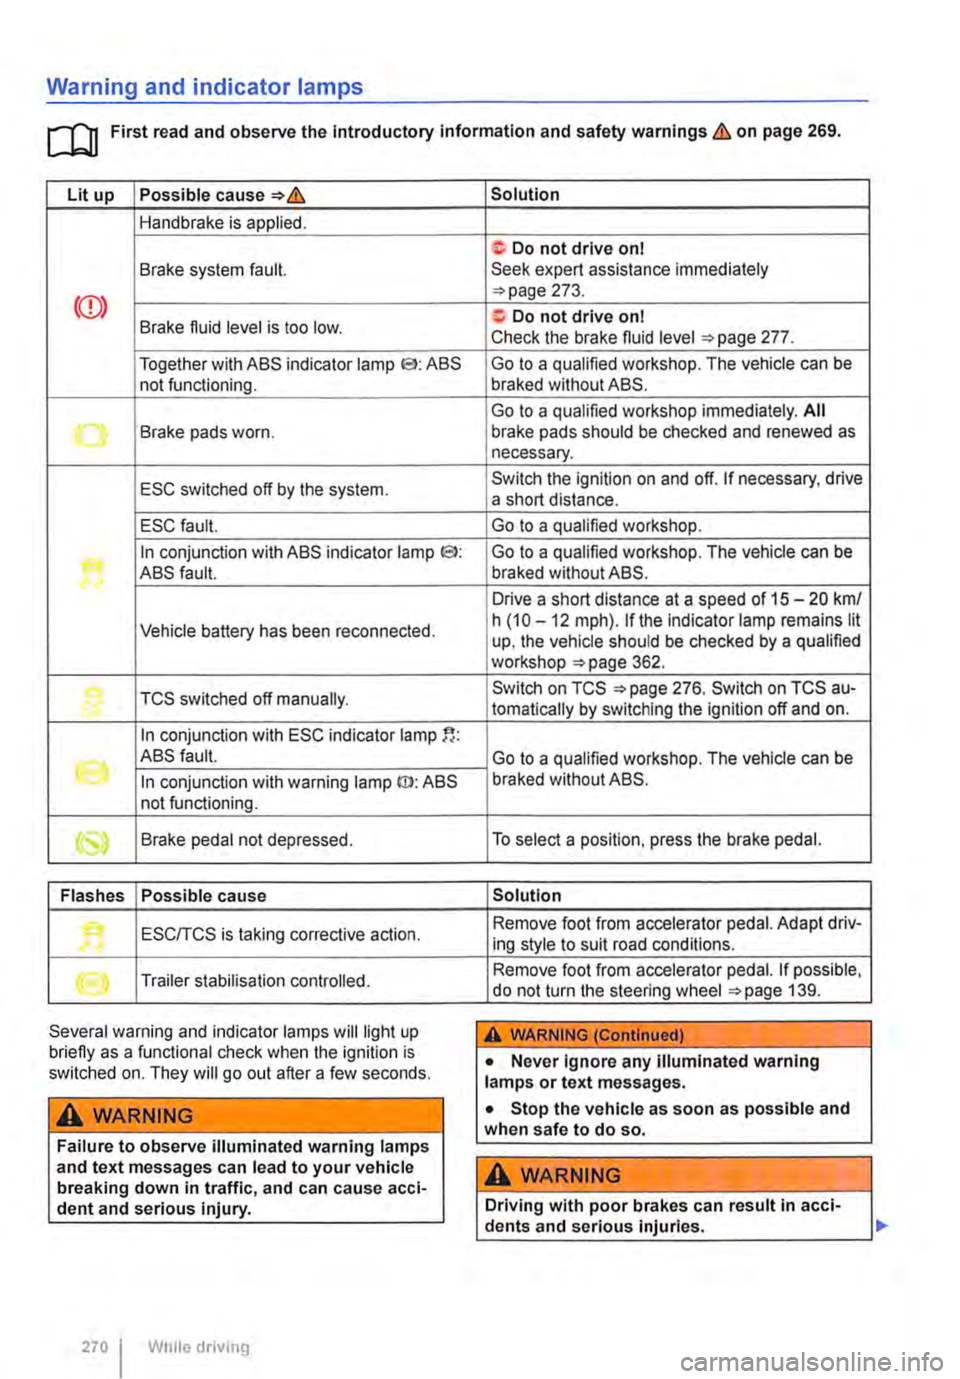
Warning and indicator lamps
[Q First read and observe the Introductory information and safety warnings & on page 269.
Lit up Possible cause=>&
Handbrake is applied.
Brake system fault.
Together with ABS indicator lamp El: ABS not functioning.
-...-Brake pads worn .
ESC switched off by the system.
ESC fault.
In conjunction with ABS indicator lamp CS>: ABS fault.
Vehicle battery has been reconnected.
TCS switched off manually.
In conjunction with ESC indicator lamp
((oil ABS fault.
In conjunction with warning lamp ID: ABS not functioning.
Brake pedal not depressed.
Flashes Possible cause
'• ESCITCS is taking corrective action.
Trailer stabilisation controlled.
Several warning and indicator lamps will light up briefly as a functional check when the ignition is switched on. They will go out after a few seconds.
A WARNING
Failure to observe illuminated warning lamps and text messages can lead to your vehicle breaking down in traffic, and can cause acci-dent and serious injury.
270 I While driving
Solution
f; Do not drive on I Seek expert assistance immediately =>page 273.
a:. Do not drive on I Check the brake fluid level =>page 277.
Go to a qualified workshop. The vehicle can be braked without ABS.
Go to a qualified workshop immediately. All brake pads should be checked and renewed as necessary.
Switch the ignition on and off. If necessary, drive a short distance.
Go to a qualified workshop.
Go to a qualified workshop. The vehicle can be braked without ABS.
Drive a short distance at a speed of 15 -20 km/ h (10 -12 mph). if the indicator lamp remains lit up, the vehicle should be checked by a qualified workshop =>page 362.
Switch on TCS =>page 276. Switch on TCS au-tomatically by switching the ignition off and on.
Go to a qualified workshop. The vehicle can be braked without ABS.
To select a position, press the brake pedal.
Solution
Remove foot from accelerator pedal. Adapt driv-ing style to suit road conditions.
Remove foot from accelerator pedal. If possible, do not turn the steering wheel =>page 139.
A WARNING (Continued)
• Never ignore any illuminated warning lamps or text messages.
• Stop the vehicle as soon as possible and when safe to do so.
A WARNING
Driving with poor brakes can result in acci-dents and serious injuries.
Page 281 of 486
Steering
CJ:n Introduction
This chapter contains information on the following subjects:
Information on steering . . . . . . . . . . . . . . . . . . . 281
Additional information and warnings:
• Starting and stopping the engine 257
• Battery 362
• Tow-starting and towing 446
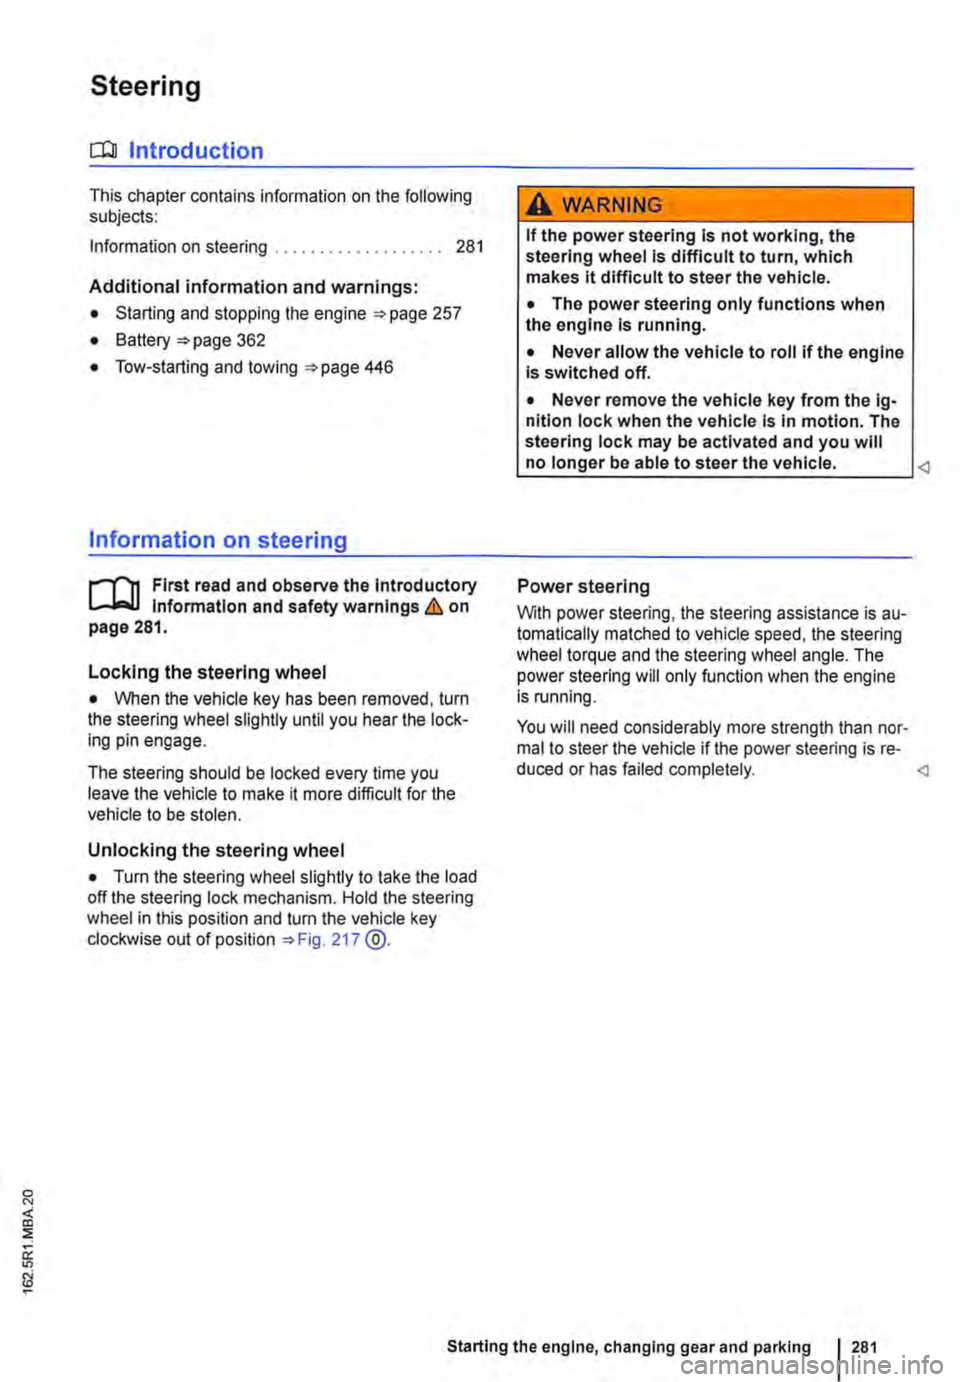
Information on steering
r--f"n First read and observe the introductory L-la.LI infonmation and safety warnings & on page 281.
Locking the steering wheel
• When the vehicle key has been removed, turn the steering wheel slightly until you hear the lock-ing pin engage.
The steering should be locked every time you leave the vehicle to make il more difficult for the vehicle to be stolen.
Unlocking the steering wheel
• Turn the steering wheel slightly to lake the load off the steering lock mechanism. Hold the steering wheel in this position and tu m the vehicle key clockwise out of position 217 @.
A WARNING
If the power steering is not working, the steering wheel is difficult to turn, which makes it difficult to steer the vehicle.
• The power steering only functions when the engine Is running.
• Never allow the vehicle to roll if the engine is switched off.
• Never remove the vehicle key from the ig-nition lock when the vehicle is in motion. The steering lock may be activated and you will no longer be able to steer the vehicle.
With power steering, the steering assistance is au-tomatically matched to vehicle speed, the steering wheel torque and the steering wheel angle. The power steering will only function when the engine is running.
You will need considerably more strength than nor-mal to steer the vehicle if lhe power steering is re-duced or has failed completely.
Page 282 of 486
Driver assist systems
Pull-away assist systems
cr:n Introduction
This chapter contains information on the following subjects:
Warning and indicator lamps . . . . . . . . . . . . . . 282
Start/stop system . . . . . . . . . . . . . . . . • . . . . . . . 283
Hill Hold Assist . . . . . . . . . . . . . . . . . . . . . . . . . . 284
Hill Descent Assist . . . . . . . . . . . . . . . . . . . . . . . 285
Rear axle differential lock . . . . . . . . . . . . . . . . . 286
Additional information and warnings:
• Volkswagen information system =>page 24
• Braking, stopping and parking =>page 269
• Battery =>page 362
• Wheels and tyres =>page 367
• Accessories, modifications, repairs and renewal of parts =>page 394
• Jump starting =>page 443
Warning and indicator lamps
A WARNING
The intelligent technology of the pull-away assist systems cannot overcome the laws of physics or system-related vehicle limitations. Never let the extra convenience afforded by pull-away assist systems tempt you into tak-ing any risks when driving-this can cause accidents.
• Unintentional vehicle movements can cause serious Injury.
• The pull-away assist systems cannot re-place the driver's full concentration.
• Always adapt your speed and driving style to suit visibility, weather, road and traffic con-ditions.
• Pull-away assist systems cannot hold the vehicle in all hill start situations or brake it sufficiently on all slopes going downhill (e.g. if the ground is slippery or icy).
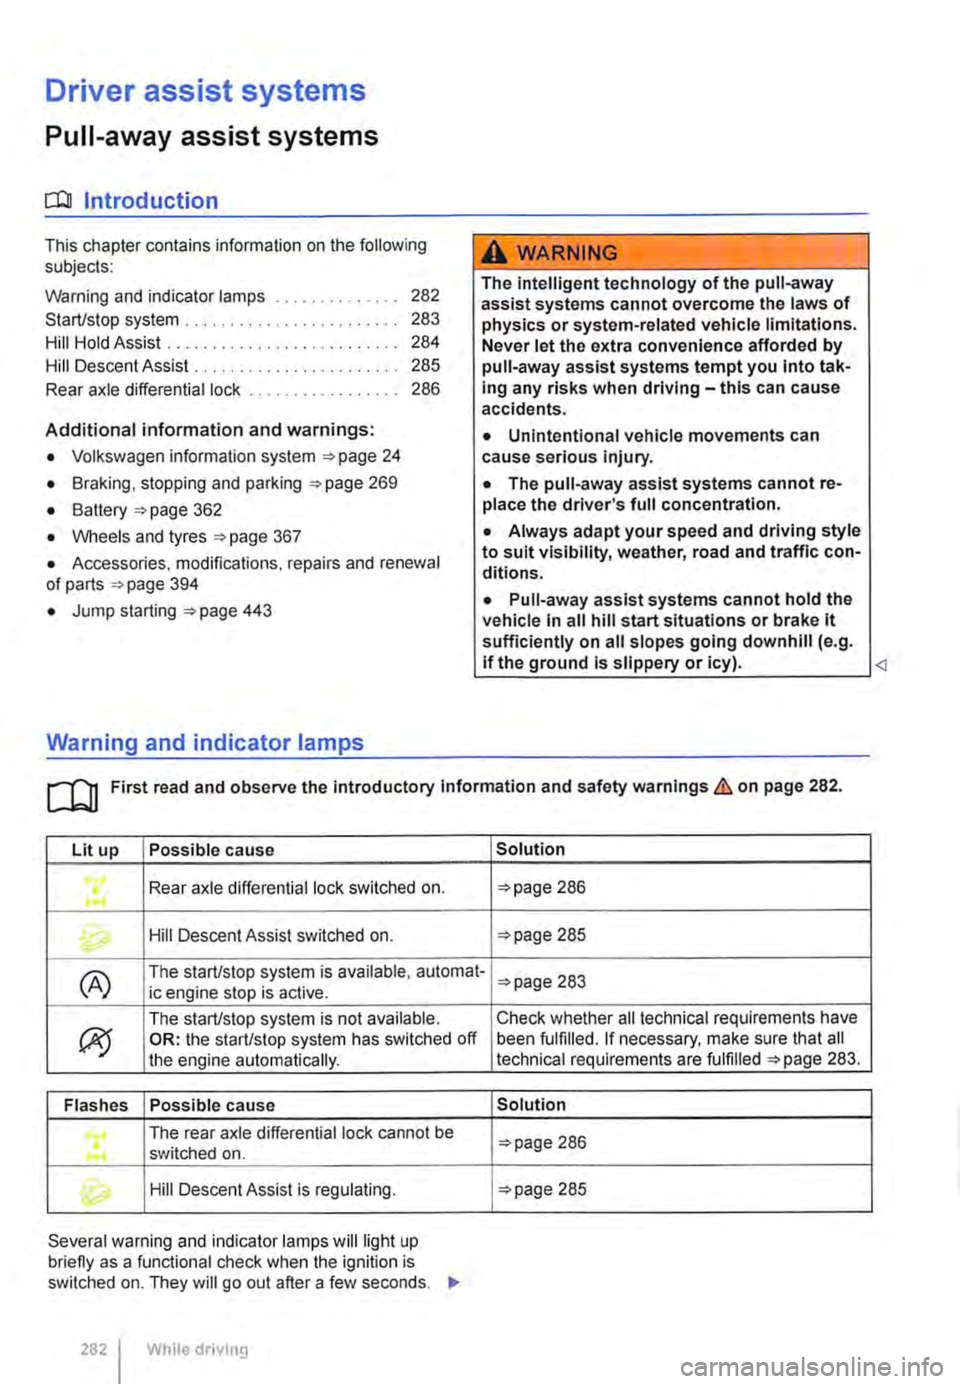
Lit up Possible cause
Rear axle differential lock switched on . ...
Hill Descent Assist switched on.
(A) The start/stop system is available, automat-ic engine stop is active.
ex;
The start/stop system is not available. OR: the start/stop system has switched off the engine automatically.
Flashes Possible cause
The rear axle differential lock cannot be .... switched on .
Hill Descent Assist is regulating.
Several warning and indicator lamps will light up briefly as a functional check when the ignition is switched on. They will go out after a few seconds. .,..
282 I While drivmg
Solution
=>page 286
=>page 285
=>page 283
Check whether all technical requirements have been fulfilled. If necessary, make sure that all technical requirements are fulfilled =>page 283.
Solution
=>page 286
=>page 285
Page 283 of 486

A WARNING
Failure to observe illuminated warning lamps and text messages can lead to your vehicle breaking down in traffic, and can cause acci-dent and serious injury.
• Never ignore any illuminated warning lamps or text messages.
Start/stop system
Fig. 227 In the centre console: button for the start/stop system.
r--flt First read and observe the introductory l-J,::JJ information and safety warnings & on page 282.
When the start/stop mode is active, the
engine is switched off automatically
whenever the vehicle is stationary. When
required, the engine restarts automati-
cally.
The start/stop mode is activated automatically each time the ignition is switched on. The instru-ment cluster display will show information about the current status.
Always switch off the start/stop system manually when driving through water.
Start/stop mode on vehicles with a manual gearbox
• When the vehicle is stationary, disengage the gear and release the clutch pedal. The engine is stopped.
• Depress the clutch pedal to restart the engine.
A WARNING (Continued)
• Stop the vehicle as soon as possible and when safe to do so.
CD
Failure to observe illuminated indicator lamps and text messages can lead to your vehicle be-ing damaged.
• When the vehicle is stationary, press and hold the brake pedal. The engine is stopped.
• To restart the engine, remove your foot from the brake pedal or depress the accelerator in selector lever position P.
Important preconditions for automatic engine switch-off
• The driver is wearing their seat belt.
• All vehicle doors have been closed.
• The bonnet is closed.
• A minimum engine temperature has been reached and the internal engine conditions allow switch off.
• The vehicle has been moved since the engine was last switched off.
• The temperature set in the interior deviates too greatly from the ambient temperature.
• On vehicles with Climatronic: The temperature control is set to around +22oC (+ 72°F).
• The defrost function of the air conditioning sys-tem is not switched on.
• The charging state of the vehicle battery is suf-ficient.
• The temperature of the vehicle battery is not too low or too high.
• The vehicle is not on a steep incline.
• The steering is not turned greatly.
• Reverse gear is not engaged.
Conditions for an automatic restart
The engine can start automatically under the fol-lowing conditions: IIJ>
Driver assist systems 283
Page 284 of 486
• On vehicles with Climatronic: if the temperature inside the vehicle substantially increases or de-creases.
• When the vehicle starts rolling or brake support is required.
• If the voltage of the vehicle battery falls.
Conditions that necessitate a manual key start
The engine has to be started manually with the ve-hicle key in the following conditions:
• If the driver unfastens their seat belt.
• If a vehicle door is opened.
• If the bonnet is opened.
Switching the start/stop system on and off manually
• Press the @ button in the centre console 227.
• If the start/stop system has been deactivated, the indicator lamp in the button lights up.
The engine will start immediately if the vehicle Is In stop mode when the system is switched off man-ually with the @ button.
Hill Hold Assist
r--T'n First read and observe the Introductory L-I=JJ information and safety warnings & on page 282.
A WARNING
The brake servo and the power steering will not function If the engine Is switched off.
• Never allow the vehicle to roll if the engine is switched off.
• The start/stop system must be switched off if work Is to be carried out In the engine compartment.
CD
If the start/stop system Is used in very high outside temperatures over a long period, the vehicle battery can be damaged.
m In some cases. it will be necessary to restart L!J the engine manually with the vehicle key. Fol-low any corresponding messages on the instru-ment cluster display.
m At low speeds, the engine can be started L!J again if it has stalled by immediately pressing the clutch pedal.
holds the vehicle when pulling away on
an incline.
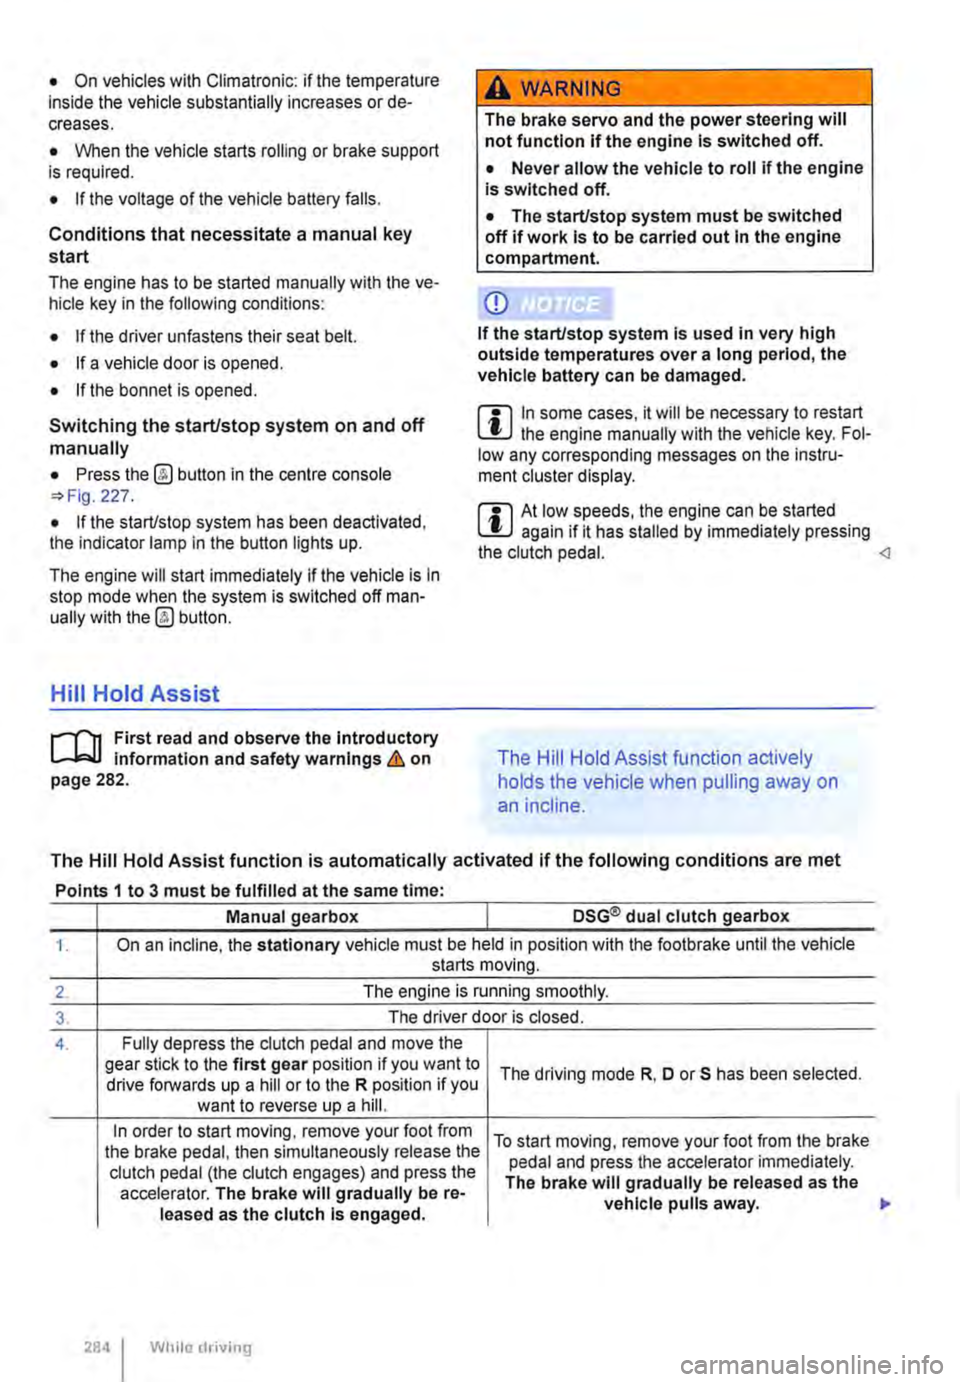
The Hill Hold Assist function is automatically activated if the following conditions are met
Points 1 to 3 must be fulfilled at the same time·
Manual gearbox DSG® dual clutch gearbox
1. On an incline, the stationary vehicle must be held in position with the footbrake until the vehicle starts moving.
2. The engine is running smoothly.
3. The driver door is closed.
4. Fully depress the clutch pedal and move the gear stick to the first gear position if you want to The driving mode R, D or S has been selected. drive forwards up a hill or to the R position if you want to reverse up a hill.
In order to start moving, remove your foot from To start moving, remove your foot from the brake the brake pedal, then simultaneously release the pedal and press the accelerator immediately. clutch pedal (the clutch engages) and press the The brake will gradually be released as the accelerator. The brake will gradually be re-vehicle pulls away. leased as the clutch Is engaged.
284 I While driving