2011 SUBARU TRIBECA warning light
[x] Cancel search: warning lightPage 288 of 422
Recommended winter (snow) tire sizeP255/55R18 stud less
& Tire chains
CAUTION
Tire chains cannot be used on your
vehicle because of the lack of
clearance between the tires and
vehicle body.
& Rocking the vehicle
If you must rock the vehicle to free it from
snow, sand, or mud, depress the accel-
erator pedal slightly and move the select
lever back and forth between “D ”and “R ”
repeatedly. Do not race the engine. For
the best possible traction, avoid spinning
the wheels when trying to free the vehicle.
When the road surface is extremely
slippery, you can obtain better traction by
starting the vehicle with the transmission
in 2nd than 1st.
For information about holding the trans-
mission in the 2nd position, refer to“ Selection of manual mode ”F 7-16 and
“ Driving tips ”F 7-17. Loading your vehicle
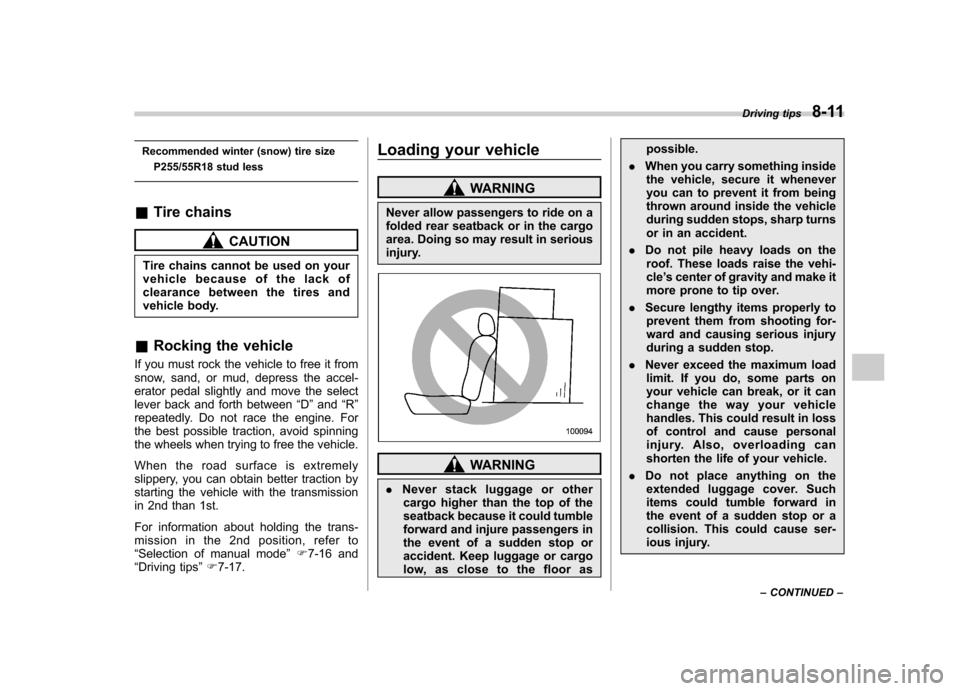
WARNING
Never allow passengers to ride on a
folded rear seatback or in the cargo
area. Doing so may result in serious
injury.
WARNING
. Never stack luggage or other
cargo higher than the top of the
seatback because it could tumble
forward and injure passengers in
the event of a sudden stop or
accident. Keep luggage or cargo
low, as close to the floor as possible.
. When you carry something inside
the vehicle, secure it whenever
you can to prevent it from being
thrown around inside the vehicle
during sudden stops, sharp turns
or in an accident.
. Do not pile heavy loads on the
roof. These loads raise the vehi-cle ’s center of gravity and make it
more prone to tip over.
. Secure lengthy items properly to
prevent them from shooting for-
ward and causing serious injury
during a sudden stop.
. Never exceed the maximum load
limit. If you do, some parts on
your vehicle can break, or it can
change the way your vehicle
handles. This could result in loss
of control and cause personal
injury. Also, overloading can
shorten the life of your vehicle.
. Do not place anything on the
extended luggage cover. Such
items could tumble forward in
the event of a sudden stop or a
collision. This could cause ser-
ious injury. Driving tips
8-11
– CONTINUED –
Page 296 of 422
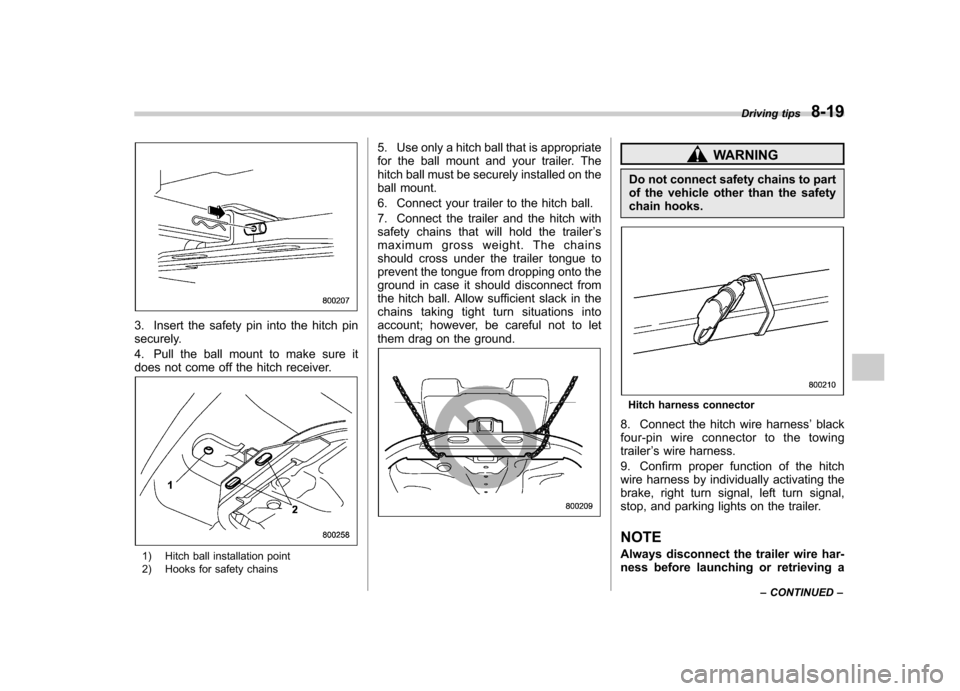
3. Insert the safety pin into the hitch pin
securely.
4. Pull the ball mount to make sure it
does not come off the hitch receiver.
1) Hitch ball installation point
2) Hooks for safety chains5. Use only a hitch ball that is appropriate
for the ball mount and your trailer. The
hitch ball must be securely installed on the
ball mount.
6. Connect your trailer to the hitch ball.
7. Connect the trailer and the hitch with
safety chains that will hold the trailer
’s
maximum gross weight. The chains
should cross under the trailer tongue to
prevent the tongue from dropping onto the
ground in case it should disconnect from
the hitch ball. Allow sufficient slack in the
chains taking tight turn situations into
account; however, be careful not to let
them drag on the ground.
WARNING
Do not connect safety chains to part
of the vehicle other than the safety
chain hooks.
Hitch harness connector
8. Connect the hitch wire harness ’black
four-pin wire connector to the towing trailer ’s wire harness.
9. Confirm proper function of the hitch
wire harness by individually activating the
brake, right turn signal, left turn signal,
stop, and parking lights on the trailer. NOTE
Always disconnect the trailer wire har-
ness before launching or retrieving a Driving tips
8-19
– CONTINUED –
Page 302 of 422
create a traffic safety hazard.
For safety, always connect the towing
vehicle and trailer with trailer safety
chains. Pass the chains crossing each
other under the trailer tongue to prevent
the trailer from dropping onto the ground
in case the trailer tongue should discon-
nect from the hitch ball. Allow sufficient
slack in the chains taking tight turn
situations into account; however, be care-
ful not to let them drag on the ground.
For more information about the safety
chain connection, refer to the instructions
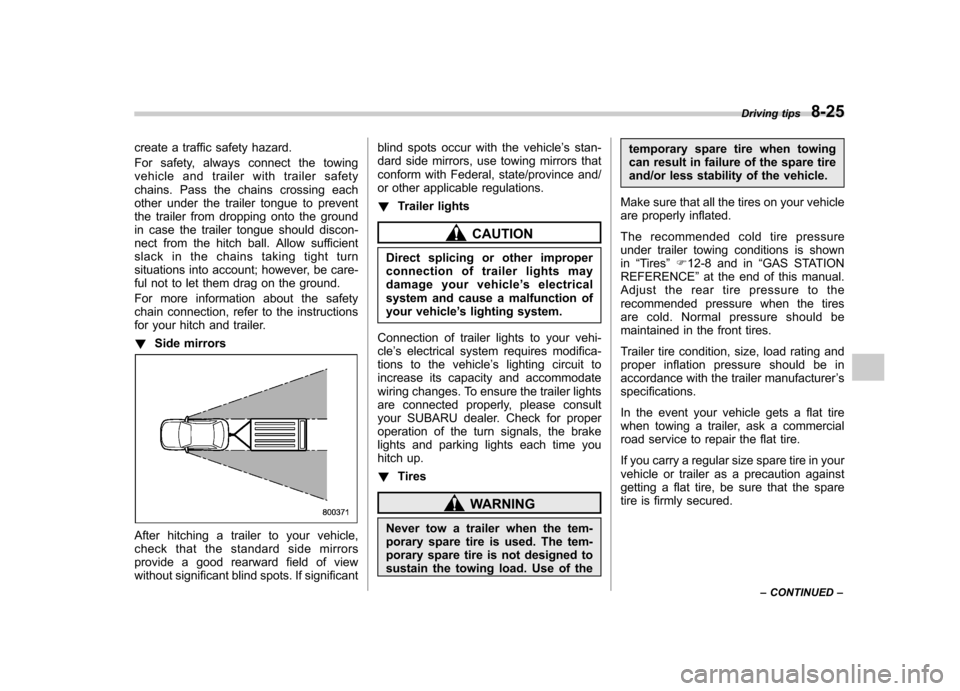
for your hitch and trailer. !Side mirrors
After hitching a trailer to your vehicle,
check that the standard side mirrors
provide a good rearward field of view
without significant blind spots. If significant blind spots occur with the vehicle
’s stan-
dard side mirrors, use towing mirrors that
conform with Federal, state/province and/
or other applicable regulations. ! Trailer lights
CAUTION
Direct splicing or other improper
connection of trailer lights may
damage your vehicle ’s electrical
system and cause a malfunction of
your vehicle ’s lighting system.
Connection of trailer lights to your vehi-cle ’s electrical system requires modifica-
tions to the vehicle ’s lighting circuit to
increase its capacity and accommodate
wiring changes. To ensure the trailer lights
are connected properly, please consult
your SUBARU dealer. Check for proper
operation of the turn signals, the brake
lights and parking lights each time you
hitch up. ! Tires
WARNING
Never tow a trailer when the tem-
porary spare tire is used. The tem-
porary spare tire is not designed to
sustain the towing load. Use of the temporary spare tire when towing
can result in failure of the spare tire
and/or less stability of the vehicle.
Make sure that all the tires on your vehicle
are properly inflated.
The recommended cold tire pressure
under trailer towing conditions is shownin “Tires ”F 12-8 and in “GAS STATION
REFERENCE ”at the end of this manual.
Adjust the rear tire pressure to the
recommended pressure when the tires
are cold. Normal pressure should be
maintained in the front tires.
Trailer tire condition, size, load rating and
proper inflation pressure should be in
accordance with the trailer manufacturer ’s
specifications.
In the event your vehicle gets a flat tire
when towing a trailer, ask a commercial
road service to repair the flat tire.
If you carry a regular size spare tire in your
vehicle or trailer as a precaution against
getting a flat tire, be sure that the spare
tire is firmly secured. Driving tips
8-25
– CONTINUED –
Page 304 of 422
.Backing up with a trailer is difficult and
takes practice. When backing up with a
trailer, never accelerate or steer rapidly.
When turning back, grip the bottom of the
steering wheel with one hand and turn it to
the left for a left turn, and turn it to the right
for a right turn. . If the ABS warning light illuminates
while the vehicle is in motion, stop towing
the trailer and have repairs performed
immediately by the nearest SUBARU
dealer. ! Driving on grades
. Before going down a steep hill, slow
down and shift into lower gear (if neces-
sary, use 1st gear) in order to utilize the
engine braking effect and prevent over-
heating of your vehicle ’s brakes. Do not
make sudden downshifts. . When driving uphill in hot weather, the
air conditioner may turn off automatically
to protect the engine from overheating. . When driving uphill in hot weather, pay
attention to the water temperature gauge
pointer and AT OIL TEMP warning light
because the engine and transmission are
relatively prone to overheating under
these conditions. If the water temperature
gauge pointer approaches the OVER-
HEAT zone or the AT OIL TEMP warning
light illuminates, immediately turn off the air conditioner and stop the vehicle in the
nearest safe location. For further instruc-
tions and additional information, refer to
the following sections.
–“If you park your vehicle in an
emergency ”F 9-2
–“ Engine overheating ”F 9-14
–“ Temperature gauge ”F 3-9
–“ AT OIL TEMP warning light ”F 3-13
NOTE
The temperature of engine coolant is
less likely to rise to the OVERHEAT
zone in the “D ” position than in the
manual mode position. . Avoid using the accelerator pedal to
stay stationary on an uphill slope instead
of using the parking brake or foot brake.
That may cause the transmission fluid tooverheat. ! Parking on a grade
Always block the wheels under both
vehicle and trailer when parking. Apply
the parking brake firmly. You should not
park on a hill or slope. But if parking on a
hill or slope cannot be avoided, you
should take the following steps.
1. Apply the brakes and hold the pedal down.
2. Have someone place wheel blocks
under both the vehicle and trailer wheels. 3. When the wheel blocks are in place,
release the regular brakes slowly until the
blocks absorb the load.
4. Apply the regular brakes and then
apply the parking brake; slowly release
the regular brakes.
5. Shift into
“P ”and shut off the engine. Driving tips
8-27
Page 310 of 422
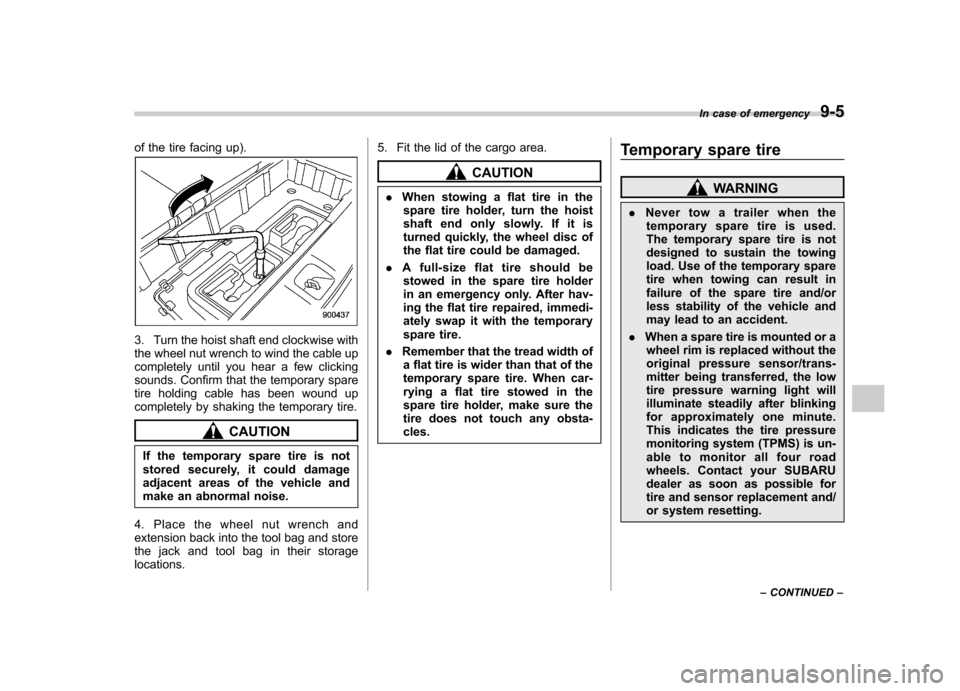
of the tire facing up).
3. Turn the hoist shaft end clockwise with
the wheel nut wrench to wind the cable up
completely until you hear a few clicking
sounds. Confirm that the temporary spare
tire holding cable has been wound up
completely by shaking the temporary tire.
CAUTION
If the temporary spare tire is not
stored securely, it could damage
adjacent areas of the vehicle and
make an abnormal noise.
4. Place the wheel nut wrench and
extension back into the tool bag and store
the jack and tool bag in their storagelocations. 5. Fit the lid of the cargo area.
CAUTION
. When stowing a flat tire in the
spare tire holder, turn the hoist
shaft end only slowly. If it is
turned quickly, the wheel disc of
the flat tire could be damaged.
. A full-size flat tire should be
stowed in the spare tire holder
in an emergency only. After hav-
ing the flat tire repaired, immedi-
ately swap it with the temporary
spare tire.
. Remember that the tread width of
a flat tire is wider than that of the
temporary spare tire. When car-
rying a flat tire stowed in the
spare tire holder, make sure the
tire does not touch any obsta-cles. Temporary spare tire
WARNING
. Never tow a trailer when the
temporary spare tire is used.
The temporary spare tire is not
designed to sustain the towing
load. Use of the temporary spare
tire when towing can result in
failure of the spare tire and/or
less stability of the vehicle and
may lead to an accident.
. When a spare tire is mounted or a
wheel rim is replaced without the
original pressure sensor/trans-
mitter being transferred, the low
tire pressure warning light will
illuminate steadily after blinking
for approximately one minute.
This indicates the tire pressure
monitoring system (TPMS) is un-
able to monitor all four road
wheels. Contact your SUBARU
dealer as soon as possible for
tire and sensor replacement and/
or system resetting. In case of emergency
9-5
– CONTINUED –
Page 311 of 422
9-6In case of emergency
CAUTION
Never use any temporary spare tire
other than the original. Using other
sizes may result in severe mechan-
ical damage to the drive train of yourvehicle.
The temporary spare tire is smaller and
lighter than a conventional tire and is
designed for emergency use only. Re-
move the temporary spare tire and re-
install the conventional tire as soon as
possible because the spare tire is de-
signed only for temporary use.
Check the inflation pressure of the tem-
porary spare tire periodically to keep the
tire ready for use. The correct pressure is
60 psi (420 kPa, 4.2 kgf/cm
2) .
When using the temporary spare tire, note
the following. . Do not exceed 50 mph (80 km/h).
. Do not put a tire chain on the temporary
spare tire. Because of the smaller tire size,
a tire chain will not fit properly. . Do not use two or more temporary
spare tires at the same time.. Do not drive over obstacles. This tire
has a smaller diameter, so road clearance
is reduced.
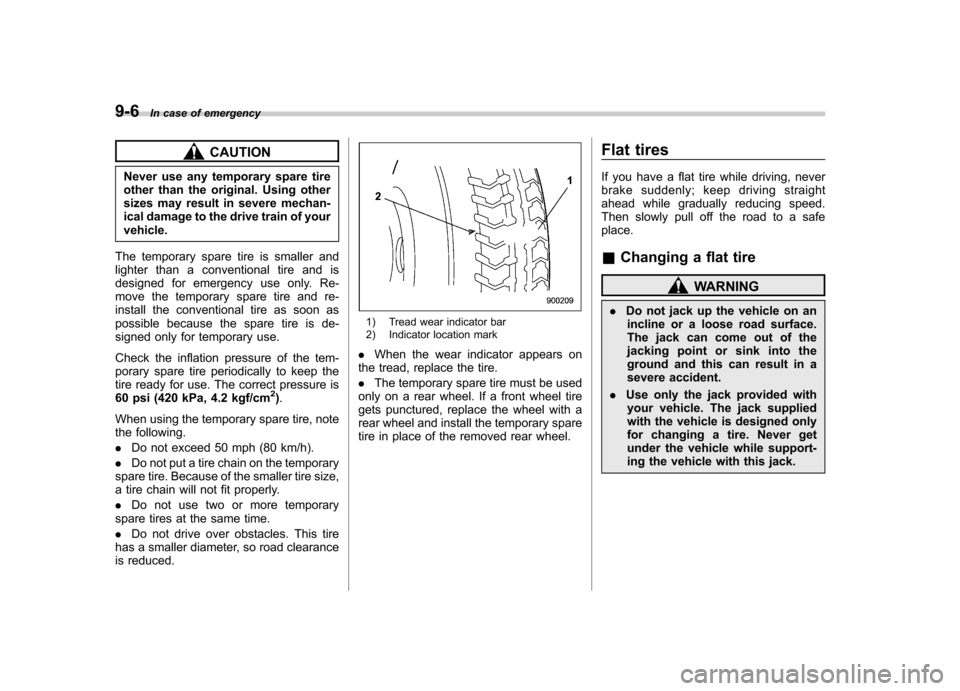
1) Tread wear indicator bar
2) Indicator location mark
. When the wear indicator appears on
the tread, replace the tire. . The temporary spare tire must be used
only on a rear wheel. If a front wheel tire
gets punctured, replace the wheel with a
rear wheel and install the temporary spare
tire in place of the removed rear wheel. Flat tires
If you have a flat tire while driving, never
brake suddenly; keep driving straight
ahead while gradually reducing speed.
Then slowly pull off the road to a safeplace. &
Changing a flat tire
WARNING
. Do not jack up the vehicle on an
incline or a loose road surface.
The jack can come out of the
jacking point or sink into the
ground and this can result in a
severe accident.
. Use only the jack provided with
your vehicle. The jack supplied
with the vehicle is designed only
for changing a tire. Never get
under the vehicle while support-
ing the vehicle with this jack.
Page 315 of 422
9-10In case of emergency
holder.
Refer to “Spare tire ”F 9-2 for its location,
instructions and precautions.
CAUTION
. When stowing a flat tire in the
spare tire holder, turn the hoist
shaft end only slowly. If it is
turned quickly, the wheel disc of
the flat tire could be damaged.
. A full-size flat tire should be
stowed in the spare tire holder
in an emergency only. After hav-
ing the flat tire repaired, immedi-
ately swap it with the temporary
spare tire.
. Remember that the tread width of
a flat tire is wider than that of the
temporary spare tire. When car-
rying a flat tire stowed in the
spare tire holder, make sure the
tire does not touch any obsta-cles.
WARNING
Never place a tire or tire changing
tools in the passenger compartment
after changing wheels. In a sudden
stop or collisions, loose equipment could strike occupants and cause
injury. Store the tire and all tools in
the proper place.
& Tire pressure monitoring
system (TPMS)
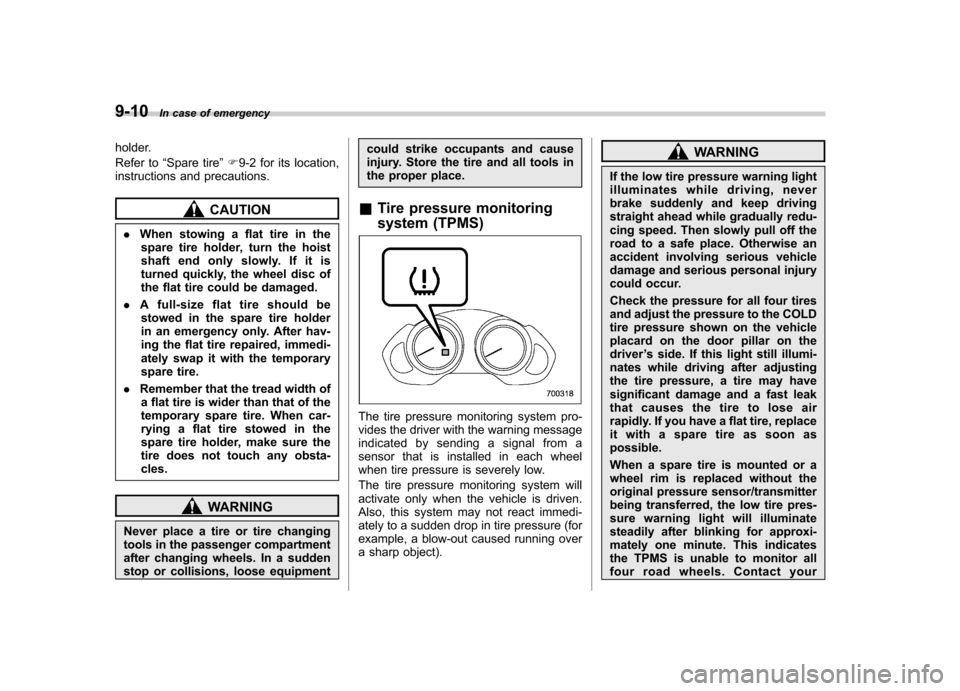
The tire pressure monitoring system pro-
vides the driver with the warning message
indicated by sending a signal from a
sensor that is installed in each wheel
when tire pressure is severely low.
The tire pressure monitoring system will
activate only when the vehicle is driven.
Also, this system may not react immedi-
ately to a sudden drop in tire pressure (for
example, a blow-out caused running over
a sharp object).
WARNING
If the low tire pressure warning light
illuminates while driving, never
brake suddenly and keep driving
straight ahead while gradually redu-
cing speed. Then slowly pull off the
road to a safe place. Otherwise an
accident involving serious vehicle
damage and serious personal injury
could occur.
Check the pressure for all four tires
and adjust the pressure to the COLD
tire pressure shown on the vehicle
placard on the door pillar on thedriver ’s side. If this light still illumi-
nates while driving after adjusting
the tire pressure, a tire may have
significant damage and a fast leak
that causes the tire to lose air
rapidly. If you have a flat tire, replace
it with a spare tire as soon as possible.
When a spare tire is mounted or a
wheel rim is replaced without the
original pressure sensor/transmitter
being transferred, the low tire pres-
sure warning light will illuminate
steadily after blinking for approxi-
mately one minute. This indicates
the TPMS is unable to monitor all
four road wheels. Contact your
Page 316 of 422
SUBARU dealer as soon as possible
for tire and sensor replacement and/
or system resetting.
Do not inject any tire liquid or
aerosol tire sealant into the tires,
as this may cause a malfunction of
the tire pressure sensors.
If the light illuminates steadily after
blinking for approximately one min-
ute, promptly contact a SUBARU
dealer to have the system inspected.Jump starting
WARNING
. Battery fluid is SULFURIC ACID.
Do not let it come in contact with
the eyes, skin, clothing or thevehicle.
If battery fluid gets on you,
thoroughly flush the exposed
area with water immediately. Get
medical help if the fluid has
entered your eyes.
If battery fluid is accidentally
swallowed, immediately drink a
large amount of milk or water,
and obtain immediate medicalhelp.
Keep everyone including chil-
dren away from the battery.
. The gas generated by a battery
explodes if a flame or spark is
brought near it. Do not smoke or
light a match while jump starting.
. Never attempt jump starting if the
discharged battery is frozen. It
could cause the battery to burst
or explode.
. Whenever working on or around
a battery, always wear suitable eye protectors, and remove metal
objects such as rings, bands or
other metal jewelry.
. Be sure the jumper cables and
clamps on them do not have
loose or missing insulation.
Do not jump start unless cables
in suitable condition are avail-able.
. A running engine can be danger-
ous. Keep your fingers, hands,
clothing, hair and tools away
from the cooling fan, belts and
any other moving engine parts.
Removing rings, watches and
ties is advisable.
. Jump starting is dangerous if it is
done incorrectly. If you are un-
sure about the proper procedure
for jump starting, consult a com-
petent mechanic.
When your vehicle does not start due to a
run down (discharged) battery, the vehicle
may be jump started by connecting your
battery to another battery (called the
booster battery) with jumper cables. In case of emergency
9-11
– CONTINUED –