2011 SUBARU TRIBECA buttons
[x] Cancel search: buttonsPage 207 of 422
5-20Audio
for more than 1.5 seconds to store the
channel. If the button is pressed for less
than 1.5 seconds, the preceding selection
will remain in memory. NOTE
If the connection between the radio and
battery is broken for any reason such
as vehicle maintenance or radio re-
moval, all channels stored in the preset
buttons are cleared. If this occurs, it is
necessary to reset the preset buttons. ! Display selection
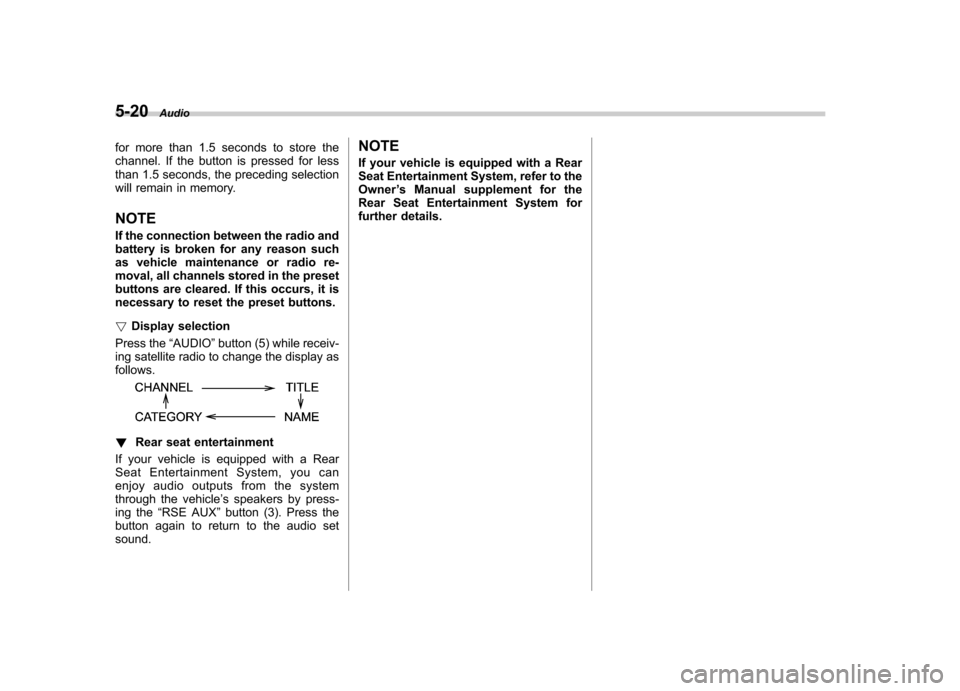
Press the “AUDIO ”button (5) while receiv-
ing satellite radio to change the display as follows.
! Rear seat entertainment
If your vehicle is equipped with a Rear
Seat Entertainment System, you can
enjoy audio outputs from the system
through the vehicle ’s speakers by press-
ing the “RSE AUX ”button (3). Press the
button again to return to the audio setsound. NOTE
If your vehicle is equipped with a Rear
Seat Entertainment System, refer to the
Owner
’s Manual supplement for the
Rear Seat Entertainment System for
further details.
Page 210 of 422

!When there are CDs loaded:
Press a desired one of the disc select
buttons (9) the disc number indicator of
which steadily lights up. The player will
then start playback of the selected CD,
beginning with the first track.
If a disc that the player cannot read has
been loaded, “CHECK DISC ”will appear
on the display and the player will not playanything. ! To select a song from its beginning
! Forward direction
Briefly press the “
”side of the “TUNE
TRACK ”button (2) to skip to the beginning
of the next track/file (track). Each time the
button is pressed, the indicated track/file
(track) number will increase.
NOTE
In an MP3 folder, skipping past the last
track/file (track) will take you back to
the first track/file (track) in the folder. ! Backward direction
Briefly press the “
”side of the “TUNE
TRACK ”button (2) to skip to the beginning
of the current track/file (track). Each time
the button is pressed, the indicated track/
file (track) number will decrease. NOTE
In an MP3 folder, skipping past the first
track/file (track) will take you to the last
track/file (track) in the folder. !
Fast-forwarding and rewinding
! Fast-forwarding
Press the “
”side of the “TUNE TRACK ”
button (2) continuously to fast-forward the track/file.
Release the button to stop fast-forwarding. NOTE
If you fast-forward to the end of the last
track/file (track), fast-forwarding will
stop and the player will start playback
beginning with the first track/file(track). ! Rewinding
Press the “
”side of the “TUNE TRACK ”
button (2) continuously to rewind the track/ file.
Release the button to stop rewinding.
NOTE
If you rewind to the beginning of the
first track/file (track), the rewinding will
stop and the player will start playback. !
Repeating
! To repeat the currently playing track/
file (track)
To repeat a track/file (track), briefly pressthe “RPT ”button (6) while the track/file
(track) is playing. The display will show “ RPT ”, and the track/file (track) will be
repeated.
To cancel the track/file (track) repeat-play
mode, briefly press the “RPT ”button
twice. The “RPT ”indication will turn off,
and the normal playback mode will beresumed. NOTE . Each time you briefly press the
button, the mode will change to the
next one in the following sequence.
If you accidentally press the button and
cancel the track/file (track) repeat-play
mode, press it again to reselect the
repeat-play mode. . The repeat-play mode will be can-
celled if you perform any of the follow-
ing steps.
–Press the “RDM ”button
– Press the “SCAN ”button
– Press the “
”button Audio
5-23
– CONTINUED –
Page 213 of 422
5-26Audio
!How to unload CDs from the player
! Ejecting a CD from the player
Of the discs loaded, you can select and
remove only one disc.
1. Use the disc select button (9) to select
the disc to be ejected.
2. Briefly press the “
”button (8). The
selected disc will be ejected. The disc
number indicator will flash at this time.
When you remove the ejected disc, the
disc number indicator will turn off.
To remove more discs in succession,
repeat Steps 1 and 2. ! Ejecting all discs from the player (all
disc ejection mode)
1. If you continue to press the “
”button
(8), the player will produce beep sound
and will enter the all disc ejection mode.
2. Remove the disc that has been
ejected. The other discs loaded will then
be ejected one after another. If you do not
remove the disc that has been ejected, the“ All disc ejection mode ”will be canceled.
NOTE . Avoid driving the vehicle with a CD
sticking out, because vibration might
make it fall out.. If you press the “
”button while the player is in all disc ejection mode,
the mode will be cancelled following
ejection of the disc that is currently
being ejected..
If you press the “CD ”button while
the player is in all disc ejection mode,
the player will draw in the discs that
have been ejected and play them. Audio control buttons
These buttons are located on the spokes
of the steering wheel. They allow the
driver to control audio functions without
taking his/her hands off the steeringwheel. &
MODE button
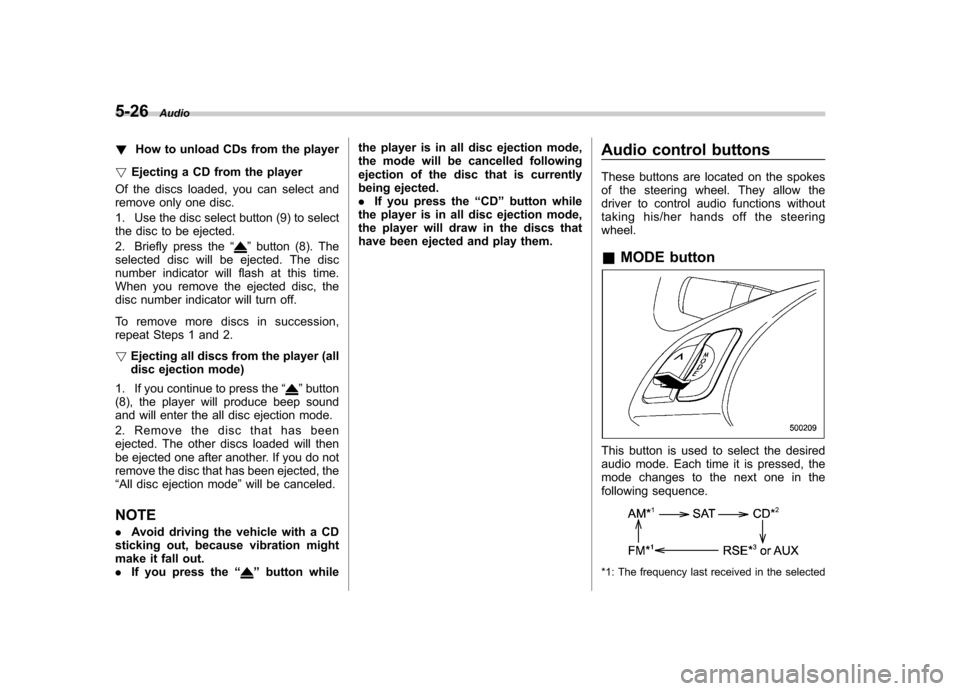
This button is used to select the desired
audio mode. Each time it is pressed, the
mode changes to the next one in the
following sequence.
*1: The frequency last received in the selected
Page 214 of 422

waveband will be displayed.
*2: Only when a CD is in the player.
*3: Only vehicle equipped with RSE (Rear Seat Entertainment)
! “
”and “”buttons
! With radio mode selected
Press the “
”button to select the next
channel and press the “”button to select
the previous channel.
That station ’s frequency will be shown on
the audio display. ! With CD mode selected
Press the “
”button to skip forward in the
track/file (track) order. Pressing the “”
button the first time makes the player go
back to the beginning of the current track/ file (track); pressing it the second time
makes it go back to the previous track/file(track).
The track/file (track) number will be shown
on the audio display. !
Volume control buttons
Press the “+ ” button to increase the
volume. Press the “� ” button to reduce
the volume.
A number indicating the volume will be
shown on the audio display. !
MUTE button
Press this button if you wish to immedi-
ately cut the volume to zero.
The audio display will show “MUTE ”.
If you press the button again, the original
sound volume will return and “MUTE ”
turns off.
NOTE
If your vehicle is equipped with a
genuine SUBARU navigation system,
the display will show “
”.Audio
5-27
Page 234 of 422
HomeLink®Wireless Control
System (if equipped)
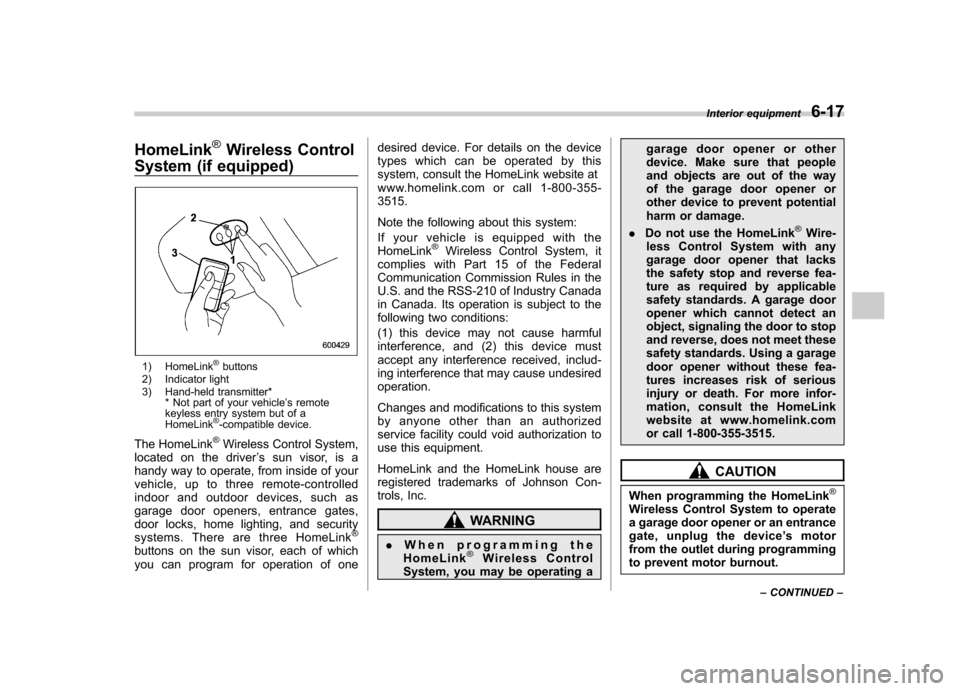
1) HomeLink®buttons
2) Indicator light
3) Hand-held transmitter* * Not part of your vehicle ’s remote
keyless entry system but of a HomeLink
®-compatible device.
The HomeLink
®Wireless Control System,
located on the driver ’s sun visor, is a
handy way to operate, from inside of your
vehicle, up to three remote-controlled
indoor and outdoor devices, such as
garage door openers, entrance gates,
door locks, home lighting, and security
systems. There are three HomeLink
®
buttons on the sun visor, each of which
you can program for operation of one desired device. For details on the device
types which can be operated by this
system, consult the HomeLink website at
www.homelink.com or call 1-800-355-3515.
Note the following about this system:
Ifyourvehicleisequippedwiththe HomeLink
®Wireless Control System, it
complies with Part 15 of the Federal
Communication Commission Rules in the
U.S. and the RSS-210 of Industry Canada
in Canada. Its operation is subject to the
following two conditions:
(1) this device may not cause harmful
interference, and (2) this device must
accept any interference received, includ-
ing interference that may cause undesiredoperation.
Changes and modifications to this system
by anyone other than an authorized
service facility could void authorization to
use this equipment.
HomeLink and the HomeLink house are
registered trademarks of Johnson Con-
trols, Inc.
WARNING
. When programming the
HomeLink
®Wireless Control
System, you may be operating a garage door opener or other
device. Make sure that people
and objects are out of the way
of the garage door opener or
other device to prevent potential
harm or damage.
. Do not use the HomeLink
®Wire-
less Control System with any
garage door opener that lacks
the safety stop and reverse fea-
ture as required by applicable
safety standards. A garage door
opener which cannot detect an
object, signaling the door to stop
and reverse, does not meet these
safety standards. Using a garage
door opener without these fea-
tures increases risk of serious
injury or death. For more infor-
mation, consult the HomeLink
website at www.homelink.com
or call 1-800-355-3515.
CAUTION
When programming the HomeLink
®
Wireless Control System to operate
a garage door opener or an entrance
gate, unplug the device ’s motor
from the outlet during programming
to prevent motor burnout. Interior equipment
6-17
– CONTINUED –
Page 235 of 422
6-18Interior equipment
NOTE . After programming your HomeLink
®
Wireless Control System for the de-
sired devices, retain the hand-held
transmitters for further programming
or device testing in the event of aproblem..It is recommended that you insert a
new battery in the hand-held transmit-
ter of a device to ensure correctprogramming. & Garage door opener pro-
gramming in the U.S.A.
NOTE
When programming the HomeLink
®
Wireless Control System for a garage
door opener, it is suggested that you
park the vehicle outside the garage.
1. Unplug the motor of the garage door
opener from the outlet. NOTE
If any of the HomeLink
®buttons are
already programmed for other devices,
skip step 2 because it clears the
memory of all the three buttons.
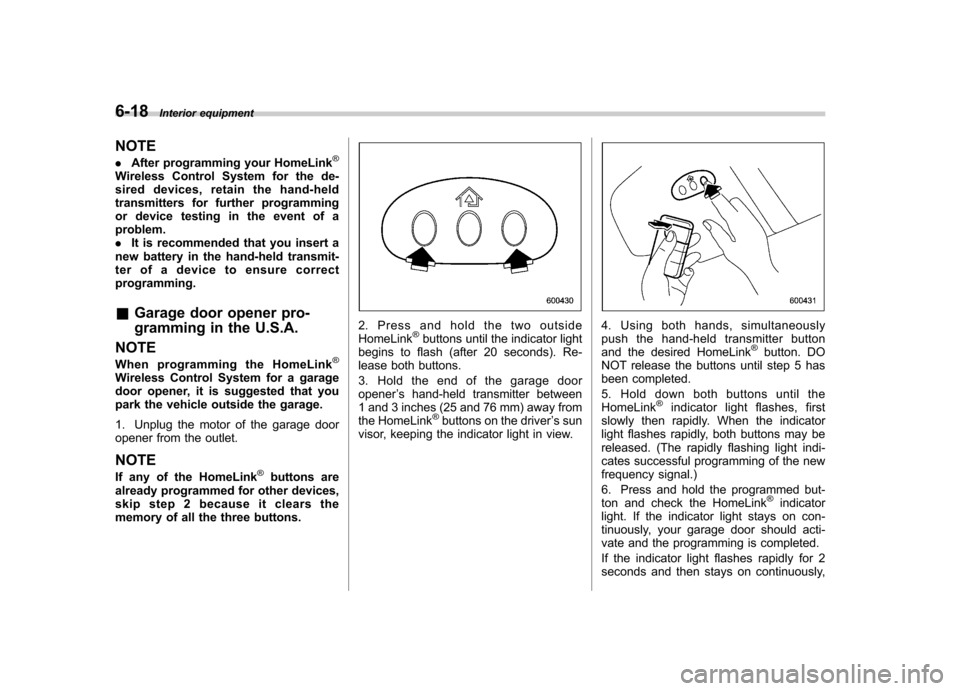
2. Press and hold the two outside HomeLink®buttons until the indicator light
begins to flash (after 20 seconds). Re-
lease both buttons.
3. Hold the end of the garage door opener ’s hand-held transmitter between
1 and 3 inches (25 and 76 mm) away from
the HomeLink
®buttons on the driver ’s sun
visor, keeping the indicator light in view.
4. Using both hands, simultaneously
push the hand-held transmitter button
and the desired HomeLink
®button. DO
NOT release the buttons until step 5 has
been completed.
5. Hold down both buttons until the
HomeLink
®indicator light flashes, first
slowly then rapidly. When the indicator
light flashes rapidly, both buttons may be
released. (The rapidly flashing light indi-
cates successful programming of the new
frequency signal.)
6. Press and hold the programmed but-
ton and check the HomeLink
®indicator
light. If the indicator light stays on con-
tinuously, your garage door should acti-
vate and the programming is completed.
If the indicator light flashes rapidly for 2
seconds and then stays on continuously,
Page 237 of 422
6-20Interior equipment
trol System and your garage door opener
should activate when the HomeLink
®
button is pressed. & Programming for entrance
gates and garage door open-
ers in Canada
1. Unplug the motor of the entrance gate
or garage door opener from the outlet.
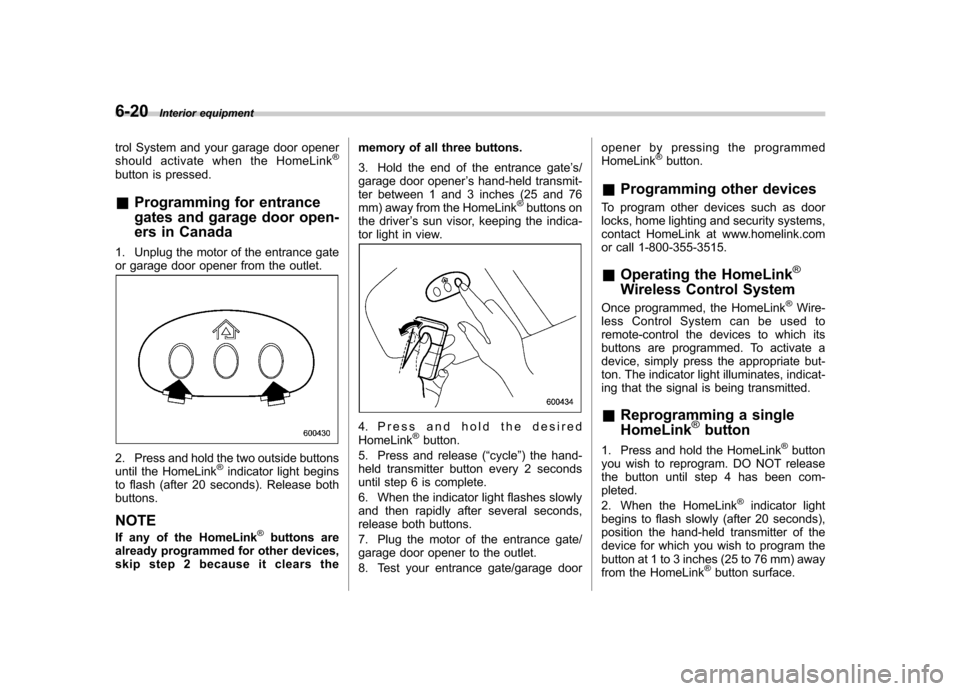
2. Press and hold the two outside buttons
until the HomeLink®indicator light begins
to flash (after 20 seconds). Release bothbuttons. NOTE
If any of the HomeLink
®buttons are
already programmed for other devices,
skip step 2 because it clears the memory of all three buttons.
3. Hold the end of the entrance gate
’s/
garage door opener ’s hand-held transmit-
ter between 1 and 3 inches (25 and 76
mm) away from the HomeLink
®buttons on
the driver ’s sun visor, keeping the indica-
tor light in view.
4. Press and hold the desired HomeLink®button.
5. Press and release ( “cycle ”) the hand-
held transmitter button every 2 seconds
until step 6 is complete.
6. When the indicator light flashes slowly
and then rapidly after several seconds,
release both buttons.
7. Plug the motor of the entrance gate/
garage door opener to the outlet.
8. Test your entrance gate/garage door opener by pressing the programmed HomeLink
®button.
& Programming other devices
To program other devices such as door
locks, home lighting and security systems,
contact HomeLink at www.homelink.com
or call 1-800-355-3515. & Operating the HomeLink
®
Wireless Control System
Once programmed, the HomeLink®Wire-
less Control System can be used to
remote-control the devices to which its
buttons are programmed. To activate a
device, simply press the appropriate but-
ton. The indicator light illuminates, indicat-
ing that the signal is being transmitted. & Reprogramming a single HomeLink
®button
1. Press and hold the HomeLink
®button
you wish to reprogram. DO NOT release
the button until step 4 has been com-pleted.
2. When the HomeLink
®indicator light
begins to flash slowly (after 20 seconds),
position the hand-held transmitter of the
device for which you wish to program the
button at 1 to 3 inches (25 to 76 mm) away
from the HomeLink
®button surface.
Page 238 of 422
3. Press and hold the hand-held trans-
mitter button. The HomeLink®indicator
light will flash, first slowly and then rapidly.
4. When the indicator light begins to flash
rapidly, release both buttons.
The programming for the previous device
is now erased and the new device can be
operated by pushing the HomeLink
®
button. & Erasing HomeLink
®button
memory
NOTE . Performing this procedure erases
the memory of all the preprogrammed
buttons simultaneously. The memory
of individual buttons cannot be erased.. It is recommended that upon the
sale of the vehicle, the memory of all
programmed HomeLink
®buttons be
erased for security purposes.
1. Press and hold the two outside buttons
until the indicator light begins to flash
(after 20 seconds).
2. Release both buttons. &
In case a problem occurs
If you cannot activate a device using the
corresponding HomeLink
®button after
programming, contact HomeLink at
www.homelink.com or call 1-800-355-
3515 for assistance. Rear view camera (if
equipped)
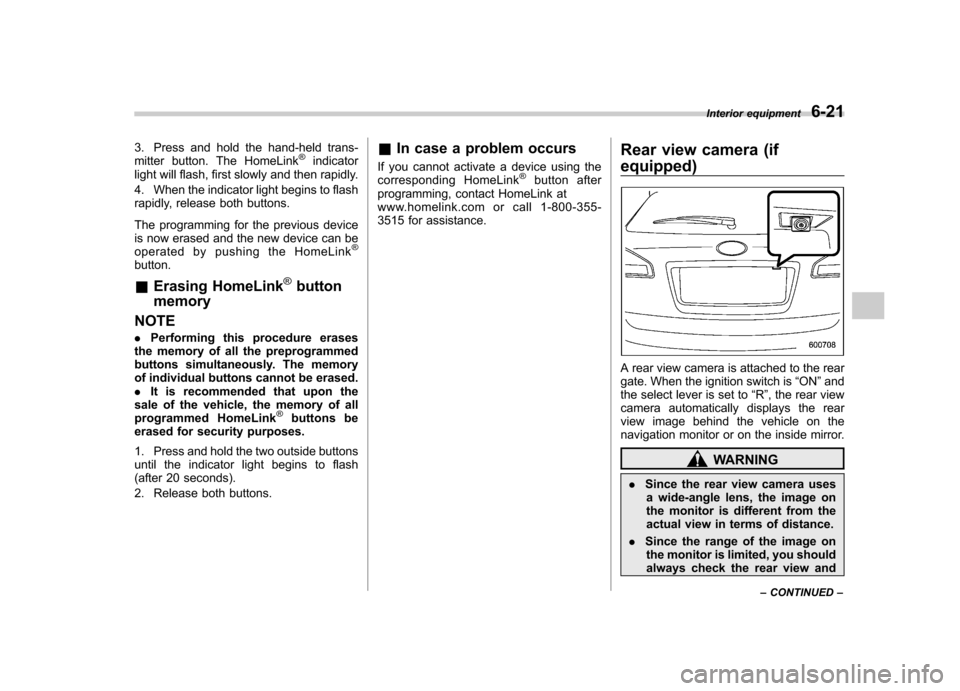
A rear view camera is attached to the rear
gate. When the ignition switch is
“ON ”and
the select lever is set to “R ”, the rear view
camera automatically displays the rear
view image behind the vehicle on the
navigation monitor or on the inside mirror.
WARNING
. Since the rear view camera uses
a wide-angle lens, the image on
the monitor is different from the
actual view in terms of distance.
. Since the range of the image on
the monitor is limited, you should
always check the rear view and Interior equipment
6-21
– CONTINUED –