2011 SUBARU TRIBECA headrest
[x] Cancel search: headrestPage 36 of 422

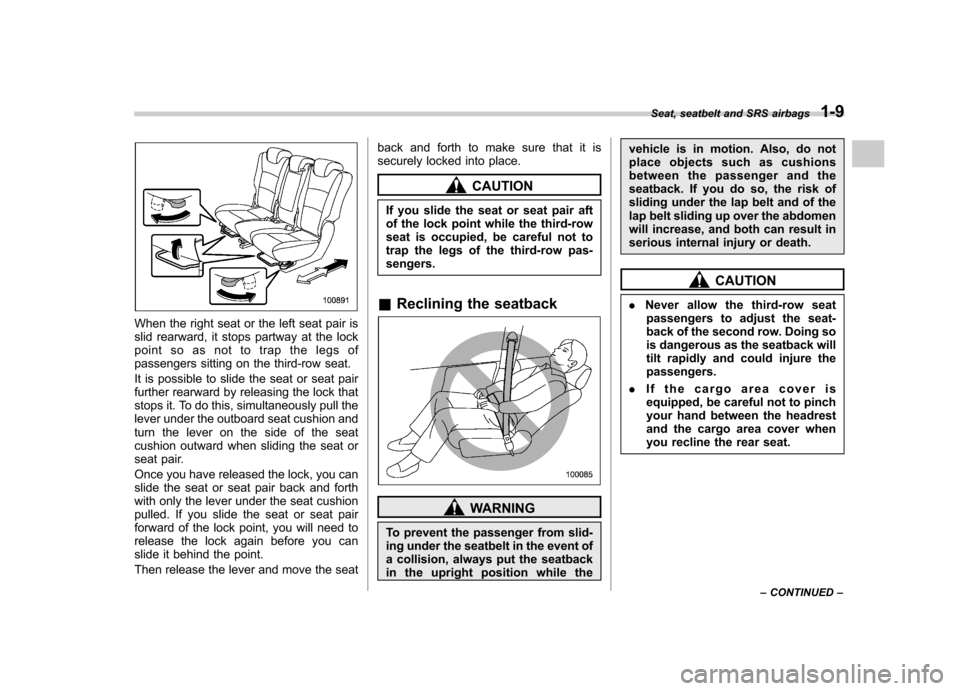
When the right seat or the left seat pair is
slid rearward, it stops partway at the lock
point so as not to trap the legs of
passengers sitting on the third-row seat.
It is possible to slide the seat or seat pair
further rearward by releasing the lock that
stops it. To do this, simultaneously pull the
lever under the outboard seat cushion and
turn the lever on the side of the seat
cushion outward when sliding the seat or
seat pair.
Once you have released the lock, you can
slide the seat or seat pair back and forth
with only the lever under the seat cushion
pulled. If you slide the seat or seat pair
forward of the lock point, you will need to
release the lock again before you can
slide it behind the point.
Then release the lever and move the seatback and forth to make sure that it is
securely locked into place.
CAUTION
If you slide the seat or seat pair aft
of the lock point while the third-row
seat is occupied, be careful not to
trap the legs of the third-row pas-sengers.
& Reclining the seatback
WARNING
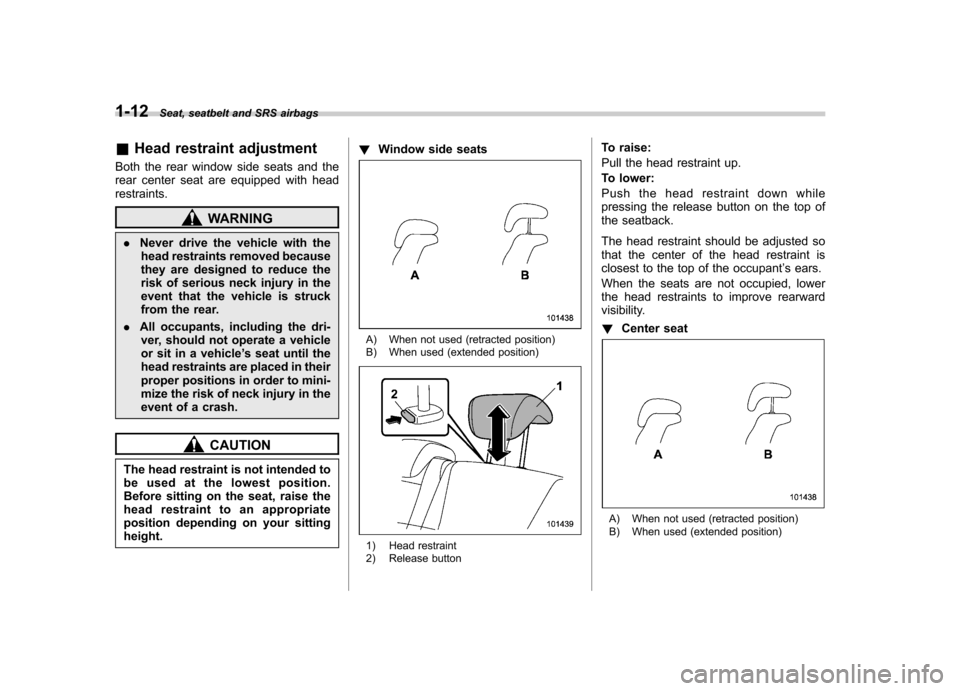
To prevent the passenger from slid-
ing under the seatbelt in the event of
a collision, always put the seatback
in the upright position while the vehicle is in motion. Also, do not
place objects such as cushions
between the passenger and the
seatback. If you do so, the risk of
sliding under the lap belt and of the
lap belt sliding up over the abdomen
will increase, and both can result in
serious internal injury or death.
CAUTION
. Never allow the third-row seat
passengers to adjust the seat-
back of the second row. Doing so
is dangerous as the seatback will
tilt rapidly and could injure thepassengers.
. If the cargo area cover is
equipped, be careful not to pinch
your hand between the headrest
and the cargo area cover when
you recline the rear seat. Seat, seatbelt and SRS airbags
1-9
– CONTINUED –
Page 39 of 422

1-12Seat, seatbelt and SRS airbags
&Head restraint adjustment
Both the rear window side seats and the
rear center seat are equipped with headrestraints.
WARNING
. Never drive the vehicle with the
head restraints removed because
they are designed to reduce the
risk of serious neck injury in the
event that the vehicle is struck
from the rear.
. All occupants, including the dri-
ver, should not operate a vehicle
or sit in a vehicle ’s seat until the
head restraints are placed in their
proper positions in order to mini-
mize the risk of neck injury in the
event of a crash.
CAUTION
The head restraint is not intended to
be used at the lowest position.
Before sitting on the seat, raise the
head restraint to an appropriate
position depending on your sittingheight. !
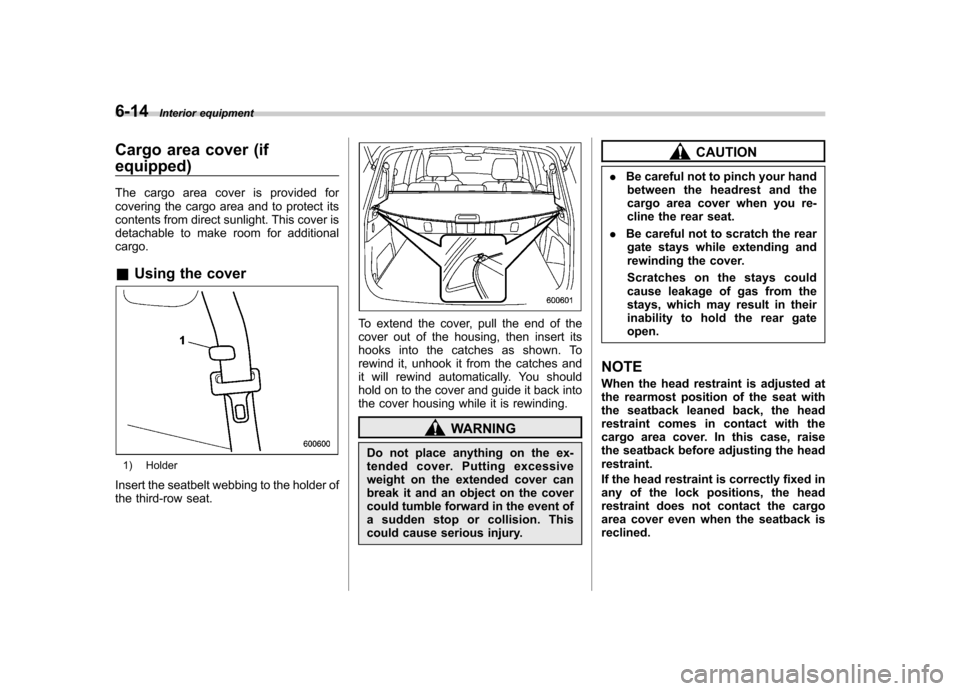
Window side seats
A) When not used (retracted position)
B) When used (extended position)
1) Head restraint
2) Release button To raise:
Pull the head restraint up.
To lower:
Push the head restraint down while
pressing the release button on the top of
the seatback.
The head restraint should be adjusted so
that the center of the head restraint is
closest to the top of the occupant
’s ears.
When the seats are not occupied, lower
the head restraints to improve rearward
visibility. ! Center seat
A) When not used (retracted position)
B) When used (extended position)
Page 231 of 422

6-14Interior equipment
Cargo area cover (if equipped)
The cargo area cover is provided for
covering the cargo area and to protect its
contents from direct sunlight. This cover is
detachable to make room for additionalcargo. &Using the cover
1) Holder
Insert the seatbelt webbing to the holder of
the third-row seat.
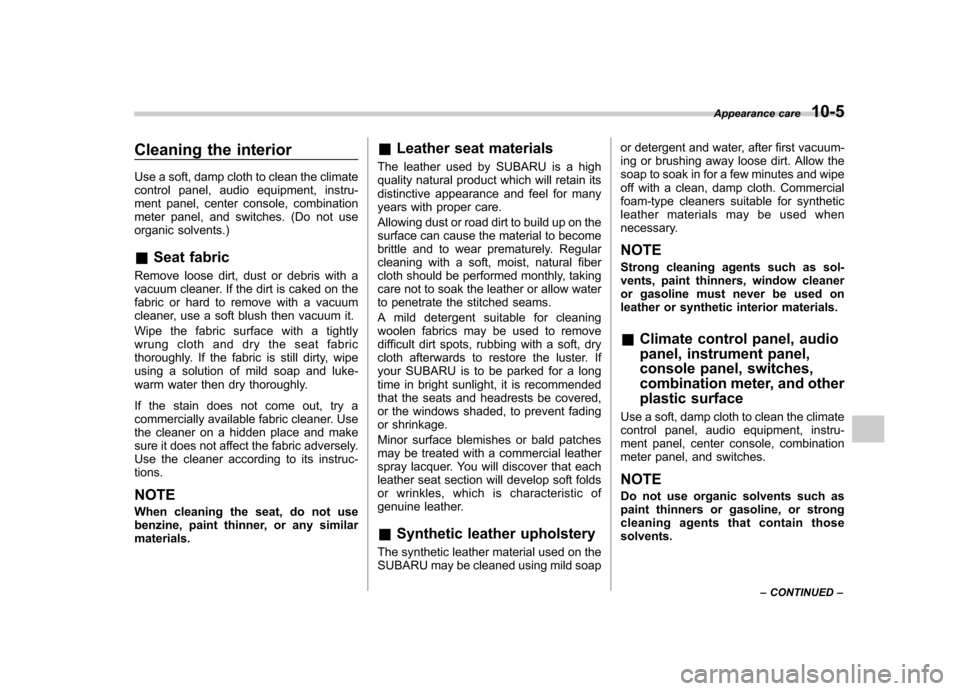
To extend the cover, pull the end of the
cover out of the housing, then insert its
hooks into the catches as shown. To
rewind it, unhook it from the catches and
it will rewind automatically. You should
hold on to the cover and guide it back into
the cover housing while it is rewinding.
WARNING
Do not place anything on the ex-
tended cover. Putting excessive
weight on the extended cover can
break it and an object on the cover
could tumble forward in the event of
a sudden stop or collision. This
could cause serious injury.
CAUTION
. Be careful not to pinch your hand
between the headrest and the
cargo area cover when you re-
cline the rear seat.
. Be careful not to scratch the rear
gate stays while extending and
rewinding the cover.
Scratches on the stays could
cause leakage of gas from the
stays, which may result in their
inability to hold the rear gateopen.
NOTE
When the head restraint is adjusted at
the rearmost position of the seat with
the seatback leaned back, the head
restraint comes in contact with the
cargo area cover. In this case, raise
the seatback before adjusting the headrestraint.
If the head restraint is correctly fixed in
any of the lock positions, the head
restraint does not contact the cargo
area cover even when the seatback isreclined.
Page 330 of 422

Cleaning the interior
Use a soft, damp cloth to clean the climate
control panel, audio equipment, instru-
ment panel, center console, combination
meter panel, and switches. (Do not use
organic solvents.) &Seat fabric
Remove loose dirt, dust or debris with a
vacuum cleaner. If the dirt is caked on the
fabric or hard to remove with a vacuum
cleaner, use a soft blush then vacuum it.
Wipe the fabric surface with a tightly
wrung cloth and dry the seat fabric
thoroughly. If the fabric is still dirty, wipe
using a solution of mild soap and luke-
warm water then dry thoroughly.
If the stain does not come out, try a
commercially available fabric cleaner. Use
the cleaner on a hidden place and make
sure it does not affect the fabric adversely.
Use the cleaner according to its instruc-tions. NOTE
When cleaning the seat, do not use
benzine, paint thinner, or any similarmaterials. &
Leather seat materials
The leather used by SUBARU is a high
quality natural product which will retain its
distinctive appearance and feel for many
years with proper care.
Allowing dust or road dirt to build up on the
surface can cause the material to become
brittle and to wear prematurely. Regular
cleaning with a soft, moist, natural fiber
cloth should be performed monthly, taking
care not to soak the leather or allow water
to penetrate the stitched seams.
A mild detergent suitable for cleaning
woolen fabrics may be used to remove
difficult dirt spots, rubbing with a soft, dry
cloth afterwards to restore the luster. If
your SUBARU is to be parked for a long
time in bright sunlight, it is recommended
that the seats and headrests be covered,
or the windows shaded, to prevent fading
or shrinkage.
Minor surface blemishes or bald patches
may be treated with a commercial leather
spray lacquer. You will discover that each
leather seat section will develop soft folds
or wrinkles, which is characteristic of
genuine leather. & Synthetic leather upholstery
The synthetic leather material used on the
SUBARU may be cleaned using mild soap or detergent and water, after first vacuum-
ing or brushing away loose dirt. Allow the
soap to soak in for a few minutes and wipe
off with a clean, damp cloth. Commercial
foam-type cleaners suitable for synthetic
leather materials may be used when
necessary. NOTE
Strong cleaning agents such as sol-
vents, paint thinners, window cleaner
or gasoline must never be used on
leather or synthetic interior materials. &
Climate control panel, audio
panel, instrument panel,
console panel, switches,
combination meter, and other
plastic surface
Use a soft, damp cloth to clean the climate
control panel, audio equipment, instru-
ment panel, center console, combination
meter panel, and switches. NOTE
Do not use organic solvents such as
paint thinners or gasoline, or strong
cleaning agents that contain thosesolvents. Appearance care
10-5
– CONTINUED –