2011 Seat Ibiza SC lights
[x] Cancel search: lightsPage 110 of 278

108Lights and visibility
Electric exterior mirrors*
The exterior mirrors can be adjusted using the rotary knob
in the driver door.
Fig. 67 Controls of exte-
rior mirrors
Basic setting of exterior mirrors
1. Turn knob ⇒ fig. 67 to position L (left exterior mirror ).
2. Turn the rotary knob to position the mirror so that you have a good view to the rear of the vehicle.
3. Turn knob to position R (right exterior mirror ).
4. Swivel the rotary knob to position the mirror so that you have a good view to the rear of the vehicle ⇒
.
Heated exterior mirrors*
– Press the demisting button
⇒
fig. 57 –
The mirrors demist for some minutes to prevent draining the
battery.
– If necessary, press the button again to repeat the function.
– The exterior mirror heating is not activated with temperatures
above 20 °C.
Folding in exterior mirrors*
– Turn the control ⇒ fig. 67 to position to fold in the exterior
mirrors. You should always fold in the exterior mirrors if you are
driving through an automatic car wash. This will help prevent
damage.
Folding exterior mirrors back out to the extended position*
– Turn the knob to position L or R to fold the exterior mirrors back
out ⇒
.
WARNING
● Convex or aspheric mirrors increase the field of vision however the
objects appear smaller and further away in the mirrors. If you use these
mirrors to estimate the distance to vehicles behind you when changing
lane, you could make a mistake. Risk of accident.
● If possible, use the rear view mirror to estimate distances to vehicles
behind you.
● Make sure that you do not get your finger trapped between the mirror
and the mirror base when folding back the mirrors. Risk of injury!
For the sake of the environment
The exterior mirror heating should be switched off when it is no longer nee-
ded. Otherwise, it is an unnecessary fuel waste.
Page 111 of 278

109
Lights and visibility
Note
● If the electrical adjustment ever fails to operate, the mirrors can be ad-
justed by hand by lightly pressing the edge of the mirror glass.
● In vehicles with electric exterior mirrors, the following points should be
observed: if, due to an external force (e.g. a knock while manoeuvring), the
adjustment of the mirror housing is altered, the mirror will have to be com-
pletely folded electrically. Do not readjust the mirror housing by hand, as
this will interfere with the mirror adjuster function.
● The rear view mirrors can be adjusted separately or simultaneously, as
described before.
● The fold-in function on the exterior mirrors is not active at speeds over
40 km/h.
Safety FirstOperating InstructionsPractical TipsTechnical Specifications
Page 116 of 278

114Seats and storage compartments
WARNING (Continued)
● Exercise caution when securing the seat height into forwards/back-
wards position. Injuries can be caused if the seat height is adjusted with-
out due care and attention.
● To move the seat lengthways, pull upwards and not sideways on the
lever, as the force exerted on it in this position could damage it.
Heated seats*
The front seat cushions and backrests can be heated electri-
cally.
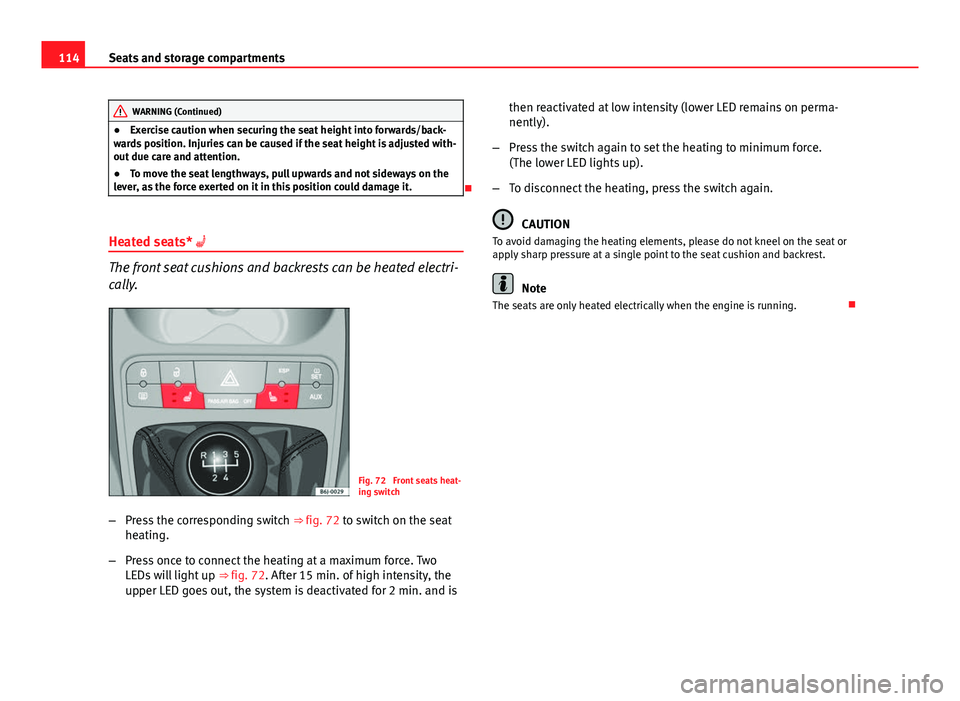
Fig. 72 Front seats heat-
ing switch
– Press the corresponding switch ⇒ fig. 72 to switch on the seat
heating.
– Press once to connect the heating at a maximum force. Two
LEDs will light up ⇒ fig. 72. After 15 min. of high intensity, the
upper LED goes out, the system is deactivated for 2 min. and is then reactivated at low intensity (lower LED remains on perma-
nently).
– Press the switch again to set the heating to minimum force.
(The lower LED lights up).
– To disconnect the heating, press the switch again.
CAUTION
To avoid damaging the heating elements, please do not kneel on the seat or
apply sharp pressure at a single point to the seat cushion and backrest.
Note
The seats are only heated electrically when the engine is running.
Page 127 of 278

125
Air conditioning
Air conditioning Heating
Controls
Fig. 90 Heating controls
on the dash panel
– Using the controls A
and C and with the switch B ⇒ fig. 90
you can adjust the temperature, the air distribution and the
blower speed.
– Press the button D
to switch air recirculation mode on or off.
When the function is activated, a warning light on the button is
turned on.
Temperature
Switch A
adjusts temperature. The required temperature inside the vehicle
cannot be lower than the ambient temperature. Maximum heat output, which is needed to defrost the windows quickly, is only available when the
engine has reached its operating temperature.
Blower
The air flow can be set at four speeds with switch
B
. The blower should al-
ways be set at the lowest speed when driving slowly.
Air distribution
Control C
for setting the flow of air in the required direction.
– Air distribution towards the windscreen in order to demist. For safety
reasons, it is not recommended to switch air recirculation on.
– Air distribution to the upper body
– Air distribution to footwell
– Air distribution to the windscreen and the footwell.
Air recirculation mode
Air recirculation mode D
on (a lamp lights up in red) prevents strong
odours from the outside air from entering in the vehicle, for example when
passing through a tunnel or in a traffic jam ⇒
.
When the outside temperature is low, air recirculation mode improves heat-
ing performance by heating air from the interior instead of cold air from the
outside.
Safety FirstOperating InstructionsPractical TipsTechnical Specifications
Page 142 of 278

140Driving
temperature increases due to the heat accumulated in the engine compart-
ment or due to its prolonged exposure to solar radiation.
WARNING
● Never switch the engine off until the vehicle is completely stationary.
● The brake servo works only when the engine is running. With the en-
gine switched off, more strength is needed to brake. As normal brake op-
eration cannot be performed, risk of accidents and serious injury may ex-
ist.
● The steering lock can be immediately blocked once the key is re-
moved from the ignition. The vehicle cannot be steered. Risk of accident.
CAUTION
When the engine has been running under a heavy load for a long period,
heat can accumulate in the engine compartment and cause engine damage.
For this reason, you should idle the engine for approx. 2 minutes before you
switch it off. Driving with LPG*Fig. 99 Centre console:
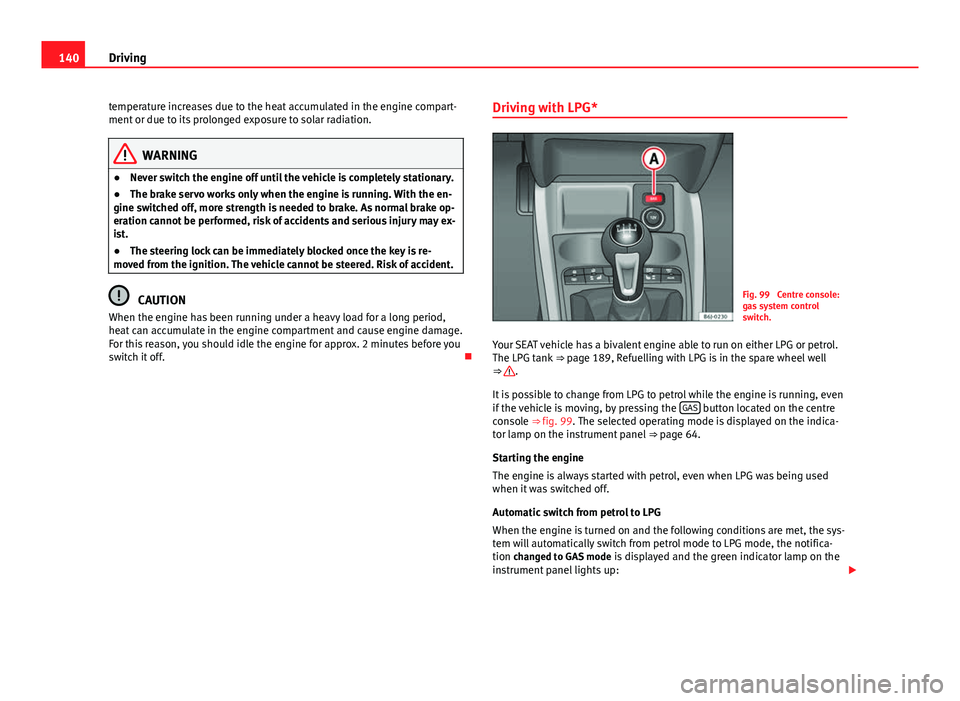
gas system control
switch.
Your SEAT vehicle has a bivalent engine able to run on either LPG or petrol.
The LPG tank ⇒ page 189, Refuelling with LPG is in the spare wheel well
⇒
.
It is possible to change from LPG to petrol while the engine is running, even
if the vehicle is moving, by pressing the GAS
button located on the centre
console ⇒ fig. 99. The selected operating mode is displayed on the indica-
tor lamp on the instrument panel ⇒ page 64.
Starting the engine
The engine is always started with petrol, even when LPG was being used
when it was switched off.
Automatic switch from petrol to LPG
When the engine is turned on and the following conditions are met, the sys-
tem will automatically switch from petrol mode to LPG mode, the notifica-
tion changed to GAS mode is displayed and the green indicator lamp on the
instrument panel lights up:
Page 143 of 278

141
Driving
● There is enough LPG in the tank.
● The temperature of the vehicle coolant is above 30 °C.
● Engine speed while driving is above 1200 rpm.
Automatic switch from LPG to petrol
When the vehicle is operating in LPG mode and one of these conditions is
met, the system automatically switches to petrol mode, the notification changed to petrol mode is displayed and the green indicator lamp on the in-
strument panel goes out:
● When the engine is started.
● If the LPG tank is empty.
● If there is a fault in the LPG system.
● At very low temperatures, below 10 °C.
Manual switch from petrol to LPG
Press the GAS
button on the centre console ⇒ fig. 99 to change mode. The
notification changed to GAS mode is displayed. When the following condi-
tions are met, the system switches to LPG mode, the green indicator lamp
on the instrument panel lights up and the notification displayed changes to changed to GAS mode .
● There is enough LPG in the tank.
● The temperature of the vehicle coolant is above 30 °C.
● Engine speed while driving is above 1200 rpm.
Manual switch from LPG to petrol
Press the GAS
button on the centre console ⇒
fig. 99 to change mode. The
green lamp on the instrument panel goes out and the notification changed
to petrol mode is displayed.
Running on petrol
Run the engine with petrol for short journeys at regular intervals to avoid
problems in the petrol system.
WARNING
LPG is a highly explosive and inflammable substance. It may cause se-
vere burns and other injury.
● Due care must be taken to avoid any risk of fire or explosion.
● When parking the vehicle in a closed area (for example in a garage),
make sure that there is adequate ventilation, either natural or mechani-
cal, to neutralise the LPG in the event of a leak.
Note
● If frequent short journeys are made, especially when the outside tem-
perature is low, the vehicle will tend to run on petrol more often than on
LPG. Therefore, the petrol tank may empty before the LPG tank.
● The notification LPG mode not possible may be displayed.
Start-Stop function* Description and operation
The Start-Stop function stops the engine when the vehicle is stop-
ped and starts it automatically when required.
– When the vehicle is stopped, put it in neutral and release the
clutch pedal. The engine will stop.
– When the clutch pedal is pressed, the engine starts again.
– The instrument panel screen displays information about the sta-
tus of the Start-Stop function ⇒
fig. 101.
Safety FirstOperating InstructionsPractical TipsTechnical Specifications
Page 146 of 278

144Driving
Manual gearbox
Driving with a manual gearbox
Fig. 102 Centre Console:
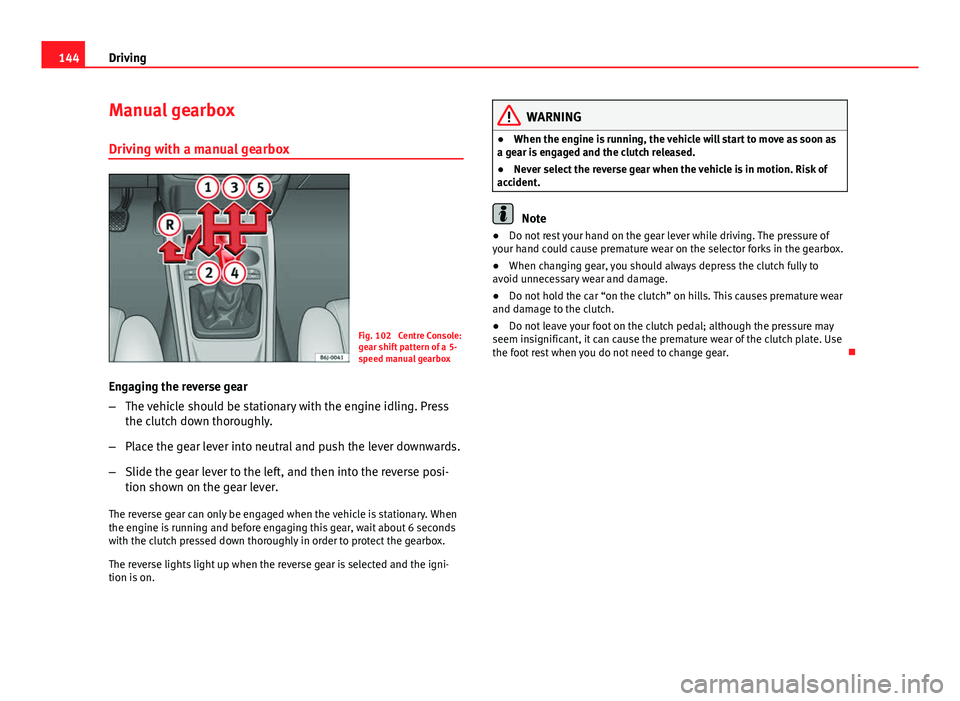
gear shift pattern of a 5-
speed manual gearbox
Engaging the reverse gear
– The vehicle should be stationary with the engine idling. Press
the clutch down thoroughly.
– Place the gear lever into neutral and push the lever downwards.
– Slide the gear lever to the left, and then into the reverse posi-
tion shown on the gear lever.
The reverse gear can only be engaged when the vehicle is stationary. When
the engine is running and before engaging this gear, wait about 6 seconds
with the clutch pressed down thoroughly in order to protect the gearbox.
The reverse lights light up when the reverse gear is selected and the igni-
tion is on.
WARNING
● When the engine is running, the vehicle will start to move as soon as
a gear is engaged and the clutch released.
● Never select the reverse gear when the vehicle is in motion. Risk of
accident.
Note
● Do not rest your hand on the gear lever while driving. The pressure of
your hand could cause premature wear on the selector forks in the gearbox.
● When changing gear, you should always depress the clutch fully to
avoid unnecessary wear and damage.
● Do not hold the car “on the clutch” on hills. This causes premature wear
and damage to the clutch.
● Do not leave your foot on the clutch pedal; although the pressure may
seem insignificant, it can cause the premature wear of the clutch plate. Use
the foot rest when you do not need to change gear.
Page 148 of 278

146Driving
Selector lever lock functions
The selector lever lock in position P or N prevents gears from
being engaged inadvertently, which would cause the vehicle
to move.
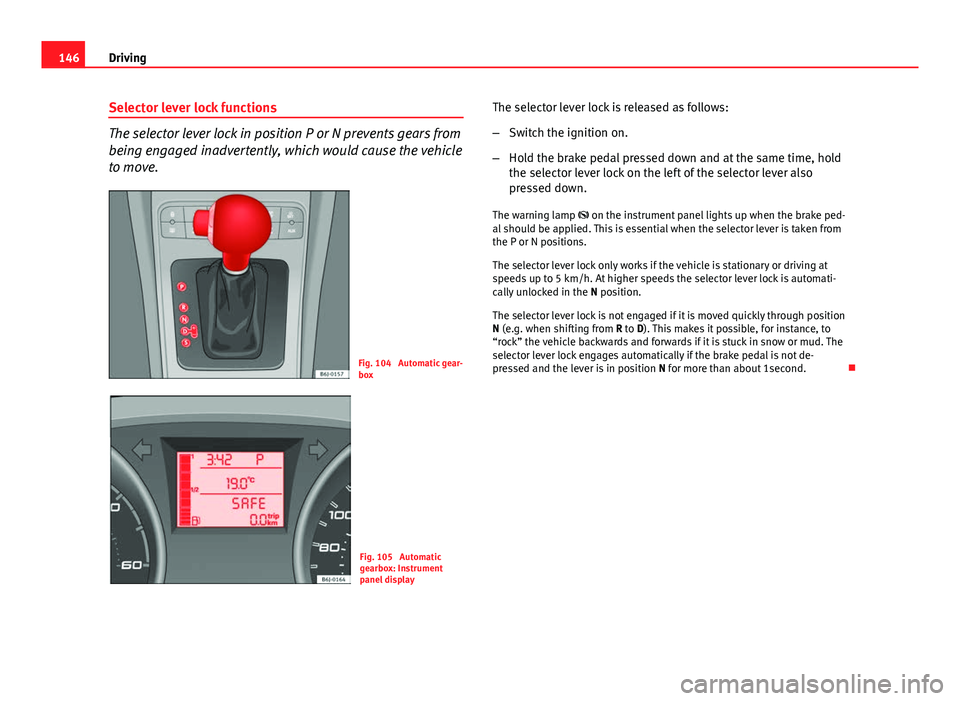
Fig. 104 Automatic gear-
box
Fig. 105 Automatic
gearbox: Instrument
panel display The selector lever lock is released as follows:
–
Switch the ignition on.
– Hold the brake pedal pressed down and at the same time, hold
the selector lever lock on the left of the selector lever also
pressed down.
The warning lamp on the instrument panel lights up when the brake ped-
al should be applied. This is essential when the selector lever is taken from
the P or N positions.
The selector lever lock only works if the vehicle is stationary or driving at
speeds up to 5 km/h. At higher speeds the selector lever lock is automati-
cally unlocked in the N position.
The selector lever lock is not engaged if it is moved quickly through position
N (e.g. when shifting from R to D). This makes it possible, for instance, to
“rock” the vehicle backwards and forwards if it is stuck in snow or mud. The
selector lever lock engages automatically if the brake pedal is not de-
pressed and the lever is in position N for more than about 1second.