2011 Seat Ibiza SC steering
[x] Cancel search: steeringPage 139 of 278

137
Driving
Ignition switched off, steering lock 1
In this position
⇒ fig. 98 the ignition and the engine are OFF and the steer-
ing may get locked.
For the Steering lock to operate without the ignition key, turn the steering
wheel until it locks with an audible sound. You should always lock the steer-
ing wheel when you leave your vehicle. This will help prevent vehicle theft
⇒
.
Switching the ignition or the glow plug system on 2
Turn the ignition key to this position and release it. If the key cannot be
turned or it is difficult to turn from position 1 to position 2, move the
steering wheel from one side to the other until it is released.
Starting 3
The engine is started when the key is in this position. Electrical components
with a high power consumption are switched off temporarily.
Every time the vehicle is started again, the ignition key must be turned to
position 1
. The
repetitive start prevention lock of the ignition prevents
possible damage to the starter motor if the engine is already running.
WARNING
● The ignition key must NOT be removed from the lock until the vehicle
comes to a standstill. Otherwise, the steering could be immediately
blocked- Risk of accident!
● Always remove the key from the ignition when leaving the vehicle,
even for a short period. This is especially important if children or disa-
bled people are left alone in the vehicle. They could accidentally start the
engine or work electrical equipment such as the electric windows, conse-
quently resulting in an accident.
● Unsupervised use of the keys could start the engine or any electrical
system, such as the electric window. This could result in serious injury.
CAUTION
The starter motor will only work when the engine is stopped (ignition key
position 3
).
Electronic immobiliser
The immobiliser prevents unauthorised persons from driv-
ing the vehicle.
Inside the key there is a chip that deactivates the electronic immobiliser au-
tomatically when the key is inserted into the ignition.
The immobiliser will be activated again automatically as soon as you pull
the key out of the ignition lock.
The engine can only be started using a genuine SEAT key with its correct
code.
Note
A perfect operation of the vehicle is ensured if genuine SEAT keys are used.
Safety FirstOperating InstructionsPractical TipsTechnical Specifications
Page 142 of 278
140Driving
temperature increases due to the heat accumulated in the engine compart-
ment or due to its prolonged exposure to solar radiation.
WARNING
● Never switch the engine off until the vehicle is completely stationary.
● The brake servo works only when the engine is running. With the en-
gine switched off, more strength is needed to brake. As normal brake op-
eration cannot be performed, risk of accidents and serious injury may ex-
ist.
● The steering lock can be immediately blocked once the key is re-
moved from the ignition. The vehicle cannot be steered. Risk of accident.
CAUTION
When the engine has been running under a heavy load for a long period,
heat can accumulate in the engine compartment and cause engine damage.
For this reason, you should idle the engine for approx. 2 minutes before you
switch it off. Driving with LPG*Fig. 99 Centre console:
gas system control
switch.
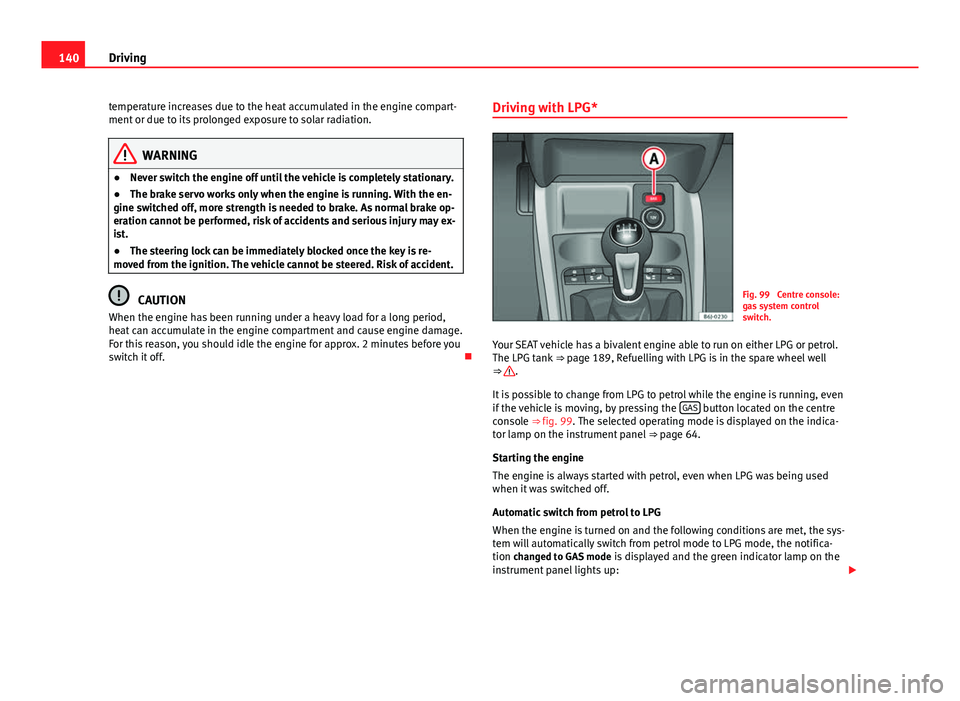
Your SEAT vehicle has a bivalent engine able to run on either LPG or petrol.
The LPG tank ⇒ page 189, Refuelling with LPG is in the spare wheel well
⇒
.
It is possible to change from LPG to petrol while the engine is running, even
if the vehicle is moving, by pressing the GAS
button located on the centre
console ⇒ fig. 99. The selected operating mode is displayed on the indica-
tor lamp on the instrument panel ⇒ page 64.
Starting the engine
The engine is always started with petrol, even when LPG was being used
when it was switched off.
Automatic switch from petrol to LPG
When the engine is turned on and the following conditions are met, the sys-
tem will automatically switch from petrol mode to LPG mode, the notifica-
tion changed to GAS mode is displayed and the green indicator lamp on the
instrument panel lights up:
Page 144 of 278
142Driving
Start-Stop function conditions
● The driver seat belt must be buckled.
● The engine hood must be closed.
● The engine must be at operating temperature
● The steering wheel must be straight.
● The vehicle must be on flat ground.
● The vehicle must not be in reverse.
● A trailer must not be connected.
● The temperature of the passenger compartment must be within the con-
venience limits ( AC
button should be selected).
● The windscreen de-mist function must be off.
● If in an increase in airflow is not requested.
● The temperature must not be set to HI or LO.
● The driver door must be closed.
● The diesel particulate filter must not be in regeneration mode, for diesel
engines.
● The battery charge must not be low for the next start.
● The battery temperature must be between -1 °C and 55 °C.
Start-Stop function interruption
In the following situations, the Start-Stop function will be interrupted and
the engine will automatically start:
● The vehicle starts moving.
● The brake pedal is pressed several times in a row.
● The battery has been discharged excessively.
● The Start-Stop System is manually deactivated.
● The windscreen de-mist function is turned on.
● The temperature of the passenger compartment exceeds the conven-
ience limits ( AC
button).
● If the airflow is increased by more than 3 presses. ●
Temperature setting HI or LO is selected.
● The engine coolant temperature is insufficient.
● The alternator is faulty, for example the V-belt has ruptured.
● If any of the conditions described in the previous section are not fulfil-
led.
WARNING
Never allow the vehicle to move with the engine off for any reason. You
could lose control of your vehicle. This could cause an accident and seri-
ous injury.
● The brake servo does not work with the engine off. You need more
force to stop the vehicle.
● Power steering does not work when the engine is not running. That is
why it is much more difficult to turn the steering wheel.
● Disconnect the Start-Stop system when driving through water (ford-
ing streams, etc.).
Note
● For vehicles with the Start-Stop function and a manual gearbox, when
the engine is started, the clutch must be pressed.
● When the conditions for the Start-Stop function are not fulfilled, the in-
strument panel displays the Start-Stop indicator dimmed.
● If the steering wheel is turned more than 270°, it will not be possible to
start the vehicle again. To start the vehicle, straighten the steering wheel so
that it is turned less than 270°.
Page 151 of 278

149
Driving
Changing gear in tiptronic mode*
The tiptronic system allows the driver to select gears man-
ually
Fig. 107 Changing gear
with tiptronic
Fig. 108 Steering wheel
with paddle levers for au-
tomatic gearbox
General information about driving in tiptronic mode Changing gear in tiptronic mode
–
Press the selector lever from position D to the right into the tip-
tronic selector gate.
– Lightly press the selector forward + to change up into high
gears.
– Lightly press the selector lever backwards - to change down into
low gears.
Changing gear with the steering wheel paddle levers*
– Press the right paddle lever +
towards the steering wheel to
change up ⇒ fig. 108.
– Press the left paddle lever –
towards the steering wheel to
change down ⇒ fig. 108.
Using the paddle levers on the steering wheel, you can access manual driv-
ing mode regardless of the pre-selected driving mode.
General information about driving in tiptronic mode
When accelerating, the automatic gearbox / DSG automatic gearbox goes
into a higher gear a little before the engine reaches its maximum permitted
revolutions.
If a lower gear is selected, the automatic gearbox / DSG automatic gearbox
will only change down when the engine cannot go over its maximum permit-
ted revolutions.
If tiptronic is selected whilst the vehicle is in motion and the automatic
gearbox / DSG automatic gearbox is in third gear and selector lever position
D, tiptronic mode will then also be in third gear.
Safety FirstOperating InstructionsPractical TipsTechnical Specifications
Page 152 of 278
150Driving
Changing gears in the normal or sport programme using the steering wheel
paddle levers
If the paddle levers ⇒ fig. 108 are used in the normal or sport programme,
the system switches temporarily to tiptronic mode. To exit “tiptronic” mode
again, press the right paddle lever +
towards the steering wheel for approx-
imately one second. You will also leave tiptronic mode if the paddle levers
are not moved for a certain time.
Note
● The gear paddle levers on the steering wheel can be operated with the
selector lever in any position and with the vehicle in motion.
Selector lever positions
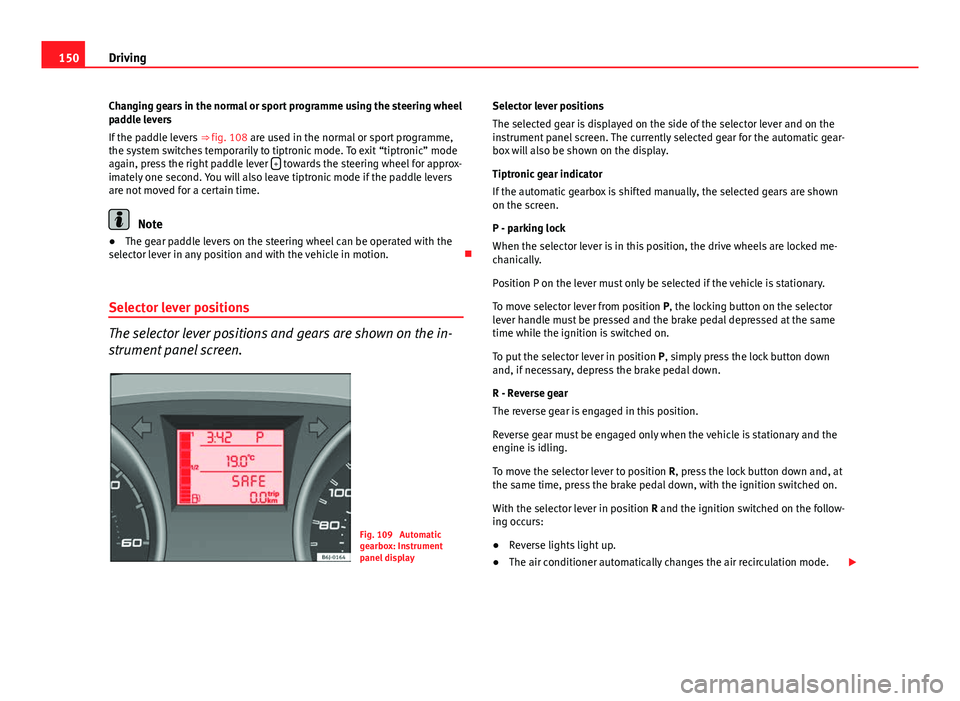
The selector lever positions and gears are shown on the in-
strument panel screen.
Fig. 109 Automatic
gearbox: Instrument
panel display Selector lever positions
The selected gear is displayed on the side of the selector lever and on the
instrument panel screen. The currently selected gear for the automatic gear-
box will also be shown on the display.
Tiptronic gear indicator
If the automatic gearbox is shifted manually, the selected gears are shown
on the screen.
P - parking lock
When the selector lever is in this position, the drive wheels are locked me-
chanically.
Position P on the lever must only be selected if the vehicle is stationary.
To move selector lever from position P, the locking button on the selector
lever handle must be pressed and the brake pedal depressed at the same
time while the ignition is switched on.
To put the selector lever in position
P, simply press the lock button down
and, if necessary, depress the brake pedal down.
R - Reverse gear
The reverse gear is engaged in this position.
Reverse gear must be engaged only when the vehicle is stationary and the
engine is idling.
To move the selector lever to position R, press the lock button down and, at
the same time, press the brake pedal down, with the ignition switched on.
With the selector lever in position R and the ignition switched on the follow-
ing occurs:
● Reverse lights light up.
● The air conditioner automatically changes the air recirculation mode.
Page 154 of 278
152Driving
WARNING (Continued)
● The brake servo does not work with the engine off. You need more
force to stop the vehicle.
● Power steering does not work when the engine is not running. That is
why it is much more difficult to turn the steering wheel.
● Never remove the key from the ignition if the vehicle is in motion. The
steering lock could suddenly engage, and you would not be able to steer
the vehicle.
● Never allow the car to roll downhill with the selector lever in “N”, re-
gardless of the engine is running or not.
CAUTION
If you allow the vehicle to move when the engine is switched off or with the
selector lever in position “N”, take your foot off the accelerator and wait un-
til the engine starts idling before returning to position “D”.
Kickdown feature
This feature allows maximum acceleration. If you press the accelerator down thoroughly, the gearbox automatically
changes down, depending on speed and engine speed, into a lower gear to
take full advantage of give the vehicle maximum acceleration.
The gearbox does not change gear until the engine reaches the maximum
determined engine speed for the gear.
WARNING
You could lose control of the vehicle if you accelerate on slippery road
surfaces. Risk of serious injury.
● Be particularly careful when using the kickdown features on slippery
road surfaces. With a fast acceleration, the vehicle could lose traction
and skid.
● You should use the kickdown feature only when traffic and weather
conditions allow it to be used safely.
Handbrake Using the handbrake
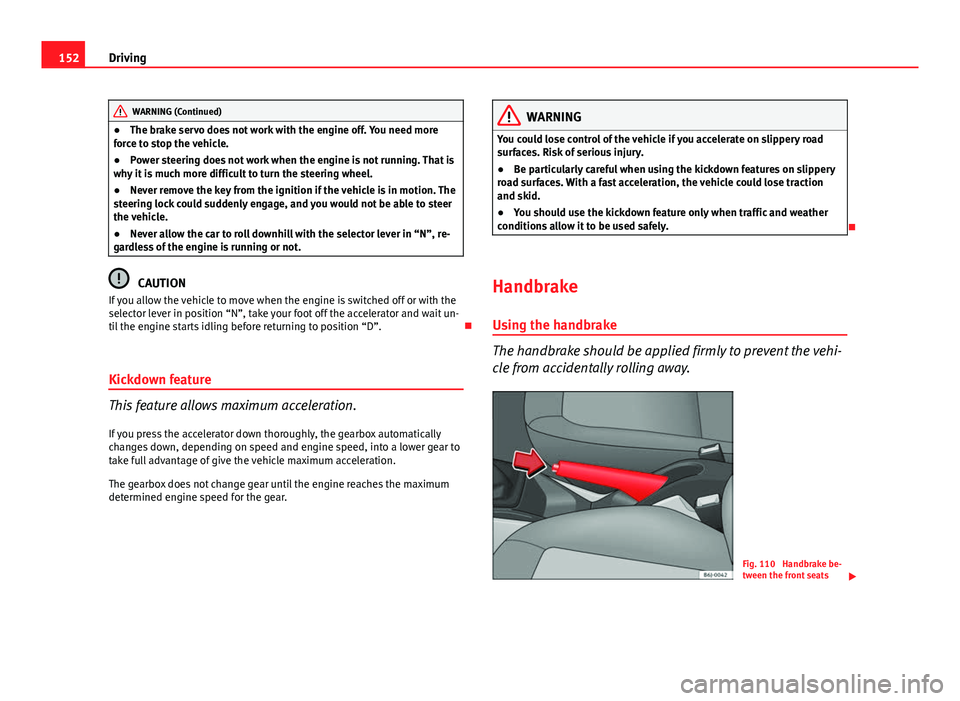
The handbrake should be applied firmly to prevent the vehi-
cle from accidentally rolling away.
Fig. 110 Handbrake be-
tween the front seats
Page 155 of 278

153
Driving
Always apply the handbrake when you leave your vehicle and when
you park.
Applying the handbrake
– Pull the handbrake lever up firmly ⇒ fig. 110.
Releasing the handbrake
– Pull the lever up slightly and press the release knob in the di-
rection of the arrow ⇒ fig. 110 and guide the handbrake lever
down fully ⇒
.
Always apply the handbrake as far as it will go in order to prevent you from
driving with the handbrake applied by mistake ⇒
.
The handbrake warning lamp lights up when the handbrake is applied
and the ignition switched on. The warning turns off when the handbrake is
released.
WARNING
● Never use the handbrake to stop the vehicle when it is in motion. The
braking distance is considerably longer, because braking is only applied
to the rear wheels. Risk of accident!
● If it is only partially released, this will cause rear brakes overheating,
which can impair the function of the brake system and could lead to an
accident. This also causes premature wear on the rear brake pads.
CAUTION
Always apply the handbrake before you leave the vehicle. The first gear
should also be selected. Parking
The handbrake should always be firmly applied when the
vehicle is parked.
Always note the following points when parking the vehicle:
–
Use the brake pedal to stop the vehicle.
– Apply the handbrake.
– Select first gear.
– Switch the engine off and remove the key from the ignition. Turn
the steering wheel slightly to engage the steering lock.
– Always take you car keys with you when you leave the vehicle
⇒
.
Additional notes on parking the vehicle on gradients:
Turn the steering wheel so that the vehicle rolls against the kerb if it started
to roll.
● If the vehicle is parked facing downhill, turn the front wheels so that
they point towards the kerb .
● If the vehicle is parked facing uphill, turn the front wheels so that they
point away from the kerb .
● Secure the vehicle as normal by applying the handbrake firmly and se-
lecting first gear.
Safety FirstOperating InstructionsPractical TipsTechnical Specifications
Page 166 of 278
164Intelligent technology
Electronic Stability Programme (ESP)*
ESP reduces the danger of skidding by braking the wheels individually.
The system uses the steering wheel angle and road speed to calculate the
changes of direction desired by the driver, and constantly compares them
with the actual behaviour of the vehicle. If the desired course is not being
maintained (for instance, if the vehicle is starting to skid), then the ESP
compensates automatically by braking the appropriate wheel.
The forces acting on the braked wheel bring the vehicle back to a stable
condition. If the vehicle tends to oversteer, the system will act on the front
wheel on the outside of the turn.
WARNING
● It must be remembered that ESP cannot defy the laws of physics. This
should be kept in mind, particularly on slippery and wet roads and when
towing a trailer.
● Always adapt your driving style to suit the condition of the roads and
the traffic situation. Do not let the extra safety afforded by ESP tempt you
into taking any risks when driving, as this can cause accidents.
CAUTION
● In order to ensure that ESP functions correctly, all four wheels must be
fitted with the same tyres. Any differences in the rolling radius of the tyres
can cause the system to reduce engine power when this is not desired.
● Modifications to the vehicle (e.g. to the engine, the brake system, run-
ning gear or any components affecting the wheels and tyres) could affect
the efficiency of the ABS, EDL, ESP and TCS. Anti-lock brake system (ABS)
The anti-lock brake system prevents the wheels locking during braking
⇒ page 162.
Electronic differential lock (EDL)*
The electronic differential lock helps prevent the loss of trac-
tion caused if one of the driven wheels starts spinning.
EDL helps the vehicle to start moving, accelerate and climb a gradient in
slippery conditions where this may otherwise be difficult or even impossi-
ble.
The system will control the revolutions of the drive wheels using the ABS
sensors (in case of an EDL fault the warning lamp for ABS lights up)
⇒ page 67.
At speeds of up to approximately 80 km/h, it is able to balance out differen-
ces in the speed of the driven wheels of approximately 100 rpm caused by a
slippery road surface on one side of the vehicle. It does this by braking the
wheel which has lost traction and distributing more driving force to the oth-
er driven wheel via the differential.
To prevent the disc brake of the braking wheel from overheating, the EDL
cuts out automatically if subjected to excessive loads. The vehicle will con-
tinue to function normally without EDL. For this reason, the driver is not in-
formed that the EDL has been switched off.
The EDL will switch on again automatically when the brake has cooled
down.