2011 Seat Ibiza SC instrument panel
[x] Cancel search: instrument panelPage 96 of 278
94Lights and visibility
Lights and visibility
Lights Switching lights on and off
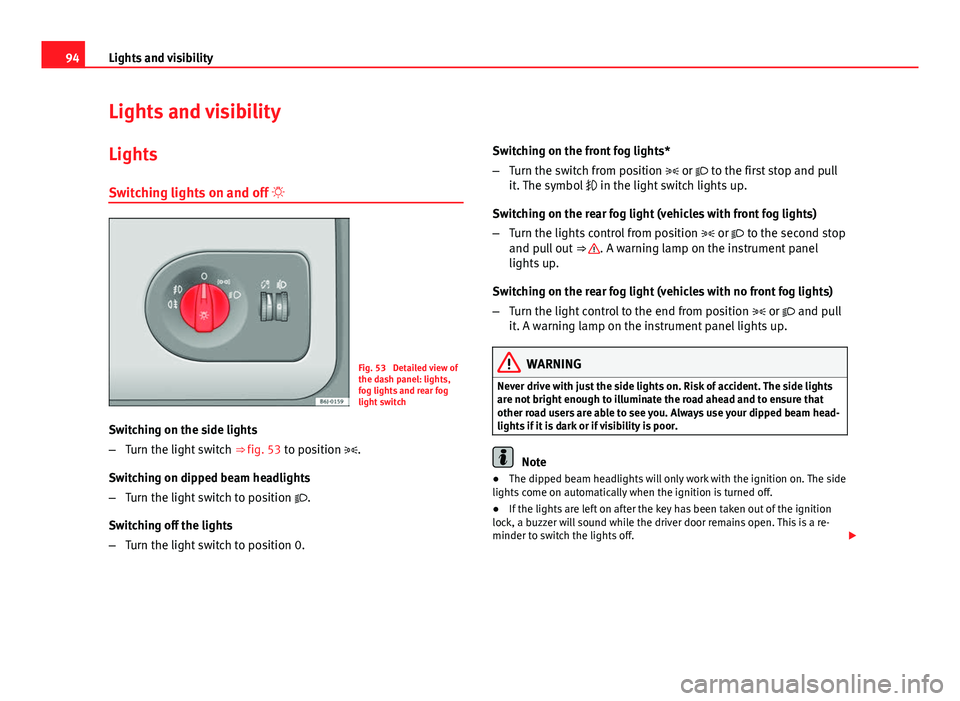
Fig. 53 Detailed view of
the dash panel: lights,
fog lights and rear fog
light switch
Switching on the side lights
– Turn the light switch ⇒ fig. 53 to position .
Switching on dipped beam headlights
– Turn the light switch to position .
Switching off the lights
– Turn the light switch to position 0. Switching on the front fog lights*
–
Turn the switch from position or to the first stop and pull
it. The symbol in the light switch lights up.
Switching on the rear fog light (vehicles with front fog lights)
– Turn the lights control from position or to the second stop
and pull out ⇒
. A warning lamp on the instrument panel
lights up.
Switching on the rear fog light (vehicles with no front fog lights)
– Turn the light control to the end from position or and pull
it. A warning lamp on the instrument panel lights up.
WARNING
Never drive with just the side lights on. Risk of accident. The side lights
are not bright enough to illuminate the road ahead and to ensure that
other road users are able to see you. Always use your dipped beam head-
lights if it is dark or if visibility is poor.
Note
● The dipped beam headlights will only work with the ignition on. The side
lights come on automatically when the ignition is turned off.
● If the lights are left on after the key has been taken out of the ignition
lock, a buzzer will sound while the driver door remains open. This is a re-
minder to switch the lights off.
Page 98 of 278
96Lights and visibility
Instrument and switch lighting / Headlight range control
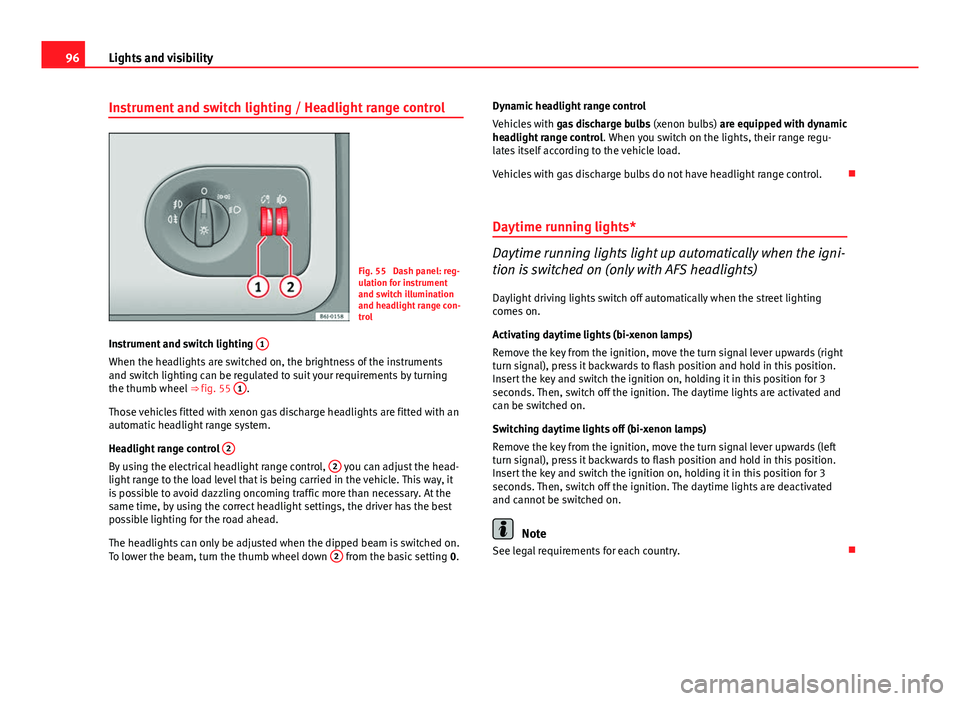
Fig. 55 Dash panel: reg-
ulation for instrument
and switch illumination
and headlight range con-
trol
Instrument and switch lighting 1
When the headlights are switched on, the brightness of the instruments
and switch lighting can be regulated to suit your requirements by turning
the thumb wheel
⇒ fig. 55 1
.
Those vehicles fitted with xenon gas discharge headlights are fitted with an
automatic headlight range system.
Headlight range control 2
By using the electrical headlight range control, 2 you can adjust the head-
light range to the load level that is being carried in the vehicle. This way, it
is possible to avoid dazzling oncoming traffic more than necessary. At the
same time, by using the correct headlight settings, the driver has the best
possible lighting for the road ahead.
The headlights can only be adjusted when the dipped beam is switched on.
To lower the beam, turn the thumb wheel down 2
from the basic setting
0.Dynamic headlight range control
Vehicles with
gas discharge bulbs (xenon bulbs) are equipped with dynamic
headlight range control . When you switch on the lights, their range regu-
lates itself according to the vehicle load.
Vehicles with gas discharge bulbs do not have headlight range control.
Daytime running lights*
Daytime running lights light up automatically when the igni-
tion is switched on (only with AFS headlights)
Daylight driving lights switch off automatically when the street lighting
comes on.
Activating daytime lights (bi-xenon lamps)
Remove the key from the ignition, move the turn signal lever upwards (right
turn signal), press it backwards to flash position and hold in this position.
Insert the key and switch the ignition on, holding it in this position for 3
seconds. Then, switch off the ignition. The daytime lights are activated and
can be switched on.
Switching daytime lights off (bi-xenon lamps)
Remove the key from the ignition, move the turn signal lever upwards (left
turn signal), press it backwards to flash position and hold in this position.
Insert the key and switch the ignition on, holding it in this position for 3
seconds. Then, switch off the ignition. The daytime lights are deactivated
and cannot be switched on.
Note
See legal requirements for each country.
Page 103 of 278
101
Lights and visibility
Note
● The turn signals only work when the ignition is switched on. The corre-
sponding warning lamp or flashes in the instrument panel. The warn-
ing lamp flashes when the turn signals are operated, provided a trailer is
correctly attached and connected to the vehicle. If a turn signal bulb is de-
fective, the warning lamp flashes at double speed. If the trailer turn signal
bulbs are damaged, warning lamp does not light up. Change the bulb.
● The main beam headlights can only be switched on if the dipped beam
headlights are already on. The warning lamp then comes on in the instru-
ment panel.
● The headlight flasher comes on for as long as you pull the lever – even if
no other lights are switched on. The warning lamp then comes on in the
instrument panel.
● When the parking lights are switched on, the headlight and the tail light
on the corresponding side of the vehicle light up. The parking lights will on-
ly work if the key is removed from the ignition. If the lights are switched on,
an acoustic signal will be emitted while the driver door is open.
● If the turn signal lever is left on after the key has been taken out of the
ignition lock, an acoustic signal sounds when the driver door is opened.
This is a reminder to switch off the turn signal, unless of course you wish to
leave the parking light on. Interior lights
Front interior light
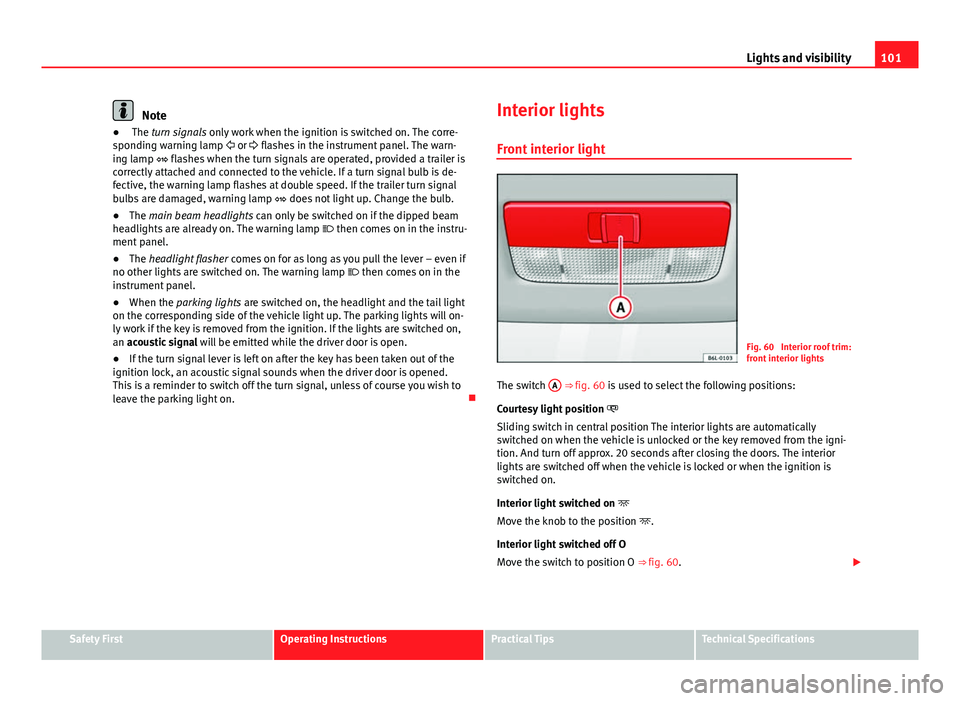
Fig. 60 Interior roof trim:
front interior lights
The switch A
⇒ fig. 60 is used to select the following positions:
Courtesy light position
Sliding switch in central position The interior lights are automatically
switched on when the vehicle is unlocked or the key removed from the igni-
tion. And turn off approx. 20 seconds after closing the doors. The interior
lights are switched off when the vehicle is locked or when the ignition is
switched on.
Interior light switched on
Move the knob to the position .
Interior light switched off O
Move the switch to position O ⇒ fig. 60.
Safety FirstOperating InstructionsPractical TipsTechnical Specifications
Page 112 of 278
110Seats and storage compartments
Seats and storage compartments
The importance of correct seat adjustment
Proper seat adjustment optimises the level of protection of-
fered by seat belts and airbags.
Your vehicle has five seats, two in the front and three in the rear. Each seat
is equipped with a three-point seat belt.
The driver seat and the front passenger seat can be adjusted in many ways
to suit the physical requirements of the vehicle occupants. The correct seat
position is very important for:
● a fast and easy operation of all controls on the instrument panel,
● a relaxed posture which does not cause drowsiness,
● a safe driving ⇒ page 7,
● ensuring that the seat belts and airbag system provide maximum pro-
tection ⇒ page 18.
WARNING
● If the driver and passengers assume improper sitting positions, they
may sustain critical injuries.
● More people than available seats must never be transported in your
vehicle.
● Every passenger in the vehicle must properly fasten and wear the
seat belt belonging to his or her seat. Children must be protected with an
appropriate child restraint system ⇒ page 42, Child safety.
● The front seats and all head restraints must always be adjusted to
body size and the seat belt must always be properly adjusted to provide
you and your passengers with optimum protection.
WARNING (Continued)
● Always keep your feet on the footwell when the vehicle is moving;
never rest them on the dash panel, out of the window or on the seat. This
is also applied to passengers. An incorrect sitting position exposes you
to an increased risk of injury in case of a sudden braking or an accident.
If the airbag is triggered, you could sustain severe injuries due to an in-
correct sitting position.
● It is important for the driver and front passenger to keep a distance of
at least 25 cm from the steering wheel and dash panel. Failure to respect
the minimum distance means that the airbag will not protect you. Risk of
fatal injury. The distance between the driver and the steering wheel or
between the front passenger and the dash panel should always be as
great as possible.
● Adjust the driver or front passenger seat only when the vehicle is sta-
tionary. Otherwise, your seat could move unexpectedly while the vehicle
is moving. This could increase the risk of an accident and therefore, in-
jury. In addition, while adjusting your seat, you will assume an incorrect
sitting position. Risk of fatal accidents.
● Special guidelines apply to installing a child seat on the front passen-
ger seat. When installing a child seat, please observe the warnings de-
scribed in ⇒ page 42, Child safety.
Page 142 of 278
140Driving
temperature increases due to the heat accumulated in the engine compart-
ment or due to its prolonged exposure to solar radiation.
WARNING
● Never switch the engine off until the vehicle is completely stationary.
● The brake servo works only when the engine is running. With the en-
gine switched off, more strength is needed to brake. As normal brake op-
eration cannot be performed, risk of accidents and serious injury may ex-
ist.
● The steering lock can be immediately blocked once the key is re-
moved from the ignition. The vehicle cannot be steered. Risk of accident.
CAUTION
When the engine has been running under a heavy load for a long period,
heat can accumulate in the engine compartment and cause engine damage.
For this reason, you should idle the engine for approx. 2 minutes before you
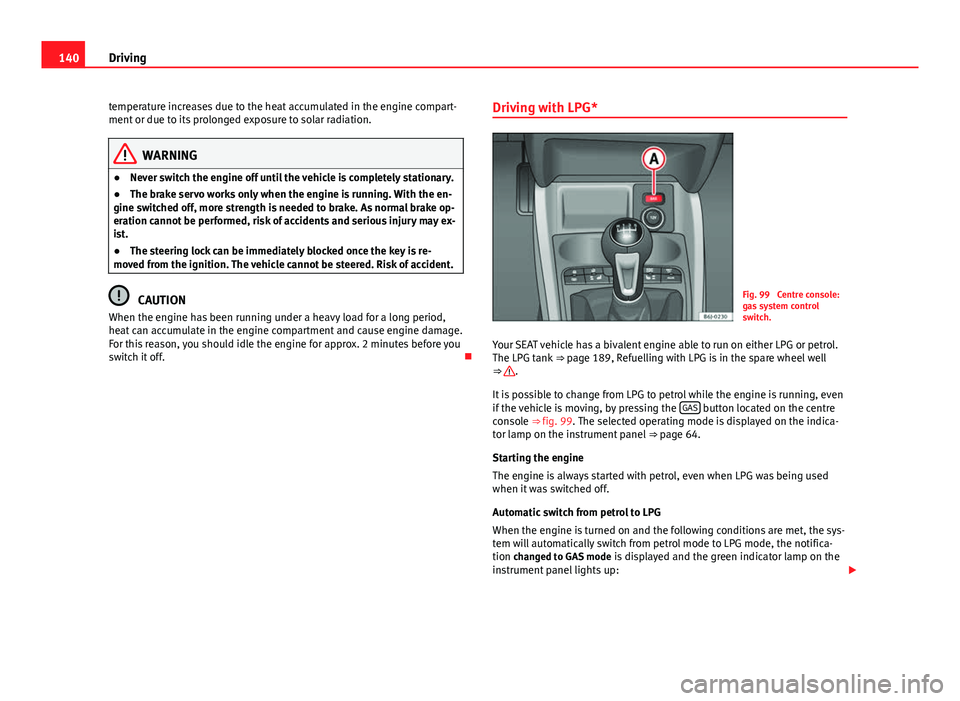
switch it off. Driving with LPG*Fig. 99 Centre console:
gas system control
switch.
Your SEAT vehicle has a bivalent engine able to run on either LPG or petrol.
The LPG tank ⇒ page 189, Refuelling with LPG is in the spare wheel well
⇒
.
It is possible to change from LPG to petrol while the engine is running, even
if the vehicle is moving, by pressing the GAS
button located on the centre
console ⇒ fig. 99. The selected operating mode is displayed on the indica-
tor lamp on the instrument panel ⇒ page 64.
Starting the engine
The engine is always started with petrol, even when LPG was being used
when it was switched off.
Automatic switch from petrol to LPG
When the engine is turned on and the following conditions are met, the sys-
tem will automatically switch from petrol mode to LPG mode, the notifica-
tion changed to GAS mode is displayed and the green indicator lamp on the
instrument panel lights up:
Page 143 of 278

141
Driving
● There is enough LPG in the tank.
● The temperature of the vehicle coolant is above 30 °C.
● Engine speed while driving is above 1200 rpm.
Automatic switch from LPG to petrol
When the vehicle is operating in LPG mode and one of these conditions is
met, the system automatically switches to petrol mode, the notification changed to petrol mode is displayed and the green indicator lamp on the in-
strument panel goes out:
● When the engine is started.
● If the LPG tank is empty.
● If there is a fault in the LPG system.
● At very low temperatures, below 10 °C.
Manual switch from petrol to LPG
Press the GAS
button on the centre console ⇒ fig. 99 to change mode. The
notification changed to GAS mode is displayed. When the following condi-
tions are met, the system switches to LPG mode, the green indicator lamp
on the instrument panel lights up and the notification displayed changes to changed to GAS mode .
● There is enough LPG in the tank.
● The temperature of the vehicle coolant is above 30 °C.
● Engine speed while driving is above 1200 rpm.
Manual switch from LPG to petrol
Press the GAS
button on the centre console ⇒
fig. 99 to change mode. The
green lamp on the instrument panel goes out and the notification changed
to petrol mode is displayed.
Running on petrol
Run the engine with petrol for short journeys at regular intervals to avoid
problems in the petrol system.
WARNING
LPG is a highly explosive and inflammable substance. It may cause se-
vere burns and other injury.
● Due care must be taken to avoid any risk of fire or explosion.
● When parking the vehicle in a closed area (for example in a garage),
make sure that there is adequate ventilation, either natural or mechani-
cal, to neutralise the LPG in the event of a leak.
Note
● If frequent short journeys are made, especially when the outside tem-
perature is low, the vehicle will tend to run on petrol more often than on
LPG. Therefore, the petrol tank may empty before the LPG tank.
● The notification LPG mode not possible may be displayed.
Start-Stop function* Description and operation
The Start-Stop function stops the engine when the vehicle is stop-
ped and starts it automatically when required.
– When the vehicle is stopped, put it in neutral and release the
clutch pedal. The engine will stop.
– When the clutch pedal is pressed, the engine starts again.
– The instrument panel screen displays information about the sta-
tus of the Start-Stop function ⇒
fig. 101.
Safety FirstOperating InstructionsPractical TipsTechnical Specifications
Page 145 of 278

143
Driving
Activating and deactivating the Start-Stop function
Fig. 100 The Start-Stop
function button.
Every time the ignition is switched on, the Start-Stop function is au-
tomatically switched on.
Manually deactivating the Start-Stop function
– Press the A
⇒ fig. 100 located in the centre console. When the
Start-Stop function is switched off, the indicator lamp comes
on.
– If the Start-Stop function is operating then the engine starts im-
mediately.
Switching the Start-Stop function on manually
– Press the A
⇒ fig. 100 located in the centre console. The indi-
cator lamp will turn off. Driver messages
Fig. 101 Display on the instrument panel during Start-Stop function operation.
When the engine is turned off by the Start-Stop function, this is displayed
on the instrument panel.
If the Start-Stop system is not switched on, the lamp will appear on the
instrument panel.
Note
There are different versions of the dash panel; the display of indications on
the screen may differ.
Safety FirstOperating InstructionsPractical TipsTechnical Specifications
Page 148 of 278
146Driving
Selector lever lock functions
The selector lever lock in position P or N prevents gears from
being engaged inadvertently, which would cause the vehicle
to move.
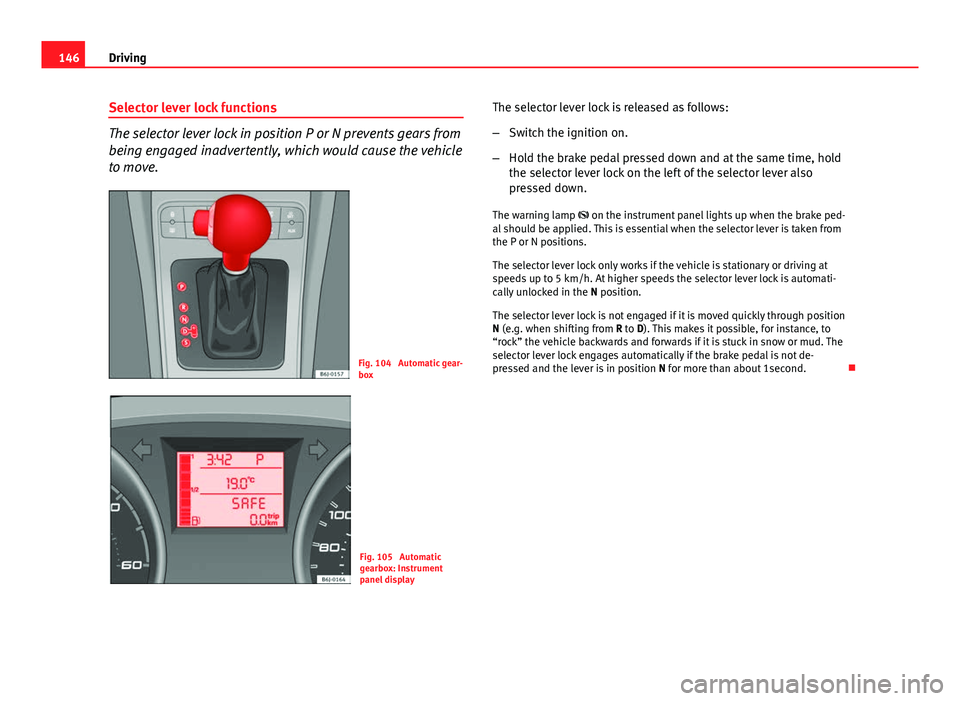
Fig. 104 Automatic gear-
box
Fig. 105 Automatic
gearbox: Instrument
panel display The selector lever lock is released as follows:
–
Switch the ignition on.
– Hold the brake pedal pressed down and at the same time, hold
the selector lever lock on the left of the selector lever also
pressed down.
The warning lamp on the instrument panel lights up when the brake ped-
al should be applied. This is essential when the selector lever is taken from
the P or N positions.
The selector lever lock only works if the vehicle is stationary or driving at
speeds up to 5 km/h. At higher speeds the selector lever lock is automati-
cally unlocked in the N position.
The selector lever lock is not engaged if it is moved quickly through position
N (e.g. when shifting from R to D). This makes it possible, for instance, to
“rock” the vehicle backwards and forwards if it is stuck in snow or mud. The
selector lever lock engages automatically if the brake pedal is not de-
pressed and the lever is in position N for more than about 1second.