Page 49 of 124
CD/MP3
48"Manual" MenuFast forward/rewind within a trackFig. 52 CD: Fast forward within a track–Press the Manual control button in the CD menu.
– Using the rotary pushbutton, select either >> (Forward) ⇒fig. 52
or << (Rewind).
– Hold down the control knob.
Note•The track advances or rewinds for as long as you hold the rotary push-
button down.•Advancing and rewinding are also possible using the forward/rewind
buttons ⇒ page 11.
Next/previous CD trackFig. 53 CD: Next track–Press the Manual control button in the CD menu.
– Using the rotary pushbutton, select >| (Next) or |<< (Previous)
⇒ fig. 53 .
– Press the rotary pushbutton.
NoteA CD track can also be selected using the forward/rewind buttons
⇒ page 11.
Media System 1.0_EN.book Seite 48 Donnerstag, 10. September 2009 1:52 13
Page 50 of 124

CD/MP349
Operating
RADIO, CD/MP3
TEL (telephone)
NAV, INFO
SETUP
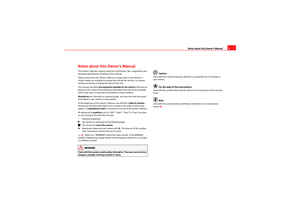
SCAN function for CD tracksFig. 54 CD: Scanning a track–Press the Manual control button in the CD menu.
– Select the option to scan all the tracks on the CD ( SCAN button)
by turning and pressing the rotary pushbutton. CD Scan now
appears at the top of the display.Pressing the control knob activates automatic track scan. Each track on the
CD will be played for a few seconds.
When the button is pressed again, scanning stops and the track currently
being played will continue to play.
Naming an audio CDFig. 55 CD: Name a CD–Press the Manual control button in the CD menu.
– By rotating and pressing the rotary pushbutton, select Name
⇒ fig. 55
4).
– Select CD name.
– Enter the name required using the alphanumeric keyboard.
Note
•The system stores the name assigned to a CD in its memory, even if the
CD is ejected and then re-inserted in another position in the CD changer.•Names can only be assigned to audio CDs (maximum 50) but not to all
their tracks.•The names of the CDs in the changer are recognised when they are played
for a few seconds.4)Valid for audio CDs.
Media System 1.0_EN.book Seite 49 Donnerstag, 10. September 2009 1:52 13
Page 51 of 124
CD/MP3
50Delete stored CD nameFig. 56 CD: Delete stored CD name–Press the Manual control button in the CD menu.
– Select Name.
– Select Delete a CD ⇒ fig. 56
5).
– Select the name to be deleted.
Delete all stored CD namesFig. 57 CD: Deleting all stored CD names–Press the Manual control button in the CD menu.
– Select Name .
– Select Delete all CDs ⇒ fig. 57
6).
– Select yes to delete all names from the list.
5)Valid for audio CDs.
6)Valid for audio CDs.
Media System 1.0_EN.book Seite 50 Donnerstag, 10. September 2009 1:52 13
Page 52 of 124
CD/MP351
Operating
RADIO, CD/MP3
TEL (telephone)
NAV, INFO
SETUP
CD shuffle ("mix")
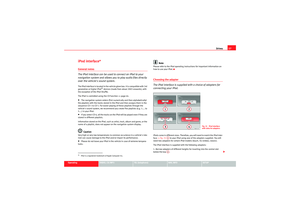
CD tracks can also be played in random order.Fig. 58 CD: Random–Press the Manual control button in the CD menu.
– Select Mix by turning and pressing the rotary pushbutton. CD -
Mix now appears at the top of the screen.CD mix must be set separately for audio CDs and MP3 CDs.
MP3 CD infoFig. 59 CD: Info–Press the Manual control button in the CD menu.
– Select Info by turning the ro tary pushbutton
7).
The following information is displayed for each track on MP3 CDs:•Artist•Album•Track•File
If there is no ID3 tag, only the file name will be shown.7)Valid for MP3 CDs.
Media System 1.0_EN.book Seite 51 Donnerstag, 10. September 2009 1:52 13
Page 53 of 124
CD/MP3
52Setup CDMP3 track display
The name of the file or the ID3 tag information can be
displayed for an MP3 CD.Fig. 60 CD Setup: Display MP3 tracks– Starting from any of the CD menus, press the button.
– Select Display MP3 tracks .MP3 track display activated: The ID3 tag information is displayed in the main
CD menu.
MP3 track display deactivated: the file name will be displayed in the main CD
menu.
The sound and tuning settings and the brightness of the display can be
altered using the control buttons ⇒ page 118.
Note
We recommend that you enter these settings when the vehicle is stationary.
Please note ⇒page 6, “Notes on road safety”.
SETUP
Media System 1.0_EN.book Seite 52 Donnerstag, 10. September 2009 1:52 13
Page 54 of 124

Sound settings53
Operating
RADIO, CD/MP3
TEL (telephone)
NAV, INFO
SETUP
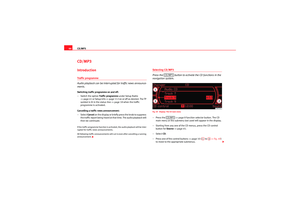
Sound settingsBasic sound settingsFig. 61 Example: Sound output setting (balance)
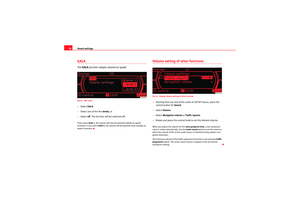
Fig. 62 Example: Sound output adjustment (balance)– Starting from any one of the audio or SETUP menus, press the
control button for Sound .
– Select the desired sound setting (e.g. balance) ⇒ fig. 61 using
the control knob. – Rotate the specific control knob in the sound settings menu (e.g.
balance) ⇒fig. 62 to set the sound to your liking.
– Confirm the selection by pressing the rotary pushbutton.
The following sound settings are available:•Balance (left/right volume relationship)•Fader (front/rear sound relationship)•Treble•Bass•GALA*•Volume settings of other functions
The sound setting for treble and bass apply to the operating mode currently
active. The balance and fader settings are independent for the operating
mode.
For example, if you change the bass setting while playing a CD, this will have
no effect on the radio sound settings.Note
In vehicles equipped with a VDA-compatible telephone, the balance of the
equipment should be set to an intermediate level for better sound quality.
Media System 1.0_EN.book Seite 53 Donnerstag, 10. September 2009 1:52 13
Page 55 of 124

Sound settings
54GALAThe GALA function adapts volume to speedFig. 63 DSP: GALA– Select GALA.
– Select one of the five levels, or
– Select off. The function will be switched off.If you select level 1, the volume will only be boosted slightly as speed
increases. If you select level 5, the volume will be boosted more strongly as
speed increases.
Volume setting of other functionsFig. 64 Display: Volume settings of other functions– Starting from any one of the audio or SETUP menus, press the control button for Sound.
– Select Volu m e .
– Select Navigation volume or Traffic reports .
– Rotate and press the control knob to set the desired volume.When you adjust the volume for the voice guidance hints , a test announce-
ment is made automatically. Use the Lower sound option to set the extent to
which the volume of the active audio source is lowered during spoken navi-
gation directions.
The minimum volume of the traffic programme function is set using the traffic
programme option. The active sound source is played at the set volume
during this setting.
Media System 1.0_EN.book Seite 54 Donnerstag, 10. September 2009 1:52 13
Page 56 of 124
Sound settings55
Operating
RADIO, CD/MP3
TEL (telephone)
NAV, INFO
SETUP
Note
If the volume is too high when the radio is turned on, it will be reduced auto-
matically to a level set by the factory. If the volume is too low when the radio
is turned on, it will be increased automatically to a level set by the factory.
Media System 1.0_EN.book Seite 55 Donnerstag, 10. September 2009 1:52 13