Page 314 of 365

13B-314
MR-372-J84-13B200$756.mif
V13
DIESEL INJECTION
Fault finding – Interpretation of commands
EDC16
Program No: C1
Vdiag No: 18, 1C, 20,
50, 58, 5C
13B
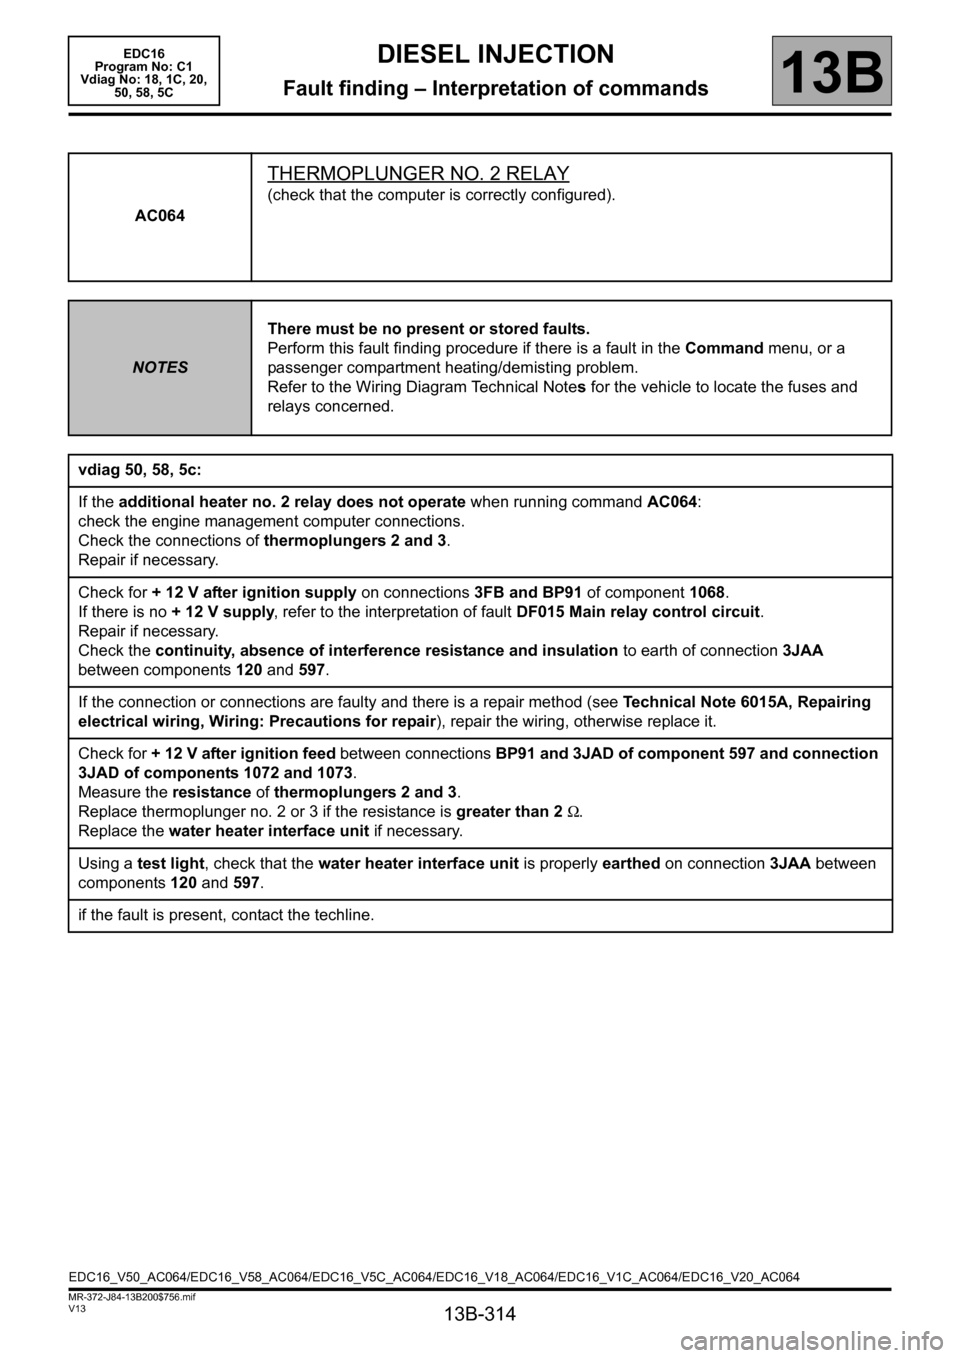
AC064
THERMOPLUNGER NO. 2 RELAY
(check that the computer is correctly configured).
NOTESThere must be no present or stored faults.
Perform this fault finding procedure if there is a fault in the Command menu, or a
passenger compartment heating/demisting problem.
Refer to the Wiring Diagram Technical Notes for the vehicle to locate the fuses and
relays concerned.
vdiag 50, 58, 5c:
If the additional heater no. 2 relay does not operate when running command AC064:
check the engine management computer connections.
Check the connections of thermoplungers 2 and 3.
Repair if necessary.
Check for + 12 V after ignition supply on connections 3FB and BP91 of component 1068.
If there is no + 12 V supply, refer to the interpretation of fault DF015 Main relay control circuit.
Repair if necessary.
Check the continuity, absence of interference resistance and insulation to earth of connection 3JAA
between components 120 and 597.
If the connection or connections are faulty and there is a repair method (see Technical Note 6015A, Repairing
electrical wiring, Wiring: Precautions for repair), repair the wiring, otherwise replace it.
Check for + 12 V after ignition feed between connections BP91 and 3JAD of component 597 and connection
3JAD of components 1072 and 1073.
Measure the resistance of thermoplungers 2 and 3.
Replace thermoplunger no. 2 or 3 if the resistance is greater than 2 Ω.
Replace the water heater interface unit if necessary.
Using a test light, check that the water heater interface unit is properly earthed on connection 3JAA between
components 120 and 597.
if the fault is present, contact the techline.
EDC16_V50_AC064/EDC16_V58_AC064/EDC16_V5C_AC064/EDC16_V18_AC064/EDC16_V1C_AC064/EDC16_V20_AC064
Page 318 of 365

13B-318
MR-372-J84-13B200$828.mif
V13
13B
DIESEL INJECTION
Fault finding – Fault Finding Chart
ALP 1 No dialogue with engine management computer
Try to establish dialogue with a computer on another vehicle to check that the diagnostic tool is not faulty.
Check the battery voltage and carry out the operations necessary to obtain the correct voltage
(9.5V
If the tool is not at fault, and dialogue cannot be established with any other computer on the same vehicle, the
cause could be a faulty computer interfering on the multiplex network.
disconnect the engine management computer.
try to establish dialogue with another computer.
if the fault is still present, reconnect the computer and proceed by elimination by successively disconnecting all
the following computers (according to wiring diagram and equipment): air conditioning, airbag, abs and esp, uch,
instrument panel, central communication unit, proximity sensor.
try to establish a dialogue between each disconnection:
if, after a disconnection, you manage to establish dialogue, perform the fault finding procedure for the relevant
computer.
Carry out a fault finding procedure on the multiplex network using the diagnostic tool.
Check for the injection fuses on the protection and switching unit and/or in the engine fuse box and check their
condition.
Check the connection of the computer connectors and the condition of its connections.
Check the injection computer earths (quality, oxidation, tightness of earth bolts on the battery terminal).
Check that the supply to the computer is correct:
Earth on connections NT (Laguna II) or N (Scénic II and Mégane II) of component 120.
+ after ignition feed on connection AP29 (Laguna II) or AP15 (Scénic II and Mégane II) of component 120.
Check that the power supply to the diagnostic socket is correct:
– + before ignition feed on connection BP32 (Scénic II and Mégane II) or BCP4 (Laguna II) of component
225.
– + after ignition feed on connection AP43 (Scénic II and Mégane II) or AP10 (Laguna II) of component
225.
– Earth on connections MAN and NAM (Scénic II and Mégane II) or MA and NAP (Laguna II) of component
225.
If dialogue has still not been established after these checks, contact the techline.
AFTER REPAIRCarry out a road test followed by a complete check with the diagnostic tool.
EDC16_V50_ALP1/EDC16_V58_ALP1/EDC16_V5C_ALP1/EDC16_V18_ALP1/EDC16_V1C_ALP1/EDC16_V20_ALP1 EDC16
Program No.: C1
Vdiag no.: 18, 1C, 20,
50, 58, 5C
MR-372-J84-13B200$828.mif
Page 348 of 365

13B-348
MR-372-J84-13B200$900.mif
V13
EDC16
Program No.: C1
Vdiag no.: 18, 1C, 20,
50, 58, 5CDIESEL INJECTION
Fault finding – Tests13B
TEST8 Manual clearing of the soot weight
Note: In certain cases, this procedure is to be carried out only after replacement of the particle filter or after an
After-sales regeneration of the particle filter.
– Start the engine.
– Raise the engine coolant temperature.
– Read the coolant temperature with PR064 Coolant temperature until a value greater than 65ºC is obtained.
– Accelerate the engine to 4000 rpm and maintain this speed for 5 minutes.
–After 5 minutes, release the accelerator and stop the engine.
– Switch on the ignition.
– Run command SC036 Reinitialise programming and select After particle filter replacement or After
particle filter regeneration (as appropriate).
– Switch off the ignition and wait for the diagnostic tool message (maximum time 8 minutes): Communication
lost with computer: EDC16C36, check the tool connection and computer power supply.
–Then switch on the ignition again, clear the present or stored faults from the computer memory (operation
to be carried out within 3 minutes of switching on the ignition).
EDC16_V50_TEST8/EDC16_V58_TEST8/EDC16_V5C_TEST8/EDC16_V18_TEST8/EDC16_V1C_TEST8/EDC16_V20_TEST8
Page 355 of 365

13B-355
MR-372-J84-13B200$936.mif
V13
EDC16
Program No: C1
Vdiag No: 18, 1C, 20,
50, 58, 5CDIESEL INJECTION
Fault finding – Tests13B
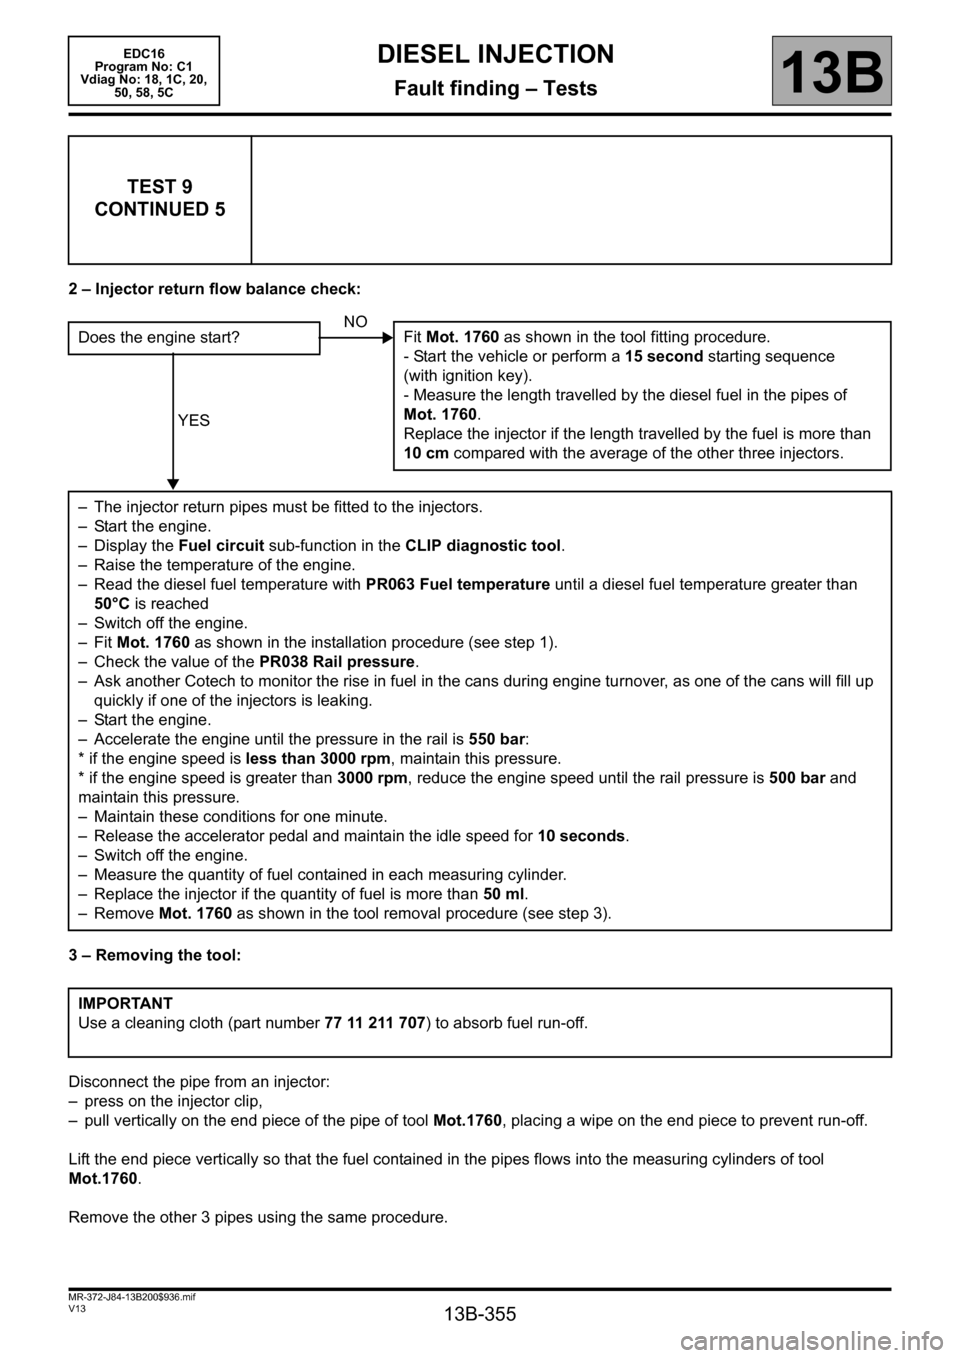
2 – Injector return flow balance check:
3 – Removing the tool:
Disconnect the pipe from an injector:
– press on the injector clip,
– pull vertically on the end piece of the pipe of tool Mot.1760, placing a wipe on the end piece to prevent run-off.
Lift the end piece vertically so that the fuel contained in the pipes flows into the measuring cylinders of tool
Mot.1760.
Remove the other 3 pipes using the same procedure.
TEST 9
CONTINUED 5
Does the engine start?
YES
– The injector return pipes must be fitted to the injectors.
– Start the engine.
– Display the Fuel circuit sub-function in the CLIP diagnostic tool.
– Raise the temperature of the engine.
– Read the diesel fuel temperature with PR063 Fuel temperature until a diesel fuel temperature greater than
50°C is reached
– Switch off the engine.
–Fit Mot. 1760 as shown in the installation procedure (see step 1).
– Check the value of the PR038 Rail pressure.
– Ask another Cotech to monitor the rise in fuel in the cans during engine turnover, as one of the cans will fill up
quickly if one of the injectors is leaking.
– Start the engine.
– Accelerate the engine until the pressure in the rail is 550 bar:
* if the engine speed is less than 3000 rpm, maintain this pressure.
* if the engine speed is greater than 3000 rpm, reduce the engine speed until the rail pressure is 500 bar and
maintain this pressure.
– Maintain these conditions for one minute.
– Release the accelerator pedal and maintain the idle speed for 10 seconds.
– Switch off the engine.
– Measure the quantity of fuel contained in each measuring cylinder.
– Replace the injector if the quantity of fuel is more than 50 ml.
– Remove Mot. 1760 as shown in the tool removal procedure (see step 3).
IMPORTANT
Use a cleaning cloth (part number 77 11 211 707) to absorb fuel run-off.NO
Fit Mot. 1760 as shown in the tool fitting procedure.
- Start the vehicle or perform a 15 second starting sequence
(with ignition key).
- Measure the length travelled by the diesel fuel in the pipes of
Mot. 1760.
Replace the injector if the length travelled by the fuel is more than
10 cm compared with the average of the other three injectors.