2011 Peugeot 3008 Hybrid 4 warning
[x] Cancel search: warningPage 34 of 280

32
ZEV mode *(all electric)Sport mode (Diesel and electric)
4WD mode ** (Diesel and electric)
Zero emissions vehicle operation is as-
sured 100 % by electric drive.
This mode forces silent running
at
moderate speeds.
This mode allows more dynamic driving
by providing additional performance
.
Vehicle acceleration and pick-up are
maximised by using the capacity of the
electric motor, supplementing the power
of the Diesel engine.
This mode manages the progressive-
ness of the accelerator, the automatic
gear control gearbox and the use of the
electric motor.
In Sport mode:
- The electric motor can be used up to
70 mph (120 km/h).
This mode provides additional trac-
tion
*** at low speed by driving all
4 wheels of the vehicle continuously:
the Diesel engine (front wheel drive) and
the electric motor (rear wheel drive) op-
erate simultaneously and permanently.
Their coupling is managed electronically
to optimise traction on slippery surfaces,
diffi cult terrain or severe conditions:
deep snow, mud, sand, …
In 4WD mode:
-
Power for the electric motor is provided,
if needed, by the alternator-starter
motor of the front engine. The Diesel
engine operates continuously.
- The additional traction from the elec-
tric motor is available up to 70 mph
(120 km/h).
*
ZEV: Zero Emissions Vehicle. In ZEV mode:
- the accelerator control is progres-
sive.
- Range and acceleration capacity
are limited. The maximum speed
possible is 36 mph (60 km/h).
- Under high load or a priority require-
ment causing the start of the Diesel
engine, the system changes auto-
matically to AUTO mode.
It can be activated when
the required conditions are
met, particularly if the state
of charge of high voltage
battery is suffi cient (4 bars minimum).
If the conditions allow, a mes-
sage "ZEV mode unavailable"
appears in the screen, the
ZEV warning lamp fl ashes for
a few seconds then goes off
and the selector comes on in AUTO.
**
4WD: 4 Wheel Drive.
***
This mode will be even more effec-
tive if suitable tyres are fi tted (winter
tyres in particular).
Page 42 of 280
40
The high voltage battery must not in any
circumstances be charged from an ex-
ternal source and must only be handled
by a workshop technician.
There is the risk of serious burns, as
well as electric arcs that could cause
serious injury or even death.
A used Ni-MH (Nickel Metal Hydride)
type high voltage battery must be re-
moved in an appropriate manner by a
repair workshop, so that its recycling
presents no risk to the environment.
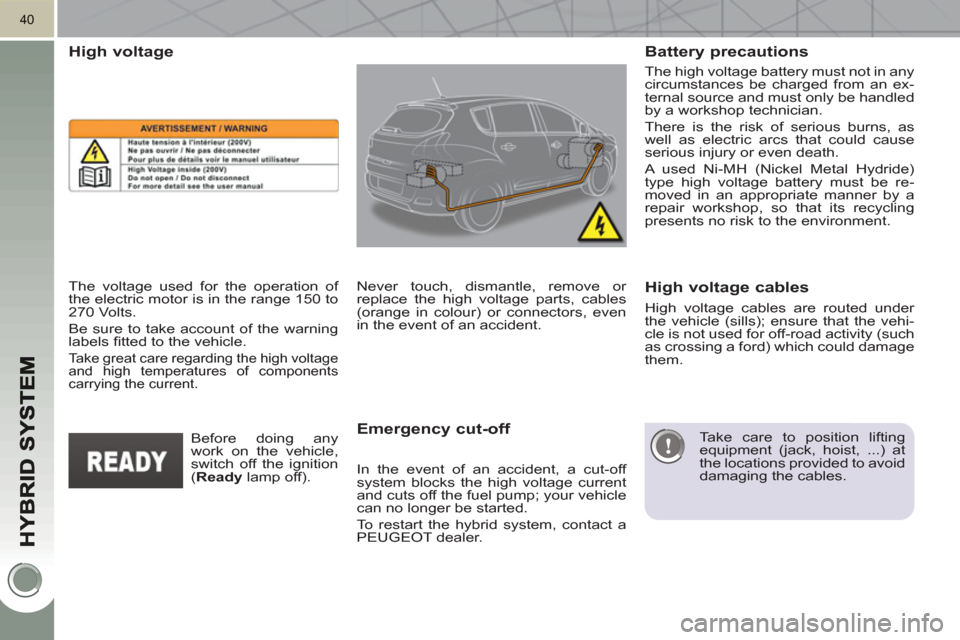
High voltage
The voltage used for the operation of
the electric motor is in the range 150 to
270 Volts.
Be sure to take account of the warning
labels fi tted to the vehicle.
Take great care regarding the high voltage
and high temperatures of components
carrying the current.
Emergency cut-off
Never touch, dismantle, remove or
replace the high voltage parts, cables
(orange in colour) or connectors, even
in the event of an accident.
In the event of an accident, a cut-off
system blocks the high voltage current
and cuts off the fuel pump; your vehicle
can no longer be started.
To restart the hybrid system, contact a
PEUGEOT dealer.
High voltage cables are routed under
the vehicle (sills); ensure that the vehi-
cle is not used for off-road activity (such
as crossing a ford) which could damage
them.
Before doing any
work on the vehicle,
switch off the ignition
( Ready
lamp off).
Battery precautions
High voltage cables
Take care to position lifting
equipment (jack, hoist, ...) at
the locations provided to avoid
damaging the cables.
Page 43 of 280
Also ensure that the ignition is
switched off when refuelling to
avoid the engine restarting.
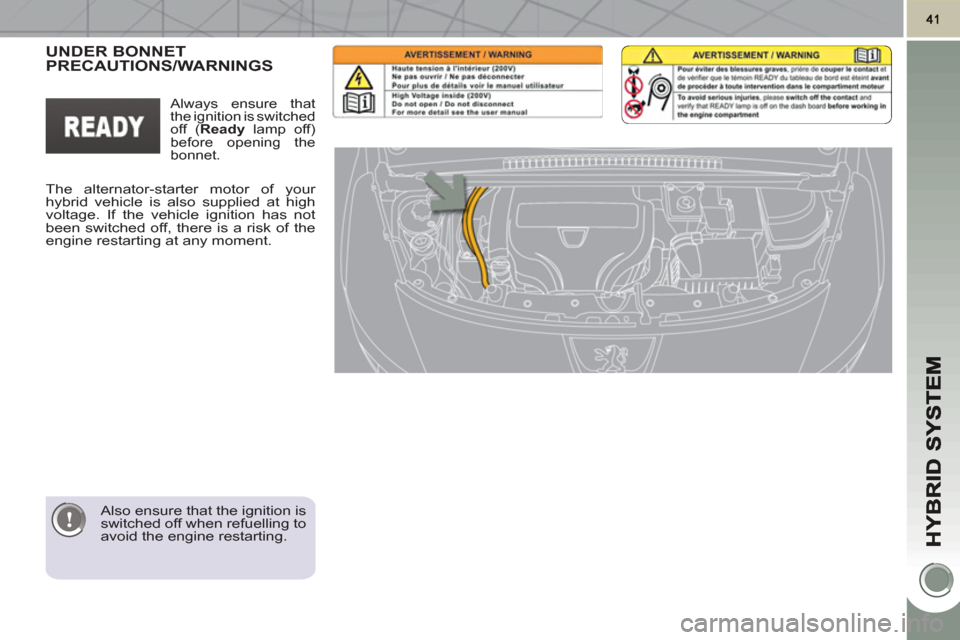
UNDER BONNETPRECAUTIONS/WARNINGS
The alternator-starter motor of your
hybrid vehicle is also supplied at high
voltage. If the vehicle ignition has not
been switched off, there is a risk of the
engine restarting at any moment.
Always ensure that
the ignition is switched
off ( Ready
lamp off)
before opening the
bonnet.
Page 45 of 280

43
Panel grouping together the vehicle operation indication dials and warning lamps.
INSTRUMENT PANELS
For more information, refer to
the paragraph relating to the
button or function and its as-
sociated display.
Dials
6.
Display zero reset or service indi-
cator re-display button.
Resets the selected function to zero
(trip distance recorder or service in-
dicator) or displays the service indi-
cator again.
7.
Instrument panel lighting dimmer.
Adjusts the brightness of the light-
ing of the instruments and controls,
if the vehicle lighting is on.
8.
Ready lamp
Indicates that the vehicle is ready to
move off.
1.
Power
meter.
Indicates the power available as a
percentage .
For more information refer to the
"Hybrid" section.
2.
Coolant temperature
gauge
.
Indicates the temperature of the en-
gine coolant (° Celsius).
3.
Fuel
gauge
.
Indicates the quantity of fuel remain-
ing in the tank.
4.
Speedometer.
Indicates the current speed of the
moving vehicle (mph or km/h).
5.
Screen.
Screen(s)
A.
Speed limiter
or
Cruise control.
(mph or km/h)
B.
Trip distance recorder.
(miles or km)
C.
Service indicator.
(miles or km) or,
Engine oil level indicator.
or
Distance
recorder.
(miles or km)
D.
6-speed electronic gear control
gearbox.
E.
- Electrical fl ow or
-
Warning messages and function
status messages
or
-
Trip computer or
-
Satellite navigation information or
-
Menus (with Peugeot Connect
Media).
Page 47 of 280
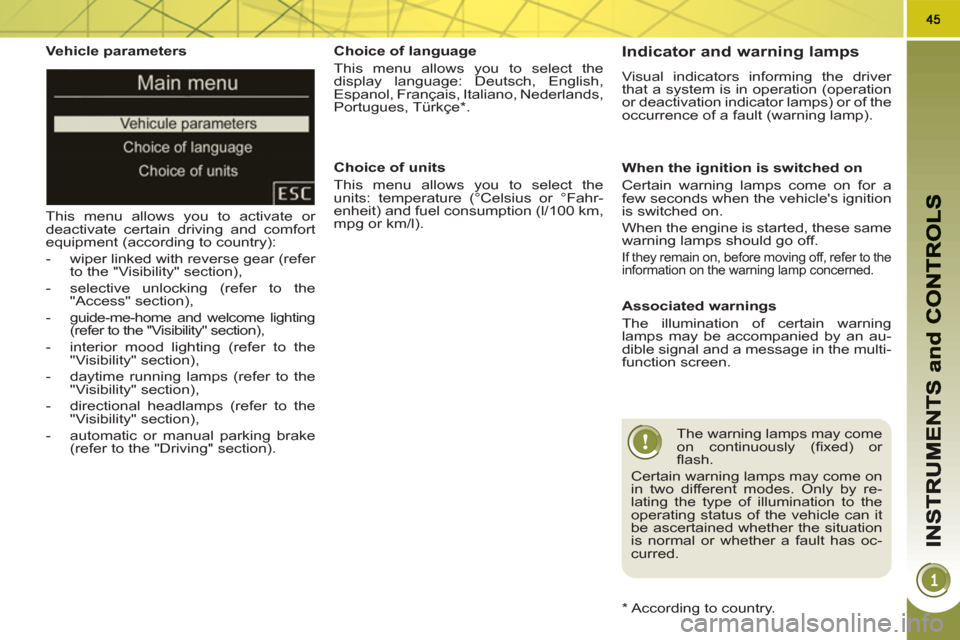
Vehicle parameters
This menu allows you to activate or
deactivate certain driving and comfort
equipment (according to country):
- wiper linked with reverse gear (refer
to the "Visibility" section),
- selective unlocking (refer to the
"Access" section),
- guide-me-home and welcome lighting
(refer to the "Visibility" section),
- interior mood lighting (refer to the
"Visibility" section),
- daytime running lamps (refer to the
"Visibility" section),
- directional headlamps (refer to the
"Visibility" section),
- automatic or manual parking brake
(refer to the "Driving" section).
Choice of units
This menu allows you to select the
units: temperature (°Celsius or °Fahr-
enheit) and fuel consumption (l/100 km,
mpg or km/l).
Choice of language
This menu allows you to select the
display language: Deutsch, English,
Espanol, Français, Italiano, Nederlands,
Portugues, Türkçe * .
*
According to country. Indicator and warning lamps
Visual indicators informing the driver
that a system is in operation (operation
or deactivation indicator lamps) or of the
occurrence of a fault (warning lamp).
When the ignition is switched on
Certain warning lamps come on for a
few seconds when the vehicle's ignition
is switched on.
When the engine is started, these same
warning lamps should go off.
If they remain on, before moving off, refer to the
information on the warning lamp concerned.
Associated warnings
The illumination of certain warning
lamps may be accompanied by an au-
dible signal and a message in the multi-
function screen.
The warning lamps may come
on continuously (fi xed) or
fl ash.
Certain warning lamps may come on
in two different modes. Only by re-
lating the type of illumination to the
operating status of the vehicle can it
be ascertained whether the situation
is normal or whether a fault has oc-
curred.
Page 48 of 280
46
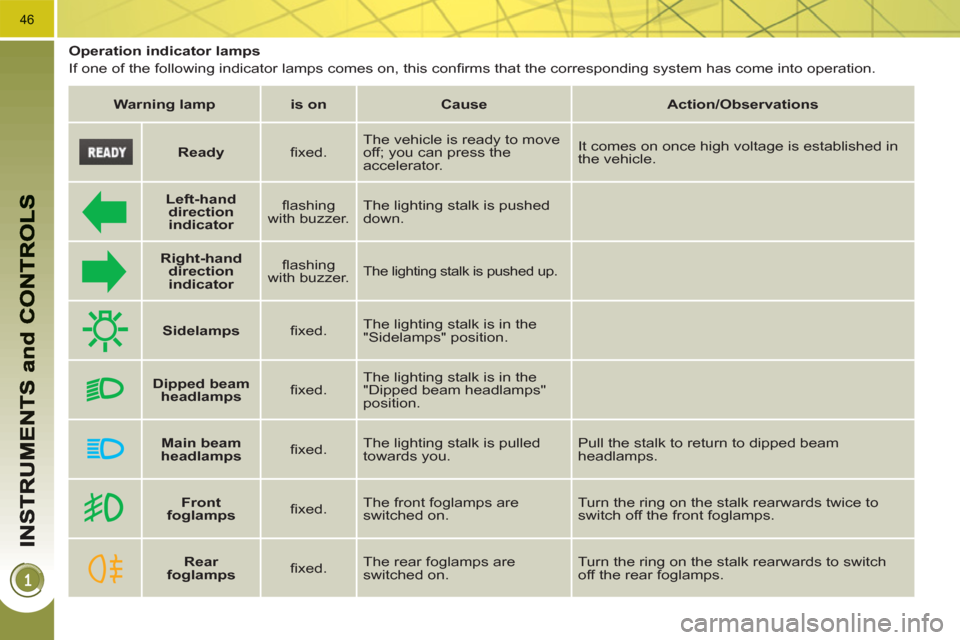
Operation indicator lamps
If one of the following indicator lamps comes on, this confi rms that the corresponding system has come into operation.
Warning lamp
is on
Cause
Action/Observations
Left-hand
direction
indicato
r
fl ashing
with buzzer. The lighting stalk is pushed
down.
Right-hand
direction
indicator
fl ashing
with buzzer.
The lighting stalk is pushed up.
Sidelamps
fi xed. The lighting stalk is in the
"Sidelamps" position.
Dipped beam
headlamps
fi xed. The lighting stalk is in the
"Dipped beam headlamps"
position.
Main beam
headlamps
fi xed. The lighting stalk is pulled
towards you. Pull the stalk to return to dipped beam
headlamps.
Ready
fi xed. The vehicle is ready to move
off; you can press the
accelerator. It comes on once high voltage is established in
the vehicle.
Front
foglamps
fi xed. The front foglamps are
switched on. Turn the ring on the stalk rearwards twice to
switch off the front foglamps.
Rear
foglamps
fi xed. The rear foglamps are
switched on. Turn the ring on the stalk rearwards to switch
off the rear foglamps.
Page 49 of 280

47
Warning lamp
is on
Cause
Action/Observations
Diesel engine
pre-heating
fi xed. The ignition switch is at the
2nd position (ignition on). Wait until the warning lamp has switched off
before starting.
The duration for which the warning lamp is on is
determined by the climatic conditions.
Electric
parking brake
fi xed. The electric parking brake is
applied. Release the electric parking brake to switch off
the warning lamp: with your foot on the brake
pedal, pull the electric brake control.
Observe the safety recommendations.
For further information about the electric parking
brake, refer to the "Driving" section.
Deactivation
of the
automatic
functions of
the electric
parking brake
fi xed. The "automatic application"
(on switching off the engine)
and "automatic release"
functions are deactivated or
faulty. Activate the function (according to country) via
the vehicle confi guration menu or contact a
PEUGEOT dealer.
Foot on the
brake pedal
fi xed. The brake pedal is not
pressed. With the 6-speed electronic gearbox system,
press the brake pedal to start the engine (lever
in position N
).
If you wish to release the parking brake without
pressing the brake pedal, this warning lamp will
remain on.
fl ashing. With the 6-speed electronic
gearbox system, if you hold
the vehicle on an incline
using the accelerator for too
long, the clutch overheats.
Use the brake pedal and/or the electric parking
brake.
Page 50 of 280
48
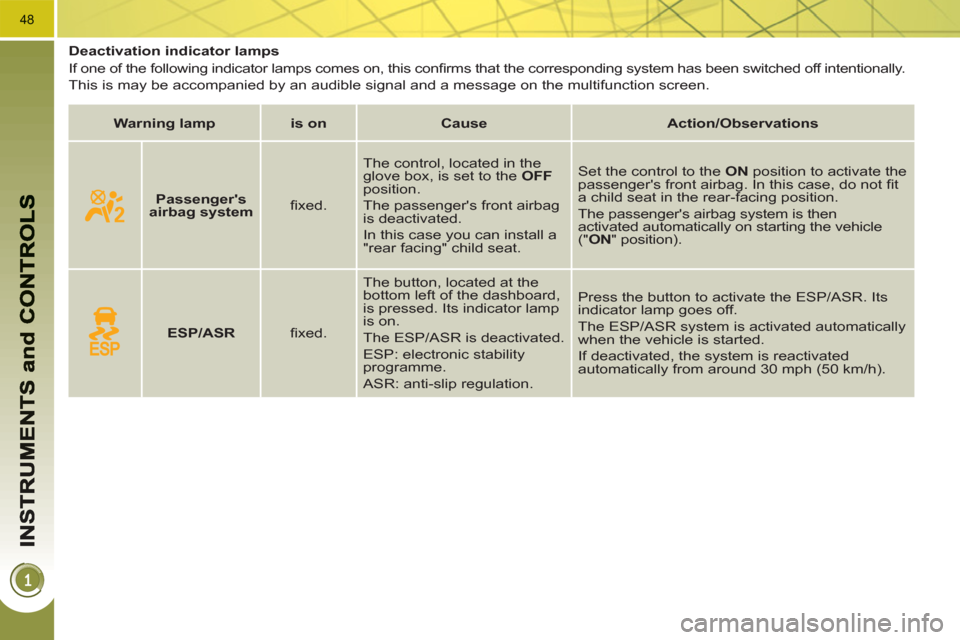
Deactivation indicator lamps
If one of the following indicator lamps comes on, this confi rms that the corresponding system has been switched off intentionally.
This is may be accompanied by an audible signal and a message on the multifunction screen.
Warning lamp
is on
Cause
Action/Observations
Passenger's
airbag system
fi xed. The control, located in the
glove box, is set to the OFF
position.
The passenger's front airbag
is deactivated.
In this case you can install a
"rear facing" child seat. Set the control to the ON
position to activate the
passenger's front airbag. In this case, do not fi t
a child seat in the rear-facing position.
The passenger's airbag system is then
activated automatically on starting the vehicle
("ON" position).
ESP/ASR
fi xed. The button, located at the
bottom left of the dashboard,
is pressed. Its indicator lamp
is on.
The ESP/ASR is deactivated.
ESP: electronic stability
programme.
ASR: anti-slip regulation. Press the button to activate the ESP/ASR. Its
indicator lamp goes off.
The ESP/ASR system is activated automatically
when the vehicle is started.
If deactivated, the system is reactivated
automatically from around 30 mph (50 km/h).