Page 3369 of 3787

TROUBLE DIAGNOSISMTC-53
< SERVICE INFORMATION >
C
DE
F
G H
I
K L
M A
B
MTC
N
O P
Insufficient HeatingINFOID:0000000005930855
SYMPTOM: Insufficient heating
INSPECTION FLOW
1.CONFIRM SYMPTOM BY PERFORMING OPERAT IONAL CHECK - TEMPERATURE INCREASE
1. Turn temperature control dial clockwise to maximum heat position.
2. Check for hot air at discharge air outlets.
Can the symptom be duplicated?
YES >> GO TO 3.
NO >> GO TO 2.
2.CHECK FOR ANY SYMPTOMS
Perform a complete operational check for any symptoms. Refer to MTC-31, "
Operational Check" .
Does another symptom exist?
YES >> Refer to MTC-23, "How to Perform Trouble Diagnosis for Quick and Accurate Repair" .
NO >> System OK.
3.CHECK FOR SERVICE BULLETINS
Check for any service bulletins.
>> GO TO 4.
4.CHECK COOLANT SYSTEM
1. Check engine coolant level. Refer to CO-11, "
Inspection" (HR16DE) or CO-36, "Inspection" (MR18DE).
2. Check hoses for leaks or kinks.
3. Check Radiator cap. Refer to CO-14, "
Checking Radiator Cap" HR16DE or CO-39, "Checking Radiator
Cap" (MR18DE).
OK or NG
OK >> GO TO 5.
NG >> Repair/replace as necessary.
5.CHECK AIR MIX DOOR CABLE
Check air mix door cable operation. Refer to MTC-65, "
Air Mix Door Cable Adjustment" .
OK or NG
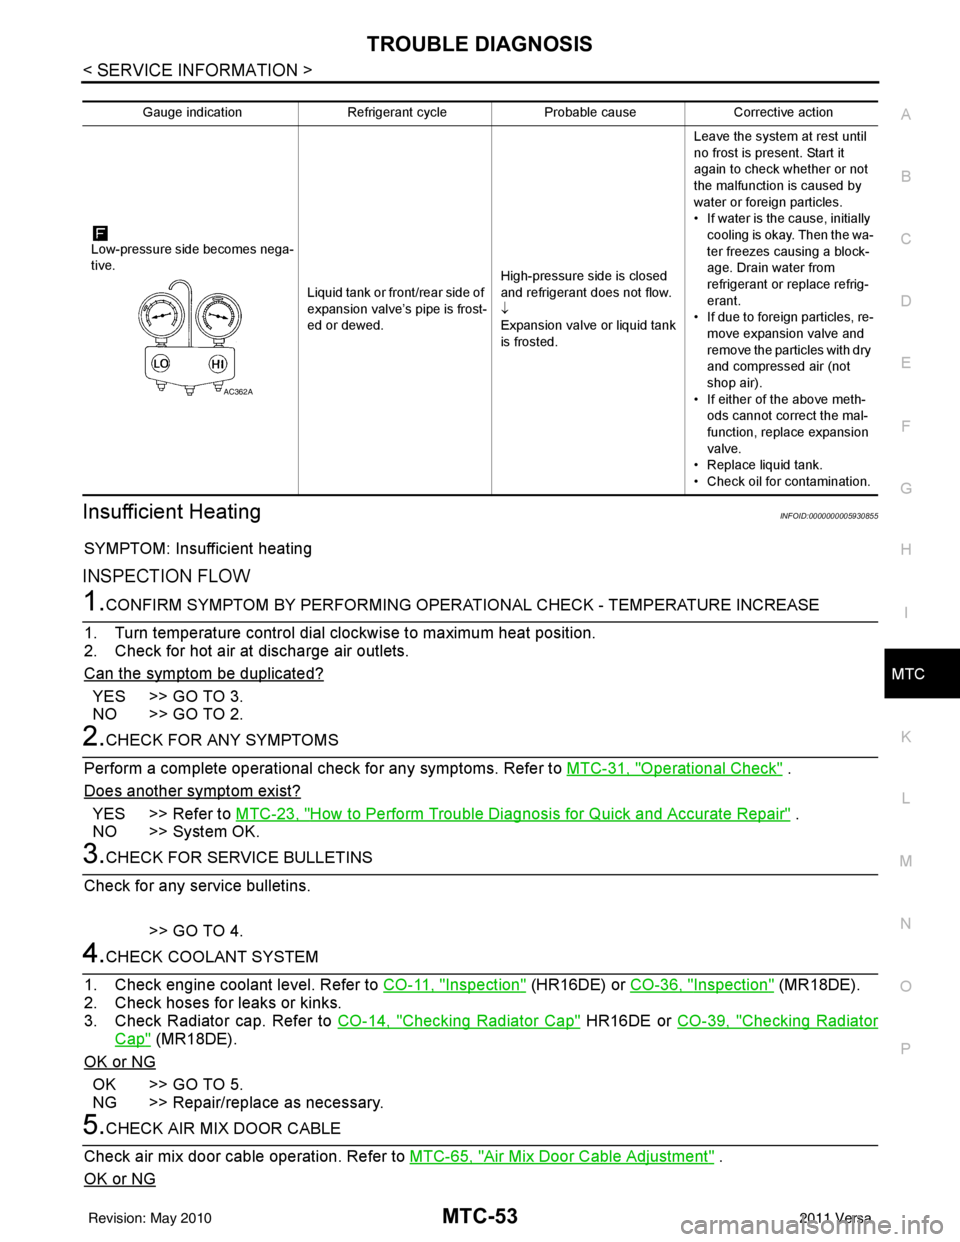
Gauge indication Refrigerant cycleProbable causeCorrective action
Low-pressure side becomes nega-
tive. Liquid tank or front/rear side of
expansion valve’s pipe is frost-
ed or dewed.High-pressure side is closed
and refrigerant does not flow.
↓
Expansion valve or liquid tank
is frosted.Leave the system at rest until
no frost is present. Start it
again to check whether or not
the malfunction is caused by
water or foreign particles.
• If water is the cause, initially
cooling is okay. Then the wa-
ter freezes causing a block-
age. Drain water from
refrigerant or replace refrig-
erant.
• If due to foreign particles, re-
move expansion valve and
remove the particles with dry
and compressed air (not
shop air).
• If either of the above meth- ods cannot correct the mal-
function, replace expansion
valve.
• Replace liquid tank.
• Check oil for contamination.
AC362A
Revision: May 2010 2011 Versa
Page 3386 of 3787
MTC-70
< SERVICE INFORMATION >
DUCTS AND GRILLES
CENTER VENTILATOR GRILLES
Removal
1. Remove cluster lid C. Refer to IP-11.
2. Remove center ventilator grills (1) from cluster lid C using suit- able tool (A).
Installation
Installation is in the reverse order of removal.
SIDE VENTILATOR GRILLES (LH/RH)
Removal
1. Remove side ventilator assembly (LH). Refer to IP-11.
2. Remove side ventilator grille (LH) (1) using suitable tool (A).
3. Remove side ventilator assembly (RH). Refer to IP-11
.
4. Remove the side ventilator grille (RH) screw.
5. Remove side ventilator grille (RH) (1) using suitable tool (A).
Installation
Installation is in the reverse order of removal.
DEFROSTER NOZZLE AND SIDE DEFROSTER DUCTS (LH/RH)
1. Front floor duct 2. Rear floor duct (left) 3. Clip
4. Rear floor duct (right)
ZJIA0661E
SJIA0658E
SJIA0659E
Revision: May 2010 2011 Versa
Page 3388 of 3787
MTC-72
< SERVICE INFORMATION >
DUCTS AND GRILLES
CENTER VENTILATOR DUCTS
Removal
1. Remove instrument panel & pad. Refer to IP-11.
2. Remove screws (A), and then remove center ventilator ducts (1).
Installation
Installation is in the reverse order of removal.
SIDE FOOT DUCTS
NOTE:
The side foot ducts are part of the A/C unit assembly case.
Removal
1. Remove A/C unit assembly. Refer to MTC-59.
2. Remove screws (A), and then remove side foot duct (LH) (1).
3. Remove screws (A), and then remove side foot duct (RH) (1).
Installation
Installation is in the reverse order of removal.
FLOOR DUCTS
Removal
1. Remove front seats. Refer to SE-11 .
2. Remove center console assembly. Refer to IP-11
.
SJIA0663E
SJIA0664E
SJIA0665E
Revision: May 2010 2011 Versa
Page 3389 of 3787
DUCTS AND GRILLESMTC-73
< SERVICE INFORMATION >
C
DE
F
G H
I
K L
M A
B
MTC
N
O P
3. Disengage pawls (A), and then remove front floor duct (1).
4. Peel back floor trim to a point where floor duct is visible.
5. Remove clips (A), and then remove rear floor duct (left) (1) and rear floor duct (right) (2).
Installation
Installation is in the reverse order of removal.
SJIA0667E
SJIA0668E
Revision: May 2010 2011 Versa
Page 3391 of 3787
REFRIGERANT LINESMTC-75
< SERVICE INFORMATION >
C
DE
F
G H
I
K L
M A
B
MTC
N
O P
7. Manifold gauge set (J-39183) A. Prefe rred (best) method B. Alternative method
C. For charging
*1 MTC-17, "
Maintenance of Oil Quanti-
ty in Compressor"
*2MTC-92, "Checking of Refrigerant
Leaks"
*3 MTC-93, "Electronic Refrigerant
Leak Detector"
*4MTC-46, "Insufficient Cooling"
WJIA1923E
Revision: May 2010 2011 Versa
Page 3398 of 3787
MTC-82
< SERVICE INFORMATION >
REFRIGERANT LINES
6. Remove the magnet coil snap ring (A) using a suitable tool.Then remove the magnet coil (1) from compressor shaft.
INSPECTION AFTER REMOVAL
Clutch Disc
If the contact surface shows signs of damage due to excessive heat, replace clutch disc and pulley.
Pulley
Check the appearance of the pulley assembly. If the cont act surface of the pulley shows signs of excessive
grooving, replace the clutch disc and pulley. The contact surfaces of the pulley assembly should be cleaned
with a suitable solvent before installation.
Coil
Check the magnet coil for a loose connection or cracked insulation.
INSTALLATION
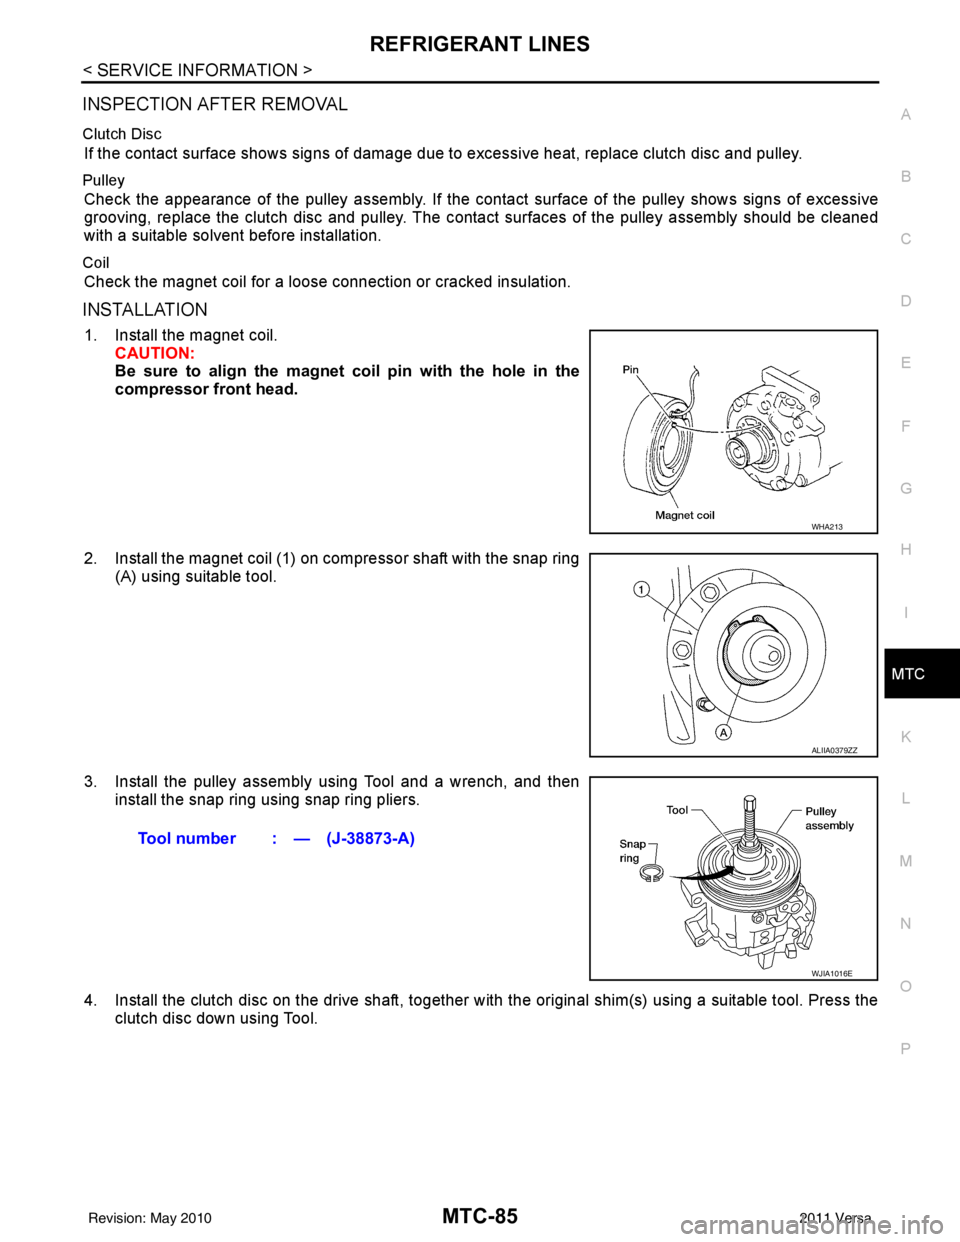
1. Install the magnet coil.
CAUTION:
Be sure to align the magnet coil pin with the hole in the
compressor front head.
2. Install the magnet coil (1) on the compressor shaft with the snap ring (A) using suitable tool.
ALIIA0379ZZ
WHA213
ALIIA0379ZZ
Revision: May 2010 2011 Versa
Page 3401 of 3787

REFRIGERANT LINESMTC-85
< SERVICE INFORMATION >
C
DE
F
G H
I
K L
M A
B
MTC
N
O P
INSPECTION AFTER REMOVAL
Clutch Disc
If the contact surface shows signs of damage due to excessive heat, replace clutch disc and pulley.
Pulley
Check the appearance of the pulley assembly. If the cont act surface of the pulley shows signs of excessive
grooving, replace the clutch disc and pulley. The c ontact surfaces of the pulley assembly should be cleaned
with a suitable solvent before installation.
Coil
Check the magnet coil for a loose connection or cracked insulation.
INSTALLATION
1. Install the magnet coil. CAUTION:
Be sure to align the magnet coil pin with the hole in the
compressor front head.
2. Install the magnet coil (1) on compressor shaft with the snap ring (A) using suitable tool.
3. Install the pulley assembly using Tool and a wrench, and then install the snap ring using snap ring pliers.
4. Install the clutch disc on the drive shaft, together with the original shim(s) using a suitable tool. Press the
clutch disc down using Tool.
WHA213
ALIIA0379ZZ
Tool number : — (J-38873-A)
WJIA1016E
Revision: May 2010 2011 Versa
Page 3408 of 3787

MTC-92
< SERVICE INFORMATION >
REFRIGERANT LINES
• If reusing the evaporator, install the thermo control amp. at the position marked when removing the
thermo control amp., if equipped (MR18DE - TYPE 2 systems).
• When recharging refrigerant, check for leaks.
Removal and Installation of Expansion ValveINFOID:0000000005930883
REMOVAL
1. Use the recovery/recycling equipment to evacuate the refrigerant.
2. Remove cowl top cover. Refer to EI-24, "
Removal and Installation".
3. Remove lower dash insulator.
4. Disconnect low-pressure flexible hose and high-pressure pipe from evaporator. Refer to MTC-59,
"Removal and Installation".
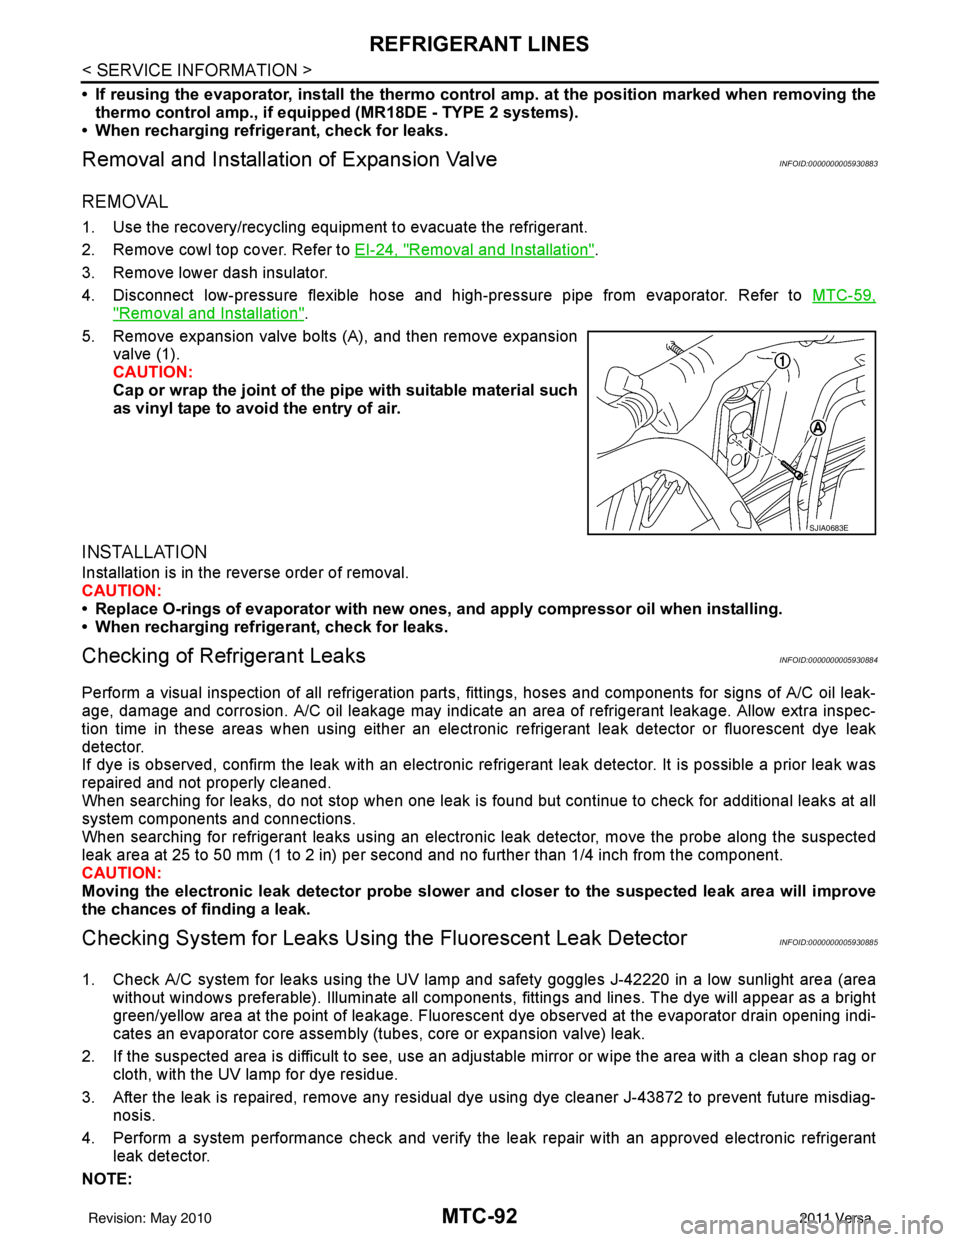
5. Remove expansion valve bolts (A), and then remove expansion valve (1).
CAUTION:
Cap or wrap the joint of the pi pe with suitable material such
as vinyl tape to avoid the entry of air.
INSTALLATION
Installation is in the reverse order of removal.
CAUTION:
• Replace O-rings of evaporator with new ones, and apply compressor oil when installing.
• When recharging refrigerant, check for leaks.
Checking of Refrigerant LeaksINFOID:0000000005930884
Perform a visual inspection of all refrigeration parts, fittings, hoses and components for signs of A/C oil leak-
age, damage and corrosion. A/C oil leakage may indicate an area of refrigerant leakage. Allow extra inspec-
tion time in these areas when using either an electronic refrigerant leak detector or fluorescent dye leak
detector.
If dye is observed, confirm the leak with an electronic refrigerant leak detector. It is possible a prior leak was
repaired and not properly cleaned.
When searching for leaks, do not stop when one leak is found but continue to check for additional leaks at all
system components and connections.
When searching for refrigerant leaks using an electronic leak detector, move the probe along the suspected
leak area at 25 to 50 mm (1 to 2 in) per second and no further than 1/4 inch from the component.
CAUTION:
Moving the electronic leak detector probe slower an d closer to the suspected leak area will improve
the chances of finding a leak.
Checking System for Leaks Using the Fluorescent Leak DetectorINFOID:0000000005930885
1. Check A/C system for leaks using the UV lamp and safety goggles J-42220 in a low sunlight area (area
without windows preferable). Illuminate all components, fittings and lines. The dye will appear as a bright
green/yellow area at the point of leakage. Fluoresce nt dye observed at the evaporator drain opening indi-
cates an evaporator core assembly (tubes, core or expansion valve) leak.
2. If the suspected area is difficult to see, use an adjustable mirror or wipe the area with a clean shop rag or cloth, with the UV lamp for dye residue.
3. After the leak is repaired, remove any residual dye using dye cleaner J-43872 to prevent future misdiag- nosis.
4. Perform a system performance chec k and verify the leak repair with an approved electronic refrigerant
leak detector.
NOTE:
SJIA0683E
Revision: May 2010 2011 Versa