2011 NISSAN NOTE ECO mode
[x] Cancel search: ECO modePage 111 of 235
![NISSAN NOTE 2011 Owners Manual SPD VOL (Speed volume) control:
This mode controls the volume output from the
speakers automatically in relation to vehicle speed.
When [SPD VOL] is displayed, turn the<TUNE/
MENU>dial clockwise or an NISSAN NOTE 2011 Owners Manual SPD VOL (Speed volume) control:
This mode controls the volume output from the
speakers automatically in relation to vehicle speed.
When [SPD VOL] is displayed, turn the<TUNE/
MENU>dial clockwise or an](/manual-img/5/56793/w960_56793-110.png)
SPD VOL (Speed volume) control:
This mode controls the volume output from the
speakers automatically in relation to vehicle speed.
When [SPD VOL] is displayed, turn the
the volume level.
Adjusting the setting to 0 (zero) turns off the speed
volume feature. Increasing the speed volume setting
results in the audio volume increasing more rapidly
with vehicle speed. Once chosen, press
to save the setting.
Clock setting
The [Clock] set up screen will appear when select-
ing the [Clock] item from the set up menu.
[Set Time]:
Select [Set Time] then adjust the clock as follows:
1. The hour display will start flashing. Turn the
2. Press the
will start flashing.
3. Turn the
minute.
4. Press
[On/Off]:
Set the clock display between on or off when the
audio unit is turned off.
If set in the [ON] position, the clock will be dis-
played when the audio unit is turned off either bypressing the<
>button or when the ignition
switch is placed in the “OFF” position.
[Clock Format):
Set the clock display between 24-hour mode and
12-hour clock mode.
Bluetooth®
For activation or deactivation details, see “BLUE-
TOOTH® settings” later in this section
Language
Select the appropriate language and press the
automatically adapt the language setting.
•[French]
•[English]
•[German]
•[Spanish]
•[Portuguese]
•[Italian]
•[Dutch]
•[Turkish]
•[Russian]
Scroll direction
Sets the scroll direction of the
For example, to change the way in which you turn
the dial (anticlockwise or clockwise) in order to scroll
up or down a list.
COMPACT DISC (CD) OPERATION
The CD player can play a music CD or an encoded
MP3/WMA CD and while listening to those CD’s
certain text might be able to be displayed (when CD
encoded with text is being used).
Press the
start to play.
When
mode is already operating, it will automatically turn
off the playing source and the CD play mode will
start.
However, if the CD disc is not loaded, then a notifi-
cation message will be displayed and the audio unit
remains in radio or AUX source mode.
CAUTION
•Do not force the CD into the slot. This could
damage the player.
•Do not use 8 cm (3.1 in) discs.
CD insert (CD player)
Insert the CD disc into the slot with the label side
facing up. The disc will be guided automatically into
the slot and will start playing. After loading the disc,
track information will be displayed.
NOTE
•The CD player accepts normal audio CD or
CD recorded with MP3/WMA files.
Heater and air conditioner, and audio system4-27
Page 112 of 235
![NISSAN NOTE 2011 Owners Manual •Inserting a CD recorded with MP3/WMA files,
the audio unit will automatically detect and
[MP3CD] will be indicated.
•An error notification message will be
displayed when inserting a wrong disc ty NISSAN NOTE 2011 Owners Manual •Inserting a CD recorded with MP3/WMA files,
the audio unit will automatically detect and
[MP3CD] will be indicated.
•An error notification message will be
displayed when inserting a wrong disc ty](/manual-img/5/56793/w960_56793-111.png)
•Inserting a CD recorded with MP3/WMA files,
the audio unit will automatically detect and
[MP3CD] will be indicated.
•An error notification message will be
displayed when inserting a wrong disc type
(e.g. DVD), or the player cannot read the CD
disc. Eject the disc and insert another disc.
CD button
Press the
CD. Playing starts from the track that was being
played when the CD play mode was switched off.
Audio main operation
List view:
While the track is being played, press either the
>button to display the available
tracks in a listed view mode. To select a track from
the list, or a track to start listening from, turn the
Quick search:
In the list view mode, quick search can be per-
formed to find a track from the list.
Push the
of the track title then press
a list of the available tracks will be displayed. Select,
and press
Fast Forward (Cue), Fast
Reverse (Review) buttons:
When the<
>(Cue) or<>(Review) button
is pressed continuously, the track will be played at
high speed. When the button is released, the track
will be played at normal playing speed.
Track up/down buttons:
Pressing the <
>or<> button once, the
track will be skipped forward to the next track or
backward to the beginning of the current played
track. Press the<
>or<>button more than
once to skip through the tracks.
Folder browsing:
If the recorded media contains folders with music
files, pressing the<
>or<>button will play
in sequence the tracks of each folder.
To select a preferred folder:
1. Press the
>button and a list
of tracks in the current folder is displayed.
2. Press the<
>button.
3. Turn the
folder.
4. Press
turn the
If the current selected folder contains sub folders,
press
folders will be displayed. Turn the
lect. Select the [Root] folder item when songs are
recorded additionally in the root folder.
To return to the previous folder screen, press
<
>.
Repeat button:
Push the<
/j1>button and the current track
will be played continuously.
button:
Push the<
/j2>button and all the tracks will
be played in a random order.
<
/j5 > button:
While a CD with recorded music information tags
(CD-text/ID3–text tags) is being played, the title of
the played track is displayed. If the title information
is not provided then [Track] is displayed.
When the<
/j5>button is pressed repeat-
edly, further information about the track can be dis-
played along with the track title as follows:
CD:
Track time→Artist name→Track title→Album
title→Track time
CD with MP3/WMA:
Track time→Artist name→Album title→Folder
name→Track time
4-28Heater and air conditioner, and audio system
Page 113 of 235
Track details:
A long press on the<
/j5>button will turn the
display into a detailed overview and after a few sec-
onds it returns to the main display, or press
<
/j5>briefly.
CD eject button
CD player:
Press the <
> (eject) button and the CD will be
ejected.
Ejecting CD (with ignition switch in “OFF” or
LOCK):
When the ignition switch is in the “OFF” or LOCK
position it is possible to eject the currently played
CD. However the audio unit will not be activated.
Press the <
> button and the CD will be ejected.
NOTE
•When the CD is ejected and not removed
within 8 seconds, it will automatically retract
into the slot to protect it from damage.
•If an error message appears in the display,
press <> to eject the faulty CD and insert
another CD or check if the ejected CD is in-
serted upside down.
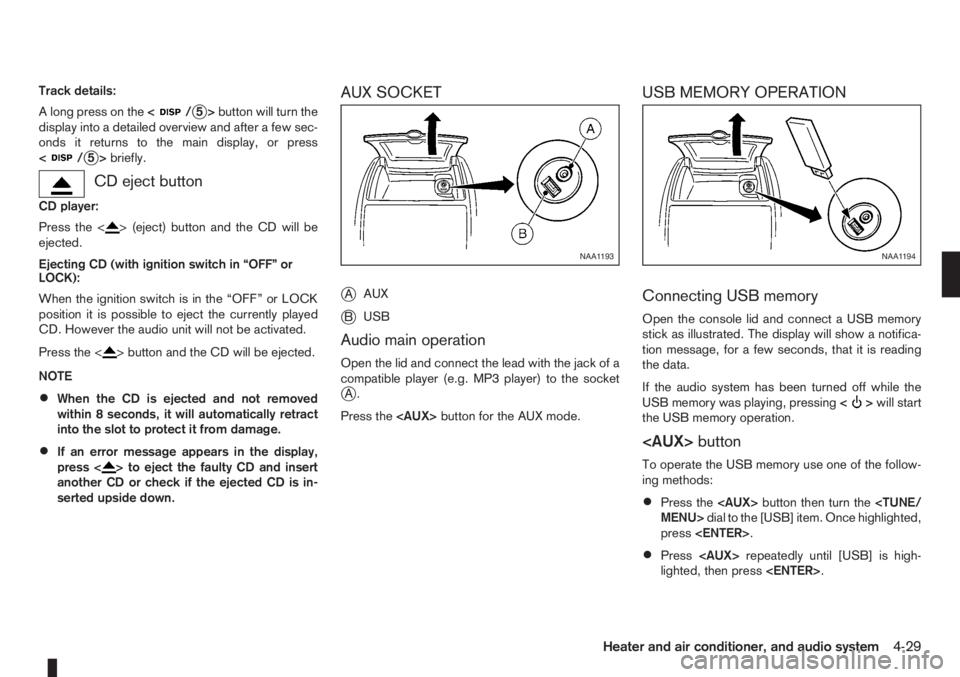
AUX SOCKET
j
AAUX
jBUSB
Audio main operation
Open the lid and connect the lead with the jack of a
compatible player (e.g. MP3 player) to the socket
jA.
Press the
USB MEMORY OPERATION
Connecting USB memory
Open the console lid and connect a USB memory
stick as illustrated. The display will show a notifica-
tion message, for a few seconds, that it is reading
the data.
If the audio system has been turned off while the
USB memory was playing, pressing<
>will start
the USB memory operation.
To operate the USB memory use one of the follow-
ing methods:
•Press the
press
•Press
lighted, then press
NAA1193NAA1194
Heater and air conditioner, and audio system4-29
Page 120 of 235
For details, see “FM AM radio with CD player
(where fitted)” earlier in this section.
When successfully paired, a notification message
will be displayed. During the connection the follow-
ing status icons will be displayed (top left of dis-
play): Signal strength (
), Battery status (), and
Bluetooth ().
*: If the low battery message comes on, the Blue-
tooth® device must be recharged soon.
HANDS-FREE TELEPHONE
CONTROL
The hands-free mode can be operated using the
telephone<>button on the audio system, or
(where fitted) on the steering wheel.
Initiating a call
A call can be initiated using one of the following
methods:
– Redial
– Phone book
– Manual dialling
– Missed calls
– Dialled calls
– Received callsRedial:
To redial or call the last number dialled, press<
>
for more than 2 seconds.
Making a call from the phone book:
Once the Bluetooth
®connection has been made,
between the registered mobile phone and the audio
system, phone book data will be transferred auto-
matically to the audio system. The transfer may take
a while before completion.
NOTE
Phone book data will be erased when:
•Switching to another registered mobile
phone.
•Mobile phone is disconnected.
•The registered mobile phone is deleted from
the audio system.
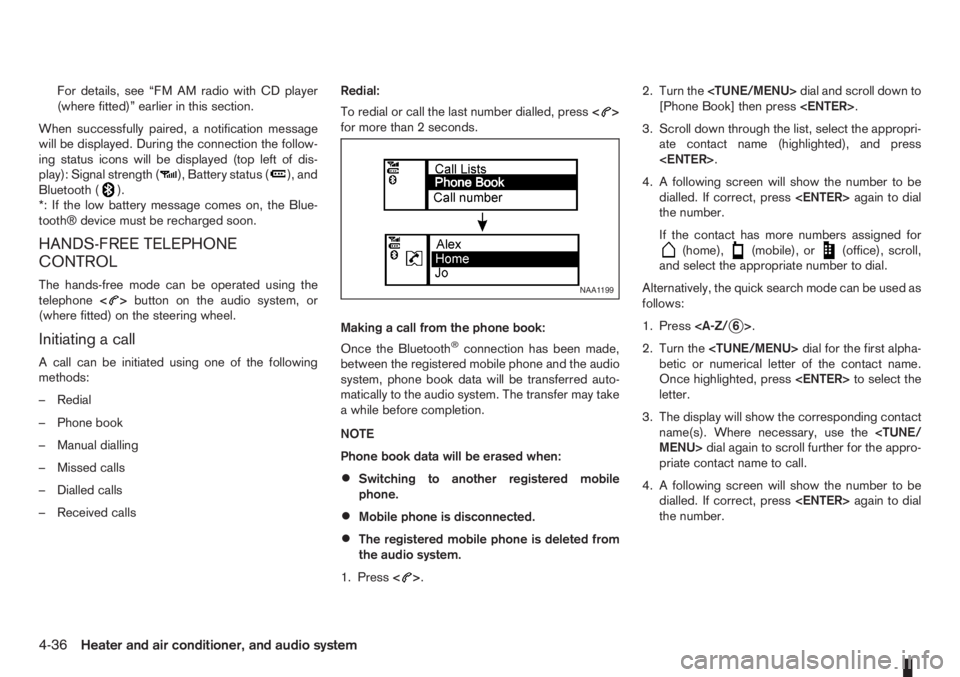
1. Press<
>.2. Turn the
[Phone Book] then press
3. Scroll down through the list, select the appropri-
ate contact name (highlighted), and press
4. A following screen will show the number to be
dialled. If correct, press
the number.
If the contact has more numbers assigned for
(home),(mobile), or(office), scroll,
and select the appropriate number to dial.
Alternatively, the quick search mode can be used as
follows:
1. Press
2. Turn the
betic or numerical letter of the contact name.
Once highlighted, press
letter.
3. The display will show the corresponding contact
name(s). Where necessary, use the
priate contact name to call.
4. A following screen will show the number to be
dialled. If correct, press
the number.
NAA1199
4-36Heater and air conditioner, and audio system
Page 122 of 235
![NISSAN NOTE 2011 Owners Manual •[#123] — Use this item to enter numbers during
a call. For example, if directed by an automated
phone system to dial an extension number the
system will send the tone associated with the
selected NISSAN NOTE 2011 Owners Manual •[#123] — Use this item to enter numbers during
a call. For example, if directed by an automated
phone system to dial an extension number the
system will send the tone associated with the
selected](/manual-img/5/56793/w960_56793-121.png)
•[#123] — Use this item to enter numbers during
a call. For example, if directed by an automated
phone system to dial an extension number the
system will send the tone associated with the
selected number.
•[] — Use this item (the transfer handset com-
mand) to transfer the call from the audio system
to your mobile phone.
To transfer the call back to hands-free via the
audio system select [
].
STEERING WHEEL SWITCHES
(where fitted)
j
1Telephone button
j2Volume control buttons
The hands-free mode can be operated using the
steering wheel switches.
Volume control buttons
The volume control buttons allow you to adjust the
volume of the speakers by pressing the<+>or<
—>button.
Telephone button
The phone <> button allows you to:
•Accept an incoming call by pressing<>once.
•Reject an incoming call by pressing<>for
more than 2 seconds during the incoming call.
•End an active call by pressing the<>button
once.
•Redial the last outgoing call by pressing the<>
button for more than 2 seconds.
MAIN OPERATION
A.Source button
B.Volume control buttons
C.
(INFO) button
D.Scrolling switch
A.
(INFO) button
B.Volume control buttons
NAA1020Z
NAA898Z
Type A
NAA1010Z
Type B
STEERING WHEEL SWITCHES
FOR AUDIO CONTROL
(where fitted)
4-38Heater and air conditioner, and audio system
Page 123 of 235
C.Telephone button
D.Scrolling switch
E.Source button
The audio unit can be operated by using the con-
trols on the steering wheel.
To use the steering wheel audio switch, push the
power “ON” button of the audio unit with the ignition
switch in either the Acc or ON position.
mormScrolling switch
– Preset station change (radio mode)
Push the up/down scrolling switch (
or) for
less than 1.5 seconds to select one of the preset
radio stations.
– Seek tuning (radio mode)
Push the up/down scrolling switch (
or) for
more than 1.5 seconds to seek for the next or
previous radio station.
– Track up/down (CD mode)
Push the up/down scrolling switch (
or) for
less than 1.5 seconds to select the next track or
to return to the beginning of the present track.
Push (up/down) several times to skip through or
skip back the tracks.
– DISC change (where fitted, CD mode)
Push the up/down scrolling switch (
or) for
more than 1.5 seconds to change the playing
disc.
mINFO button
For additional information about thebutton,
see “Meters and gauges” in the “2. Instruments and
controls” section.
SOURCE button
When the SRC (or SOURCE) button is pressed
repeatedly, the source will change as follows:
Radio⇒CD⇒AUX *⇒Radio
* where fitted
mTelephone button
For additional information of the telephone button,
see “Mobile phone integration (where fitted)” earlier
in this section.
mVolume control buttons
Press the + or — button to adjust the volume level.When installing large capacity wireless equipment
or a car phone in your NISSAN, be sure to observe
the following as it may adversely affect the Engine
control system and other electronic parts depend-
ing on its installation location.
CAUTION
•Keep the antenna as far as possible away from
the Electric Control Module.
•Also keep the antenna wire more than 20 cm
(8 inches) away from the Electro Injection har-
ness. Do not route the antenna wire next to
any harness.
•Adjust the antenna standing-wave ratio as rec-
ommended by the manufacturer.
•Connect the ground wire from the radio chas-
sis to the body.
For details, consult a NISSAN dealer or qualified
workshop.
CAR PHONE OR CB RADIO
Heater and air conditioner, and audio system4-39
Page 126 of 235
During the first 1,600 km (1,000 miles), follow these
recommendations for the future reliability and
economy of your new vehicle. Failure to follow the
recommendations may result in shortened engine
life and reduced engine performance.
•Avoid driving for long periods at a constant
speed, either fast or slow.
•Do not accelerate at full throttle in any gear.
•Avoid quick starts.
•Avoid hard braking as much as possible.
•Do not tow a trailer during the first 800 km (500
miles).
NOTE
Models with K9K diesel engine will achieve top
performance only after approximately 5,000 km
(3,000 miles).
WARNING
The driving characteristics of your vehicle can be
changed remarkably by any additional load and
its distribution as well as by adding optional
equipment (trailer couplings, roof racks, etc.).
Your driving style and speed have to be adjusted
accordingly. Especially when carrying heavy
loads, your speed must be reduced adequately.
•Make sure the area around the vehicle is free of
obstacles.
•Check fluid levels such as engine oil, coolant,
brake and clutch fluid, and window washer fluid
as frequently as possible, at least whenever you
refuel.
•Visually inspect tyres for their appearance and
condition. Also check the tyre pressure for
proper inflation.
•Maintenance items in the “8. Maintenance and
do-it-yourself” section should be checked peri-
odically.
•Check that all windows and light lenses are
clean.
•Check that all doors are closed.
•Position the seat and adjust the head restraints.
•Adjust the inside and outside mirrors.
•Fasten your seat belt and ask all passengers to
do likewise.
•Check the operation of the warning/indicator
lights when the ignition switch is turned to the
ON position.
•Do not place hard or heavy objects on the dash-
board or rear parcel shelf in order to prevent
injury in the event of a sudden stop.
RUNNING-IN SCHEDULE BEFORE STARTING THE ENGINE
5-2Starting and driving
Page 127 of 235
WARNING
•Do not leave children or adults who would
normally require the support of others alone
in your vehicle. Pets should also not be left
alone. They could accidentally injure them-
selves or others through inadvertent opera-
tion of the vehicle. Also, on hot, sunny days,
temperatures in a closed vehicle could quickly
become high enough to cause severe or pos-
sibly fatal injuries to people or animals.
•To prevent luggage or packages from sliding
forward during braking, do not stack anything
in the cargo area higher than the seatbacks.
•Secure all cargo with ropes or straps to pre-
vent it from sliding or shifting.
•Failure to follow proper seating instructions
see “Seats” in the “1. Safety — seats, seat
belts and supplemental restraint system” sec-
tion, could result in serious personal injury in
an accident or sudden stop.
EXHAUST GAS (Carbon Monoxide)
WARNING
•Do not breathe exhaust gases; they contain
colourless and odourless carbon monoxide.
Carbon monoxide is a dangerous gas and can
cause unconsciousness or death.
•If you suspect that exhaust fumes are enter-
ing the vehicle, drive with all windows fully
open and have the vehicle inspected immedi-
ately.
•Do not run the engine in closed spaces, such
as a garage, for any longer than is absolutely
necessary.
•Do not park the vehicle with the engine run-
ning for any extended length of time.
•Keep the back door closed while driving, oth-
erwise exhaust gases could be drawn into the
passenger compartment. If you must drive in
this way for some reason, take the following
steps:
1) Open all the windows.
2) Manual air conditioner equipped models:
Move the air intake lever to the
posi-
tion.
Automatic air conditioner equipped mod-
els: Switch on the outside air mode.
3) Set the fan speed control to the maximum
position to circulate the air.
•If electrical wiring or other cable connections
must pass to a trailer through the seal of the
body, follow the manufacturer’s recommen-
dations to prevent carbon monoxide entry into
the vehicle.
•When a vehicle has been stopped in an open
area with its engine running for any significant
length of time, turn the fan on to force outside
air into the vehicle.
•The exhaust system and body should be in-
spected by a NISSAN dealer or qualified work-
shop whenever:
– the vehicle is raised for service.
– you suspect that exhaust fumes are enter-
ing into the passenger compartment.
– you notice a change in the sound of the
exhaust system.
– you have had an accident involving dam-
age to the exhaust system, underbody, or
rear of the vehicle.
PRECAUTIONS WHEN STARTING
AND DRIVING
Starting and driving5-3