2011 NISSAN MURANO start
[x] Cancel search: startPage 109 of 433
Black plate (107,1)
Model "Z51-D" EDITED: 2010/ 7/ 23
SIC3670
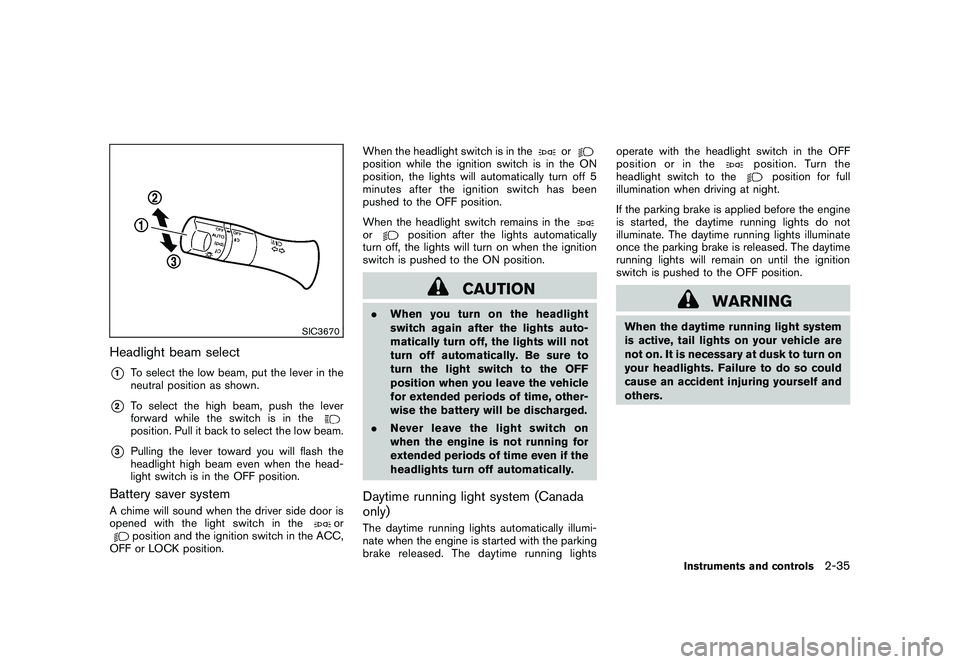
Headlight beam select*1
To select the low beam, put the lever in the
neutral position as shown.
*2
To select the high beam, push the lever
forward while the switch is in theposition. Pull it back to select the low beam.
*3
Pulling the lever toward you will flash the
headlight high beam even when the head-
light switch is in the OFF position.
Battery saver systemA chime will sound when the driver side door is
opened with the light switch in the
or
position and the ignition switch in the ACC,
OFF or LOCK position. When the headlight switch is in the
or
position while the ignition switch is in the ON
position, the lights will automatically turn off 5
minutesaftertheignitionswitchhasbeen
pushed to the OFF position.
When the headlight switch remains in theor
position after the lights automatically
turn off, the lights will turn on when the ignition
switch is pushed to the ON position.
CAUTION
. When you turn on the headlight
switch again after the lights auto-
matically turn off, the lights will not
turn off automatically. Be sure to
turn the light switch to the OFF
position when you leave the vehicle
for extended periods of time, other-
wise the battery will be discharged.
. Never leave the light switch on
when the engine is not running for
extended periods of time even if the
headlights turn off automatically.Daytime running light system (Canada
only)The daytime running lights automatically illumi-
nate when the engine is started with the parking
brake released. The daytime running lights operate with the headlight switch in the OFF
position or in the
position. Turn the
headlight switch to the
position for full
illumination when driving at night.
If the parking brake is applied before the engine
is started, the daytime running lights do not
illuminate. The daytime running lights illuminate
once the parking brake is released. The daytime
running lights will remain on until the ignition
switch is pushed to the OFF position.
WARNING
When the daytime running light system
is active, tail lights on your vehicle are
not on. It is necessary at dusk to turn on
your headlights. Failure to do so could
cause an accident injuring yourself and
others.
Instruments and controls
2-35
Page 112 of 433

Black plate (110,1)
Model "Z51-D" EDITED: 2010/ 7/ 23
SIC4401
The heated steering wheel system is designed
to operate only when the surface temperature of
the steering wheel is below 688F (20 8C) .
Push the heated steering wheel switch to warm
the steering wheel after the engine starts. The
indicator light
*1
on the switch will illuminate.
If the surface temperature of the steering wheel
is below 68 8F (20 8C) , the system will heat the
steering wheel and cycle off and on to maintain a
temperature above 68 8F (20 8C) . The indicator
light will remain on as long as the system is on.
Push the switch again to turn the heated
steering wheel system off manually. The indica-
tor light will turn off. NOTE:
If the surface temperature of the steering
wheel is above 68
8F (20 8C) when the switch
is turned on, the system will not heat the
steering wheel. This is not a malfunction.
WARNING
Do not use or allow occupants to use
the seat heater if you or the occupants
cannot monitor elevated seat tempera-
tures or have an inability to feel pain in
body parts that contact the seat. Use of
the seat heater by such people could
result in serious injury.
CAUTION
. The battery could run down if the
seat heater is operated while the
engine is not running.
. Do not use the seat heater for
extended periods or when no one
is using the seat.
. Do not put anything on the seat
which insulates heat, such as a
blanket, cushion, seat cover, etc.
Otherwise, the seat may become
overheated.
. Do not place anything hard or heavy
on the seat or pierce it with a pin or
similar object. This may result in
damage to the heater.
HEATED STEERING WHEEL (if so
equipped) HEATED SEATS (if so equipped)2-38
Instruments and controls
Page 113 of 433

Black plate (111,1)
Model "Z51-D" EDITED: 2010/ 7/ 23
.Any liquid spilled on the heated seat
should be removed immediately
with a dry cloth.
. When cleaning the seat, never use
gasoline, thinner, or any similar
materials.
. If any malfunctions are found or the
heated seat does not operate, turn
the switch off and have the system
checked by a NISSAN dealer.
SIC2770
The seats are warmed by built-in heaters. The
switches located on the center console and rear
doors (if so equipped for rear seats) can be
operated independently of each other.
1. Start the engine.
2. Select heat range.
*1
For high heat, push the HI (High) side of
the switch.
*2
For low heat, push the LO (Low) side of
the switch.
The indicator light in the switch
*3
will
illuminate when the heater is on. 3. To turn off the heater, return the switch to
the level position. Make sure the indicator
light goes off.
The heater is controlled by a thermostat,
automatically turning the heater on and off.
The indicator light will remain on as long as
the switch is on.
When the vehicle’s interior is warmed, or
before you leave the vehicle, be sure to turn
off the switch.
Instruments and controls
2-39
Page 115 of 433
Black plate (113,1)
Model "Z51-D" EDITED: 2010/ 7/ 23
SSD1153
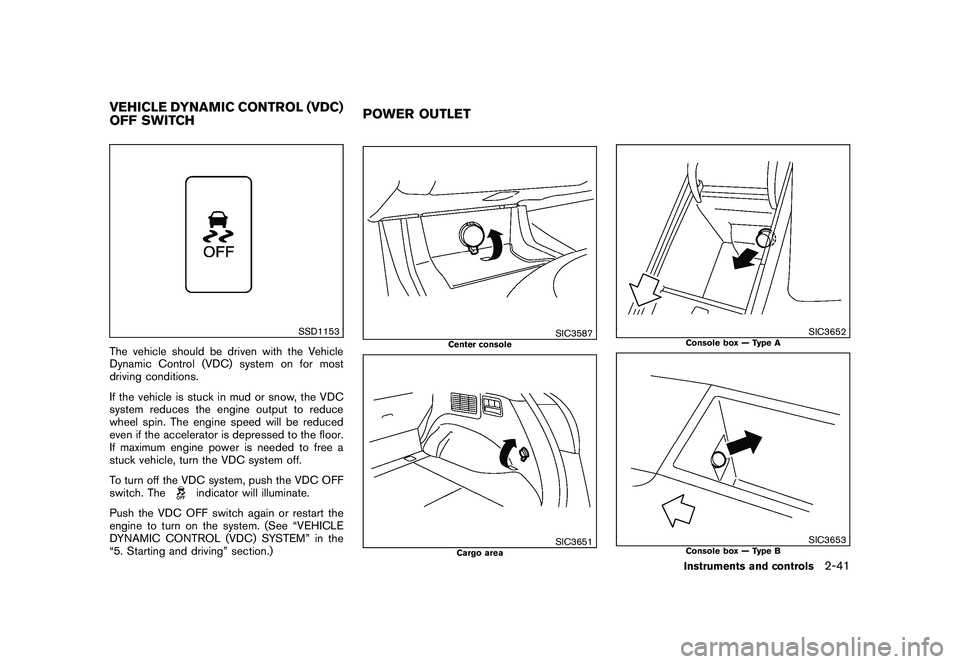
The vehicle should be driven with the Vehicle
Dynamic Control (VDC) system on for most
driving conditions.
If the vehicle is stuck in mud or snow, the VDC
system reduces the engine output to reduce
wheel spin. The engine speed will be reduced
even if the accelerator is depressed to the floor.
If maximum engine power is needed to free a
stuck vehicle, turn the VDC system off.
To turn off the VDC system, push the VDC OFF
switch. The
indicator will illuminate.
Push the VDC OFF switch again or restart the
engine to turn on the system. (See “VEHICLE
DYNAMIC CONTROL (VDC) SYSTEM” in the
“5. Starting and driving” section.)
SIC3587
Center console
SIC3651
Cargo area
SIC3652
Console box — Type A
SIC3653
Console box — Type B
VEHICLE DYNAMIC CONTROL (VDC)
OFF SWITCH POWER OUTLET
Instruments and controls
2-41
Page 117 of 433
Black plate (115,1)
Model "Z51-D" EDITED: 2010/ 7/ 23
CAUTION
.The cigarette lighter socket is a
power source for the cigarette light-
er element only. The use of the
cigarette lighter socket as a power
source for any other accessory is
not recommended.
. Do not use any other power outlet
for an accessory lighter.
CUP HOLDERS
CAUTION
.Avoid abrupt starting and braking
when the cup holder is being used
to prevent spilling the drink. If the
liquid is hot, it can scald you or your
passenger.
. Use only soft cups in the cup holder.
Hard objects can injure you in an
accident.
SIC3118
Front
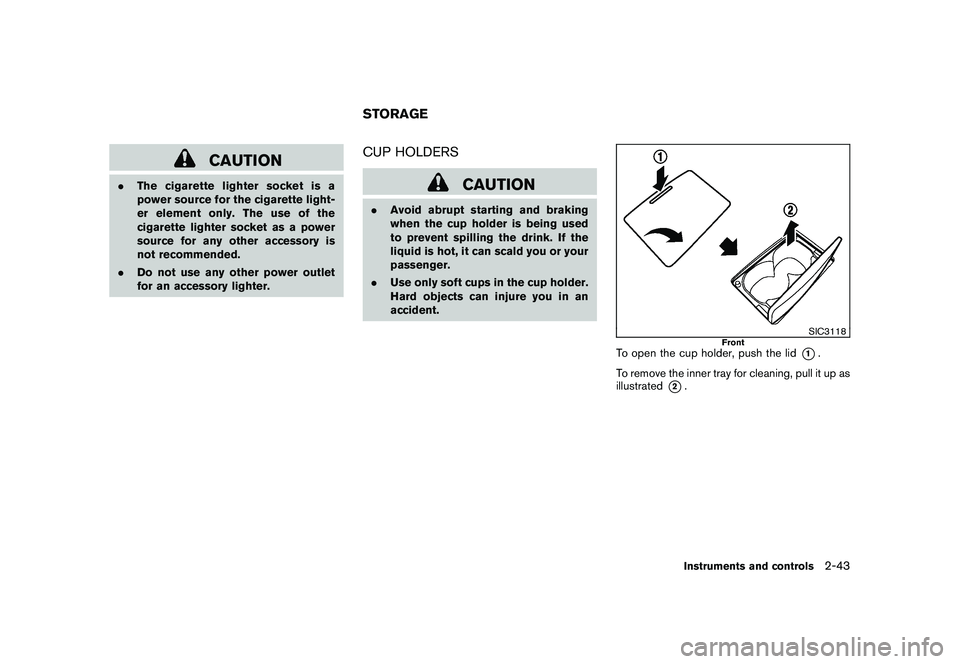
To open the cup holder, push the lid
*1.
To remove the inner tray for cleaning, pull it up as
illustrated
*2.
STORAGE
Instruments and controls
2-43
Page 138 of 433
Black plate (136,1)
Model "Z51-D" EDITED: 2010/ 7/ 23
A key number plate is supplied with your keys.
Record the key number and keep it in a safe
place (such as your wallet) , not in the vehicle. If
you lose your keys, see a NISSAN dealer for
duplicates by using the key number. NISSAN
does not record any key numbers so it is very
important to keep track of your key number plate.
A key number is only necessary when you have
lost all keys and do not have one to duplicate
from. If you still have a key, this key can be
duplicated by a NISSAN dealer.
SPA2406
Type A
SPA2431
Type B
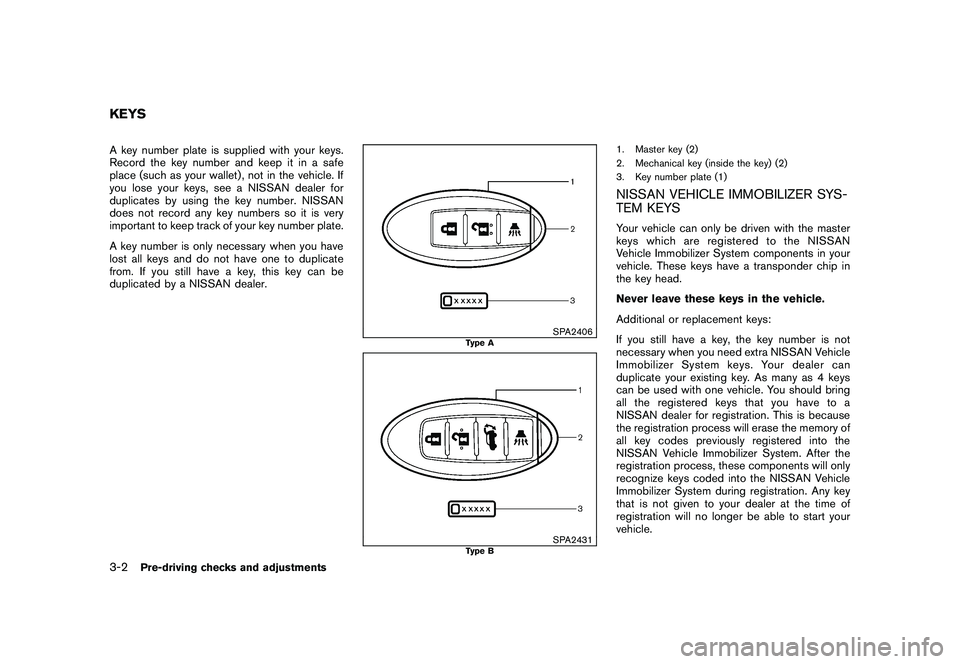
1. Master key (2)
2. Mechanical key (inside the key) (2)
3. Key number plate (1)NISSAN VEHICLE IMMOBILIZER SYS-
TEM KEYSYour vehicle can only be driven with the master
keys which are registered to the NISSAN
Vehicle Immobilizer System components in your
vehicle. These keys have a transponder chip in
the key head.
Never leave these keys in the vehicle.
Additional or replacement keys:
If you still have a key, the key number is not
necessary when you need extra NISSAN Vehicle
Immobilizer System keys. Your dealer can
duplicate your existing key. As many as 4 keys
can be used with one vehicle. You should bring
all the registered keys that you have to a
NISSAN dealer for registration. This is because
the registration process will erase the memory of
all key codes previously registered into the
NISSAN Vehicle Immobilizer System. After the
registration process, these components will only
recognize keys coded into the NISSAN Vehicle
Immobilizer System during registration. Any key
that is not given to your dealer at the time of
registration will no longer be able to start your
vehicle.
KEYS3-2
Pre-driving checks and adjustments
Page 144 of 433
Black plate (142,1)
Model "Z51-D" EDITED: 2010/ 7/ 23
computer.
. When the vehicle is parked near a parking
meter.
In such cases, correct the operating conditions
before using the Intelligent Key function or use
the mechanical key.
Although the life of the battery varies depending
on the operating conditions, the battery’s life is
approximately 2 years. If the battery is dis-
charged, replace it with a new one.
When the Intelligent Key battery is almost
discharged, insert the Intelligent Key into the
Intelligent Key port to start the engine. Replace
the discharged battery with a new one as soon
as possible. For more details, see “PUSH-
BUTTON IGNITION SWITCH” in the “5. Start-
ing and driving” section.
Since the Intelligent Key is continuously receiv-
ing radio waves, if the key is left near equipment
which transmits strong radio waves, such as
signals from a TV and personal computer, the
battery life may become shorter.
For information regarding replacement of a
battery, see “INTELLIGENT KEY BATTERY
REPLACEMENT” in the “8. Maintenance and
do-it-yourself” section.
As many as 4 Intelligent Keys can be registered
and used with one vehicle. For information about the purchase and use of additional Intelligent
Keys, contact a NISSAN dealer.
CAUTION
.
Do not allow the Intelligent Key,
which contains electrical compo-
nents, to come into contact with
water or salt water. This could affect
the system function.
. Do not drop the Intelligent Key.
. Do not strike the Intelligent Key
sharply against another object.
. Do not change or modify the Intel-
ligent Key.
. Wetting may damage the Intelligent
Key. If the Intelligent Key gets wet,
immediately wipe until it is comple-
tely dry.
. If the outside temperature is below
148F( �10 8C) degrees, the battery of
the Intelligent Key may not function
properly.
. Do not place the Intelligent Key for
an extended period in an area where
temperatures exceed 140 8F (60 8C) .
. Do not attach the Intelligent Key
with a key holder that contains a magnet.
. Do not place the Intelligent Key near
equipment that produces a mag-
netic field, such as a TV, audio
equipment, personal computer or
cellular phone.
If an Intelligent Key is lost or stolen, NISSAN
recommends erasing the ID code of that
Intelligent Key from the vehicle. This may prevent
the unauthorized use of the Intelligent Key to
operate the vehicle. For information regarding
the erasing procedure, contact a NISSAN deal-
er.
The Intelligent Key function can be disabled. For
information about disabling the Intelligent Key
function, contact a NISSAN dealer.
3-8
Pre-driving checks and adjustments
Page 155 of 433

Black plate (153,1)
Model "Z51-D" EDITED: 2010/ 7/ 23
SPA2437
1. Pull the hood lock release handle
*1
located below the instrument panel; the
hood will then spring up slightly.
2. Pull the lever
*2
up at the front of the hood
with your fingertips and raise the hood.
3. When closing the hood, slowly close the hood down and make sure it locks into
place.
WARNING
.Make sure the hood is completely
closed and latched before driving.
Failure to do so could cause the
hood to fly open and result in an
accident.
. If you see steam or smoke coming
from the engine compartment, to
avoid injury do not open the hood.
WARNING
.Always be sure the lift gate has
been closed securely to prevent it
from opening while driving.
. Do not drive with the lift gate open.
This could allow dangerous exhaust
gases to be drawn into the vehicle.
See “EXHAUST GAS (carbon mon-
oxide)” in the “5. Starting and driv-
ing” section of this manual.
. Do not leave children unattended
inside the vehicle. They could un-
knowingly activate switches or con-
trols. Unattended children could
become involved in serious acci-
dents.
. Always be sure that hands and feet
are clear of the door frame to avoid
injury while closing the lift gate.
HOOD LIFT GATE
Pre-driving checks and adjustments
3-19