Page 97 of 345
Black plate (95,1)
Model "Z12-D" EDITED: 2010/ 9/ 27
WARNING
In freezing temperatures the washer
solution may freeze on the rear window
glass and obscure your vision. Warm
the rear window with the defroster
before you wash the rear window.
CAUTION
.Do not operate the washer continu-
ously for more than 30 seconds.
. Do not operate the washer if the
reservoir tank is empty.
. Do not fill the window washer
reservoir tank with washer fluid
concentrates at full strength. Some
methyl alcohol based washer fluid
concentrates may permanently stain
the grille if spilled while filling the
window washer reservoir tank.
. Pre-mix washer fluid concentrates
with water to the manufacturer’s
recommended levels before pouring
the fluid into the window washer
reservoir tank. Do not use the
window washer reservoir tank to
mix the washer fluid concentrate and water.
If the rear window wiper operation is
interrupted by snow or ice, the wiper may
stop moving to protect its motor. If this
occurs, turn the wiper switch to the OFF
position and remove the snow or ice that is
on and around the wiper arms. In approxi-
mately 1 minute, turn the switch on again
to operate the wiper.
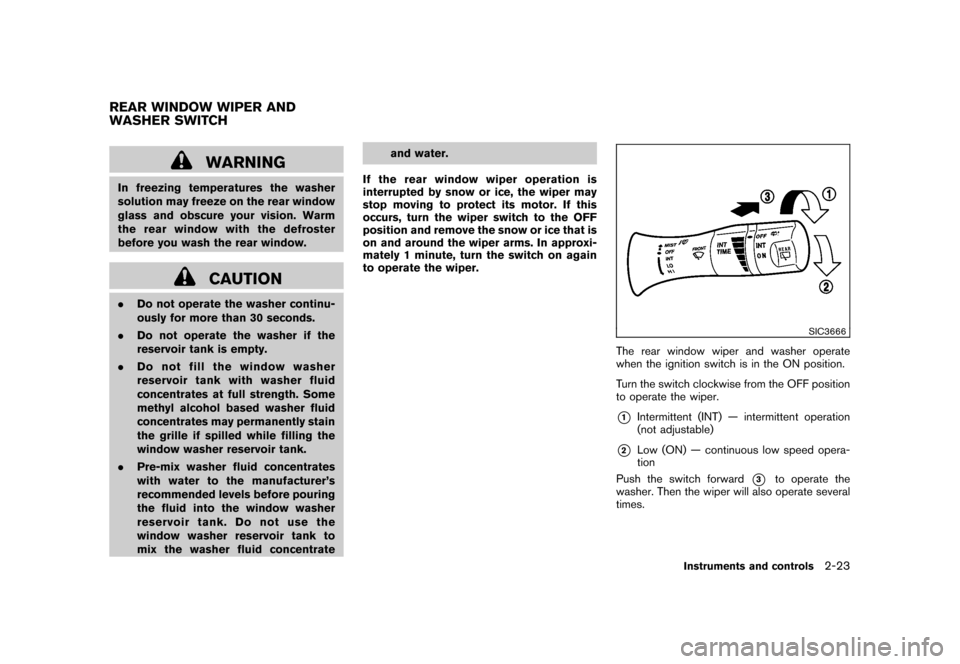
SIC3666
The rear window wiper and washer operate
when the ignition switch is in the ON position.
Turn the switch clockwise from the OFF position
to operate the wiper.*1
Intermittent (INT) — intermittent operation
(not adjustable)
*2
Low (ON) — continuous low speed opera-
tion
Push the switch forward
*3
to operate the
washer. Then the wiper will also operate several
times.
REAR WINDOW WIPER AND
WASHER SWITCH
Instruments and controls
2-23
Page 99 of 345
Black plate (97,1)
Model "Z12-D" EDITED: 2010/ 9/ 27
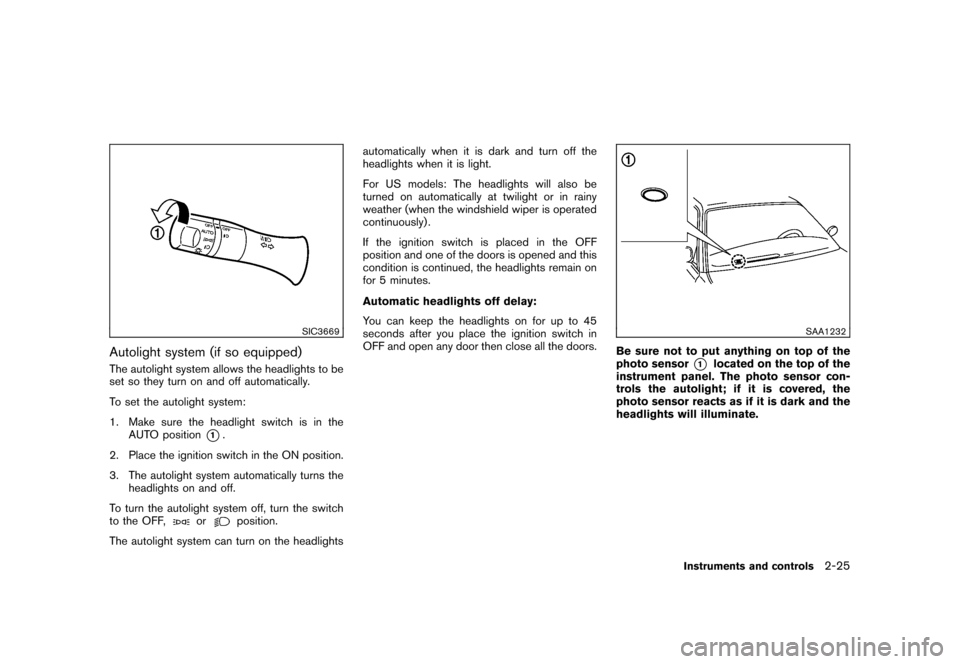
SIC3669
Autolight system (if so equipped)The autolight system allows the headlights to be
set so they turn on and off automatically.
To set the autolight system:
1. Make sure the headlight switch is in theAUTO position
*1.
2. Place the ignition switch in the ON position.
3. The autolight system automatically turns the headlights on and off.
To turn the autolight system off, turn the switch
to the OFF,
or
position.
The autolight system can turn on the headlights automatically when it is dark and turn off the
headlights when it is light.
For US models: The headlights will also be
turned on automatically at twilight or in rainy
weather (when the windshield wiper is operated
continuously) .
If the ignition switch is placed in the OFF
position and one of the doors is opened and this
condition is continued, the headlights remain on
for 5 minutes.
Automatic headlights off delay:
You can keep the headlights on for up to 45
seconds after you place the ignition switch in
OFF and open any door then close all the doors.
SAA1232
Be sure not to put anything on top of the
photo sensor
*1
located on the top of the
instrument panel. The photo sensor con-
trols the autolight; if it is covered, the
photo sensor reacts as if it is dark and the
headlights will illuminate.
Instruments and controls
2-25
Page 102 of 345
Black plate (100,1)
Model "Z12-D" EDITED: 2010/ 9/ 27
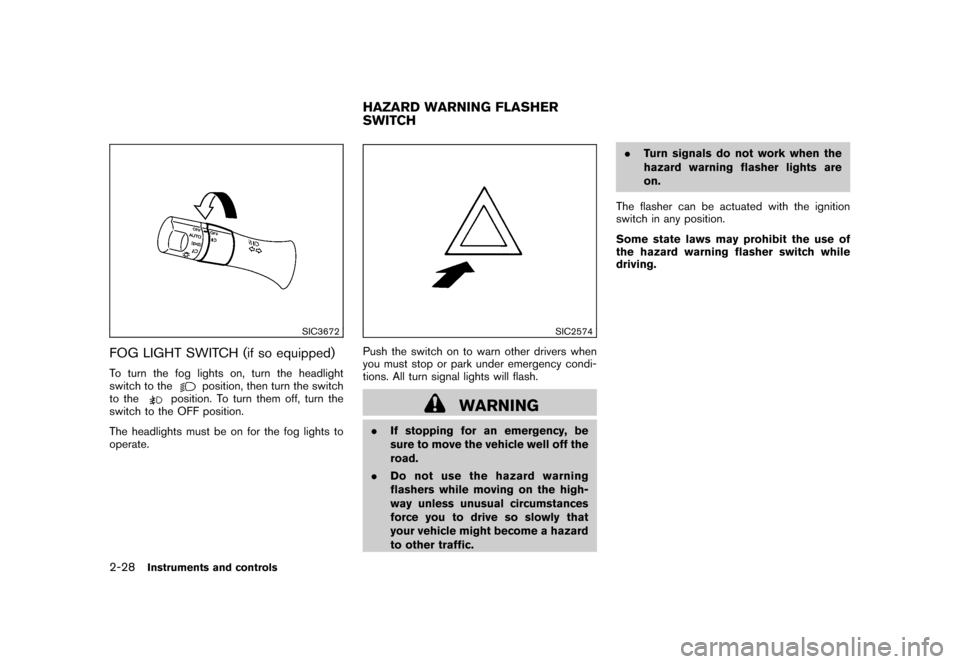
SIC3672
FOG LIGHT SWITCH (if so equipped)To turn the fog lights on, turn the headlight
switch to the
position, then turn the switch
to the
position. To turn them off, turn the
switch to the OFF position.
The headlights must be on for the fog lights to
operate.
SIC2574
Push the switch on to warn other drivers when
you must stop or park under emergency condi-
tions. All turn signal lights will flash.
WARNING
. If stopping for an emergency, be
sure to move the vehicle well off the
road.
. Do not use the hazard warning
flashers while moving on the high-
way unless unusual circumstances
force you to drive so slowly that
your vehicle might become a hazard
to other traffic. .
Turn signals do not work when the
hazard warning flasher lights are
on.
The flasher can be actuated with the ignition
switch in any position.
Some state laws may prohibit the use of
the hazard warning flasher switch while
driving.HAZARD WARNING FLASHER
SWITCH
2-28
Instruments and controls
Page 103 of 345
Black plate (101,1)
Model "Z12-D" EDITED: 2010/ 9/ 27
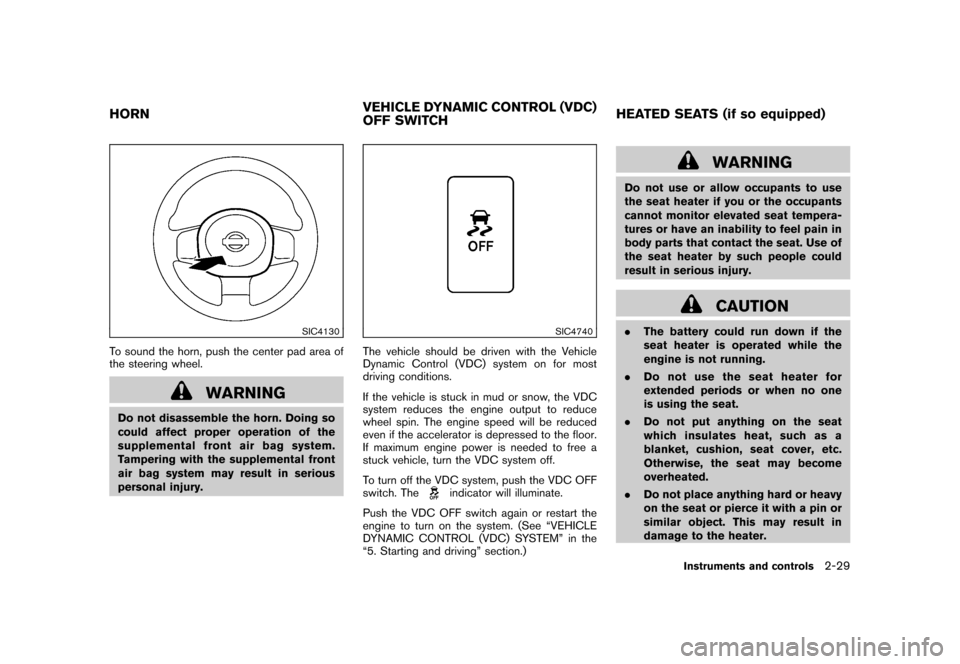
SIC4130
To sound the horn, push the center pad area of
the steering wheel.
WARNING
Do not disassemble the horn. Doing so
could affect proper operation of the
supplemental front air bag system.
Tampering with the supplemental front
air bag system may result in serious
personal injury.
SIC4740
The vehicle should be driven with the Vehicle
Dynamic Control (VDC) system on for most
driving conditions.
If the vehicle is stuck in mud or snow, the VDC
system reduces the engine output to reduce
wheel spin. The engine speed will be reduced
even if the accelerator is depressed to the floor.
If maximum engine power is needed to free a
stuck vehicle, turn the VDC system off.
To turn off the VDC system, push the VDC OFF
switch. The
indicator will illuminate.
Push the VDC OFF switch again or restart the
engine to turn on the system. (See “VEHICLE
DYNAMIC CONTROL (VDC) SYSTEM” in the
“5. Starting and driving” section.)
WARNING
Do not use or allow occupants to use
the seat heater if you or the occupants
cannot monitor elevated seat tempera-
tures or have an inability to feel pain in
body parts that contact the seat. Use of
the seat heater by such people could
result in serious injury.
CAUTION
. The battery could run down if the
seat heater is operated while the
engine is not running.
. Do not use the seat heater for
extended periods or when no one
is using the seat.
. Do not put anything on the seat
which insulates heat, such as a
blanket, cushion, seat cover, etc.
Otherwise, the seat may become
overheated.
. Do not place anything hard or heavy
on the seat or pierce it with a pin or
similar object. This may result in
damage to the heater.
HORN VEHICLE DYNAMIC CONTROL (VDC)
OFF SWITCHHEATED SEATS (if so equipped)
Instruments and controls
2-29
Page 105 of 345
Black plate (103,1)
Model "Z12-D" EDITED: 2010/ 9/ 27
The digital clock (in the audio unit) displays time
when the ignition switch is in the ACC or ON
position.
The clock ON or OFF mode can be selected.
If the power supply is disconnected, the
clock will not indicate the correct time.
Readjust the time.
SIC4131
Type A
ADJUSTING THE TIME
Type APush the CLOCK button
*1
to turn the clock on
or off.
1. Push and hold the CLOCK button
*1
until
the clock display starts to flash.
2. Push the SEEK/TRACK button
*2
to adjust
the hours.
3. Push the TUNE/ FF·REW button*3
to
adjust the minutes.
4. Push the CLOCK button
*1
again to exit
the clock set mode. The display will return to the regular clock
display after 5 seconds.
CLOCK (if so equipped)
Instruments and controls
2-31
Page 106 of 345
Black plate (104,1)
Model "Z12-D" EDITED: 2010/ 9/ 27
SIC4146
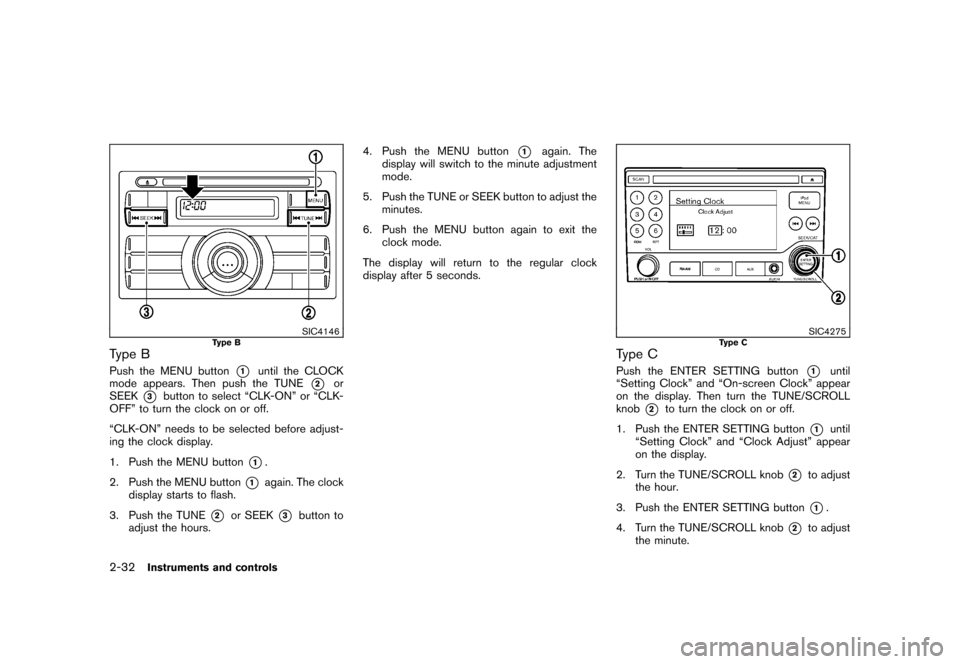
Type B
Type BPush the MENU button
*1
until the CLOCK
mode appears. Then push the TUNE
*2
or
SEEK
*3
button to select “CLK-ON” or “CLK-
OFF” to turn the clock on or off.
“CLK-ON” needs to be selected before adjust-
ing the clock display.
1. Push the MENU button
*1.
2. Push the MENU button
*1
again. The clock
display starts to flash.
3. Push the TUNE
*2
or SEEK
*3
button to
adjust the hours. 4. Push the MENU button
*1
again. The
display will switch to the minute adjustment
mode.
5. Push the TUNE or SEEK button to adjust the minutes.
6. Push the MENU button again to exit the clock mode.
The display will return to the regular clock
display after 5 seconds.
SIC4275
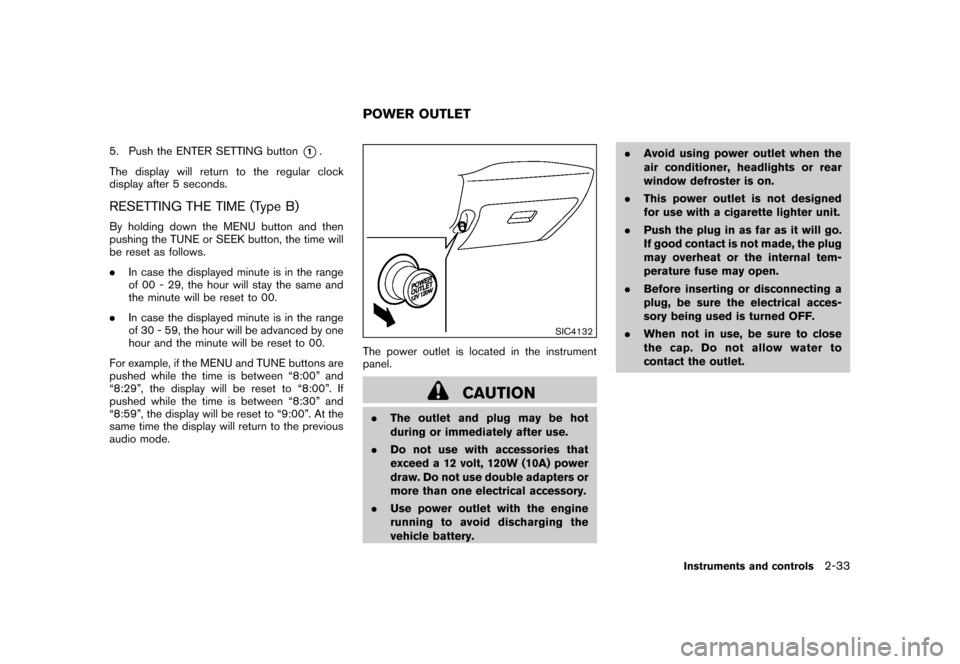
Type C
Type CPush the ENTER SETTING button
*1
until
“Setting Clock” and “On-screen Clock” appear
on the display. Then turn the TUNE/SCROLL
knob
*2
to turn the clock on or off.
1. Push the ENTER SETTING button
*1
until
“Setting Clock” and “Clock Adjust” appear
on the display.
2. Turn the TUNE/SCROLL knob
*2
to adjust
the hour.
3. Push the ENTER SETTING button*1.
4. Turn the TUNE/SCROLL knob
*2
to adjust
the minute.
2-32
Instruments and controls
Page 107 of 345
Black plate (105,1)
Model "Z12-D" EDITED: 2010/ 9/ 27
5. Push the ENTER SETTING button
*1.
The display will return to the regular clock
display after 5 seconds.
RESETTING THE TIME (Type B)By holding down the MENU button and then
pushing the TUNE or SEEK button, the time will
be reset as follows.
. In case the displayed minute is in the range
of 00 - 29, the hour will stay the same and
the minute will be reset to 00.
. In case the displayed minute is in the range
of 30 - 59, the hour will be advanced by one
hour and the minute will be reset to 00.
For example, if the MENU and TUNE buttons are
pushed while the time is between “8:00” and
“8:29”, the display will be reset to “8:00”. If
pushed while the time is between “8:30” and
“8:59”, the display will be reset to “9:00”. At the
same time the display will return to the previous
audio mode.
SIC4132
The power outlet is located in the instrument
panel.
CAUTION
. The outlet and plug may be hot
during or immediately after use.
. Do not use with accessories that
exceed a 12 volt, 120W (10A) power
draw. Do not use double adapters or
more than one electrical accessory.
. Use power outlet with the engine
running to avoid discharging the
vehicle battery. .
Avoid using power outlet when the
air conditioner, headlights or rear
window defroster is on.
. This power outlet is not designed
for use with a cigarette lighter unit.
. Push the plug in as far as it will go.
If good contact is not made, the plug
may overheat or the internal tem-
perature fuse may open.
. Before inserting or disconnecting a
plug, be sure the electrical acces-
sory being used is turned OFF.
. When not in use, be sure to close
the cap. Do not allow water to
contact the outlet.POWER OUTLET
Instruments and controls
2-33
Page 110 of 345
Black plate (108,1)
Model "Z12-D" EDITED: 2010/ 9/ 27
SIC4138
GLOVE BOX
WARNING
Keep glove box lid closed while driving
to help prevent injury in an accident or a
sudden stop.
To open the glove box, pull the handle.
To close, push the lid in until the lock latches.
SIC4165
WARNING
Do not store objects on the horizontal
surface just above the glove box or on
top of the instrument panel. Objects
can become projectiles and/or interfere
with passenger air bag deployment
causing serious personal injury.
SIC4147
REAR PILLAR POCKET
CAUTION
Do not keep heavy or long objects in
the pocket.
2-36
Instruments and controls