2011 NISSAN CUBE ECO mode
[x] Cancel search: ECO modePage 136 of 345
Black plate (134,1)
Model "Z12-D" EDITED: 2010/ 9/ 27
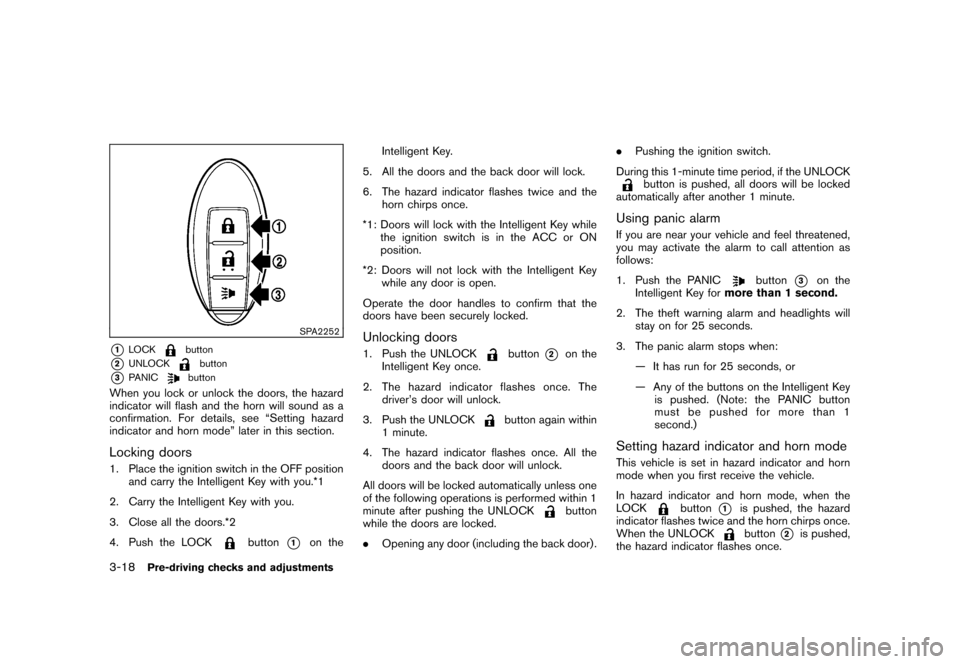
SPA2252
*1
LOCK
button
*2
UNLOCK
button
*3
PANIC
button
When you lock or unlock the doors, the hazard
indicator will flash and the horn will sound as a
confirmation. For details, see “Setting hazard
indicator and horn mode” later in this section.Locking doors1. Place the ignition switch in the OFF positionand carry the Intelligent Key with you.*1
2. Carry the Intelligent Key with you.
3. Close all the doors.*2
4. Push the LOCK
button
*1
on the Intelligent Key.
5. All the doors and the back door will lock.
6. The hazard indicator flashes twice and the horn chirps once.
*1: Doors will lock with the Intelligent Key while the ignition switch is in the ACC or ON
position.
*2: Doors will not lock with the Intelligent Key while any door is open.
Operate the door handles to confirm that the
doors have been securely locked.
Unlocking doors1. Push the UNLOCK
button
*2
on the
Intelligent Key once.
2. The hazard indicator flashes once. The driver’s door will unlock.
3. Push the UNLOCK
button again within
1 minute.
4. The hazard indicator flashes once. All the doors and the back door will unlock.
All doors will be locked automatically unless one
of the following operations is performed within 1
minute after pushing the UNLOCK
button
while the doors are locked.
. Opening any door (including the back door) . .
Pushing the ignition switch.
During this 1-minute time period, if the UNLOCK
button is pushed, all doors will be locked
automatically after another 1 minute.
Using panic alarmIf you are near your vehicle and feel threatened,
you may activate the alarm to call attention as
follows:
1. Push the PANIC
button
*3
on the
Intelligent Key for more than 1 second.
2. The theft warning alarm and headlights will stay on for 25 seconds.
3. The panic alarm stops when: — It has run for 25 seconds, or
— Any of the buttons on the Intelligent Keyis pushed. (Note: the PANIC button
must be pushed for more than 1
second.)
Setting hazard indicator and horn modeThis vehicle is set in hazard indicator and horn
mode when you first receive the vehicle.
In hazard indicator and horn mode, when the
LOCK
button
*1
is pushed, the hazard
indicator flashes twice and the horn chirps once.
When the UNLOCKbutton
*2
is pushed,
the hazard indicator flashes once.
3-18
Pre-driving checks and adjustments
Page 138 of 345
Black plate (136,1)
Model "Z12-D" EDITED: 2010/ 9/ 27
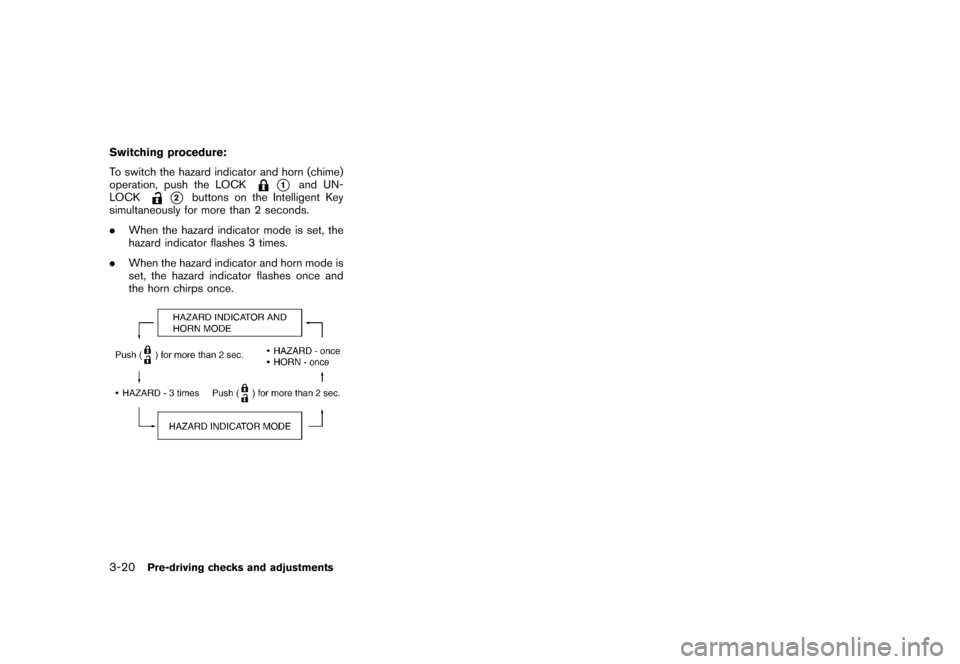
Switching procedure:
To switch the hazard indicator and horn (chime)
operation, push the LOCK
*1
and UN-
LOCK
*2
buttons on the Intelligent Key
simultaneously for more than 2 seconds.
. When the hazard indicator mode is set, the
hazard indicator flashes 3 times.
. When the hazard indicator and horn mode is
set, the hazard indicator flashes once and
the horn chirps once.
3-20
Pre-driving checks and adjustments
Page 143 of 345
Black plate (141,1)
Model "Z12-D" EDITED: 2010/ 9/ 27
.Do not fill a portable fuel container
in the vehicle or trailer. Static elec-
tricity can cause an explosion of
flammable liquid, vapor or gas in
any vehicle or trailer. To reduce the
risk of serious injury or death when
filling portable fuel containers:
— Always place the container on
the ground when filling.
— Do not use electronic devices when filling.
— Keep the pump nozzle in contact with the container while you are
filling it.
— Use only approved portable fuel containers for flammable liquid.
CAUTION
. If fuel is spilled on the vehicle body,
flush it away with water to avoid
paint damage.
. Insert the cap straight into the fuel-
filler tube, then tighten until the
fuel-filler cap clicks. Failure to tight-
en the fuel-filler cap properly may
cause the
malfunction indicator
light (MIL) to illuminate. If the
light illuminates because the fuel-
filler cap is loose or missing, tighten
or install the cap and continue to
drive the vehicle. The
light
should turn off after a few driving
trips. If the
light does not turn
off after a few driving trips, have the
vehicle inspected by a NISSAN deal-
er.
For additional information, see
“Malfunction Indicator Light (MIL)”
in the “2. Instruments and controls”
section.
. The LOOSE FUEL CAP warning
message will be displayed if the
fuel-filler cap is not properly tigh-
tened. Failure to tighten the fuel-
filler cap properly after the LOOSE
FUEL CAP warning message is dis-
played may cause the
Malfunc-
tion Indicator Light (MIL) to
illuminate.
SIC4712
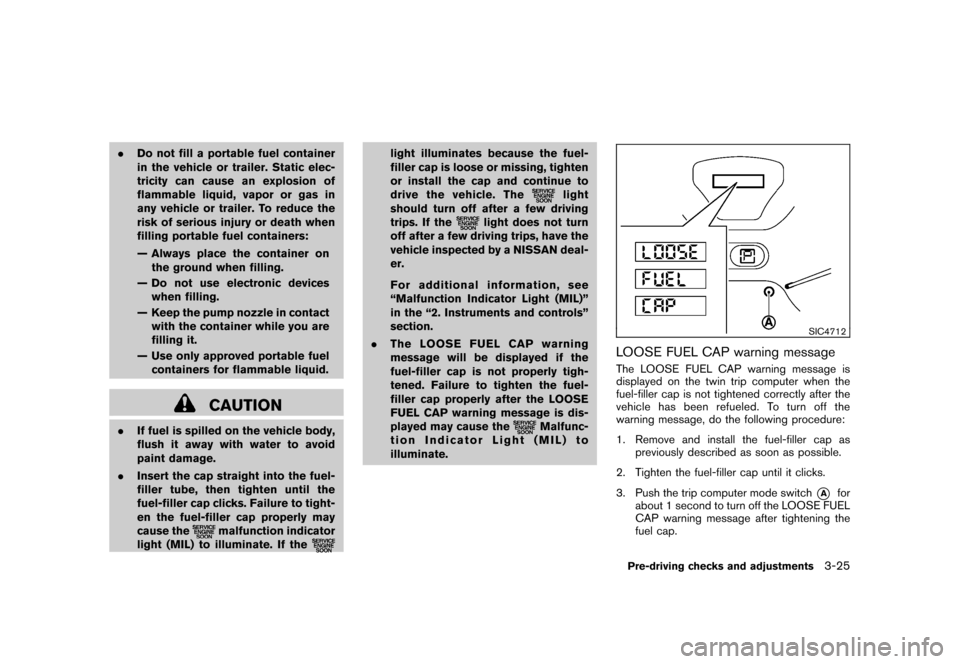
LOOSE FUEL CAP warning messageThe LOOSE FUEL CAP warning message is
displayed on the twin trip computer when the
fuel-filler cap is not tightened correctly after the
vehicle has been refueled. To turn off the
warning message, do the following procedure:
1. Remove and install the fuel-filler cap as previously described as soon as possible.
2. Tighten the fuel-filler cap until it clicks.
3. Push the trip computer mode switch
*A
for
about 1 second to turn off the LOOSE FUEL
CAP warning message after tightening the
fuel cap.
Pre-driving checks and adjustments
3-25
Page 153 of 345
Black plate (151,1)
Model "Z12-D" EDITED: 2010/ 9/ 27
touch. Touch and hold the “Delete” key to
delete all of the characters.
. OK:
Completes the character input.
Touch screen maintenanceIf you clean the display screen, use a dry, soft
cloth. If additional cleaning is necessary, use a
small amount of neutral detergent with a soft
cloth. Never spray the screen with water or
detergent. Dampen the cloth first and then wipe
the screen.HOW TO USE THE BACK BUTTONPush the
BACK button to return to the
previous screen.
HOW TO USE BRIGHTNESS CON-
TROL AND DISPLAY ON/OFF BUTTONTo change the display brightness, push thebutton. Pushing the button again will change the
display to the day or the night display.
If no operation is performed within 5 seconds,
the display will return to the previous display.
Push and hold the
button for more than two
seconds to turn the display off. Push the button
again to turn the display on.
SAA3390
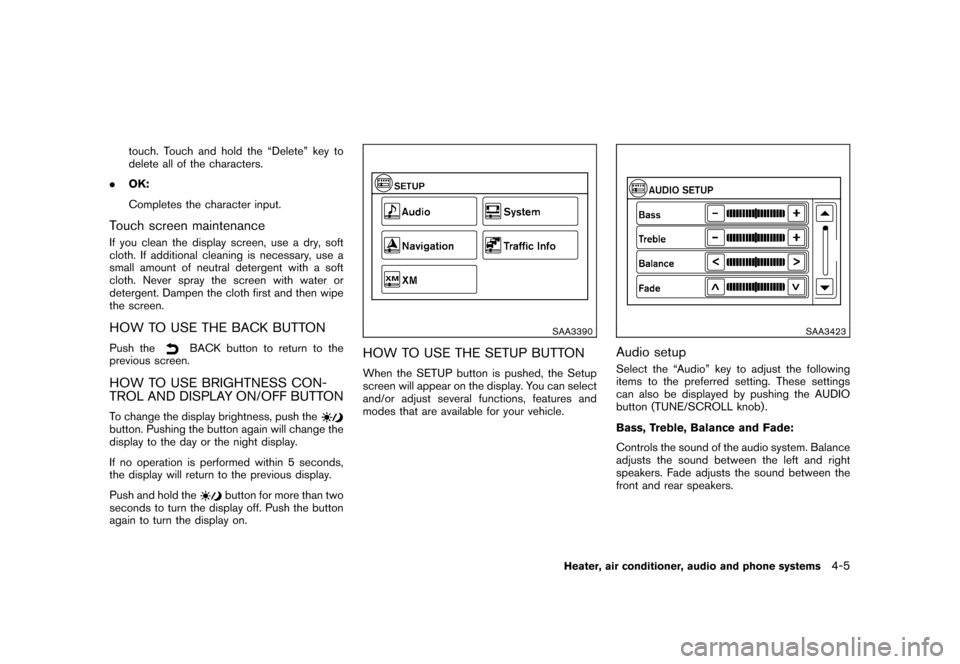
HOW TO USE THE SETUP BUTTONWhen the SETUP button is pushed, the Setup
screen will appear on the display. You can select
and/or adjust several functions, features and
modes that are available for your vehicle.
SAA3423
Audio setupSelect the “Audio” key to adjust the following
items to the preferred setting. These settings
can also be displayed by pushing the AUDIO
button (TUNE/SCROLL knob) .
Bass, Treble, Balance and Fade:
Controls the sound of the audio system. Balance
adjusts the sound between the left and right
speakers. Fade adjusts the sound between the
front and rear speakers.
Heater, air conditioner, audio and phone systems
4-5
Page 156 of 345
Black plate (154,1)
Model "Z12-D" EDITED: 2010/ 9/ 27
set manually. Touch the “+” or “�” key to adjust
the hours and minutes up or down.
.Daylight Savings Time:
When this setting is activated, daylight savings
time is on. Touch the “Daylight Savings Time”
key to toggle the setting on or off.
. Time Zone:
Choose the applicable time zone from the list.
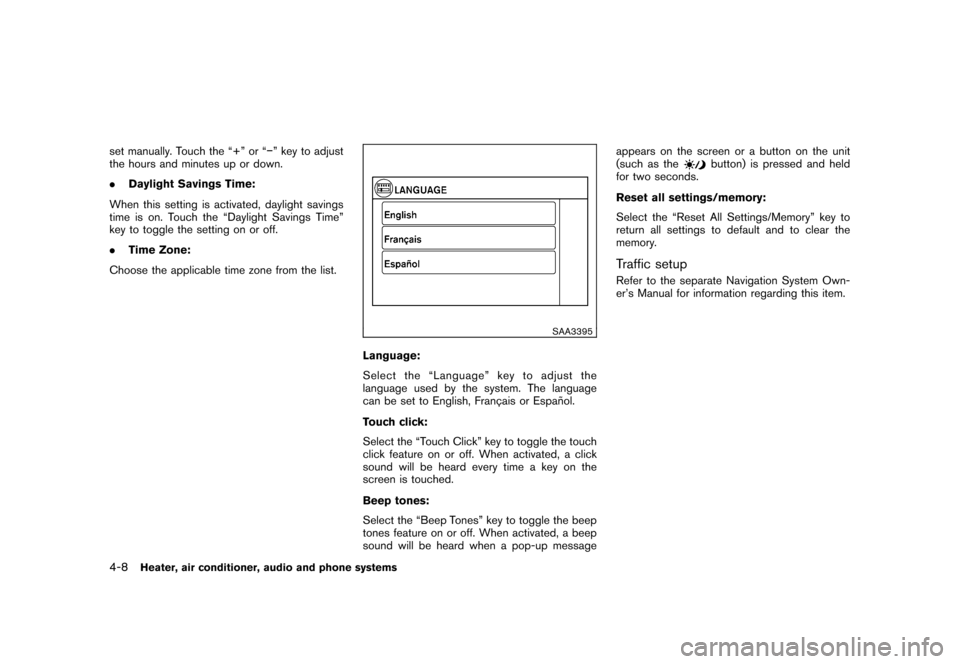
SAA3395
Language:
Select the “Language” key to adjust the
language used by the system. The language
can be set to English, Franc¸ ais or Espan ˜
ol.
Touch click:
Select the “Touch Click” key to toggle the touch
click feature on or off. When activated, a click
sound will be heard every time a key on the
screen is touched.
Beep tones:
Select the “Beep Tones” key to toggle the beep
tones feature on or off. When activated, a beep
sound will be heard when a pop-up message appears on the screen or a button on the unit
(such as the
button) is pressed and held
for two seconds.
Reset all settings/memory:
Select the “Reset All Settings/Memory” key to
return all settings to default and to clear the
memory.
Traffic setupRefer to the separate Navigation System Own-
er’s Manual for information regarding this item.
4-8
Heater, air conditioner, audio and phone systems
Page 161 of 345
Black plate (159,1)
Model "Z12-D" EDITED: 2010/ 9/ 27
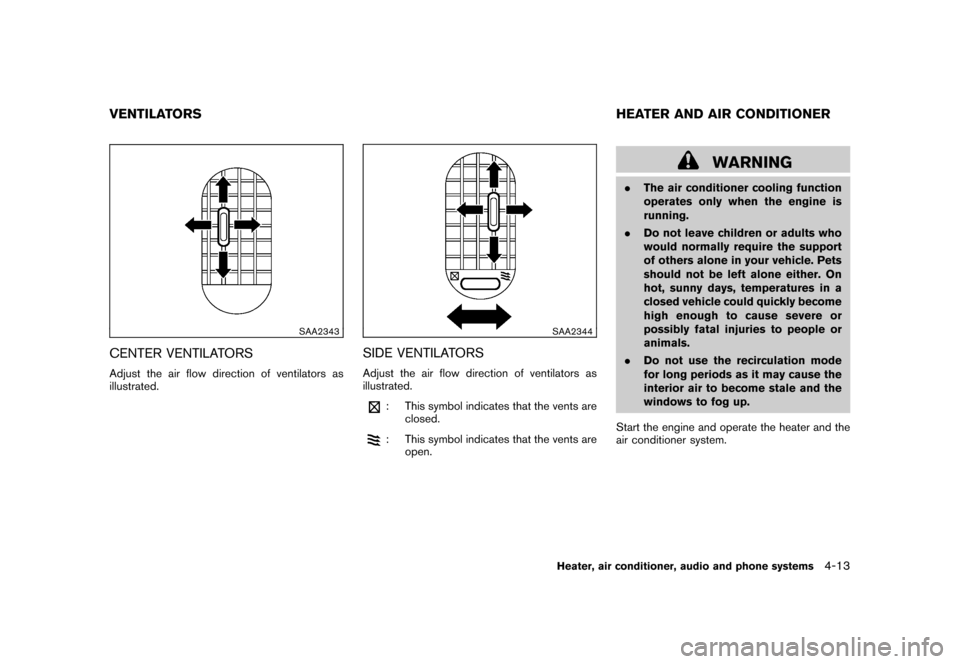
SAA2343
CENTER VENTILATORSAdjust the air flow direction of ventilators as
illustrated.
SAA2344
SIDE VENTILATORSAdjust the air flow direction of ventilators as
illustrated.
: This symbol indicates that the vents areclosed.: This symbol indicates that the vents areopen.
WARNING
.The air conditioner cooling function
operates only when the engine is
running.
. Do not leave children or adults who
would normally require the support
of others alone in your vehicle. Pets
should not be left alone either. On
hot, sunny days, temperatures in a
closed vehicle could quickly become
high enough to cause severe or
possibly fatal injuries to people or
animals.
. Do not use the recirculation mode
for long periods as it may cause the
interior air to become stale and the
windows to fog up.
Start the engine and operate the heater and the
air conditioner system.
VENTILATORS HEATER AND AIR CONDITIONER
Heater, air conditioner, audio and phone systems
4-13
Page 166 of 345
Black plate (164,1)
Model "Z12-D" EDITED: 2010/ 9/ 27
light will illuminate.)
3. Push the temperature control
,
button to set the desired temperature. The
temperature range is between 60 8F (18 8C)
and 90 8F (32 8C) .
4. To set the automatic control mode, perform one of the following operations.
— When the outside air circulation mode is
on, push and hold the outside air
circulation
button for more than
1.5 seconds.
— When the air recirculation mode is on, push and hold the air recirculation
button for more than 1.5 seconds.
When setting the automatic control mode,
both indicator lights will blink twice indicat-
ing that the system is in the automatic
control mode.
A visible mist may be seen coming from the
ventilators in hot, humid conditions as the air is
cooled rapidly. This does not indicate a mal-
function.
Heating (A/C off):
1. Push the AUTO button. (The AUTO indicator will be displayed.)
2. If the A/C indicator light illuminates, push the A/C button. (The A/C indicator light will turn off.)
3. Push the temperature control
,
button to set the desired temperature. The
temperature range is between 60 8F (18 8C)
and 90 8F (32 8C) .
— Do not set the temperature lower than the outside air temperature. Doing so
may cause the temperature to not be
controlled properly.
— If the windows fog up, use dehumidified heating instead of the A/C off heating.
Dehumidified defrosting/defogging:
1. Push the front defroster
button. (The
indicator light will illuminate.)
2. Turn the temperature control
,
button to set the desired temperature.
— To remove moisture or fog on the front window quickly, set the temperature to
the high temperature and the fan speed
to their maximum level.
— After the windshield is cleared, push the front defroster
button again. (The
indicator light will turn off.)
— When the front defroster
button is
pushed, the air conditioner will auto-
matically turn on to defog the wind-
shield. The outside air circulation mode will be selected to improve the defog-
ging performance.
Manual operationThe manual mode can be used to control the
heater and air conditioner to your desired
settings.
To turn off the heater and air conditioner, push
the OFF button.
Fan speed control:
Turn the fan speed control
,
dial to
adjust the fan speed.
Air flow control:
Push the MODE button to change the air flow
mode.
— Air flows from the center and side ventilators.— Air flows from the center and sideventilators and foot outlets.— Air flows mainly from the foot outlets.— Air flows from the defroster outlets andfoot outlets.
Temperature control:
Push the temperature control
,
button
to set the desired temperature.
4-18
Heater, air conditioner, audio and phone systems
Page 167 of 345
Black plate (165,1)
Model "Z12-D" EDITED: 2010/ 9/ 27
The temperature range is between 608F (188C)
and 90 8F (32 8C) .
Air recirculation:
Push the air recirculation
button to change
the air circulation mode. When the indicator light
illuminates, the flowing air is recirculated inside
the vehicle.
Outside air circulation:
Push the outside air circulation
button to
change the air circulation mode. When the
indicator light illuminates, the flowing air is
drawn from outside the vehicle.
Automatic air intake control:
To set the automatic control mode, perform one
of the following operations.
. When the outside air circulation mode is on,
push and hold the outside air circulation
button for more than 1.5 seconds.
. When the air recirculation mode is on, push
and hold the air recirculation
button for
more than 1.5 seconds.
When setting the automatic control mode, both
indicator lights will blink twice indicating that the
system is in the automatic control mode.
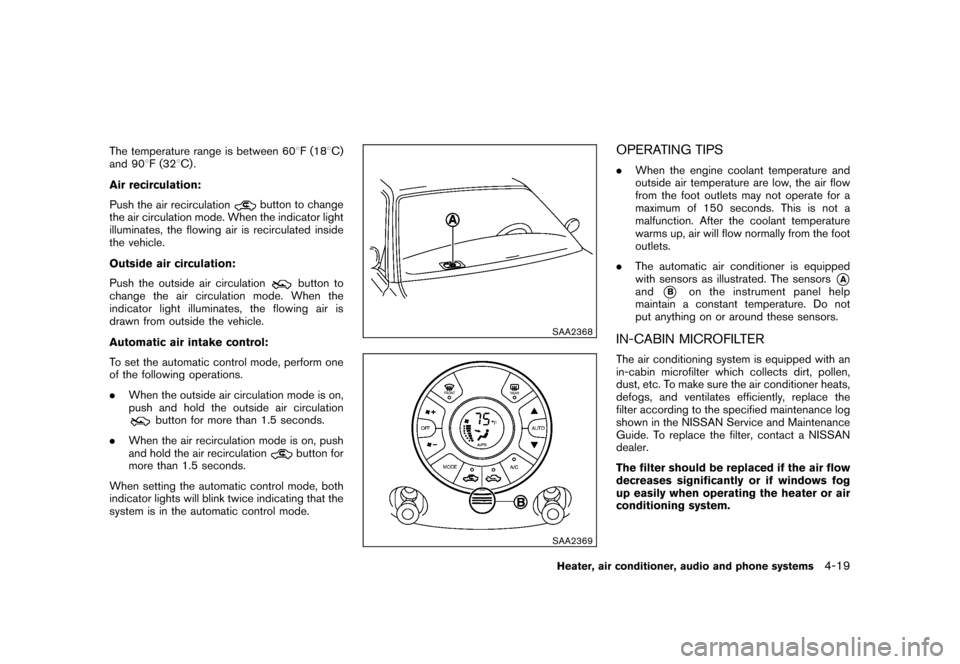
SAA2368SAA2369
OPERATING TIPS. When the engine coolant temperature and
outside air temperature are low, the air flow
from the foot outlets may not operate for a
maximum of 150 seconds. This is not a
malfunction. After the coolant temperature
warms up, air will flow normally from the foot
outlets.
. The automatic air conditioner is equipped
with sensors as illustrated. The sensors
*A
and
*B
on the instrument panel help
maintain a constant temperature. Do not
put anything on or around these sensors.
IN-CABIN MICROFILTERThe air conditioning system is equipped with an
in-cabin microfilter which collects dirt, pollen,
dust, etc. To make sure the air conditioner heats,
defogs, and ventilates efficiently, replace the
filter according to the specified maintenance log
shown in the NISSAN Service and Maintenance
Guide. To replace the filter, contact a NISSAN
dealer.
The filter should be replaced if the air flow
decreases significantly or if windows fog
up easily when operating the heater or air
conditioning system.
Heater, air conditioner, audio and phone systems
4-19