Page 111 of 489
●When a spare tire is mounted or a wheel
is replaced, tire pressure will not be
indicated, the TPMS will not function
and the low tire pressure warning light
will flash for approximately 1 minute.
The light will remain on after 1 minute.
Contact your NISSAN dealer as soon as
possible for tire replacement and/or
system resetting.
● Replacing tires with those not originally
specified by NISSAN could affect the
proper operation of the TPMS.
Page 128 of 489
To sound the horn, push near the horn icon of the
steering wheel.
Page 129 of 489

●If any malfunctions are found or the
heated seat does not operate, turn the
switch off and have the system checked
by your NISSAN dealer.
● The battery could run down if the seat
heater is operated while the engine is
not running.
The heated steering wheel system is designed to
operate only when the surface temperature of the
steering wheel is below approximately 68°F
(20°C) .
Push the heated steering wheel switch to warm
the steering wheel after the engine starts. The
indicator light will come on.
If the surface temperature of the steering wheel is
below 68°F (20°C) , the system will heat the
steering wheel to approximately 86°F (30°C) ,
then turn off automatically.
Push the switch again to turn the heated steering
wheel off manually. The indicator light will go off. NOTE:
The heated steering wheel switch is
equipped with a 30 minute timer. After the
switch has been activate for 30 minutes,
the system will automatically turn off.If the
surface temperature of the steering wheel
is above 68°F (20°C) when the switch is
turned on, the system will not heat the
steering wheel. This is not a malfunction.
Page 130 of 489
The vehicle should be driven with the Vehicle
Dynamic Control (VDC) system on for most driv-
ing conditions.
If the vehicle is stuck in mud or snow, the VDC
system reduces the engine output to reduce
wheel spin. The engine speed will be reduced
even if the accelerator is depressed to the floor. If
maximum engine power is needed to free a stuck
vehicle, turn the VDC system off.
To turn off the VDC system, push the VDC OFF
switch. The
Page 144 of 489
 on
entire roof rack. Be sure load is evenly distributed
across both crossbars. Be careful that your ve-
hic")
Always distribute the luggage evenly on the roof
rack. Do not load more than 200 lbs (91 kg) on
entire roof rack. Be sure load is evenly distributed
across both crossbars. Be careful that your ve-
hicle does not exceed the Gross Vehicle Weight
Rating (GVWR) or its Gross Axle Weight Rating
(GAWR front and rear) . The GVWR and GAWR
are located on the F.M.V.S.S. label (located on
the driver’s door pillar) . For more information
regarding GVWR and GAWR, refer to “Vehicle
loading information” in the “Technical and con-
sumer information” section later in this manual.The crossbars can be adjusted forward and
backward. Loosen the thumbwheel
�1and ad-
just the crossbar to the desired position. Tighten
the thumbwheel. Place your luggage on the bars
and secure the luggage with rope to the utility
loops
�2. Do not place luggage on the side rails
or tie rope directly to the side rails. Always be
sure the thumbwheels are fully tightened to keep
the crossbar in place. Do not use utility loops for
any purpose other than securing luggage.
POWER WINDOWS
Page 185 of 489
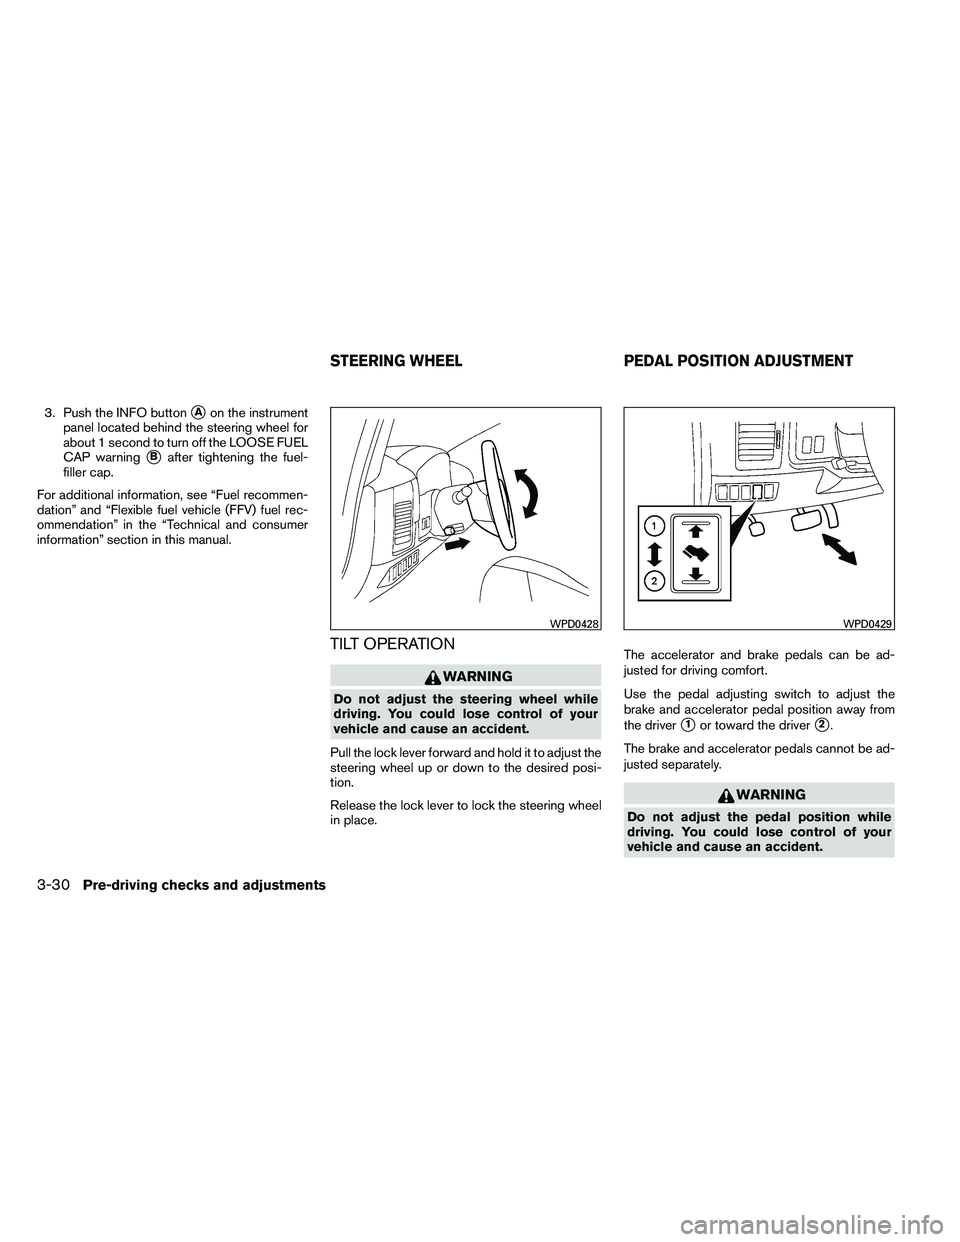
3. Push the INFO button�Aon the instrument
panel located behind the steering wheel for
about 1 second to turn off the LOOSE FUEL
CAP warning
�Bafter tightening the fuel-
filler cap.
For additional information, see “Fuel recommen-
dation” and “Flexible fuel vehicle (FFV) fuel rec-
ommendation” in the “Technical and consumer
information” section in this manual.
TILT OPERATION
Page 269 of 489

1. Volume control switch
2. MODE select switch
3. POWER on/off switch
4. Tuning switch1. Volume control switch
2. Phone operation switch
3. POWER on and MODE select switch
4. Tuning switch
STEERING WHEEL SWITCH FOR
AUDIO CONTROL
The audio system can be operated using the
controls on the steering wheel.
POWER on/off switch
If you have the Type A switch, with the ignition
switch placed in the ACC or ON position, push
the POWER switch to turn the audio system on
or off.
If you have the Type B switch, with the ignition
switch placed in the ACC or ON position, push
the MODE switch to turn the audio system on.
MODE select switch
Push the mode select switch to change the mode
in the following sequence: PRESET A
→PRE-
SET B →PRESET C →Music Box** (if so
equipped) →CD* →CompactFlash�* (if so
equipped) →DVD* (if so equipped) →AUX***.
*These modes are only available when compat-
ible media storage is inserted into the device.
**This mode is only available when music has
been downloaded into the Music Box hard-disk
drive audio system.
***This mode is only available when a compatible
auxiliary device is plugged into the AUX jack.
Volume control switch
Push the volume control switch up or down to
increase or decrease the volume.
Page 291 of 489

●Numbers can be spoken in small groups.
The system will prompt you to continue en-
tering digits, if desired.
Example: 1-800-662-6200
– “One eight zero zero”
The system repeats the numbers and
prompts you to enter more.
– “six six two”
The system repeats the numbers and
prompts you to enter more.
– “six two zero zero”
● Say “pound” for “#”. Say “star” for “*” (avail-
able when using the “Call International”
command and the “Send” command during
a call) .
● Say “plus” for “+” (available only when using
the “Call International” command) .
● Say “pause” for a 2 second pause (available
only when storing a phone book number) .
● You can say “star” for “*” and “pound” for “#”
at any time in any position of the phone
number (available only when using “Call In-
ternational” command) .
See “List of voice commands” and “Interna-
tional” in this section for more information. Example: 1-555-1212 *123
– “One five five five one two one two star
one two three”
NOTE:
For best results, say phone numbers as
single digits.
The voice command “Help” is available at any
time. Please use the “Help” command to get
information on how to use the system.
CONTROL BUTTONS
The control buttons for the Bluetooth� Hands-
Free Phone System are located on the steering
wheel.


 system on for most driv-
ing conditions.
If the vehicle is stuck in mud or snow, the VDC
system reduces the engine output to reduce")