Page 241 of 446

Connecting iPod�
To connect an iPod�to the vehicle so that the
iPod� can be controlled with the audio system
controls and display screen")
iPod�* PLAYER OPERATION WITH
NAVIGATION SYSTEM (if so
equipped)
Connecting iPod�
To connect an iPod�to the vehicle so that the
iPod� can be controlled with the audio system
controls and display screen, use the USB jack
located in the center console. Open the protec-
tive cover
�1on the USB jack in the center
console. Then connect the iPod�-specific end of
the cable to the iPod� and the USB end of the
cable to the USB jack on the vehicle. If your iPod�
supports charging via a USB connection, its bat- tery will be charged while connected to the ve-
hicle with the ignition switch in the ACC or ON
position.
While connected to the vehicle, the iPod�
can
only be operated by the vehicle audio controls.
To disconnect the iPod� from the vehicle, remove
the USB end of the cable from the USB jack on
the vehicle, then remove the cable from the
iPod�.
*iPod �is a trademark of Apple Inc., registered in
the U.S. and other countries.
Compatibility
The following models are compatible:
● iPod� 5th Generation version 1.2.3
● iPod� Classic - version 1.1.1
● iPod� Touch - version 2.0.0*
● iPod� Nano - 1st generation version 1.3.1
● iPod� Nano - 2nd generation version 1.1.3
● iPod� Nano - 3rd generation version 1.1.3
● iPod� Nano - 4th generation version 1.0.4
● iPod� Nano - 5th generation version 1.0.1
* Some features of this iPod� may not be fully
functional. Make sure that your iPod�
firmware is updated to
the version indicated above.
Page 242 of 446

Audio main operation
Place the ignition switch in the ACC or ON
position. Press the DISC·AUX button repeatedly
to switch to the iPod�mode.
If the system has been turned off while the iPod�
was playing, pressing the VOL/ON·OFF control
knob will start the iPod�.
DISC·AUX button:
When the DISC·AUX button is pressed with the
system off and the iPod� connected, the system
will turn on. If another audio source is playing and
the iPod� is connected, press the DISC·AUX but-
ton repeatedly until the center display changes to
the iPod� mode.
Interface:
The interface for iPod� operation shown on the
vehicle center display is similar to the iPod� in-
terface. Use the touchscreen to control your fa-
vorite settings.
The following items can be chosen from the menu
list screen. For further information about each
item, see the iPod� Owner’s Manual.
● Now Playing
● Playlists
● Artists
● Albums ●
Songs
● Podcasts
● Genres
● Composers
● Audiobooks
● Shuffle Songs
The following keys shown on the screen are also
available: ● Menu: returns to the previous screen.
●
Page 243 of 446
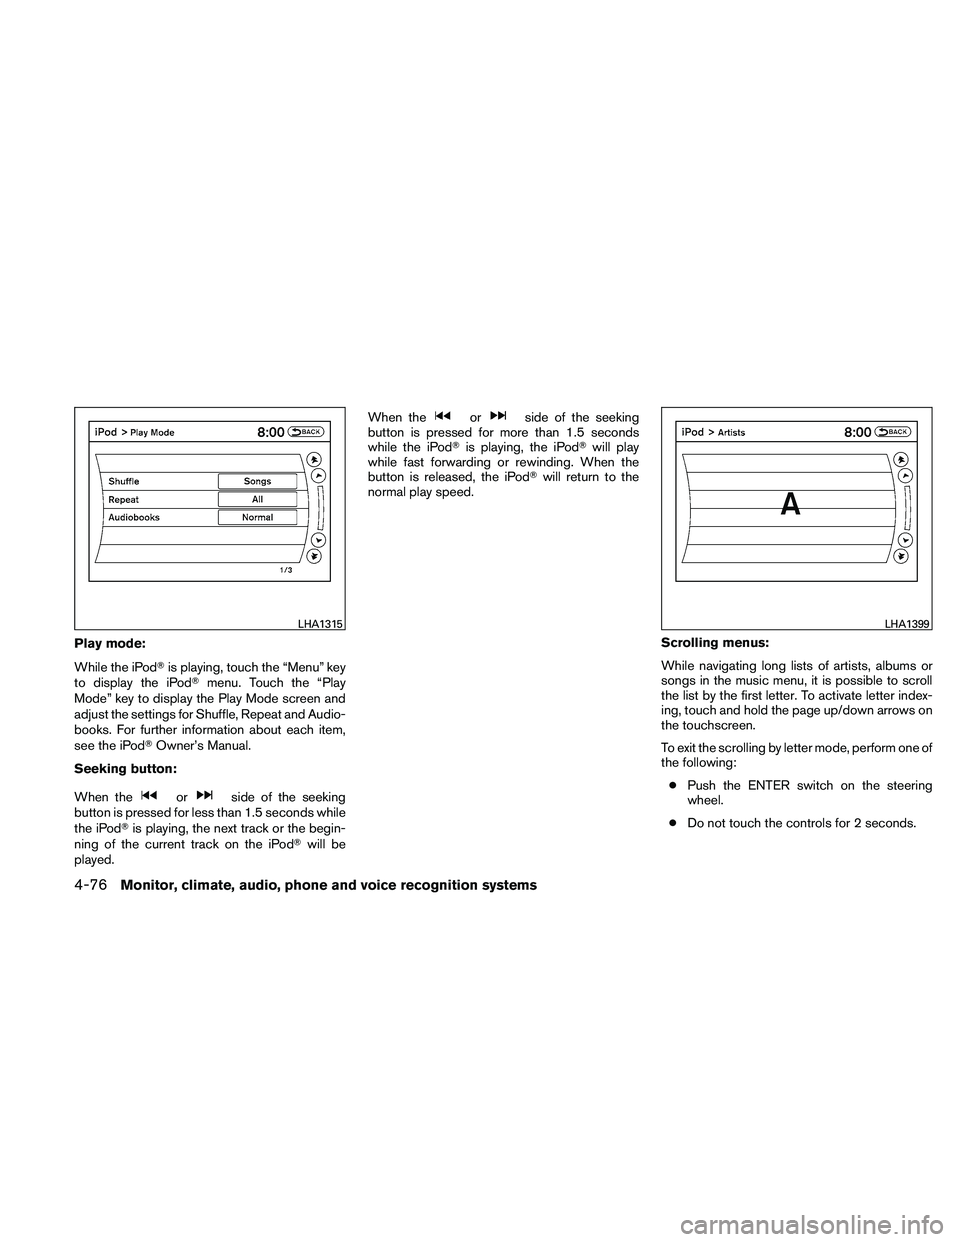
Play mode:
While the iPod�is playing, touch the “Menu” key
to display the iPod� menu. Touch the “Play
Mode” key to display the Play Mode screen and
adjust the settings for Shuffle, Repeat and Audio-
books. For further information about each item,
see the iPod� Owner’s Manual.
Seeking button:
When the
Page 245 of 446
If the title information of the track being recorded
is stored either in the hard drive or in the CD, the
title is automatically displayed on the screen. For
title acquisition from the hard drive, music recog-
nition technology and related data are provided
by Gracenote�.
To view the details of the track, touch the “Text”
key on the screen. The track name and album title
are displayed on the screen.
If a track is not recorded successfully due to
skipping sounds, the
Page 247 of 446
●My Playlists
Displays the playlists stored in the system.
Touch the “Edit” key next to a playlist to
perform the following operations for that
playlist:
– Add Current Song - adds the song cur- rently playing to the playlist.
– Add Songs by Album - adds songs to the playlist by album.
– Add Songs by Artist - adds songs to the playlist by artist.
– Edit Song Order - edits the order of the songs in the playlist. – Edit Name - changes the name of the
playlist.
– Delete Songs - deletes songs from the playlist.
Page 249 of 446
Music Box settings
To set up the Music Box system to your preferred
settings, touch the “Menu” key during playback,
then touch the “Music Box Settings” key.● Music Box Used/Free Space:
Displays the number of tracks and albums
stored on the hard drive. The percentage of
hard drive space taken up and the amount of
remaining recording time left are also shown.
● Automatic Recording:
When this item is turned to ON, the Music
Box system automatically starts recording
when a CD is inserted. ●
Delete Songs from Music Box:
Delete music data stored on the hard drive.
● Recording Quality:
Set the recording quality of 105 kbps or 132
kbps. The default is set to 132 kbps.
● CDDB Version:
Shows the version of CDDB (Compact Disc
Data Base) .
Page 252 of 446
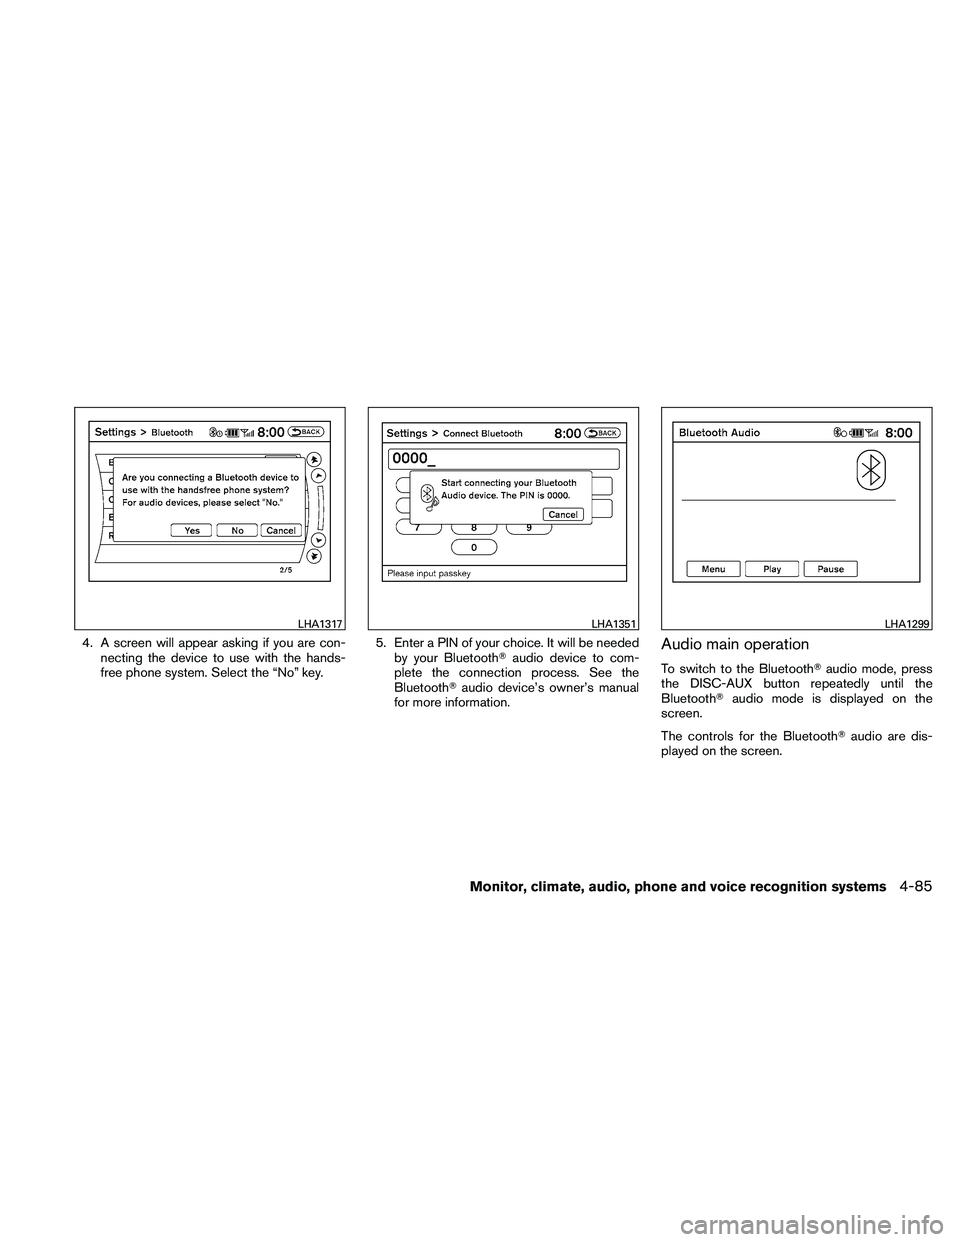
4. A screen will appear asking if you are con-necting the device to use with the hands-
free phone system. Select the “No” key. 5. Enter a PIN of your choice. It will be needed
by your Bluetooth� audio device to com-
plete the connection process. See the
Bluetooth� audio device’s owner’s manual
for more information.Audio main operation
To switch to the Bluetooth� audio mode, press
the DISC-AUX button repeatedly until the
Bluetooth� audio mode is displayed on the
screen.
The controls for the Bluetooth� audio are dis-
played on the screen.
Page 253 of 446
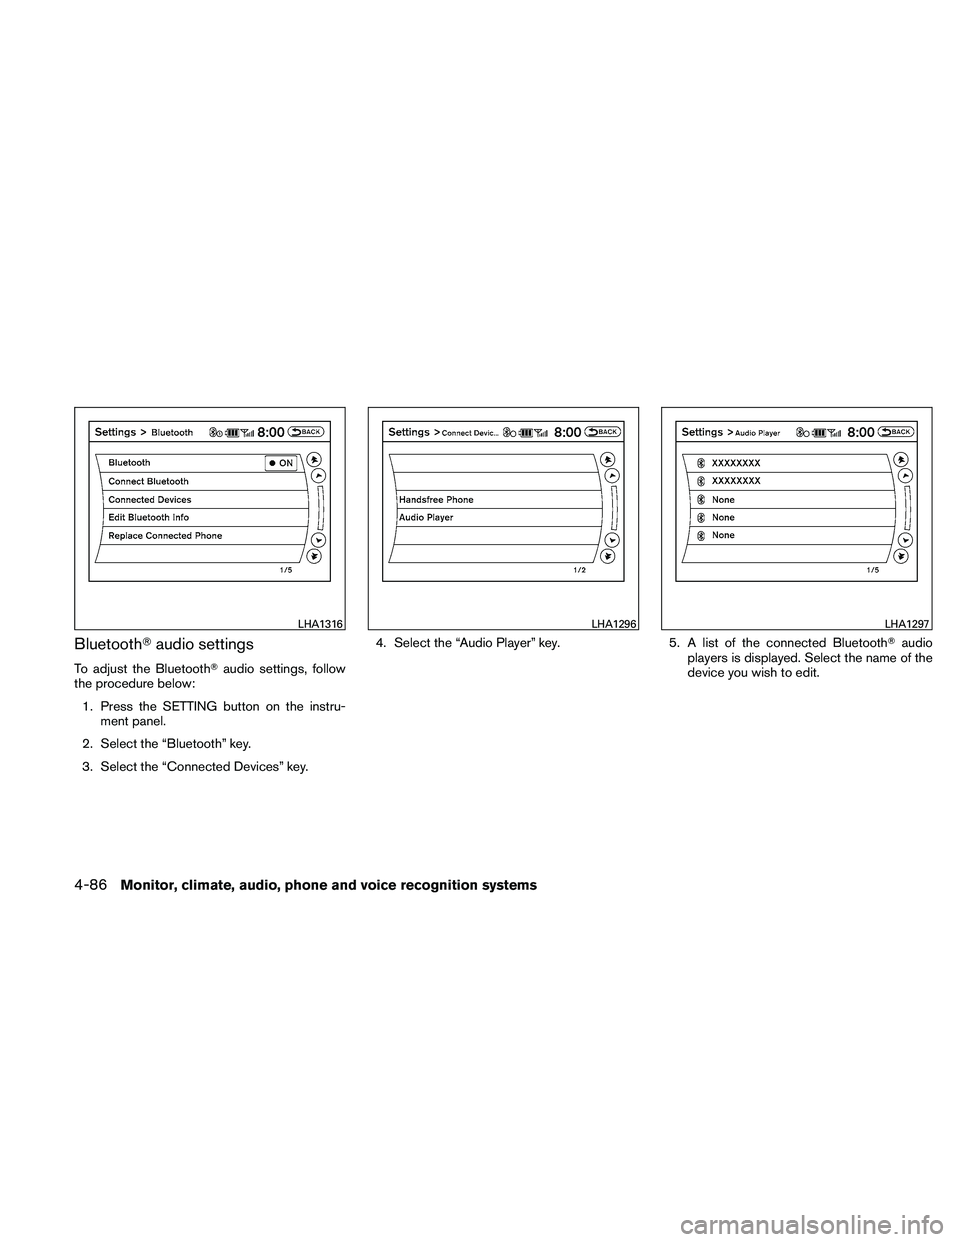
Bluetooth�audio settings
To adjust the Bluetooth� audio settings, follow
the procedure below:
1. Press the SETTING button on the instru- ment panel.
2. Select the “Bluetooth” key.
3. Select the “Connected Devices” key. 4. Select the “Audio Player” key.
5. A list of the connected Bluetooth�audio
players is displayed. Select the name of the
device you wish to edit.