2011 NISSAN 370Z ROADSTER headlight
[x] Cancel search: headlightPage 93 of 419
Black plate (89,1)
Model "Z34-D" EDITED: 2010/ 7/ 27
automatically when it is dark and turn off the
headlights when it is light.
If the ignition switch is pushed to the OFF
position and one of the doors is opened and this
condition is continued, the headlights remain on
for 5 minutes.
Automatic headlights off delay:
You can keep the headlights on for up to 180
seconds after you push the ignition switch to
OFF and open any door then close all the doors.
You can adjust the period of the automatic
headlights off delay from 0 seconds (OFF) to
180 seconds. The factory default setting is 45
seconds.
For automatic headlights off delay setting, see
“Light Off Delay” in the “4. Center display,
heater, air conditioner, audio, phone and voice
recognition systems” section.
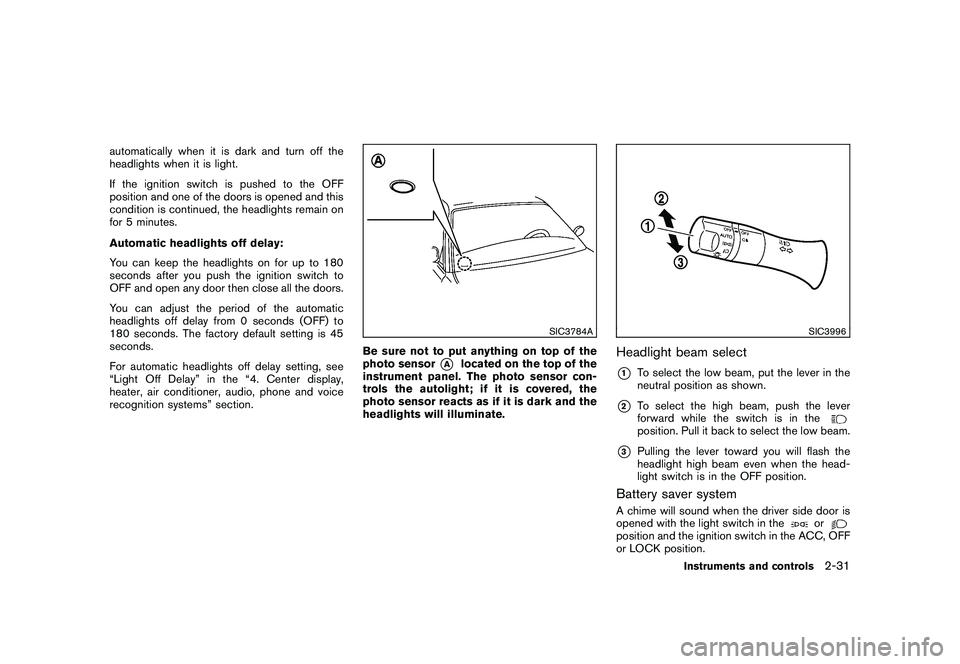
SIC3784A
Be sure not to put anything on top of the
photo sensor
*A
located on the top of the
instrument panel. The photo sensor con-
trols the autolight; if it is covered, the
photo sensor reacts as if it is dark and the
headlights will illuminate.
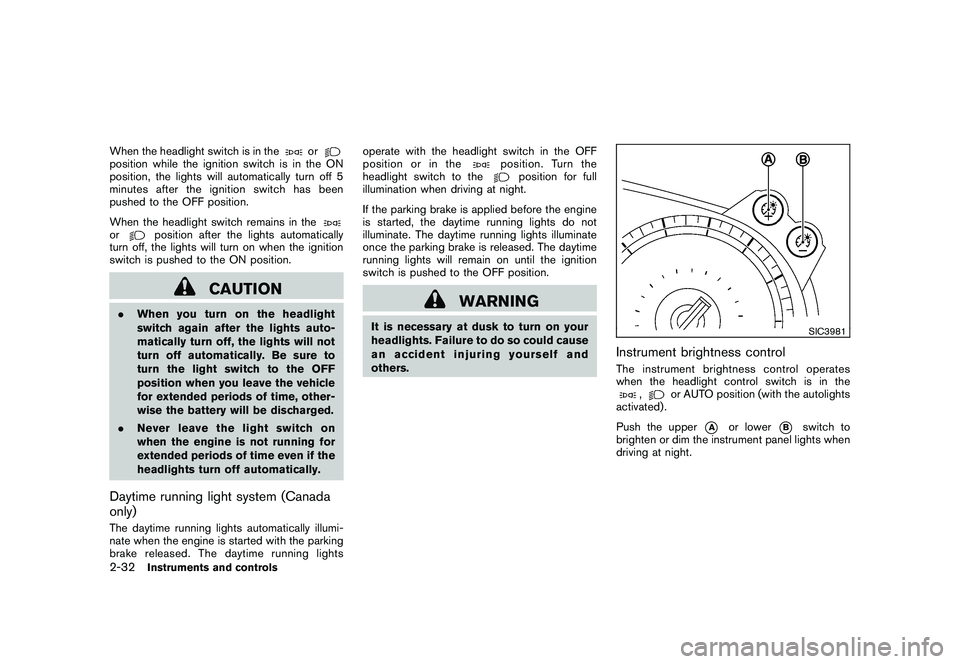
SIC3996
Headlight beam select*1
To select the low beam, put the lever in the
neutral position as shown.
*2
To select the high beam, push the lever
forward while the switch is in theposition. Pull it back to select the low beam.
*3
Pulling the lever toward you will flash the
headlight high beam even when the head-
light switch is in the OFF position.
Battery saver systemA chime will sound when the driver side door is
opened with the light switch in the
or
position and the ignition switch in the ACC, OFF
or LOCK position.
Instruments and controls
2-31
Page 94 of 419
Black plate (90,1)
Model "Z34-D" EDITED: 2010/ 7/ 27
When the headlight switch is in the
or
position while the ignition switch is in the ON
position, the lights will automatically turn off 5
minutesaftertheignitionswitchhasbeen
pushed to the OFF position.
When the headlight switch remains in theor
position after the lights automatically
turn off, the lights will turn on when the ignition
switch is pushed to the ON position.
CAUTION
. When you turn on the headlight
switch again after the lights auto-
matically turn off, the lights will not
turn off automatically. Be sure to
turn the light switch to the OFF
position when you leave the vehicle
for extended periods of time, other-
wise the battery will be discharged.
. Never leave the light switch on
when the engine is not running for
extended periods of time even if the
headlights turn off automatically.Daytime running light system (Canada
only)The daytime running lights automatically illumi-
nate when the engine is started with the parking
brake released. The daytime running lights operate with the headlight switch in the OFF
position or in the
position. Turn the
headlight switch to the
position for full
illumination when driving at night.
If the parking brake is applied before the engine
is started, the daytime running lights do not
illuminate. The daytime running lights illuminate
once the parking brake is released. The daytime
running lights will remain on until the ignition
switch is pushed to the OFF position.
WARNING
It is necessary at dusk to turn on your
headlights. Failure to do so could cause
an accident injuring yourself and
others.
SIC3981
Instrument brightness controlThe instrument brightness control operates
when the headlight control switch is in the
,
or AUTO position (with the autolights
activated) .
Push the upper
*A
or lower
*B
switch to
brighten or dim the instrument panel lights when
driving at night.
2-32
Instruments and controls
Page 95 of 419
Black plate (91,1)
Model "Z34-D" EDITED: 2010/ 7/ 27
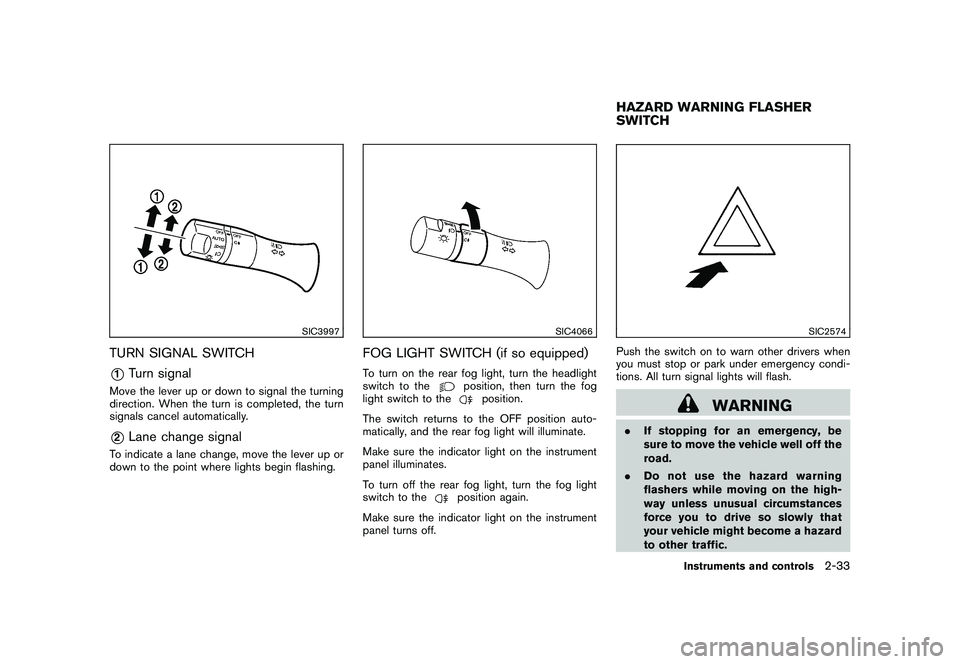
SIC3997
TURN SIGNAL SWITCH*1
Turn signal
Move the lever up or down to signal the turning
direction. When the turn is completed, the turn
signals cancel automatically.*2
Lane change signal
To indicate a lane change, move the lever up or
down to the point where lights begin flashing.
SIC4066
FOG LIGHT SWITCH (if so equipped)To turn on the rear fog light, turn the headlight
switch to the
position, then turn the fog
light switch to the
position.
The switch returns to the OFF position auto-
matically, and the rear fog light will illuminate.
Make sure the indicator light on the instrument
panel illuminates.
To turn off the rear fog light, turn the fog light
switch to the
position again.
Make sure the indicator light on the instrument
panel turns off.
SIC2574
Push the switch on to warn other drivers when
you must stop or park under emergency condi-
tions. All turn signal lights will flash.
WARNING
. If stopping for an emergency, be
sure to move the vehicle well off the
road.
. Do not use the hazard warning
flashers while moving on the high-
way unless unusual circumstances
force you to drive so slowly that
your vehicle might become a hazard
to other traffic.HAZARD WARNING FLASHER
SWITCH
Instruments and controls
2-33
Page 99 of 419
Black plate (95,1)
Model "Z34-D" EDITED: 2010/ 7/ 27
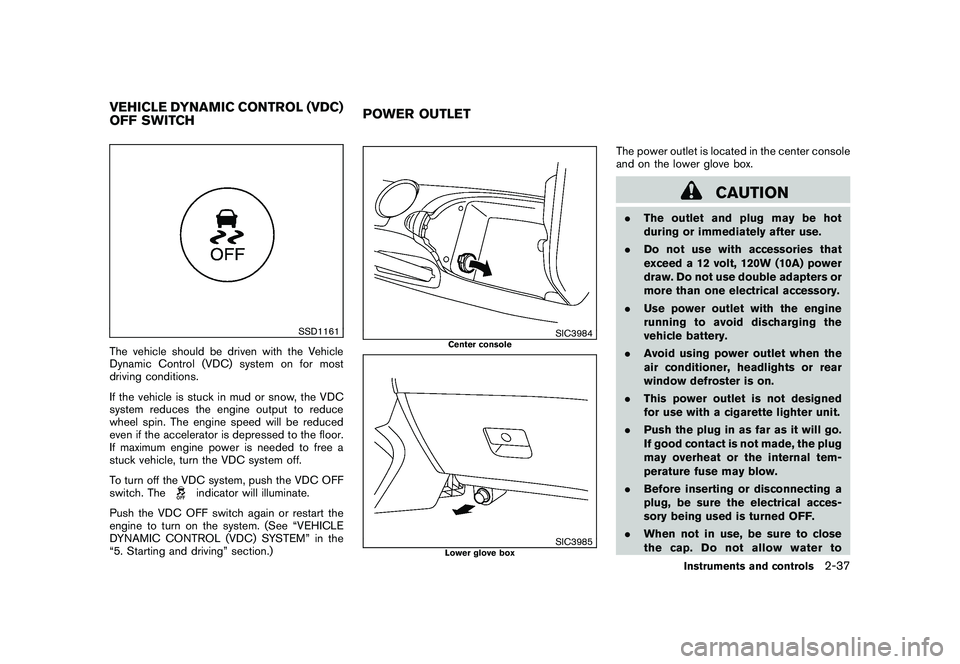
SSD1161
The vehicle should be driven with the Vehicle
Dynamic Control (VDC) system on for most
driving conditions.
If the vehicle is stuck in mud or snow, the VDC
system reduces the engine output to reduce
wheel spin. The engine speed will be reduced
even if the accelerator is depressed to the floor.
If maximum engine power is needed to free a
stuck vehicle, turn the VDC system off.
To turn off the VDC system, push the VDC OFF
switch. The
indicator will illuminate.
Push the VDC OFF switch again or restart the
engine to turn on the system. (See “VEHICLE
DYNAMIC CONTROL (VDC) SYSTEM” in the
“5. Starting and driving” section.)
SIC3984
Center console
SIC3985
Lower glove box
The power outlet is located in the center console
and on the lower glove box.
CAUTION
. The outlet and plug may be hot
during or immediately after use.
. Do not use with accessories that
exceed a 12 volt, 120W (10A) power
draw. Do not use double adapters or
more than one electrical accessory.
. Use power outlet with the engine
running to avoid discharging the
vehicle battery.
. Avoid using power outlet when the
air conditioner, headlights or rear
window defroster is on.
. This power outlet is not designed
for use with a cigarette lighter unit.
. Push the plug in as far as it will go.
If good contact is not made, the plug
may overheat or the internal tem-
perature fuse may blow.
. Before inserting or disconnecting a
plug, be sure the electrical acces-
sory being used is turned OFF.
. When not in use, be sure to close
the cap. Do not allow water to
VEHICLE DYNAMIC CONTROL (VDC)
OFF SWITCH POWER OUTLET
Instruments and controls
2-37
Page 128 of 419
Black plate (124,1)
Model "Z34-D" EDITED: 2010/ 7/ 27
Locking doors, rear hatch/trunk lid and
fuel-filler door1. Push the ignition switch to the OFF positionand make sure you carry the Intelligent Key
with you.*1
2. Close all the doors and the rear hatch/trunk lid.*2
3. Push the LOCK
button
*1
on the
Intelligent Key.
4. All the doors, the rear hatch/trunk lid and fuel-filler door will lock.
5. The hazard indicator flashes twice and the horn chirps once.
*1: Doors and the rear hatch/trunk lid will lock with the Intelligent Key while the ignition
switch is in the ACC or ON position.
*2: Doors and the rear hatch/trunk lid will not lock with the Intelligent Key while any door
or the rear hatch/trunk lid is open.
Unlocking doors, rear hatch/trunk lid and
fuel-filler door1. Push the UNLOCK
button
*2
on the
Intelligent Key once.
2. The hazard indicator flashes once. The driver’s door and fuel-filler door will unlock. 3. Push the UNLOCK
button on the
Intelligent Key again within 60 seconds.
4. The hazard indicator flashes once again. All the doors and the rear hatch/trunk lid will
unlock.
All doors and the rear hatch/trunk lid will be
locked automatically unless one of the following
operations is performed within 1 minute after
pushing the UNLOCKbutton on the
Intelligent Key while the doors are locked. If
during this 1-minute time period, the UNLOCK
button on the Intelligent Key is pushed, all
doors and the rear hatch/trunk lid will be locked
automatically after another 1 minute.
. Opening any door
. Pushing the ignition switch
. Inserting the Intelligent Key into the Intelli-
gent Key port
Opening windowsThe UNLOCK
button operation also allows
you to open a window that is equipped with the
automatic open/close function. (See “POWER
WINDOWS” in the “2. Instruments and con-
trols” section.)
To open the window, push the door UNLOCK
button
*2
on the Intelligent Key for about
3 seconds after the door is unlocked. To stop opening, release the UNLOCK
button.
Window cannot be closed using the Intelligent
Key.
The door window can be opened or closed by
turning the metal key in a door lock. (See
“DOORS” earlier in this section.)Using panic alarmIf you are near your vehicle and feel threatened,
you may activate the alarm to call attention as
follows:
1. Push the PANIC
button
*3
on the Key
for more than 1 second.
2. The theft warning alarm and headlights will stay on for 25 seconds.
3. The panic alarm stops when: .It has run for 25 seconds, or
. Any of the buttons on the Intelligent Key
are pushed. (Note: Panic button should
be pushed for more than 1 second.)
Setting hazard indicator and horn modeThis vehicle is set in hazard indicator and horn
mode when you first receive the vehicle.
In hazard indicator and horn mode, when the
LOCK
button
*1
is pushed, the hazard
3-14
Pre-driving checks and adjustments
Page 151 of 419
Black plate (147,1)
Model "Z34-D" EDITED: 2010/ 7/ 27
SPA2447
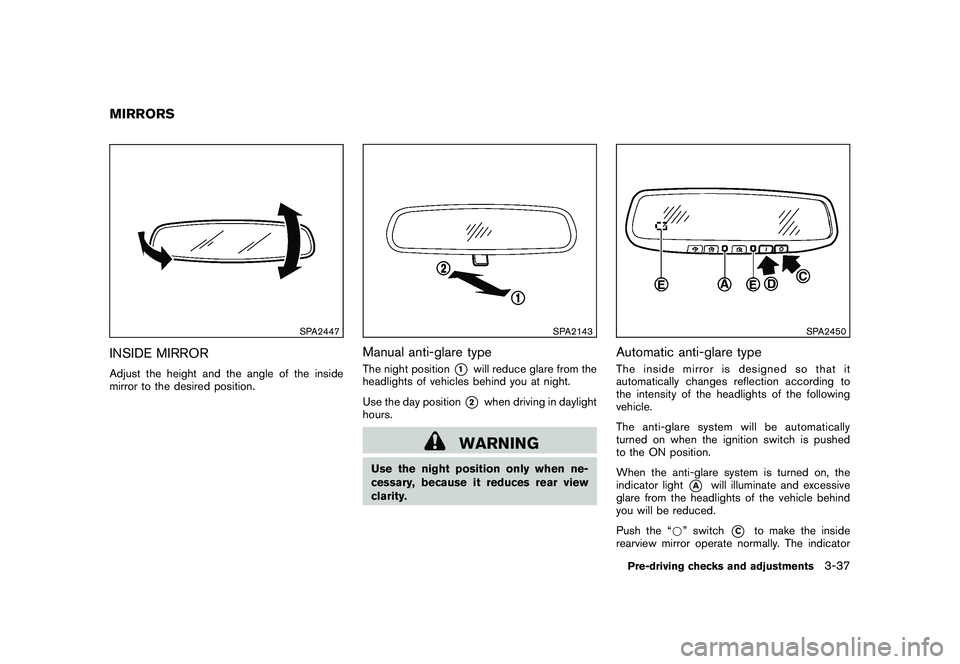
INSIDE MIRRORAdjust the height and the angle of the inside
mirror to the desired position.
SPA2143
Manual anti-glare typeThe night position
*1
will reduce glare from the
headlights of vehicles behind you at night.
Use the day position*2
when driving in daylight
hours.
WARNING
Use the night position only when ne-
cessary, because it reduces rear view
clarity.
SPA2450
Automatic anti-glare typeThe inside mirror is designed so that it
automatically changes reflection according to
the intensity of the headlights of the following
vehicle.
The anti-glare system will be automatically
turned on when the ignition switch is pushed
to the ON position.
When the anti-glare system is turned on, the
indicator light
*A
will illuminate and excessive
glare from the headlights of the vehicle behind
you will be reduced.
Push the “* ” switch
*C
to make the inside
rearview mirror operate normally. The indicator
MIRRORS
Pre-driving checks and adjustments
3-37
Page 168 of 419
Black plate (164,1)
Model "Z34-D" EDITED: 2010/ 7/ 27
SAA2488
Example
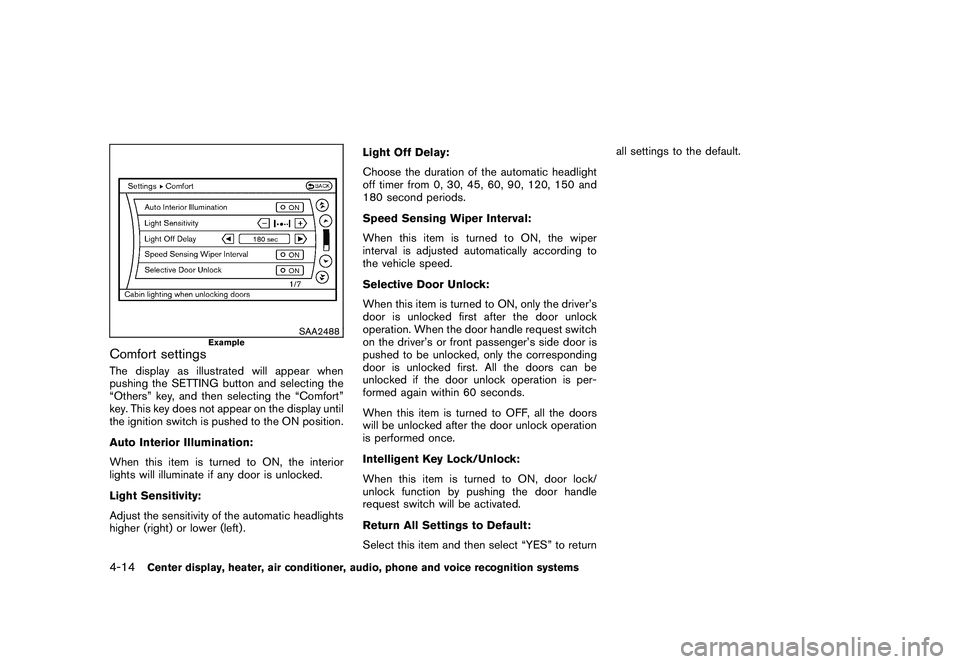
Comfort settingsThe display as illustrated will appear when
pushing the SETTING button and selecting the
“Others” key, and then selecting the “Comfort”
key. This key does not appear on the display until
the ignition switch is pushed to the ON position.
Auto Interior Illumination:
When this item is turned to ON, the interior
lights will illuminate if any door is unlocked.
Light Sensitivity:
Adjust the sensitivity of the automatic headlights
higher (right) or lower (left) .Light Off Delay:
Choose the duration of the automatic headlight
off timer from 0, 30, 45, 60, 90, 120, 150 and
180 second periods.
Speed Sensing Wiper Interval:
When this item is turned to ON, the wiper
interval is adjusted automatically according to
the vehicle speed.
Selective Door Unlock:
When this item is turned to ON, only the driver’s
door is unlocked first after the door unlock
operation. When the door handle request switch
on the driver’s or front passenger’s side door is
pushed to be unlocked, only the corresponding
door is unlocked first. All the doors can be
unlocked if the door unlock operation is per-
formed again within 60 seconds.
When this item is turned to OFF, all the doors
will be unlocked after the door unlock operation
is performed once.
Intelligent Key Lock/Unlock:
When this item is turned to ON, door lock/
unlock function by pushing the door handle
request switch will be activated.
Return All Settings to Default:
Select this item and then select “YES” to returnall settings to the default.4-14
Center display, heater, air conditioner, audio, phone and voice recognition systems
Page 345 of 419
Black plate (25,1)
8 Maintenance and do-it-yourself
Model "Z34-D" EDITED: 2010/ 7/ 28
Maintenance requirement..................................... 8-2
Scheduled maintenance ................................... 8-2
General maintenance ...................................... 8-2
Where to go for service ................................... 8-2
General maintenance .......................................... 8-2
Explanation of maintenance items ....................... 8-2
Maintenance precautions ..................................... 8-5
Engine compartment check locations ...................... 8-7
VQ37VHR engine model. ................................. 8-7
Engine cooling system ......................................... 8-8
Checking engine coolant level ........................... 8-9
Changing engine coolant ................................. 8-9
Engine oil ......................................................... 8-9
Checking engine oil level ................................. 8-9
Changing engine oil and filter .......................... 8-10
Automatic transmission fluid ................................ 8-12
Power steering fluid .......................................... 8-12
Brake and clutch fluid ....................................... 8-13
Brake fluid .................................................. 8-13
Clutch fluid ................................................. 8-13
Window washer fluid ........................................ 8-14
Battery .......................................................... 8-14
Jump starting .............................................. 8-16
Variable voltage control system ............................ 8-16
Drive belts ...................................................... 8-17 Spark plugs
.................................................... 8-17
Replacing spark plugs ................................... 8-18
Air cleaner ...................................................... 8-18
Windshield wiper blades .................................... 8-19
Cleaning .................................................... 8-19
Replacing ................................................... 8-19
Brakes ........................................................... 8-20
Self-adjusting brakes .................................... 8-20
Brake pad wear warning ................................ 8-20
Fuses ............................................................ 8-21
Engine compartment ..................................... 8-21
Passenger compartment ................................ 8-22
Intelligent Key battery replacement ....................... 8-23
Lights ............................................................ 8-25
Coupe ....................................................... 8-25
Roadster .................................................... 8-26
Headlights .................................................. 8-27
Exterior and interior lights ............................... 8-27
Wheels and tires .............................................. 8-29
Tire pressure ............................................... 8-29
Tire labeling ................................................ 8-32
Types of tires .............................................. 8-34
Tire chains .................................................. 8-35
Changing wheels and tires ............................. 8-36
Emergency tire puncture repair kit
(if so equipped) ........................................... 8-38