2011 MITSUBISHI L200 warning
[x] Cancel search: warningPage 216 of 330
lThe unit may not successfully play back a
CD-R/RW that was made by the combina-
tion of writing software, a CD recorder
(CD-R/RW drive) and a disc if they are in-
compatible with one another.
l This player cannot play the
CD-R/RW discs
if the session is not closed.
l This player cannot play
CD-R/RW discs
which contain other than CD-DA or MP3 da-
ta (Video CD, etc.).
l Be sure to observe the handling instructions
for the CD-R/RW disc.WARNINGl Operating the CD player in a manner oth-
er than specifically instructed herein may
result in hazardous radiation exposure.
Do not remove the cover and attempt to
repair the CD player by yourself. There
are no user serviceable parts inside. In
case of malfunction, we recommend you
to have it checked.Antenna E00710500022Pillar antenna* E00710700109
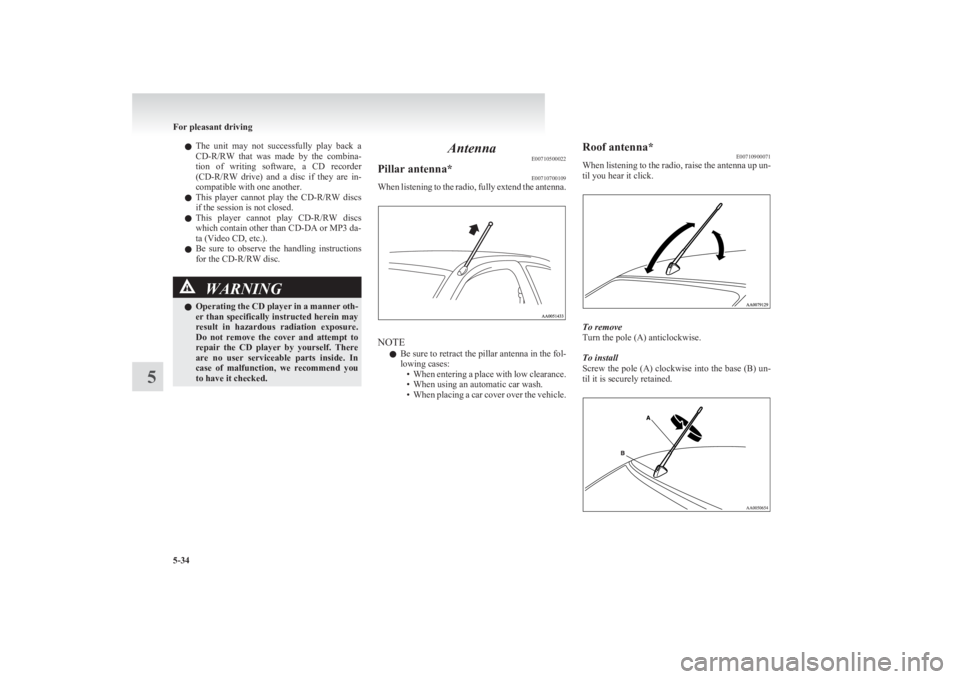
When listening to the radio, fully extend the antenna.
NOTE
l Be sure to retract the pillar antenna in the fol-
lowing cases: •When entering a place with low clearance.
• When using an automatic car wash.
• When placing a car cover over the vehicle.
Roof antenna*
E00710900071
When listening to the radio, raise the antenna up un-
til you hear it click.
To remove
Turn the pole (A) anticlockwise.
To install
Screw the pole (A) clockwise into the base (B) un-
til it is securely retained.
For pleasant driving
5-34
5
Page 228 of 330
Convenient hookE00732900071
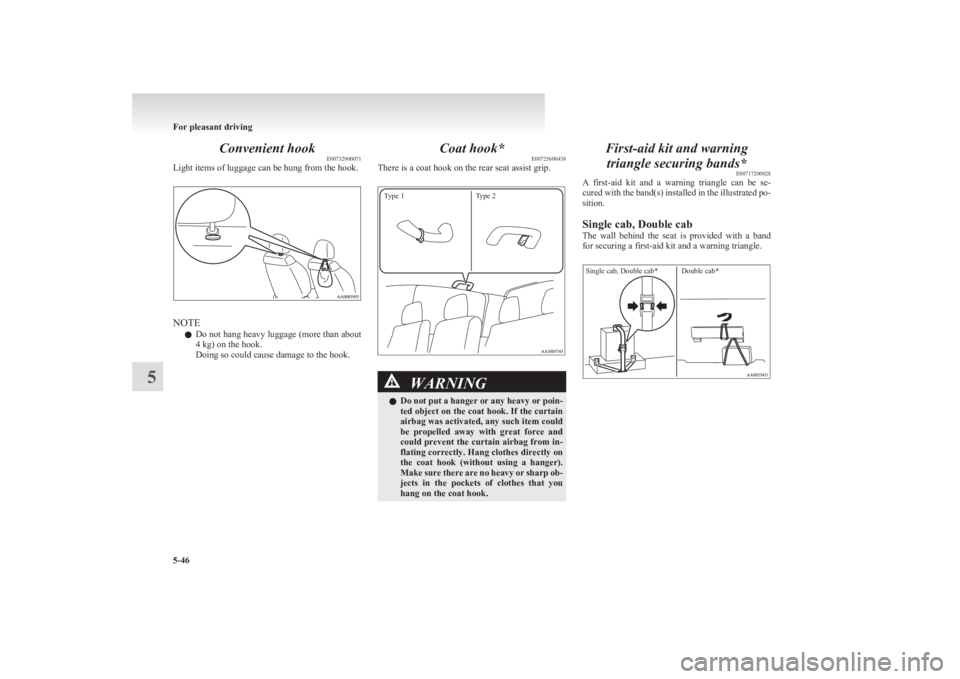
Light items of luggage can be hung from the hook.
NOTE
l Do not hang heavy luggage (more than about
4 kg) on the hook.
Doing so could cause damage to the hook.
Coat hook* E00725600438
There is a coat hook on the rear seat assist grip.
Type 1Type 2
WARNINGl Do not put a hanger or any heavy or poin-
ted object on the coat hook. If the curtain
airbag was activated, any such item could
be propelled away with great force and
could prevent the curtain airbag from in-
flating correctly. Hang clothes directly on
the coat hook (without using a hanger).
Make sure there are no heavy or sharp ob-
jects in the pockets of clothes that you
hang on the coat hook.First-aid kit and warning
triangle securing bands* E00717200028
A first-aid kit and a warning triangle can be se-
cured with the band(s) installed in the illustrated po-
sition.
Single cab, Double cab
The wall behind the seat is provided with a band
for securing a first-aid kit and a warning triangle.
Single cab, Double cab*Double cab*
For pleasant driving
5-46
5
Page 229 of 330
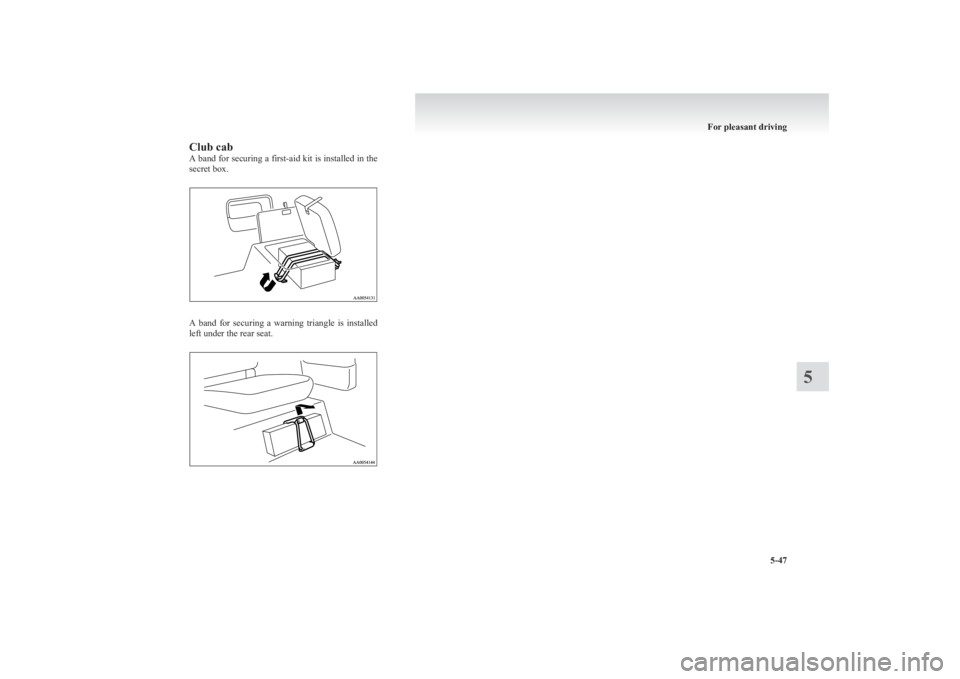
Club cab
A band for securing a first-aid kit is installed in the
secret box.
A band for securing a warning triangle is installed
left under the rear seat.
For pleasant driving
5-47
5
Page 232 of 330

If the vehicle breaks downE00800101166
If the vehicle breaks down on the road, move it to
the shoulder and use the hazard warning flashers and/
or the warning triangle etc.
Refer to “Hazard warning flasher switch” on page
3-34.
If the engine stops/fails
Vehicle operation and control are affected if the en-
gine stops.
Before moving the vehicle to a safe area, be aware
of the following:
l The brake booster becomes inoperative and
the pedal effort will increase. Press down the
brake pedal harder than usual.
l Since the power steering pump is no longer
operative, the steering wheel feels heavy
when turning it.Emergency starting E00800502112
If the engine cannot be started because the battery
is weak or dead, the battery from another vehicle
can be used with jumper cables to start the engine.WARNINGl To start the engine using jumper cables
connected from another vehicle, perform
the correct procedures according to the in-
struction manual. Incorrect procedures
could result in a fire or explosion or dam-
age to the vehicles.
1. Get the vehicles close enough so the jumper
cables can reach, but be sure the vehicles
aren’t touching each other.
If they are, it could cause a ground connec-
tion you don’t want. The vehicle will not
start, and the bad grounding could damage
the electrical systems.
CAUTIONl Check the other vehicle. It must have a 12-
volt battery.
If the other system isn’t 12-volt, shorting
can damage both vehicles.
2. You could be injured if the vehicles move.
Set the parking brake firmly on each vehicle.
Put an automatic transmission in “P”
(PARK) or a manual transmission in “N”
(Neutral). Turn off the ignition switch.
WARNINGl Turn off the ignition on both vehicles be-
forehand.
Make sure that the cables or your clothes
cannot be caught by the fan or drive belt.
Personal injury could result.
NOTE
l Turn off all lamps, heater and other electrical
loads. This will avoid sparks and help save
both batteries.
3. Make sure battery electrolyte is at the proper
level.
Refer to “Battery” on page 8-09.
WARNINGl If electrolyte fluid is not visible, or ap-
pears to be frozen, Do Not Attempt Jump
Starting!
A battery might rupture or explode if the
temperature is below the freezing point
or if it is not filled to the proper level.
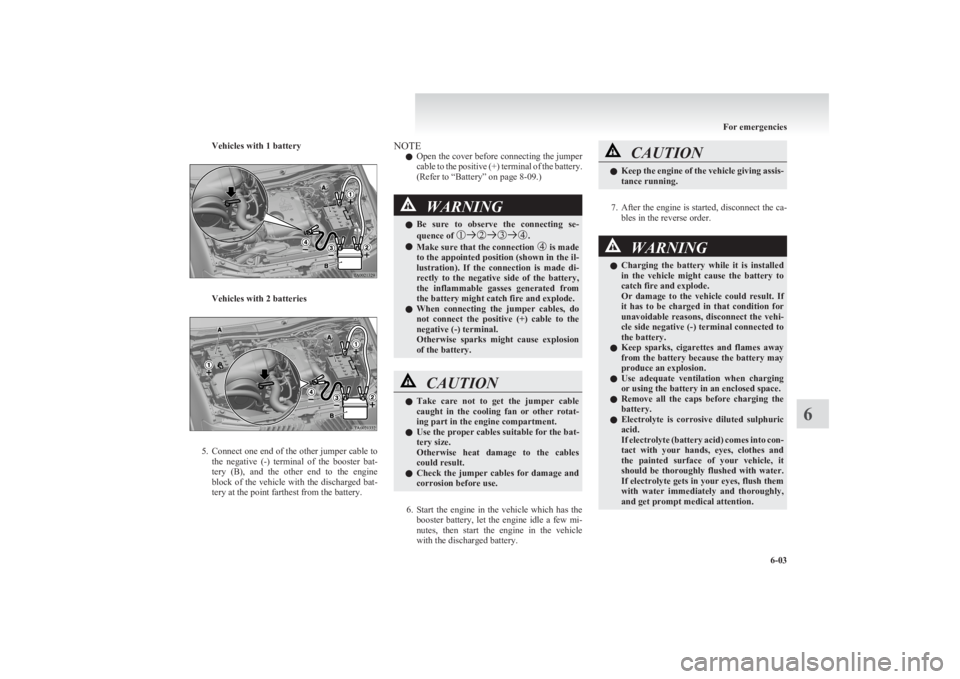
4. Connect one end of one jumper cable to the
positive (+) terminal of the discharged bat-
tery (A), and the other end to the positive (+)
terminal of the booster battery (B).
For emergencies
6-02
6
Page 233 of 330
Vehicles with 1 battery
Vehicles with 2 batteries
5.Connect one end of the other jumper cable to
the negative (-) terminal of the booster bat-
tery (B), and the other end to the engine
block of the vehicle with the discharged bat-
tery at the point farthest from the battery.
NOTE
l Open the cover before connecting the jumper
cable to the positive (+) terminal of the battery.
(Refer to “Battery” on page 8-09.)WARNINGl Be sure to observe the connecting se-
quence of .
l Make sure that the connection is made
to the appointed position (shown in the il-
lustration). If the connection is made di-
rectly to the negative side of the battery,
the inflammable gasses generated from
the battery might catch fire and explode.
l When connecting the jumper cables, do
not connect the positive (+) cable to the
negative (-) terminal.
Otherwise sparks might cause explosion
of the battery.
CAUTIONl Take care not to get the jumper cable
caught in the cooling fan or other rotat-
ing part in the engine compartment.
l Use the proper cables suitable for the bat-
tery size.
Otherwise heat damage to the cables
could result.
l Check the jumper cables for damage and
corrosion before use.
6. Start the engine in the vehicle which has the
booster battery, let the engine idle a few mi-
nutes, then start the engine in the vehicle
with the discharged battery.
CAUTIONl Keep the engine of the vehicle giving assis-
tance running.
7. After the engine is started, disconnect the ca-
bles in the reverse order.
WARNINGl Charging the battery while it is installed
in the vehicle might cause the battery to
catch fire and explode.
Or damage to the vehicle could result. If
it has to be charged in that condition for
unavoidable reasons, disconnect the vehi-
cle side negative (-) terminal connected to
the battery.
l Keep sparks, cigarettes and flames away
from the battery because the battery may
produce an explosion.
l Use adequate ventilation when charging
or using the battery in an enclosed space.
l Remove all the caps before charging the
battery.
l Electrolyte is corrosive diluted sulphuric
acid.
If electrolyte (battery acid) comes into con-
tact with your hands, eyes, clothes and
the painted surface of your vehicle, it
should be thoroughly flushed with water.
If electrolyte gets in your eyes, flush them
with water immediately and thoroughly,
and get prompt medical attention.
For emergencies
6-03
6
Page 234 of 330
CAUTIONlDo not attempt to start the engine by pull-
ing or pushing the vehicle.
It could damage your vehicle.
l Always wear protective eye goggles when
working near the battery.
l Keep the battery out of the reach of chil-
dren.
NOTE
l On vehicles with anti-lock brake system, if
the vehicle is put in motion without fully
charging the battery, it might cause the loss
of smooth engine operation and the antilock
brake warning lamp to illuminate.
Refer to “Anti-lock brake system (ABS)” on
page 4-43.
Engine overheating E00800601985
If the water temperature gauge indication remains
in the overheating zone for a long time, the engine
may be overheating. If this occurs, take the follow-
ing corrective measures: 1. Stop the vehicle in a safe place.
2. Check whether steam is coming from the en-
gine compartment.
[ If steam does not come from the engine com-
partment]
With the engine still running, raise the bon-
net to ventilate the engine compartment.
[If steam is coming from the engine compart-
ment]
Stop the engine, and when the steam stops,
raise the bonnet to ventilate the engine com-
partment. Restart the engine.WARNINGl Do not open the bonnet while steam is com-
ing from the engine compartment. It
could cause steam or hot water to spurt
out, causing burns. Hot water could spurt
out even when there is no steam coming
out, and some parts will be very hot. Be
very careful when opening the bonnet.
l Be careful of hot steam, which could be
blowing off the reserve tank cap.
l Do not attempt to remove the radiator
cap while the engine is hot.3. Confirm that the cooling fan is turning. If the
fan is not turning, stop the engine immediate-
ly and have it checked.
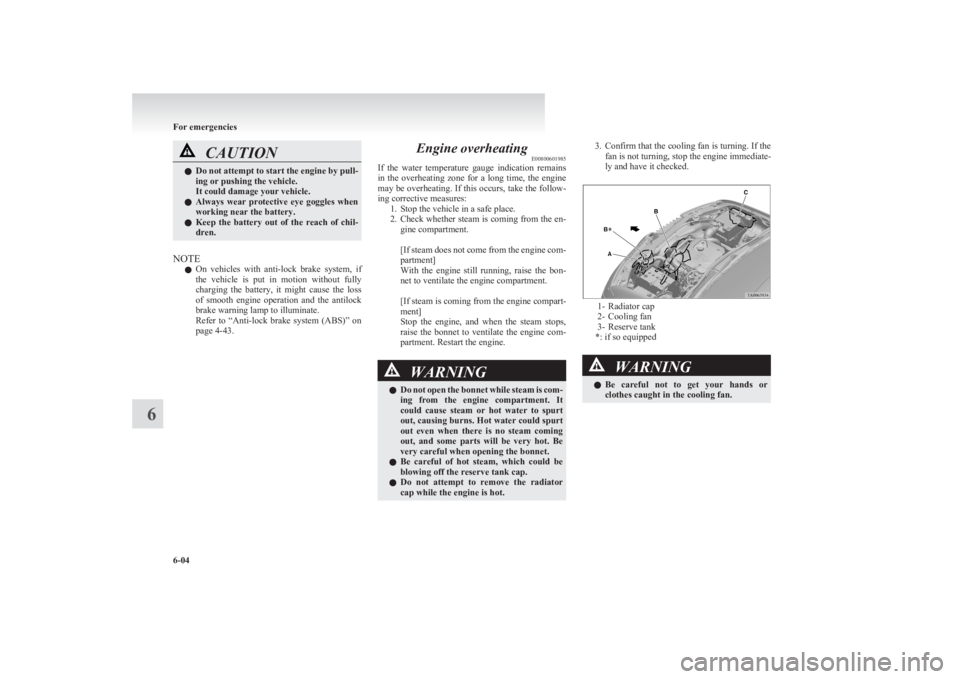
1- Radiator cap
2- Cooling fan
3- Reserve tank
*: if so equipped
WARNINGl Be careful not to get your hands or
clothes caught in the cooling fan.
For emergencies
6-04
6
Page 235 of 330
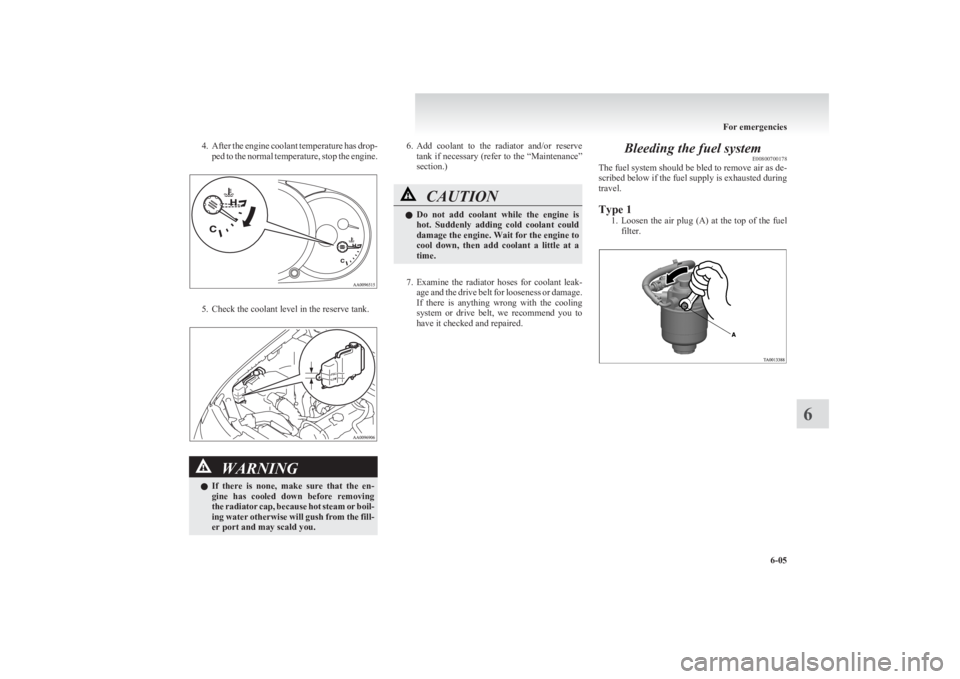
4.After the engine coolant temperature has drop-
ped to the normal temperature, stop the engine.
5. Check the coolant level in the reserve tank.
WARNINGl If there is none, make sure that the en-
gine has cooled down before removing
the radiator cap, because hot steam or boil-
ing water otherwise will gush from the fill-
er port and may scald you.6. Add coolant to the radiator and/or reserve
tank if necessary (refer to the “Maintenance”
section.)CAUTIONl Do not add coolant while the engine is
hot. Suddenly adding cold coolant could
damage the engine. Wait for the engine to
cool down, then add coolant a little at a
time.
7. Examine the radiator hoses for coolant leak-
age and the drive belt for looseness or damage.
If there is anything wrong with the cooling
system or drive belt, we recommend you to
have it checked and repaired.
Bleeding the fuel system E00800700178
The fuel system should be bled to remove air as de-
scribed below if the fuel supply is exhausted during
travel.
Type 1 1.Loosen the air plug (A) at the top of the fuel
filter.
For emergencies
6-05
6
Page 243 of 330
Jacking up the vehicleE00801001436
1. Park the vehicle on level and stable ground.
2. Set the parking brake firmly.
3. On vehicles with manual transmission, turn
the ignition key to the “LOCK” position,
move the gearshift lever to the “R” (Reverse)
position.
On vehicles with automatic transmission,
move the selector lever to the “P” (PARK) po-
sition, turn the ignition key to the “LOCK”
position.
4. Turn on the hazard warning flashers and set
up a warning triangle, flashing signal lamp,
etc., at an adequate distance from the vehi-
cle, and have all your passengers leave the ve-
hicle.
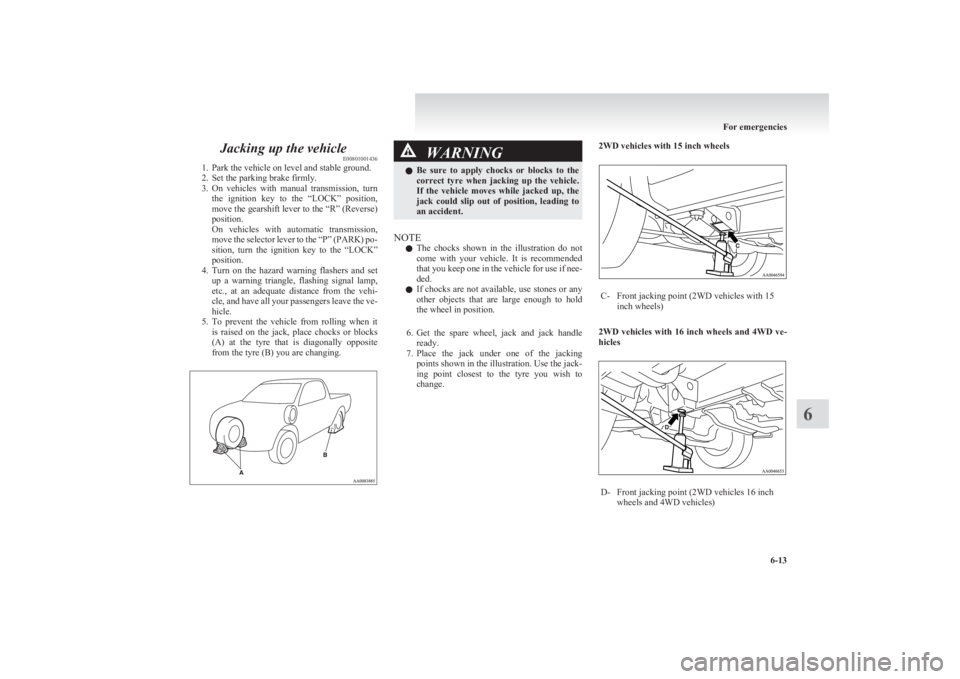
5. To prevent the vehicle from rolling when it
is raised on the jack, place chocks or blocks
(A) at the tyre that is diagonally opposite
from the tyre (B) you are changing.WARNINGl Be sure to apply chocks or blocks to the
correct tyre when jacking up the vehicle.
If the vehicle moves while jacked up, the
jack could slip out of position, leading to
an accident.
NOTE
l The chocks shown in the illustration do not
come with your vehicle. It is recommended
that you keep one in the vehicle for use if nee-
ded.
l If chocks are not available, use stones or any
other objects that are large enough to hold
the wheel in position.
6. Get the spare wheel, jack and jack handle
ready.
7. Place the jack under one of the jacking
points shown in the illustration. Use the jack-
ing point closest to the tyre you wish to
change.
2WD vehicles with 15 inch wheelsC-Front jacking point (2WD vehicles with 15
inch wheels)
2WD vehicles with 16 inch wheels and 4WD ve-
hicles
D-Front jacking point (2WD vehicles 16 inch
wheels and 4WD vehicles)
For emergencies
6-13
6