Page 246 of 514

Features and controls
3-157
3 Turn signal lever
N00522600027
When changing lanes, or making a gradual turn, hold the lever
in the “lane change” position (1). It will return to the neutral
position when you let go. Use the full position (2) when mak-
ing a normal turn. The lever will return to the neutral position
when the turn is complete. There may be times when the lever
does not return to the neutral position. This usually happens
when the steering wheel is turned only slightly. You can easily
return the lever by hand.
NOTE�A light in the instrument panel flashes to show when the
front and rear turn signal lights are working properly.
If this light flashes faster than usual, check for a burned
out lamp bulb or malfunctioning connection.
If the panel light does not come on when the lever is
moved, check for a blown fuse or a burned out bulb in the
panel.
Have the vehicle inspected by an authorized Mitsubishi
dealer or a repair facility of your choice.
�In a vehicle with a multi center display, the multi center
display can be used to select whether the tone will sound
or not sound when the hazard warning flashers are acti-
vated. For details, refer to “Setting and customization” on
page 3-108.
BK0121600US.book 157 ページ 2010年4月12日 月曜日 午前10時39分
Page 247 of 514

3-158 Features and controls
3Hazard warning flasher switch
N00522700161
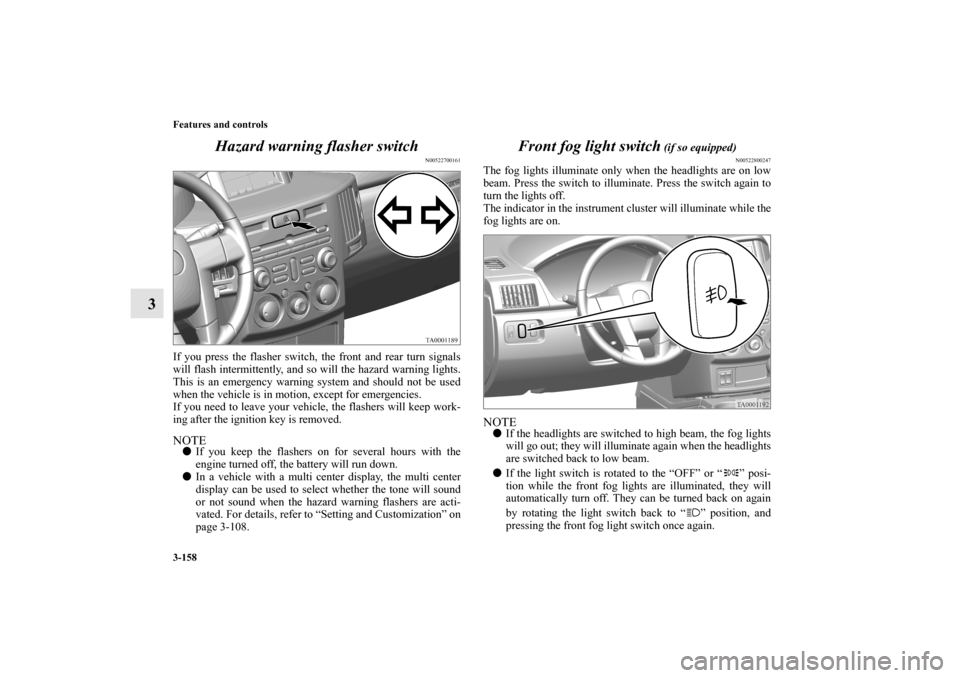
If you press the flasher switch, the front and rear turn signals
will flash intermittently, and so will the hazard warning lights.
This is an emergency warning system and should not be used
when the vehicle is in motion, except for emergencies.
If you need to leave your vehicle, the flashers will keep work-
ing after the ignition key is removed. NOTE�If you keep the flashers on for several hours with the
engine turned off, the battery will run down.
�In a vehicle with a multi center display, the multi center
display can be used to select whether the tone will sound
or not sound when the hazard warning flashers are acti-
vated. For details, refer to “Setting and Customization” on
page 3-108.
Front fog light switch
(if so equipped)
N00522800247
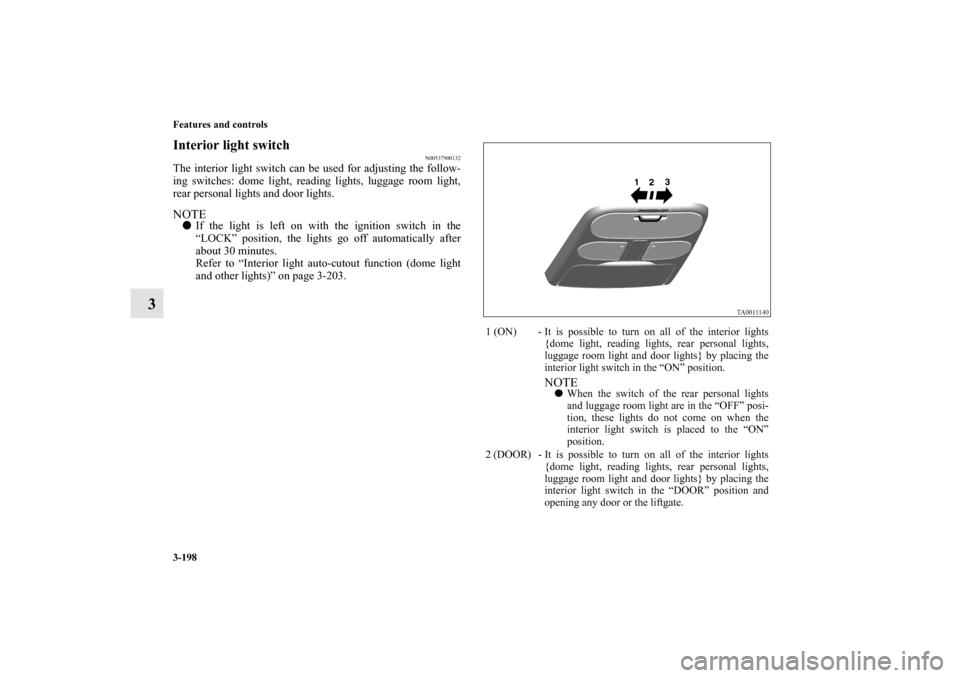
The fog lights illuminate only when the headlights are on low
beam. Press the switch to illuminate. Press the switch again to
turn the lights off.
The indicator in the instrument cluster will illuminate while the
fog lights are on.NOTE�If the headlights are switched to high beam, the fog lights
will go out; they will illuminate again when the headlights
are switched back to low beam.
�If the light switch is rotated to the “OFF” or “ ” posi-
tion while the front fog lights are illuminated, they will
automatically turn off. They can be turned back on again
by rotating the light switch back to “ ” position, and
pressing the front fog light switch once again.
BK0121600US.book 158 ページ 2010年4月12日 月曜日 午前10時39分
Page 248 of 514
Features and controls
3-159
3 Instrument panel light dimmer control
N00522900121
The brightness of the instrument panel lights can be adjusted
by turning this control while the light switch is in the “ ” or
“ ” position. NOTE�It is possible to disable the function that adjusts the bright-
ness of the multi center display in synchronization with
the instrument panel light dimmer control. For details,
refer to “Setting and customization” on page 3-108.
Wiper and washer switch
N00523000392
Windshield wipersThe windshield wipers wipe when the wiper lever is moved as
shown in the illustration and the ignition key is in the “ON” or
“ACC” position.
1- Bright
2- Dark
MIST- Misting function
The wipers will wipe one time
OFF- Off
INT- Speed sensitive intermittent operation
Interval between wiper sweeps varies in accordance with
vehicle speed.
LO- Slow
HI- Fast
BK0121600US.book 159 ページ 2010年4月12日 月曜日 午前10時39分
Page 252 of 514

Features and controls
3-163
3 Electric rear window defogger switch
N00523700328
The electric rear window defogger can be used with the igni-
tion key in the “ON” position.
The indicator light (A) will come on when you press the elec-
tric rear window defogger switch. Electric current will flow
through the heating wires on the rear window to help clear
away moisture or frost.
After about 17 minutes of operation, the defogger will shut off
automatically.
To switch the defogger OFF before 17 minutes have passed,
press the switch again. The indicator light will go out and the
defogger will turn off.
If you need the defogger for more than 17 minutes, press the
switch again. This will add 17 more minutes.
NOTE�If your vehicle is equipped with heated mirrors, mist can
also be removed from the outside rearview mirrors when
the rear window defogger switch is pressed. (Refer to
“Heated mirror” on page 3-33.)
CAUTION
!�The rear window defogger is not designed to melt
snow. Remove any snow manually before using the
rear window defogger.�Use the rear window defogger only after the engine
has started and is running. Be sure to turn the
defogger switch off immediately after the window is
clear to save on battery power.�Do not place stickers, tape, or other items that are
attached with adhesive over the grid wires on the
rear window.�When cleaning the inside rear window, use a soft
cloth and wipe lightly over the grid wires.
BK0121600US.book 163 ページ 2010年4月12日 月曜日 午前10時39分
Page 284 of 514

Features and controls
3-195
3 Vanity mirror
N00524700208
The vanity mirrors are located on the back of the sun visors.
Opening the lid (A) of the vanity mirror will automatically turn
on the mirror light (B).
Power outlet
(if so equipped)
N00525000455
To use a “plug-in” type accessory, open the cover located on
the floor console and the right side wall of the rear luggage
area, then insert the plug in the power outlet.NOTE�The power outlets can be used simultaneously.
CAUTION
!�If the lid of the lighted vanity mirror is kept open for
prolonged periods of time, the battery may be dis-
charged.
CAUTION
!�Be aware that using electronic equipment with the
engine off may run the battery down.
Be sure to use a “plug-in” type accessory operating
at 12 V and 120 W or less.
When using two or more power outlets at the same
time, make sure the total power consumption of the
electrical accessories for the power outlets does not
exceed 120 W at 12 V.�When the power outlet is not in use, be sure to close
the power outlet cover. This will prevent the power
outlet from becoming clogged and short circuiting.
BK0121600US.book 195 ページ 2010年4月12日 月曜日 午前10時39分
Page 286 of 514
Features and controls
3-197
3 Digital clock
(if so equipped)
N00525100182
When the ignition switch is in the “ACC” or “ON” position,
the time is displayed.How each button works:Set the time by pressing the various buttons as described
below.NOTE�If the battery cables are disconnected or the battery
becomes discharged, the clock will have to be reset.
�For vehicles with multi center display, see “Digital
clock/Calender” on page 3-90.
Interior lights
N00525300474
H (HOUR)- Press and hold the “H” button until the correct
hour appears.
M (MINUTE)- Press and hold the “M” button until the correct
minute appears.
Luggage room light
→ P. 3 - 2 0 2Dome light/
Reading lights
→ P.3-200, 3-200
Door lights
→ P.3-202 Rear personal lights
→P.3-201
BK0121600US.book 197 ページ 2010年4月12日 月曜日 午前10時39分
Page 287 of 514

3-198 Features and controls
3
Interior light switch
N00537900132
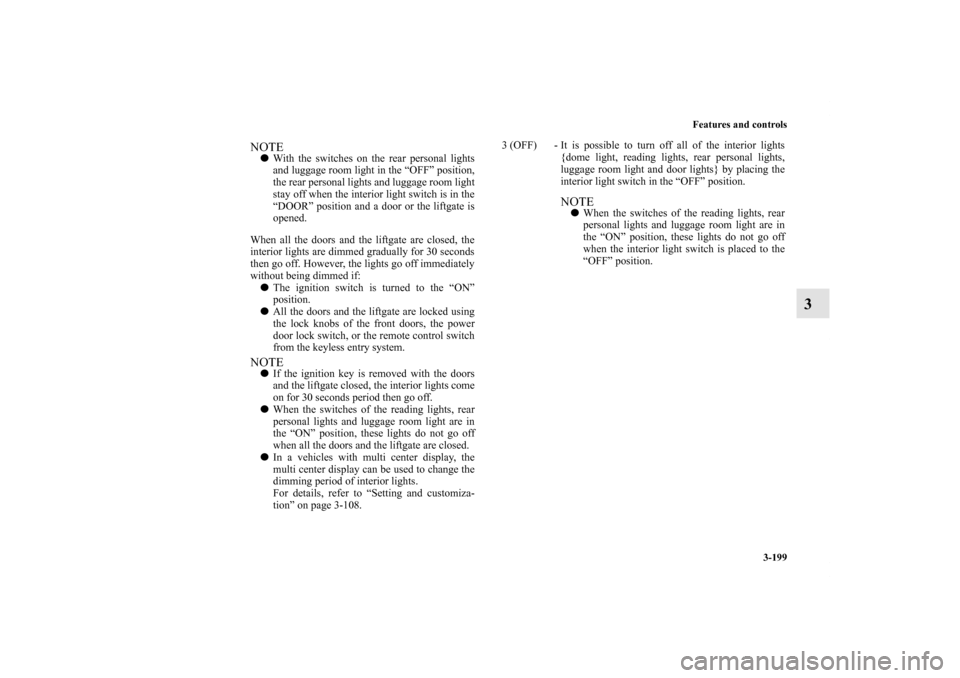
The interior light switch can be used for adjusting the follow-
ing switches: dome light, reading lights, luggage room light,
rear personal lights and door lights.NOTE�If the light is left on with the ignition switch in the
“LOCK” position, the lights go off automatically after
about 30 minutes.
Refer to “Interior light auto-cutout function (dome light
and other lights)” on page 3-203.
1 (ON) - It is possible to turn on all of the interior lights
{dome light, reading lights, rear personal lights,
luggage room light and door lights} by placing the
interior light switch in the “ON” position.
NOTE�When the switch of the rear personal lights
and luggage room light are in the “OFF” posi-
tion, these lights do not come on when the
interior light switch is placed to the “ON”
position.
2 (DOOR) - It is possible to turn on all of the interior lights
{dome light, reading lights, rear personal lights,
luggage room light and door lights} by placing the
interior light switch in the “DOOR” position and
opening any door or the liftgate.
BK0121600US.book 198 ページ 2010年4月12日 月曜日 午前10時39分
Page 288 of 514

Features and controls
3-199
3
NOTE�With the switches on the rear personal lights
and luggage room light in the “OFF” position,
the rear personal lights and luggage room light
stay off when the interior light switch is in the
“DOOR” position and a door or the liftgate is
opened.
When all the doors and the liftgate are closed, the
interior lights are dimmed gradually for 30 seconds
then go off. However, the lights go off immediately
without being dimmed if:
�The ignition switch is turned to the “ON”
position.
�All the doors and the liftgate are locked using
the lock knobs of the front doors, the power
door lock switch, or the remote control switch
from the keyless entry system.NOTE�If the ignition key is removed with the doors
and the liftgate closed, the interior lights come
on for 30 seconds period then go off.
�When the switches of the reading lights, rear
personal lights and luggage room light are in
the “ON” position, these lights do not go off
when all the doors and the liftgate are closed.
�In a vehicles with multi center display, the
multi center display can be used to change the
dimming period of interior lights.
For details, refer to “Setting and customiza-
tion” on page 3-108.3 (OFF) - It is possible to turn off all of the interior lights
{dome light, reading lights, rear personal lights,
luggage room light and door lights} by placing the
interior light switch in the “OFF” position.
NOTE�When the switches of the reading lights, rear
personal lights and luggage room light are in
the “ON” position, these lights do not go off
when the interior light switch is placed to the
“OFF” position.
BK0121600US.book 199 ページ 2010年4月12日 月曜日 午前10時39分