2011 MERCEDES-BENZ SLS weight
[x] Cancel search: weightPage 54 of 436
technicians as soon as possible. Contact an
authorized Mercedes-Benz Center.
Only have the seat repaired or replaced at an
authorized Mercedes-Benz Center.
In order to ensure proper operation of the air
bag system and OCS:
R Sit with the seat belt properly fastened in a
position that is as upright as possible with
your back against the seat backrest.
R While seated, an occupant should not
position him/herself in such a way as to
cause the occupant’s weight to be lifted
from the seat bottom as this may result in
the OCS being unable to correctly
approximate the occupant’s weight
category.
R Read and observe all warnings in this
chapter.
OCS Self-test
After turning the SmartKey in the starter
switch to position 1 or 2 or pressing the
KEYLESS-GO start/stop button once or
twice, the 4 5 indicator lamp
illuminates. If an adult occupant is properly
sitting on the passenger seat and the system
classifies the occupant as an adult, the 4
5 indicator lamp will illuminate and go out
after approximately 6 seconds.
If the seat is not occupied and the system
classifies the passenger seat as being empty,
the 4 5 indicator lamp will illuminate
and not go out.
GWarning!
If the 4 5 indicator lamp does not
illuminate, the system is not functioning. You
must contact an authorized Mercedes-Benz
Center before seating any child on the
passenger seat.
For more information, see the “Practical
hints” section ( Y page 49).
GWarning!
Never place anything between seat cushion
and child seat (e.g. pillow), since it reduces
the effectiveness of the OCS. The bottom and
back of the child seat must make full contact
with the passenger seat cushion and
backrest.
If necessary, adjust the tilt of the passenger
seat backrest.
An incorrectly mounted child seat could cause
injuries to the child in case of an accident,
instead of increasing protection for the child.
Follow the manufacturer’s instructions for
installation of child seats.
Seat belts
Safety notes
The use of seat belts and infant and child
restraint systems is required by law in all 50
states, the District of Columbia, the U.S.
territories and all Canadian provinces.
Even where this is not the case, all vehicle
occupants should have their seat belts
fastened whenever the vehicle is in motion.
i See “Children in the vehicle”
( Y page 57) for information on
R infants and children traveling with you in
the vehicle
R restraint systems for infants and children
GWarning!
Always fasten your seat belt before driving off.
Always make sure your passenger is properly
restrained. You and your passenger should
always wear seat belts.
Failure to wear and properly fasten and
position your seat belt greatly increases your
risk of injuries and their likely severity in an
accident.
If you are ever in an accident, your injuries can
be considerably more severe without your
seat belt properly buckled. Without your seat
belt buckled, you are much more likely to hit
52Occupant safetySafety and security
BA 197 USA, CA Edition A 2011; 1; 27, en-UShereepeVersion: 3.0.3.52010-03-24T15:31:10+01:00 - Seite 52
Page 56 of 436

RNever wear seat belts over rigid or
breakable objects in or on your clothing,
such as eyeglasses, pens, keys etc., as
these might cause injuries.
RMake sure the seat belt is always fitted
snugly. Take special care of this when
wearing loose clothing.
RNever use a seat belt for more than one
person at a time. Do not fasten a seat belt
around a person and another person or
other objects at the same time.
RSeat belts should not be worn twisted. In a
crash, you would not have the full width of
the seat belt to distribute impact forces.
The twisted seat belt against your body
could cause injuries.
RPregnant women should also always use a
lap/shoulder belt. The lap belt portion
should be positioned as low as possible on
the hips to avoid any possible pressure on
the abdomen.
RPlace the seat backrest in a position that is
as upright as possible.
RCheck your seat belt during travel to make
sure it is properly positioned.
RNever place your feet on the instrument
panel, dashboard, or on the seat. Always
keep both feet on the floor in front of the
seat.
RWhen using a seat belt to secure infant
restraints, toddler restraints, or children in
booster seats, always follow the child seat
manufacturer’s instructions.
GWarning!
Do not pass seat belts over sharp edges. They
could tear.
Do not allow the seat belt to get caught in the
door or in the seat adjustment mechanism.
This could damage the seat belt.
Never attempt to make modifications to seat
belts. This could impair the effectiveness of
the seat belts.
Fastening the seat beltsGWarning!
Children 12 years old and under must be
seated and properly secured in an
appropriately sized infant restraint, toddler
restraint, or booster seat recommended for
the size and weight of the child. For additional
information, see section “Children in the
vehicle”.
A child’s risk of serious or fatal injuries is
significantly increased if the child restraints
are not properly secured in the vehicle and/
or the child is not properly secured in the child
restraint.
XWith a smooth motion, pull the seat belt out
of seat belt outlet :.
XPlace the shoulder portion of the seat belt
across the top of your shoulder and the lap
portion across your hips.
XPush latch plate ; into buckle = until it
clicks.
XIf necessary, tighten the lap portion to a
snug fit by pulling shoulder portion up.
The passenger lap/shoulder belt has a
special seat belt retractor to secure child
restraints properly. For more information on
54Occupant safetySafety and security
BA 197 USA, CA Edition A 2011; 1; 27, en-UShereepeVersion: 3.0.3.52010-03-24T15:31:10+01:00 - Seite 54
Page 60 of 436

Unsecured or improperly positioned cargo
increases a child’s risk of injury in the event
of
R strong braking maneuvers
R sudden changes of direction
R an accident
Infant and child restraint systemsGObserve Safety notes, see page 57.
We recommend all infants and children be
properly restrained at all times while the
vehicle is in motion.
The passenger lap/shoulder belt has a
special seat belt retractor for secure
fastening of child restraints.
To fasten a child restraint, follow the child
restraint manufacturer’s instructions for
mounting.
To activate the special seat belt retractor:
XPull the shoulder belt out completely and
let it retract.
During seat belt retraction, a ratcheting
sound can be heard to indicate that the
special seat belt retractor is activated.
The seat belt is now locked.XPush down on child restraint to take up any
slack.
To deactivate the special seat belt retractor:
XRelease the seat belt buckle and let the
seat belt retract completely.
The seat belt can then again be used in the
usual manner.GWarning!
Never release the seat belt buckle while the
vehicle is in motion, since the special seat belt
retractor will be deactivated.
The use of infant or child restraints is required
by law in all 50 states, the District of
Columbia, the U.S. territories and all
Canadian provinces.
Infants and small children should be seated
in an appropriate infant or child restraint
system. They must be properly secured by a
lap/shoulder belt in accordance with the
manufacturer’s instructions for the child
restraint. All infant or child restraint systems
must comply with U.S. Federal Motor Vehicle
Safety Standards 213 and 225 and Canadian
Motor Vehicle Safety Standards 213 and
210.2.
A statement by the child restraint
manufacturer of compliance with these
standards can be found on the instruction
label on the restraint and in the instruction
manual provided with the restraint.
When using any infant restraint, toddler
restraint, or booster seat, make sure to
carefully read and follow all manufacturer’s
instructions for installation and use.
Please read and observe warning labels
affixed to the inside of the vehicle and to
infant or child restraints.GWarning!
Children 12 years old and under must be
seated and properly secured in an appropriate
infant restraint, toddler restraint, or booster
seat recommended for the size and weight of
the child.
The infant or child restraint must be properly
secured with the vehicle’s seat belt fully in
accordance with the child seat
manufacturer’s instructions.
Occupants, especially children, should always
sit as upright as possible, wear the seat belt
properly and use an appropriately sized infant
restraint, toddler restraint, or booster seat
recommended for the size and weight of the
child.
Children can be killed or seriously injured by
an inflating air bag. Note the following
important information:
R Your vehicle is equipped with air bag
technology designed to deactivate the
passenger front air bag in your vehicle
when the system senses the weight of a
typical 12-month-old child or less along
58Occupant safetySafety and security
BA 197 USA, CA Edition A 2011; 1; 27, en-UShereepeVersion: 3.0.3.52010-03-24T15:31:10+01:00 - Seite 58
Page 61 of 436
with the weight of a standard appropriate
child restraint on the passenger seat.
R A child in a rear-facing child restraint on the
passenger seat will be seriously injured or
even killed if the passenger front air bag
inflates in a collision which could occur
under some circumstances, even with the
air bag technology installed in your vehicle.
R If you install a rear-facing child restraint on
the passenger seat, make sure the 4
5 indicator lamp is illuminated,
indicating that the passenger front air bag
is deactivated. Should the 4 5
indicator lamp not illuminate or go out while
the restraint is installed, please check
installation. Periodically check the 4
5 indicator lamp while driving to make
sure the 4 5 indicator lamp is
illuminated. If the 4 5 indicator
lamp goes out or remains out, do not
transport a child on the passenger seat
until the system has been repaired.
A child in a rear-facing child restraint on the
passenger seat will be seriously injured or
even killed if the passenger front air bag
inflates.
R If you place a child in a forward-facing child
restraint on the passenger seat, move the
seat as far back as possible, use the proper
child restraint recommended for the age,
size and weight of the child, and secure
child restraint with the vehicle’s seat belt
according to the child seat manufacturer’s
instructions. For children larger than the
typical 12-month-old child, the passenger
front air bag may or may not be activated.GWarning!
Infants and small children should never share
a seat belt with another occupant. During an
accident, they could be crushed between the
occupant and seat belt.
A child’s risk of serious or fatal injuries is
significantly increased if the child restraints
are not properly secured in the vehicle and/
or the child is not properly secured in the child
restraint.
Children too big for a toddler restraint must
ride in seats using regular seat belts. Position
shoulder belt across chest and shoulder, not
face or neck. A booster seat may be
necessary to achieve proper seat belt
positioning for children over 41 lb (18 kg) until
they reach a height where a lap/shoulder belt
fits properly without a booster.
When the child restraint is not in use, remove
it from the vehicle or secure it with the seat
belt to prevent the child restraint from
becoming a projectile in the event of an
accident.
Installation of infant and child restraint
systemsGObserve Safety notes, see page 57.
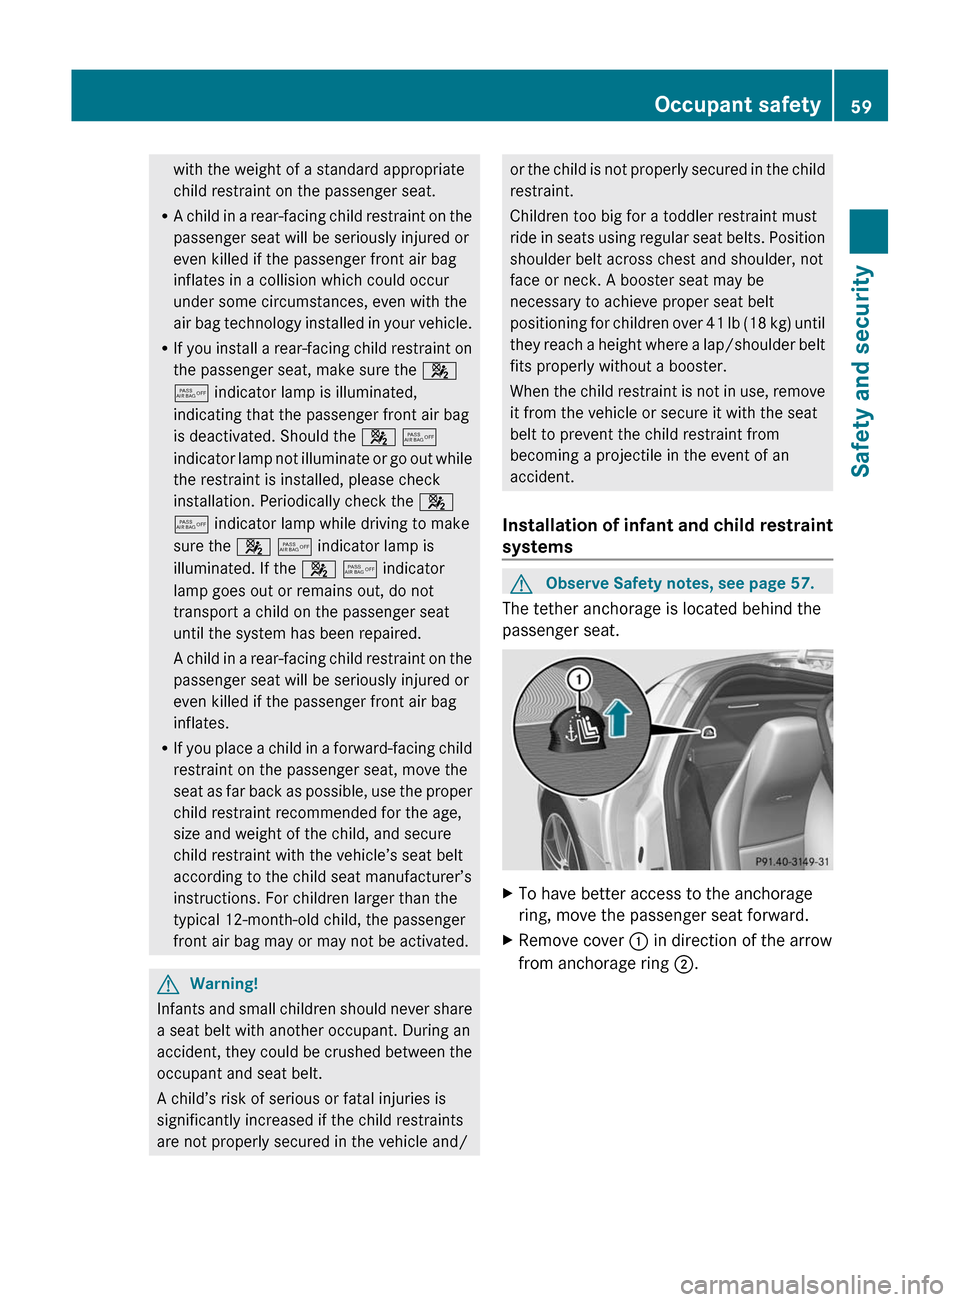
The tether anchorage is located behind the
passenger seat.
XTo have better access to the anchorage
ring, move the passenger seat forward.XRemove cover : in direction of the arrow
from anchorage ring ;.Occupant safety59Safety and securityBA 197 USA, CA Edition A 2011; 1; 27, en-UShereepeVersion: 3.0.3.52010-03-24T15:31:10+01:00 - Seite 59Z
Page 246 of 436
GWarning!
Children 12 years old and under must be
seated and properly secured in an
appropriately sized infant restraint, toddler
restraint, or booster seat recommended for
the size and weight of the child. For additional
information, see section “Children in the
vehicle”.
A child’s risk of serious or fatal injuries is
significantly increased if the child restraints
are not properly secured in the vehicle and/
or the child is not properly secured in the child
restraint.
Seat adjustment
! When moving the seats, make sure there
are no items in the footwell or behind the
seats. Otherwise, you could damage the
seats and/or the items.
Power seats
iThe memory function (Y page 249) lets
you store the settings for the seat position
together with the settings for the steering
wheel and the exterior rear view mirrors.
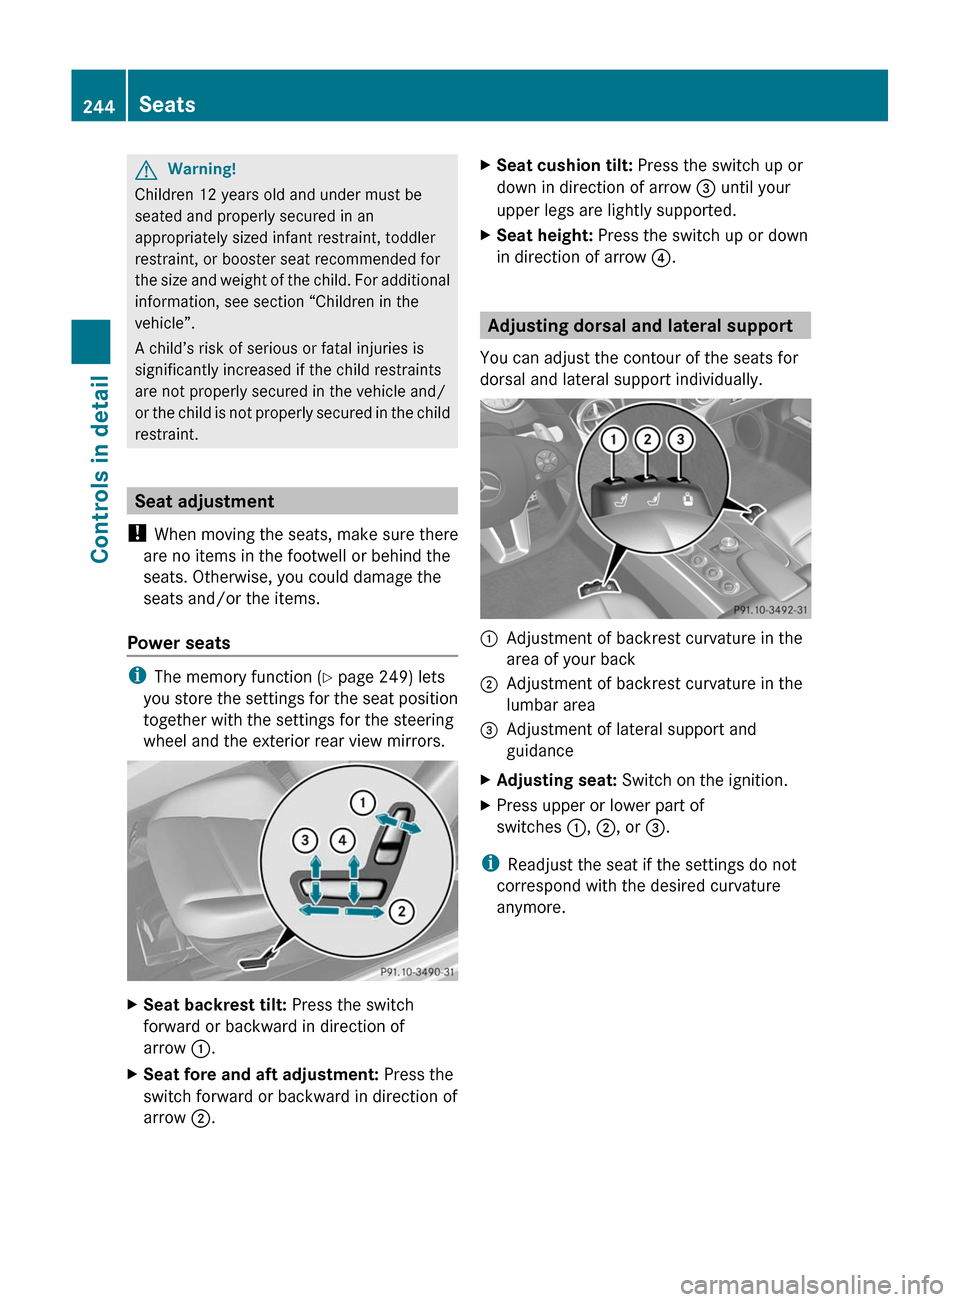
XSeat backrest tilt: Press the switch
forward or backward in direction of
arrow :.
XSeat fore and aft adjustment: Press the
switch forward or backward in direction of
arrow ;.
XSeat cushion tilt: Press the switch up or
down in direction of arrow = until your
upper legs are lightly supported.
XSeat height: Press the switch up or down
in direction of arrow ?.
Adjusting dorsal and lateral support
You can adjust the contour of the seats for
dorsal and lateral support individually.
:Adjustment of backrest curvature in the
area of your back
;Adjustment of backrest curvature in the
lumbar area
=Adjustment of lateral support and
guidance
XAdjusting seat: Switch on the ignition.XPress upper or lower part of
switches :, ;, or =.
iReadjust the seat if the settings do not
correspond with the desired curvature
anymore.
244SeatsControls in detail
BA 197 USA, CA Edition A 2011; 1; 27, en-UShereepeVersion: 3.0.3.52010-03-24T15:31:10+01:00 - Seite 244
Page 306 of 436
XActivating: Adjust the air temperature, air
volume and air distribution.
XPress button ¸.
The indicator lamp in the button comes on.
The driver-side settings are used for the
passenger side.
XDeactivating: Press button ¸ again.
The indicator lamp in the button goes out.
Rear window defroster
GWarning!
Any accumulation of snow and ice should be
removed from the rear window before driving.
Visibility could otherwise be impaired,
endangering you and others.
The rear window defroster uses a large
amount of power. To keep the battery drain
to a minimum, switch off the defroster as
soon as the rear window is clear. The
defroster is switched off automatically after
some time of operation depending on the
outside temperature.
XSwitch on the ignition.XSwitching on: Press button ¤.
The indicator lamp in the button comes on.
XSwitching off: Press button ¤ again.
The rear window defroster switches off when
the battery voltage is too low. Too many
electrical consumers may be operating
simultaneously.
XSwitch off consumers that are currently not
needed if required.
Loading and storing
Parcel net
GWarning!
The parcel net is intended for storing light-
weight items only, such as road maps, mail,
etc.
Heavy objects, objects with sharp edges, or
fragile objects may not be transported in the
parcel net. In an accident, during hard
braking, or sudden maneuvers, they could be
thrown around inside the vehicle and cause
injury to vehicle occupants.
The parcel net cannot protect transported
goods in the event of an accident.
A parcel net is located in the passenger
footwell.
Storage compartments
GWarning!
To help avoid personal injury during a collision
or sudden maneuver, exercise care when
storing objects in the vehicle. Put luggage or
cargo in the trunk if possible.
Keep compartment lids closed. This will help
to prevent stored objects from being thrown
about and injuring vehicle occupants during
Rbraking
Rvehicle maneuvers
Ran accident
Glove box
Depending on vehicle equipment, an AUX
socket or a media interface is located in the
glove box. For information on Audio AUX
mode, see (Y page 197) and for media
interface, see (Y page 192).
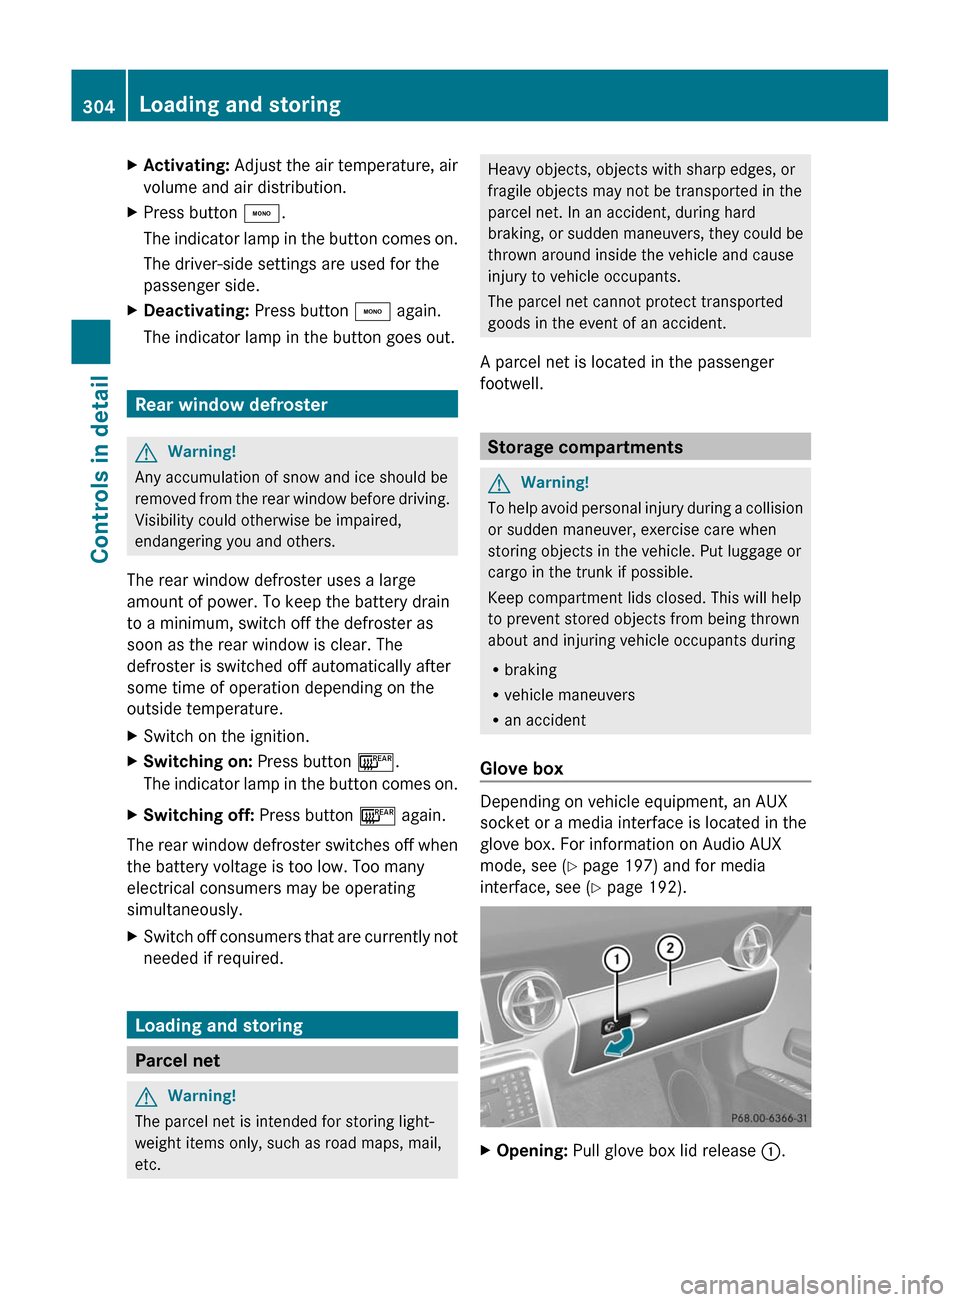
XOpening: Pull glove box lid release :.304Loading and storingControls in detail
BA 197 USA, CA Edition A 2011; 1; 27, en-UShereepeVersion: 3.0.3.52010-03-24T15:31:10+01:00 - Seite 304
Page 330 of 436
weight. The tire inflation pressures listed
apply to the tires installed as original
equipment.
Important notes on tire inflation
pressure GWarning!
If the tire inflation pressure drops repeatedly,
check the tires for punctures from foreign
objects and/or whether air is leaking from the
valves or from around the rim.
Tire temperature and tire inflation pressure
are also increased while driving, depending
on the driving speed and the tire load.
If you will be driving your vehicle at high
speeds of 100 mph (160 km/h) or higher,
where it is legal and conditions allow, consult
the tire inflation pressure label on the inside
of the fuel filler flap on how to adjust the cold
tire inflation pressure. If you do not adjust the
tire inflation pressure, excessive heat can
build up and result in sudden tire failure.
If you are not sure about the proper tire
inflation pressure, contact an authorized
Mercedes-Benz Center.
i Driving comfort may be reduced when the
tire inflation pressure is adjusted to the
value for speeds above 100 mph
( 160 km/h) as specified on the tire inflation
pressure label located on the inside of the
fuel filler flap.
Make sure to readjust the tire inflation
pressure for normal driving speeds.
Supplemental tire inflation pressure
information for different loading conditions of
the vehicle can be found on the tire inflation
pressure label. The tire inflation pressure
label is located on the inside of the fuel filler
flap.
Unless specified otherwise, the tire inflation
pressures on the tire inflation pressure label
are valid for all approved, factory-equipped
tires.
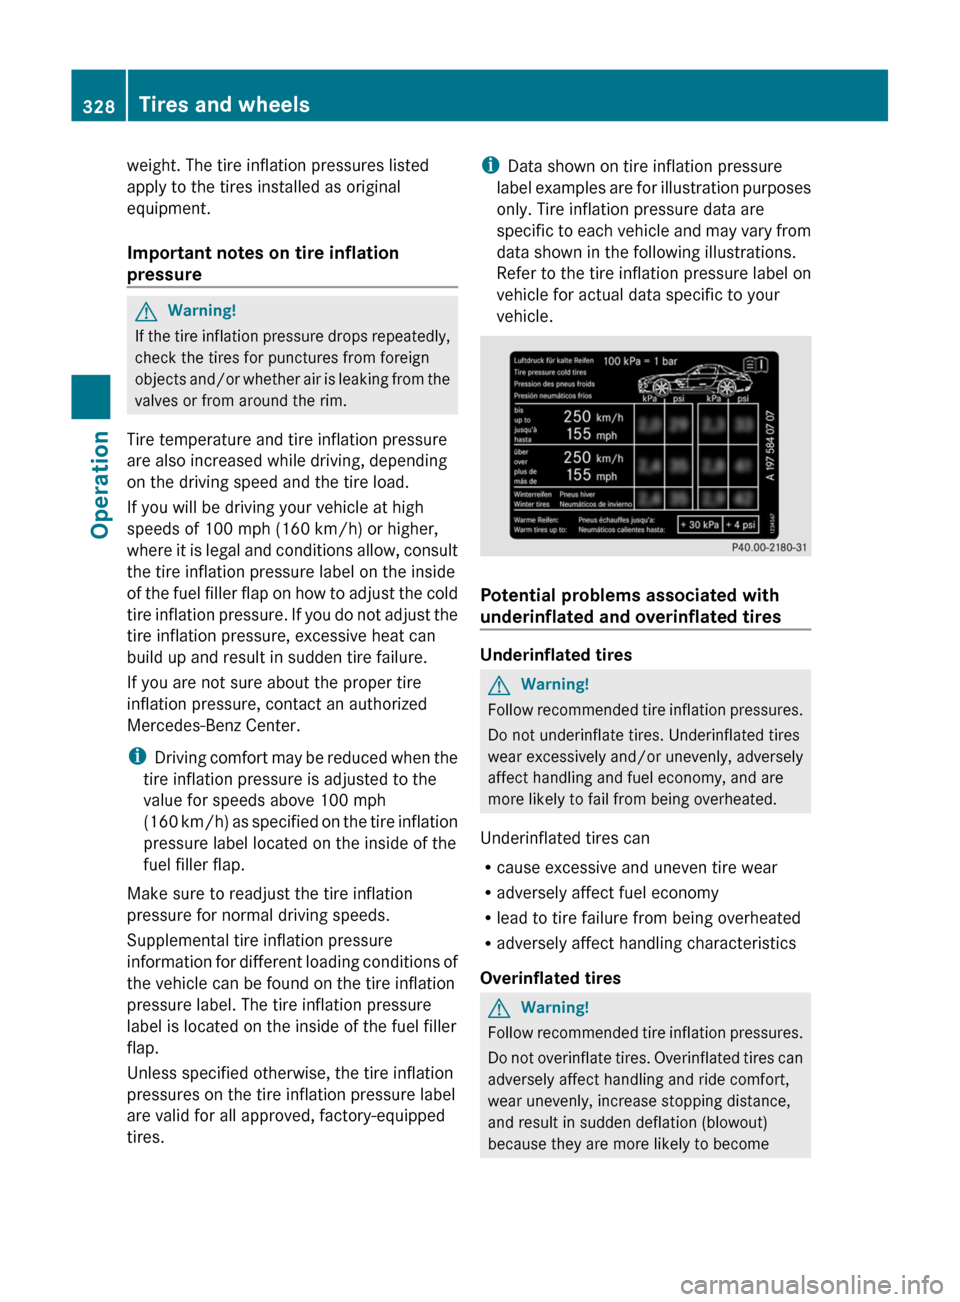
i Data shown on tire inflation pressure
label examples are for illustration purposes
only. Tire inflation pressure data are
specific to each vehicle and may vary from
data shown in the following illustrations.
Refer to the tire inflation pressure label on
vehicle for actual data specific to your
vehicle.
Potential problems associated with
underinflated and overinflated tires
Underinflated tires
GWarning!
Follow recommended tire inflation pressures.
Do not underinflate tires. Underinflated tires
wear excessively and/or unevenly, adversely
affect handling and fuel economy, and are
more likely to fail from being overheated.
Underinflated tires can
R cause excessive and uneven tire wear
R adversely affect fuel economy
R lead to tire failure from being overheated
R adversely affect handling characteristics
Overinflated tires
GWarning!
Follow recommended tire inflation pressures.
Do not overinflate tires. Overinflated tires can
adversely affect handling and ride comfort,
wear unevenly, increase stopping distance,
and result in sudden deflation (blowout)
because they are more likely to become
328Tires and wheelsOperation
BA 197 USA, CA Edition A 2011; 1; 27, en-UShereepeVersion: 3.0.3.52010-03-24T15:31:10+01:00 - Seite 328
Page 336 of 436
Loading the vehicle
Two labels on your vehicle show how much weight it may properly carry.
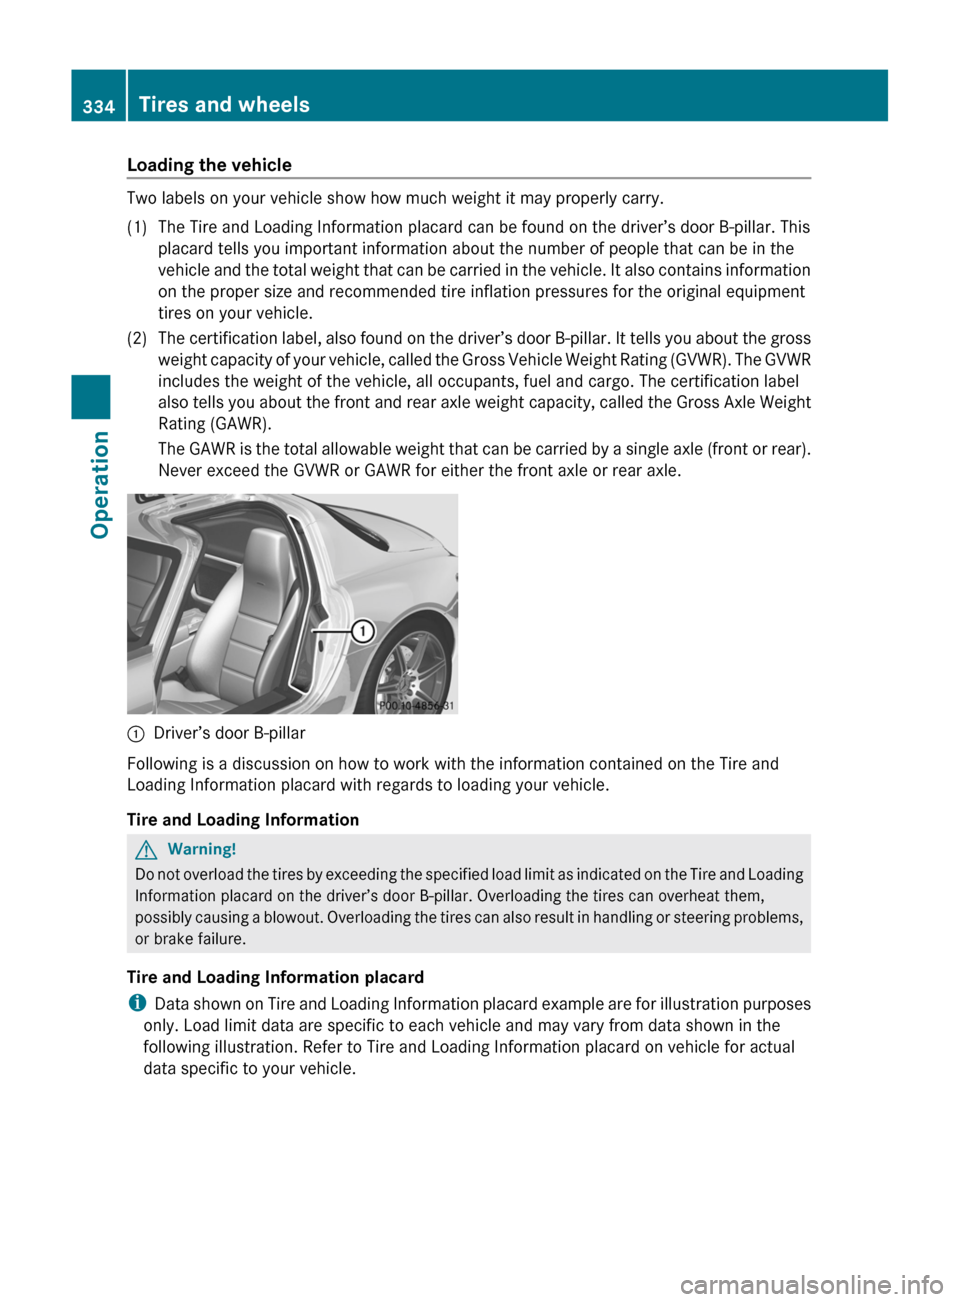
(1)The Tire and Loading Information placard can be found on the driver’s door B-pillar. This
placard tells you important information about the number of people that can be in the
vehicle and the total weight that can be carried in the vehicle. It also contains information
on the proper size and recommended tire inflation pressures for the original equipment
tires on your vehicle.(2)The certification label, also found on the driver’s door B-pillar. It tells you about the gross
weight capacity of your vehicle, called the Gross Vehicle Weight Rating (GVWR). The GVWR
includes the weight of the vehicle, all occupants, fuel and cargo. The certification label
also tells you about the front and rear axle weight capacity, called the Gross Axle Weight
Rating (GAWR).
The GAWR is the total allowable weight that can be carried by a single axle (front or rear).
Never exceed the GVWR or GAWR for either the front axle or rear axle.:Driver’s door B-pillar
Following is a discussion on how to work with the information contained on the Tire and
Loading Information placard with regards to loading your vehicle.
Tire and Loading Information
GWarning!
Do not overload the tires by exceeding the specified load limit as indicated on the Tire and Loading
Information placard on the driver’s door B-pillar. Overloading the tires can overheat them,
possibly causing a blowout. Overloading the tires can also result in handling or steering problems,
or brake failure.
Tire and Loading Information placard
i Data shown on Tire and Loading Information placard example are for illustration purposes
only. Load limit data are specific to each vehicle and may vary from data shown in the
following illustration. Refer to Tire and Loading Information placard on vehicle for actual
data specific to your vehicle.
334Tires and wheelsOperation
BA 197 USA, CA Edition A 2011; 1; 27, en-UShereepeVersion: 3.0.3.52010-03-24T15:31:10+01:00 - Seite 334