2011 MERCEDES-BENZ SLS turn signal
[x] Cancel search: turn signalPage 296 of 436
Parktronic system
The Parktronic system is an electronic
parking aid with ultrasonic sensors designed
to assist the driver during parking maneuvers.
The Parktronic system indicates the relative
distance between the vehicle and an obstacle
visually and audibly.
The Parktronic system is activated
automatically when
Ryou switch on the ignition
and
Ryou release the electronic parking brake
or
Ryou start the engine
and
Rshift the transmission into drive position
D, reverse gear R, or neutral position N
The Parktronic system deactivates at speeds
above approximately 11 mph (18 km/h). At
lower speeds, the Parktronic system
activates again.
The Parktronic system also deactivates when
you shift the transmission into park position
P or engage the electronic parking brake and
turn off the engine.
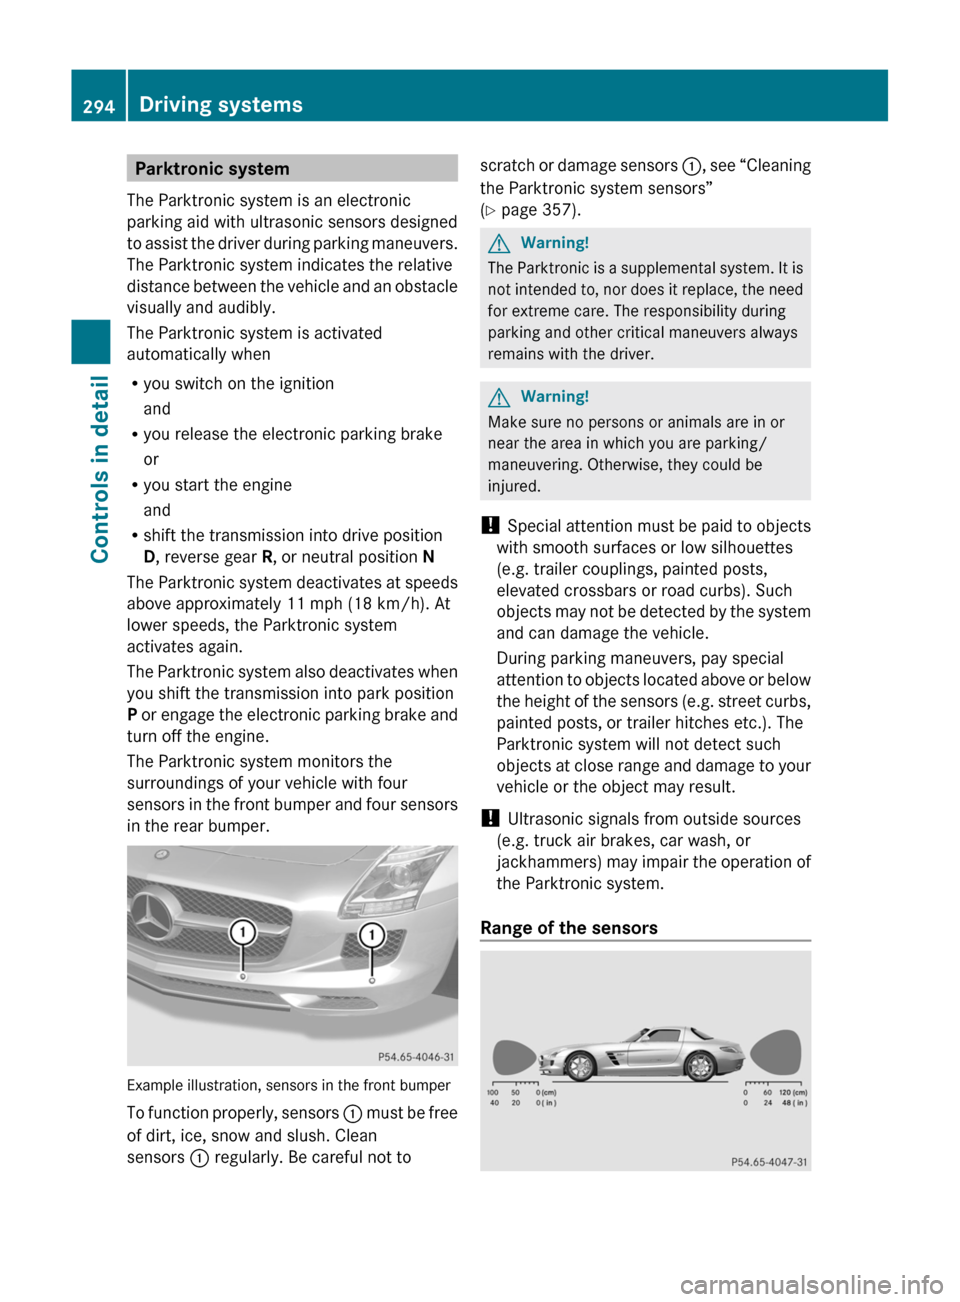
The Parktronic system monitors the
surroundings of your vehicle with four
sensors in the front bumper and four sensors
in the rear bumper.
Example illustration, sensors in the front bumper
To function properly, sensors : must be free
of dirt, ice, snow and slush. Clean
sensors : regularly. Be careful not to
scratch or damage sensors :, see “Cleaning
the Parktronic system sensors”
(Y page 357).
GWarning!
The Parktronic is a supplemental system. It is
not intended to, nor does it replace, the need
for extreme care. The responsibility during
parking and other critical maneuvers always
remains with the driver.
GWarning!
Make sure no persons or animals are in or
near the area in which you are parking/
maneuvering. Otherwise, they could be
injured.
! Special attention must be paid to objects
with smooth surfaces or low silhouettes
(e.g. trailer couplings, painted posts,
elevated crossbars or road curbs). Such
objects may not be detected by the system
and can damage the vehicle.
During parking maneuvers, pay special
attention to objects located above or below
the height of the sensors (e.g. street curbs,
painted posts, or trailer hitches etc.). The
Parktronic system will not detect such
objects at close range and damage to your
vehicle or the object may result.
! Ultrasonic signals from outside sources
(e.g. truck air brakes, car wash, or
jackhammers) may impair the operation of
the Parktronic system.
Range of the sensors
294Driving systemsControls in detail
BA 197 USA, CA Edition A 2011; 1; 27, en-UShereepeVersion: 3.0.3.52010-03-24T15:31:10+01:00 - Seite 294
Page 315 of 436
Route Assistance
This service is only available as part of the
PLUS package.
With the Route Assistance service you get
professional, reliable guidance from an
mbrace Customer Specialist without leaving
your vehicle.
Using your current location and intended
destination, a Customer Specialist can find
the best route and provide turn-by-turn
directions, giving you the reassurance of live
assistance in times of need. Route Assistance
is available at the touch of a button, even if
your vehicle is not equipped with a COMAND
navigation system.
Search & Send
“Search & Send” is a navigation destination
address entry service. For more information
on “Search & Send”, see ( Y page 125).
Remote door lock
If you have forgotten to lock your vehicle and
are no longer near it, you can have it locked
remotely through the Response Center.
The vehicle can be remotely locked within
four days after the ignition has been switched
off.
XContact Response Center at
866-990-9007 (USA only) or
1-888-923-8367 (Canada only).
You will be asked to provide your Personal
Identification Number (PIN).
When you are inside your vehicle the next
time and switch on the ignition, the message
Tele Aid Doors Locked Remotely will
appear on the multifunction display.
i The remote door lock feature is available
if the relevant cellular phone network is
available and data connection is possible.
Stolen Vehicle Recovery Services
In the event your vehicle was stolen:
XReport the incident to the police.
The police will issue a numbered incident
report.XPass this number on to the Response
Center along with your Personal
Identification Number (PIN).
The Response Center will then attempt to
covertly contact the vehicle’s mbrace
system. Once the vehicle is located, the
Response Center will contact the local law
enforcement and you. The vehicle’s
location will only be provided to law
enforcement.
i If the anti-theft alarm stays on for more
than 30 seconds, the mbrace system will
notify the Response Center automatically.
Garage door opener
The integrated remote control can operate up
to three separately controlled devices
compatible with HomeLink ®
or some other
systems.
GWarning!
Before programming the integrated remote
control to a garage door opener or gate
operator, make sure people and objects are
out of the way of the device to prevent
potential harm or damage. When
programming a garage door opener, the door
moves up or down. When programming a gate
operator, the gate opens or closes.
Do not use the integrated remote control with
any garage door opener that lacks safety stop
and reverse features as required by U.S.
federal safety standards (this includes any
garage door opener model manufactured
before April 1, 1982). A garage door that
cannot detect an object - signaling the door
to stop and reverse - does not meet current
U.S. federal safety standards.
Useful features313Controls in detailBA 197 USA, CA Edition A 2011; 1; 27, en-UShereepeVersion: 3.0.3.52010-03-24T15:31:10+01:00 - Seite 313Z
Page 316 of 436

When programming a garage door opener,
park vehicle outside the garage.
Do not run the engine while programming the
integrated remote control. Inhalation of
exhaust gas is hazardous to your health. All
exhaust gas contains carbon monoxide (CO),
and inhaling it can cause unconsciousness
and possible death.
Interior rear view mirror with integrated remote
control
Hand-held remote control A is not part of the
vehicle equipment.
Programming the integrated remote
control
XStep 1: Switch on the ignition.XStep 2: If you have previously programmed
a signal transmitter button and wish to
retain its programming, proceed to step 3.
or
XIf you are programming the integrated
remote control for the first time, press and
hold the two outer signal transmitter
buttons ; and ? and release them when
indicator lamp : begins to flash after
approximately 20 seconds.
Do not hold the buttons for longer than
30 seconds.
This procedure erases any previous
settings for all three channels and
initializes the memory. If you later wish to
program a second and/or third hand-held
transmitter to the remaining two signaltransmitter buttons, do not repeat this step
and begin directly with step 3.XStep 3: Hold the end of hand-held remote
control A of the device you wish to train
approximately 2 to 12 in (5 to 30 cm) away
from the signal transmitter button ( ;, =
or ? ) to be programmed, while keeping
indicator lamp : in view.XStep 4: Using both hands, simultaneously
press hand-held remote control button B
and the desired signal transmitter button
( ; , = or ?). Do not release the buttons
until step 5 is completed.
Indicator lamp : will flash, first slowly and
then rapidly.
i Indicator lamp : flashes immediately
the first time the signal transmitter button
is programmed. If this button has already
been programmed, the indicator lamp will
start flashing after 20 seconds.
XStep 5: After indicator lamp : changes
from a slow to a rapidly flashing light,
release the hand-held remote control
button and the signal transmitter button.XStep 6: Press and hold the just-trained
signal transmitter button ( ;, = or ?) and
observe indicator lamp :.
If indicator lamp : stays on constantly,
programming is complete and your device
should activate when the respective signal
transmitter button ( ;, = or ?) is pressed
and released.
i If indicator lamp : flashes rapidly for
approximately 2 seconds and then turns to
a constant light, continue with
programming steps 8 through 12 as your
garage door opener may be equipped with
the “rolling code” feature.
XStep 7: To program the remaining two
signal transmitter buttons, repeat the steps
above starting with step 3.314Useful featuresControls in detail
BA 197 USA, CA Edition A 2011; 1; 27, en-UShereepeVersion: 3.0.3.52010-03-24T15:31:10+01:00 - Seite 314
Page 317 of 436

Rolling code programming
To train a garage door opener (or other rolling
code devices) with the rolling code feature,
follow these instructions after completing the
“Programming” portion (steps 1 through 6) of
this text. For your convenience and to
complete the procedure faster, you might
want to have someone assist you.XStep 8: Locate the “training” button on the
garage door opener motor head unit.
i Exact location and color of the button may
vary by garage door opener brand.
Depending on manufacturer, the “training”
button may also be referred to as “learn” or
“smart” button. If there is difficulty locating
the transmitting button, refer to the garage
door opener Operator’s Manual.
XStep 9: Press the “training” button on the
garage door opener motor head unit.
The “training light” is activated.
You have 30 seconds to initiate the
following two steps.XStep 10: Return to the vehicle and firmly
press, hold for 2 seconds and release the
programmed signal transmitter button ( ;,
= or ?).XStep 11: Press, hold for 2 seconds and
release same signal transmitter button a
second time to complete the training
process.
i Some garage door openers (or other
rolling code equipped devices) may require
you to press, hold for 2 seconds and
release the same signal transmitter button
a third time to complete the training
process.
XStep 12: Confirm the garage door
operation by pressing the programmed
signal transmitter button ( ;, = or ?).XStep 13: To program the remaining two
signal transmitter buttons, repeat the steps
above starting with step 3.Gate operator/Canadian programming
Canadian radio-frequency laws require
transmitter signals to “time-out” (or quit)
after several seconds of transmission which
may not be long enough for the integrated
signal transmitter to pick up the signal during
programming. Similar to this Canadian law,
some U.S. gate operators are designed to
“time-out” in the same manner.
If you live in Canada or if you are having
difficulties programming a gate operator
(regardless of where you live) by using the
programming procedures, replace step 4 with
the following:XStep 4: Press and hold the signal
transmitter button ( ;, = or ?). Do not
release this button until it has been
successfully trained.XWhile still holding down the signal
transmitter button ( ;, = or ?), “cycle”
your hand-held remote control button B
as follows: Press and hold button B for
2 seconds, then release it for 2 seconds,
and again press and hold it for 2 seconds.
Repeat this sequence on the hand-held
remote control until the frequency signal
has been learned.
Upon successful training, indicator
lamp : will flash slowly and then rapidly
after several seconds.XProceed with programming step 5 and
step 6 to complete.
i Upon completion of programming the
integrated remote control, make sure you
retain the hand-held remote control that
came with the garage door opener, gate
operator or other device. You may need it
for use in other vehicles, for future
programming of an integrated remote
control, or simply for continued use as a
hand-held remote control to operate the
respective device in other situations.
Useful features315Controls in detailBA 197 USA, CA Edition A 2011; 1; 27, en-UShereepeVersion: 3.0.3.52010-03-24T15:31:10+01:00 - Seite 315Z
Page 388 of 436

Display messagesPossible causes/consequences and M Solutionsb
Auto Lamp Function
InoperativeThe light sensor is malfunctioning. The headlamps come on
automatically. XContact an authorized Mercedes-Benz Center as soon as
possible.
To switch off the headlamps (U.S. vehicles only):
XSwitch off the daytime running lamp mode in the control system
( Y page 284).XSwitch off the headlamps using the exterior lamp switch
( Y page 250).b
Check Left Low Beam
or
Check Right Low
BeamThe left or right low-beam lamp is malfunctioning. XContact an authorized Mercedes-Benz Center as soon as
possible.b
Switch Off LightsYou have removed the SmartKey with KEYLESS-GO from the
vehicle and left the headlamps on or removed the SmartKey from
the starter switch, opened the driver’s door and left the headlamps
on.XTurn the exterior lamp switch to c (Y page 250).b
Check Left Tail
and Brake Lamps
or
Check Right Tail
and Brake LampsThe left or right tail lamp/brake lamp is malfunctioning. This
message will only appear if all LEDs have stopped working.XContact an authorized Mercedes-Benz Center as soon as
possible.b
Check Rear Left
Turn Signal
or
Check Rear Right
Turn SignalThe left or right rear turn signal lamp is malfunctioning.XContact an authorized Mercedes-Benz Center as soon as
possible.386Vehicle status messages in the multifunction displayPractical hints
BA 197 USA, CA Edition A 2011; 1; 27, en-UShereepeVersion: 3.0.3.52010-03-24T15:31:10+01:00 - Seite 386
Page 389 of 436
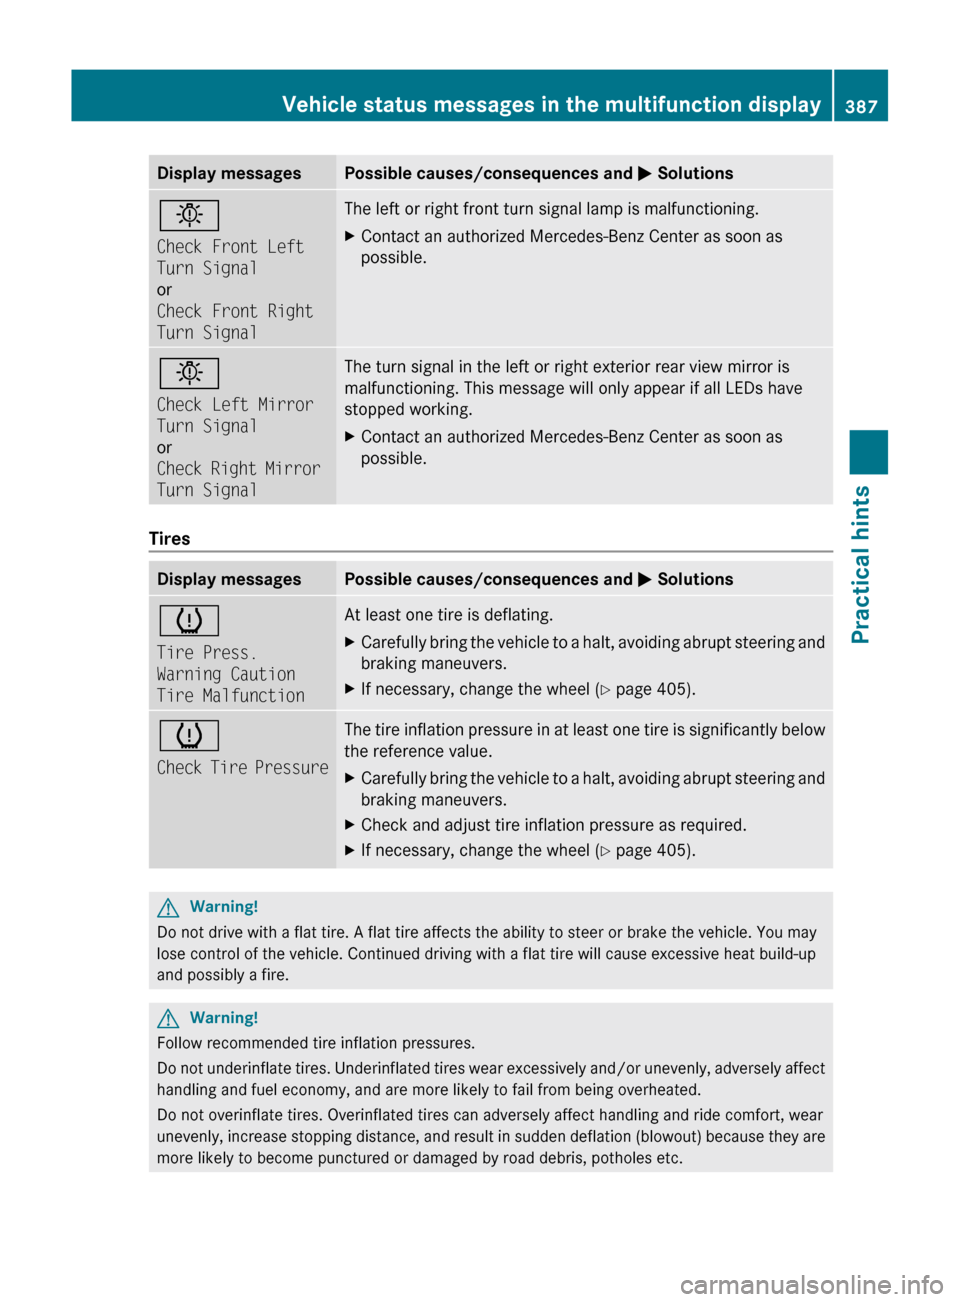
Display messagesPossible causes/consequences and M Solutionsb
Check Front Left
Turn Signal
or
Check Front Right
Turn SignalThe left or right front turn signal lamp is malfunctioning. XContact an authorized Mercedes-Benz Center as soon as
possible.b
Check Left Mirror
Turn Signal
or
Check Right Mirror
Turn SignalThe turn signal in the left or right exterior rear view mirror is
malfunctioning. This message will only appear if all LEDs have
stopped working.XContact an authorized Mercedes-Benz Center as soon as
possible.
Tires
Display messagesPossible causes/consequences and M Solutionsh
Tire Press.
Warning Caution
Tire MalfunctionAt least one tire is deflating.XCarefully bring the vehicle to a halt, avoiding abrupt steering and
braking maneuvers.XIf necessary, change the wheel ( Y page 405).h
Check Tire PressureThe tire inflation pressure in at least one tire is significantly below
the reference value.XCarefully bring the vehicle to a halt, avoiding abrupt steering and
braking maneuvers.XCheck and adjust tire inflation pressure as required.XIf necessary, change the wheel ( Y page 405).GWarning!
Do not drive with a flat tire. A flat tire affects the ability to steer or brake the vehicle. You may
lose control of the vehicle. Continued driving with a flat tire will cause excessive heat build-up
and possibly a fire.
GWarning!
Follow recommended tire inflation pressures.
Do not underinflate tires. Underinflated tires wear excessively and/or unevenly, adversely affect
handling and fuel economy, and are more likely to fail from being overheated.
Do not overinflate tires. Overinflated tires can adversely affect handling and ride comfort, wear
unevenly, increase stopping distance, and result in sudden deflation (blowout) because they are
more likely to become punctured or damaged by road debris, potholes etc.
Vehicle status messages in the multifunction display387Practical hintsBA 197 USA, CA Edition A 2011; 1; 27, en-UShereepeVersion: 3.0.3.52010-03-24T15:31:10+01:00 - Seite 387Z
Page 390 of 436
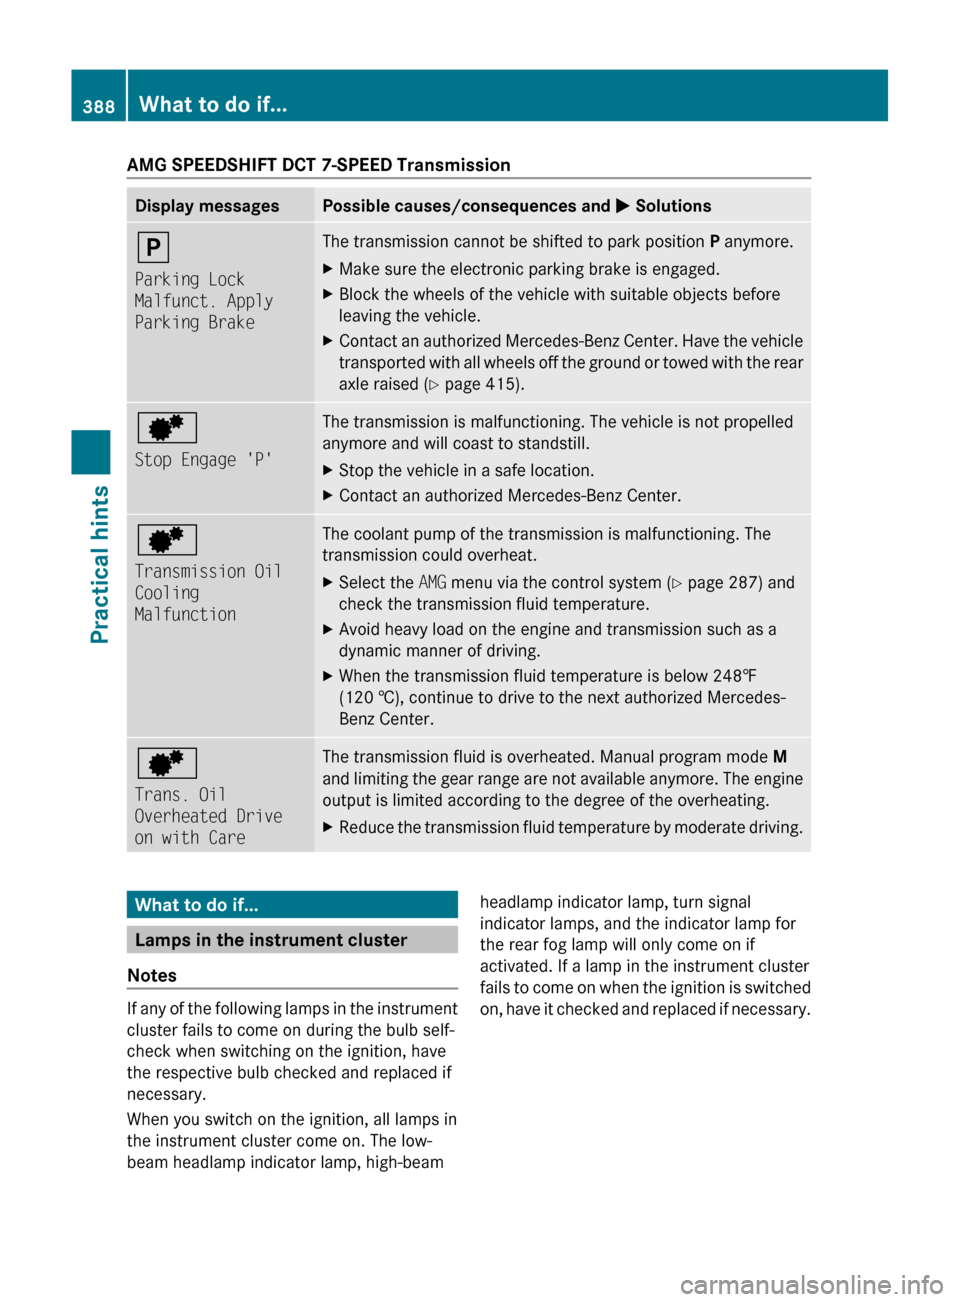
AMG SPEEDSHIFT DCT 7-SPEED TransmissionDisplay messagesPossible causes/consequences and M Solutionsj
Parking Lock
Malfunct. Apply
Parking BrakeThe transmission cannot be shifted to park position P anymore.XMake sure the electronic parking brake is engaged.XBlock the wheels of the vehicle with suitable objects before
leaving the vehicle.XContact an authorized Mercedes-Benz Center. Have the vehicle
transported with all wheels off the ground or towed with the rear
axle raised ( Y page 415).d
Stop Engage 'P'The transmission is malfunctioning. The vehicle is not propelled
anymore and will coast to standstill.XStop the vehicle in a safe location.XContact an authorized Mercedes-Benz Center.d
Transmission Oil
Cooling
MalfunctionThe coolant pump of the transmission is malfunctioning. The
transmission could overheat.XSelect the AMG menu via the control system ( Y page 287) and
check the transmission fluid temperature.XAvoid heavy load on the engine and transmission such as a
dynamic manner of driving.XWhen the transmission fluid temperature is below 248‡
(120 †), continue to drive to the next authorized Mercedes-
Benz Center.d
Trans. Oil
Overheated Drive
on with CareThe transmission fluid is overheated. Manual program mode M
and limiting the gear range are not available anymore. The engine
output is limited according to the degree of the overheating.XReduce the transmission fluid temperature by moderate driving.What to do if...
Lamps in the instrument cluster
Notes
If any of the following lamps in the instrument
cluster fails to come on during the bulb self-
check when switching on the ignition, have
the respective bulb checked and replaced if
necessary.
When you switch on the ignition, all lamps in
the instrument cluster come on. The low-
beam headlamp indicator lamp, high-beam
headlamp indicator lamp, turn signal
indicator lamps, and the indicator lamp for
the rear fog lamp will only come on if
activated. If a lamp in the instrument cluster
fails to come on when the ignition is switched
on, have it checked and replaced if necessary.388What to do if...Practical hints
BA 197 USA, CA Edition A 2011; 1; 27, en-UShereepeVersion: 3.0.3.52010-03-24T15:31:10+01:00 - Seite 388
Page 402 of 436
Replacing bulbs
Safety notes
Safe vehicle operation depends on proper
exterior lighting and signaling to a large
degree.
Correct headlamp adjustment is extremely
important. Have headlamps checked and
readjusted at regular intervals and when a
bulb has been replaced. Contact an
authorized Mercedes-Benz Center for
headlamp adjustment.
GWarning!
Bulbs and bulb sockets can be very hot. Allow
the lamp to cool down before changing a bulb.
Keep bulbs out of reach of children.
Halogen lamps contain pressurized gas. A
bulb can explode if you
R touch or move it when hot
R drop the bulb
R scratch the bulb
Wear eye and hand protection.
Because of high voltage in Xenon lamps, it is
dangerous to replace the bulb or repair the
lamp and its components. We recommend
that you have such work done by a qualified
technician.
i Since replacing bulbs is a technically
highly demanding process, we recommend
to have them replaced at an authorized
Mercedes-Benz Center.
i If the headlamps are fogged up on the
inside as a result of high humidity, driving
the vehicle a distance with the lights on
should clear up the fogging.
Replacing bulbs for front lamps
You cannot replace the bulbs in the front
lamps yourself. Contact an authorized
Mercedes-Benz Center or a qualified
workshop.
Replacing bulbs for rear lamps
Except for the license plate lamp bulbs, you
cannot replace the bulbs in the rear lamps
yourself.
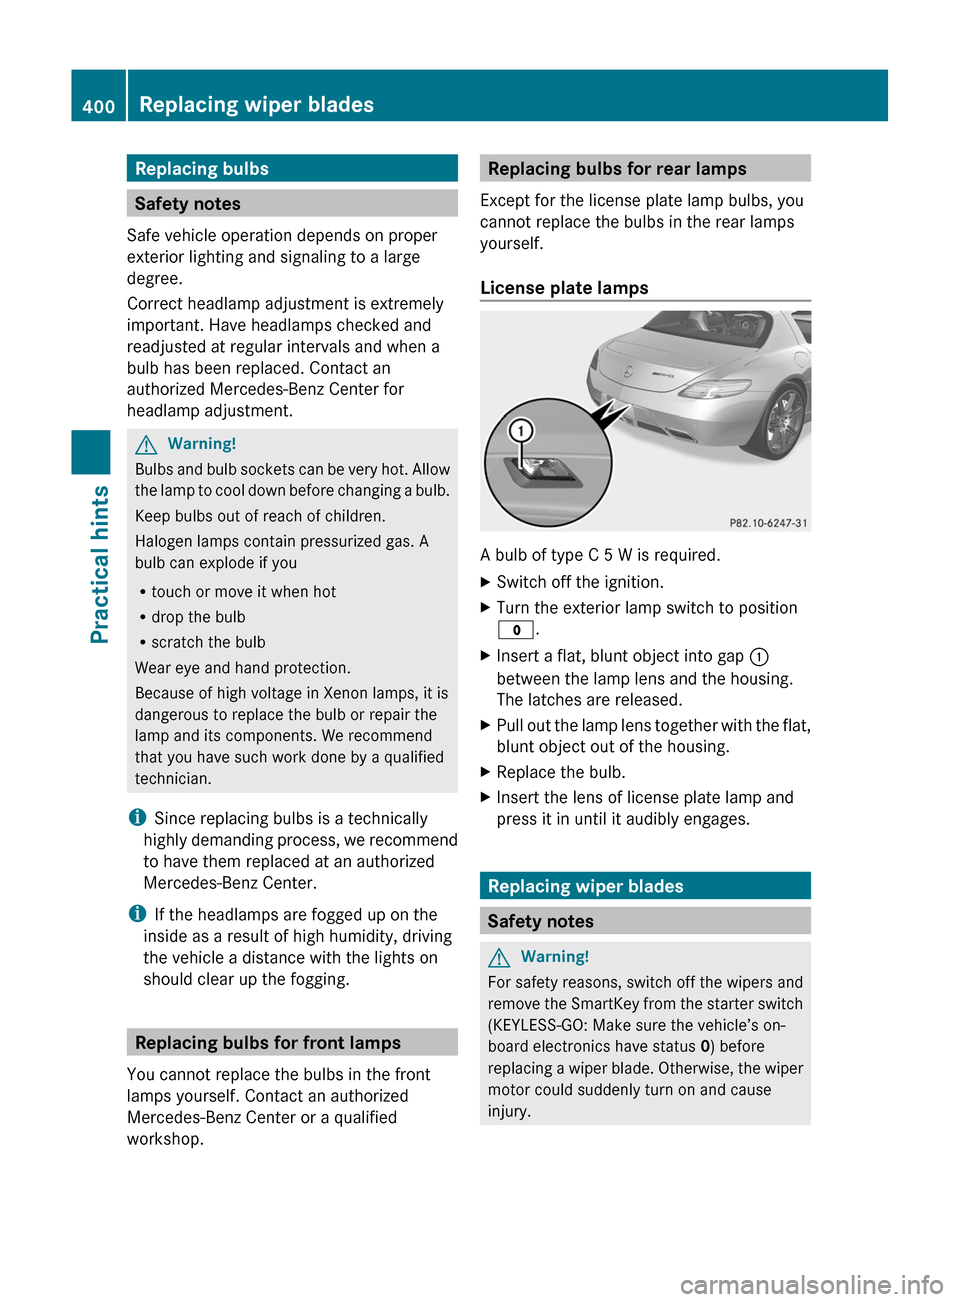
License plate lamps
A bulb of type C 5 W is required.
XSwitch off the ignition.XTurn the exterior lamp switch to position
$ .XInsert a flat, blunt object into gap :
between the lamp lens and the housing.
The latches are released.XPull out the lamp lens together with the flat,
blunt object out of the housing.XReplace the bulb.XInsert the lens of license plate lamp and
press it in until it audibly engages.
Replacing wiper blades
Safety notes
GWarning!
For safety reasons, switch off the wipers and
remove the SmartKey from the starter switch
(KEYLESS-GO: Make sure the vehicle’s on-
board electronics have status 0) before
replacing a wiper blade. Otherwise, the wiper
motor could suddenly turn on and cause
injury.
400Replacing wiper bladesPractical hints
BA 197 USA, CA Edition A 2011; 1; 27, en-UShereepeVersion: 3.0.3.52010-03-24T15:31:10+01:00 - Seite 400