2011 MERCEDES-BENZ SLS transmission
[x] Cancel search: transmissionPage 98 of 436
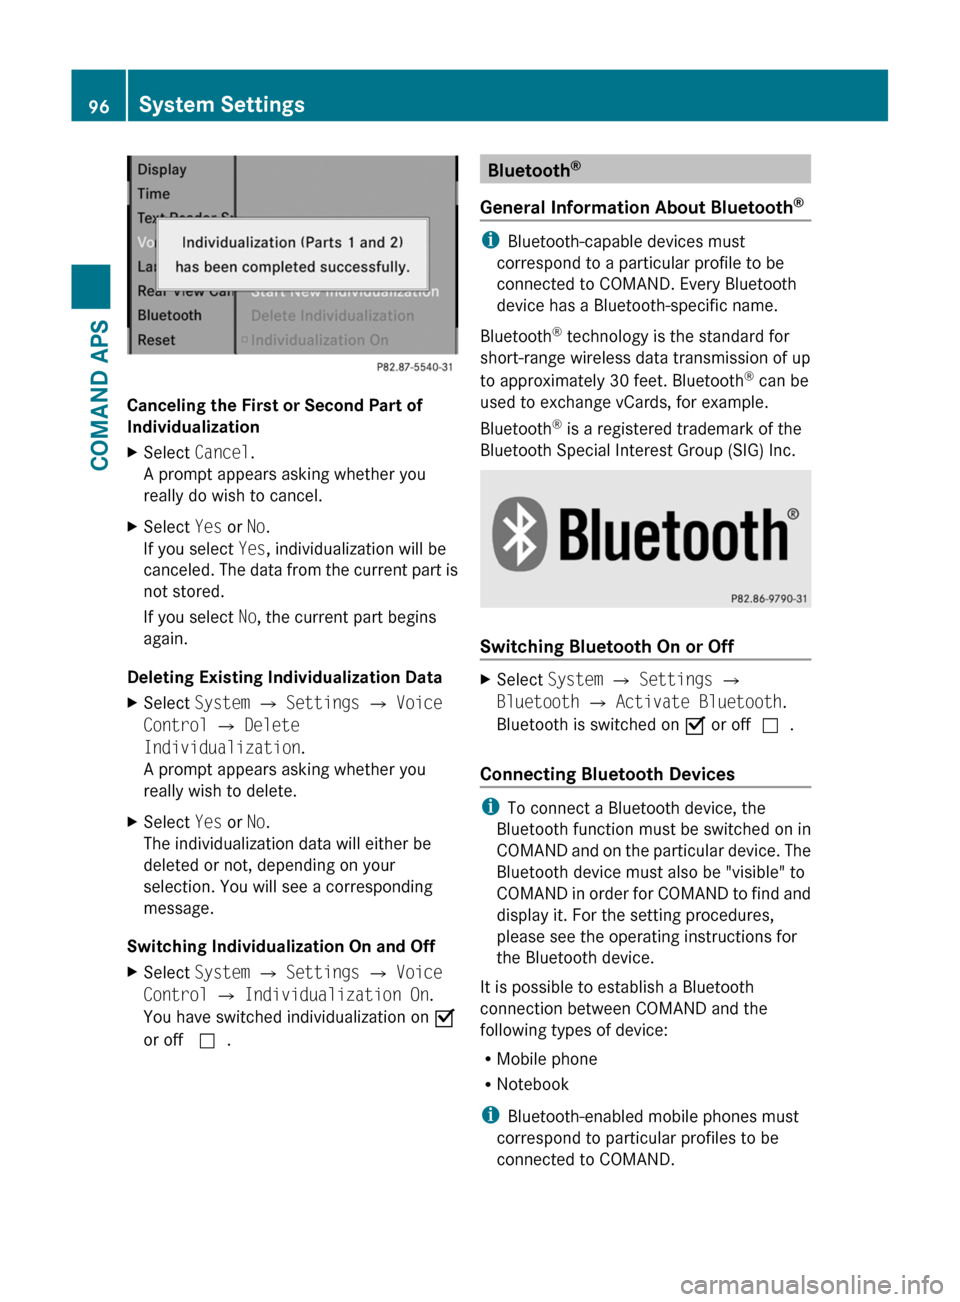
Canceling the First or Second Part of
Individualization
XSelect Cancel.
A prompt appears asking whether you
really do wish to cancel.
XSelect Yes or No.
If you select Yes, individualization will be
canceled. The data from the current part is
not stored.
If you select No, the current part begins
again.
Deleting Existing Individualization Data
XSelect System £ Settings £ Voice
Control £ Delete
Individualization.
A prompt appears asking whether you
really wish to delete.
XSelect Yes or No.
The individualization data will either be
deleted or not, depending on your
selection. You will see a corresponding
message.
Switching Individualization On and Off
XSelect System £ Settings £ Voice
Control £ Individualization On.
You have switched individualization on Ç
or off c.
Bluetooth®
General Information About Bluetooth®
iBluetooth-capable devices must
correspond to a particular profile to be
connected to COMAND. Every Bluetooth
device has a Bluetooth-specific name.
Bluetooth® technology is the standard for
short-range wireless data transmission of up
to approximately 30 feet. Bluetooth® can be
used to exchange vCards, for example.
Bluetooth® is a registered trademark of the
Bluetooth Special Interest Group (SIG) Inc.
Switching Bluetooth On or Off
XSelect System £ Settings £
Bluetooth £ Activate Bluetooth.
Bluetooth is switched on Ç or offc.
Connecting Bluetooth Devices
iTo connect a Bluetooth device, the
Bluetooth function must be switched on in
COMAND and on the particular device. The
Bluetooth device must also be "visible" to
COMAND in order for COMAND to find and
display it. For the setting procedures,
please see the operating instructions for
the Bluetooth device.
It is possible to establish a Bluetooth
connection between COMAND and the
following types of device:
RMobile phone
RNotebook
iBluetooth-enabled mobile phones must
correspond to particular profiles to be
connected to COMAND.
96System SettingsCOMAND APS
BA 197 USA, CA Edition A 2011; 1; 27, en-UShereepeVersion: 3.0.3.52010-03-24T15:31:10+01:00 - Seite 96
Page 153 of 436
XSelect COMAND (“MB Bluetooth”) on the
mobile phone.
XWhen prompted to do so, enter the
passcode on the mobile phone and on
COMAND.
iAfter you have entered the passkey on
COMAND and on the mobile phone, you
have to trigger a connection to COMAND
manually on some mobile phones.
Displaying Details on a Mobile Phone
XIn the phone submenu select Phone £
Bluetooth Phones.
XSelect the mobile phone from the list.XSelect Options £ Details.
The details screen for the device is
displayed.
XTo close the details screen: Rotate
y m z or slide o m p.
or
XPress the n or the k button.
Deregistering (De-Authorizing) a Mobile
Phone
XIn the phone submenu select Phone £
Bluetooth Phones.
XSelect the authorized mobile phone.XSelect Options £ De-Authorize.
You will be asked whether the device
should really be de-authorized.
XSelect Yes or No.
If you select Yes, the authorization of the
device is withdrawn.
iIf the authorization of a device which had
been authorized in the past has been
withdrawn, the device list no longer
includes this device.
iIf you de-authorize the mobile phone on
COMAND, you should also de-authorize
“MB Bluetooth” on the mobile phone.
Otherwise a future authorization may fail.
Activating Another Mobile Phone
If you have authorized several mobile phones,
you can switch between the individual mobile
phones.
When you authorize a new mobile phone, it is
activated automatically. Only one mobile
phone is active at a time.
XSelect Phone £ Bluetooth Phones.XSelect the mobile phone from the list.XPress n.
The selected mobile phone is activated if
the selected mobile is within reception
range and its Bluetooth® function is
switched on. Any previously activated
phone is deactivated.
Setting Transmit and Receive Volume
iThese settings should normally not be
changed as the factory settings are
matched to most mobile phones.
iChanges may result in significant
impairments to the transmission quality.
These settings may not be changed during
an active phone call.
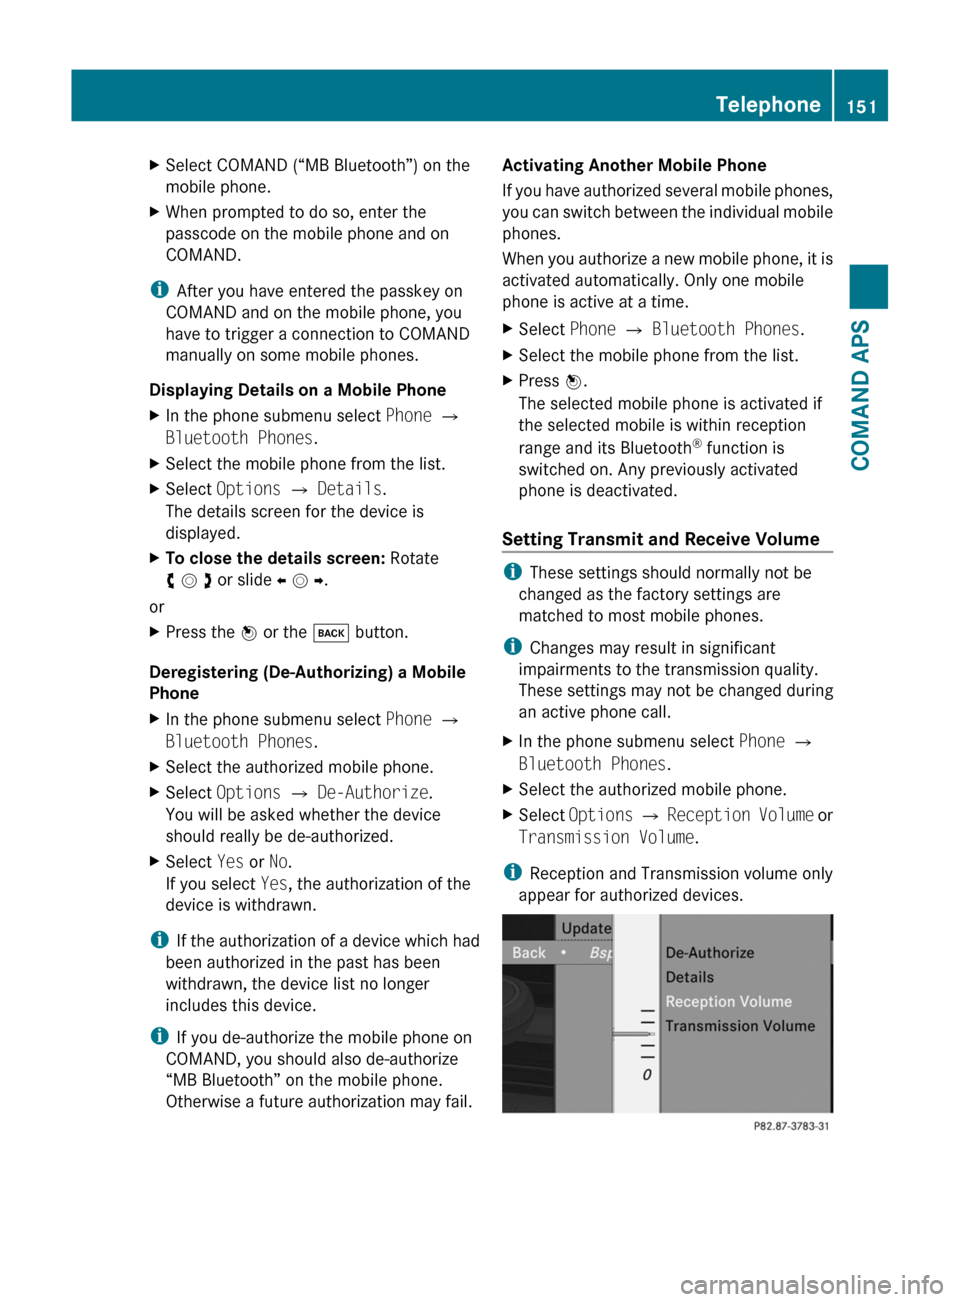
XIn the phone submenu select Phone £
Bluetooth Phones.
XSelect the authorized mobile phone.XSelect Options £ Reception Volume or
Transmission Volume.
iReception and Transmission volume only
appear for authorized devices.
Telephone151COMAND APSBA 197 USA, CA Edition A 2011; 1; 27, en-UShereepeVersion: 3.0.3.52010-03-24T15:31:10+01:00 - Seite 151Z
Page 162 of 436
Initiating a Call to a Call List Entry or
COMAND Phone Book Entry
XCall up a call list and select an entry
(Y page 156).
or
XOpen the COMAND phone book and select
an entry (Y page 153).
XTo initiate call: Press n.
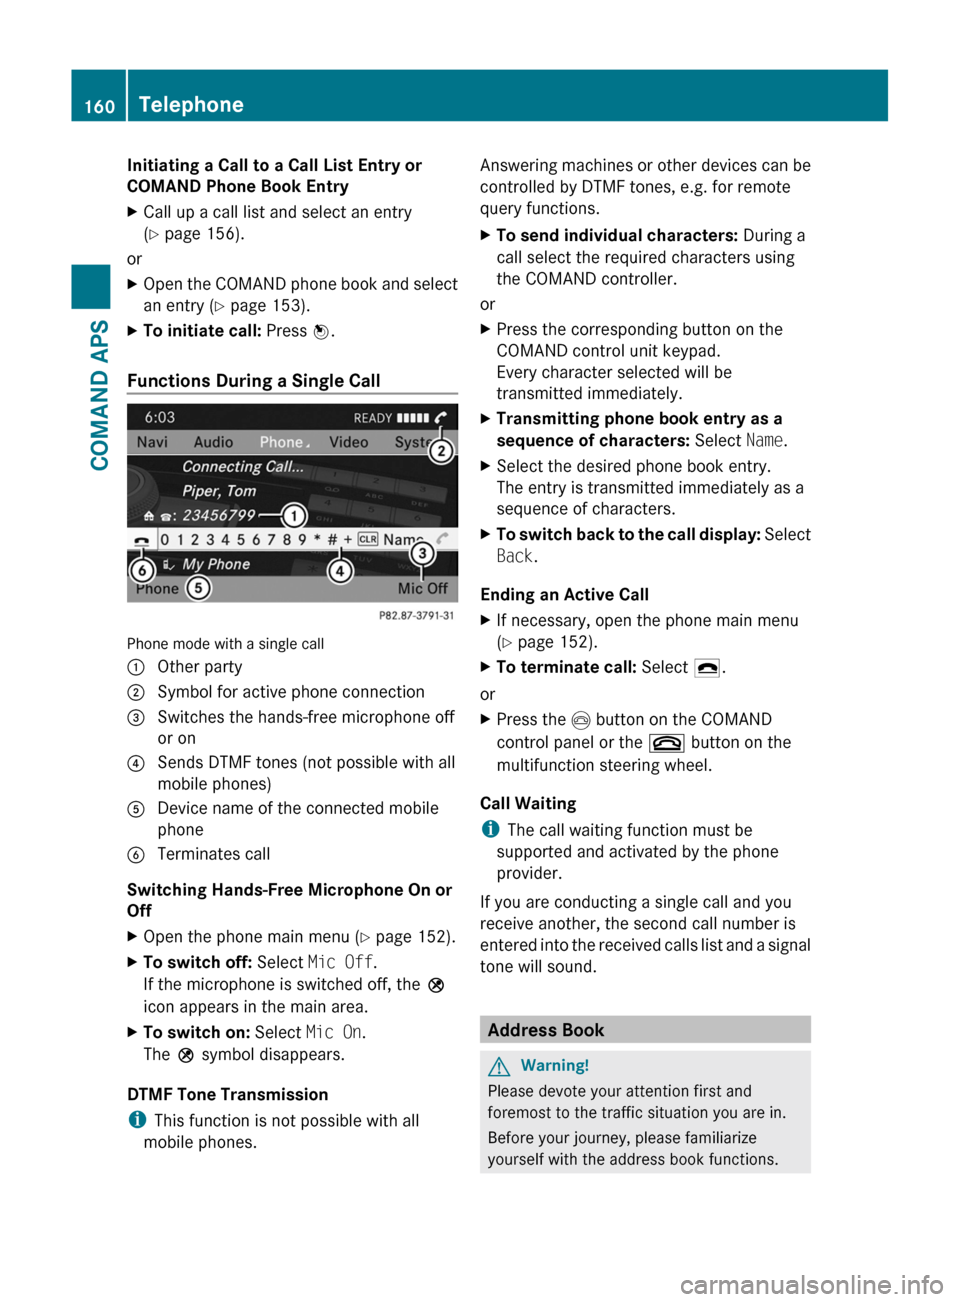
Functions During a Single Call
Phone mode with a single call
1 Other party2 Symbol for active phone connection3 Switches the hands-free microphone off
or on
4 Sends DTMF tones (not possible with all
mobile phones)
5 Device name of the connected mobile
phone
6 Terminates call
Switching Hands-Free Microphone On or
Off
XOpen the phone main menu (Y page 152).XTo switch off: Select Mic Off.
If the microphone is switched off, the >
icon appears in the main area.
XTo switch on: Select Mic On.
The > symbol disappears.
DTMF Tone Transmission
iThis function is not possible with all
mobile phones.
Answering machines or other devices can be
controlled by DTMF tones, e.g. for remote
query functions.
XTo send individual characters: During a
call select the required characters using
the COMAND controller.
or
XPress the corresponding button on the
COMAND control unit keypad.
Every character selected will be
transmitted immediately.
XTransmitting phone book entry as a
sequence of characters: Select Name.
XSelect the desired phone book entry.
The entry is transmitted immediately as a
sequence of characters.
XTo switch back to the call display: Select
Back.
Ending an Active Call
XIf necessary, open the phone main menu
(Y page 152).
XTo terminate call: Select 4.
or
XPress the I button on the COMAND
control panel or the ~ button on the
multifunction steering wheel.
Call Waiting
iThe call waiting function must be
supported and activated by the phone
provider.
If you are conducting a single call and you
receive another, the second call number is
entered into the received calls list and a signal
tone will sound.
Address Book
GWarning!
Please devote your attention first and
foremost to the traffic situation you are in.
Before your journey, please familiarize
yourself with the address book functions.
160TelephoneCOMAND APS
BA 197 USA, CA Edition A 2011; 1; 27, en-UShereepeVersion: 3.0.3.52010-03-24T15:31:10+01:00 - Seite 160
Page 169 of 436
External Bluetooth® device
RBluetooth® is activated in COMAND and on
the Bluetooth® device (see operating
instructions of the device).
RThe Bluetooth® device can send vCards via
Bluetooth® (see operating instructions of
the device).
RThe Bluetooth® device in the vehicle is
switched on.
It is not necessary to authorize the device in
COMAND to receive vCards.
Downloading from a Mobile Phone with
PBAP Support
XSelect Address Book or, if the phone main
menu is displayed, Phone on COMAND.
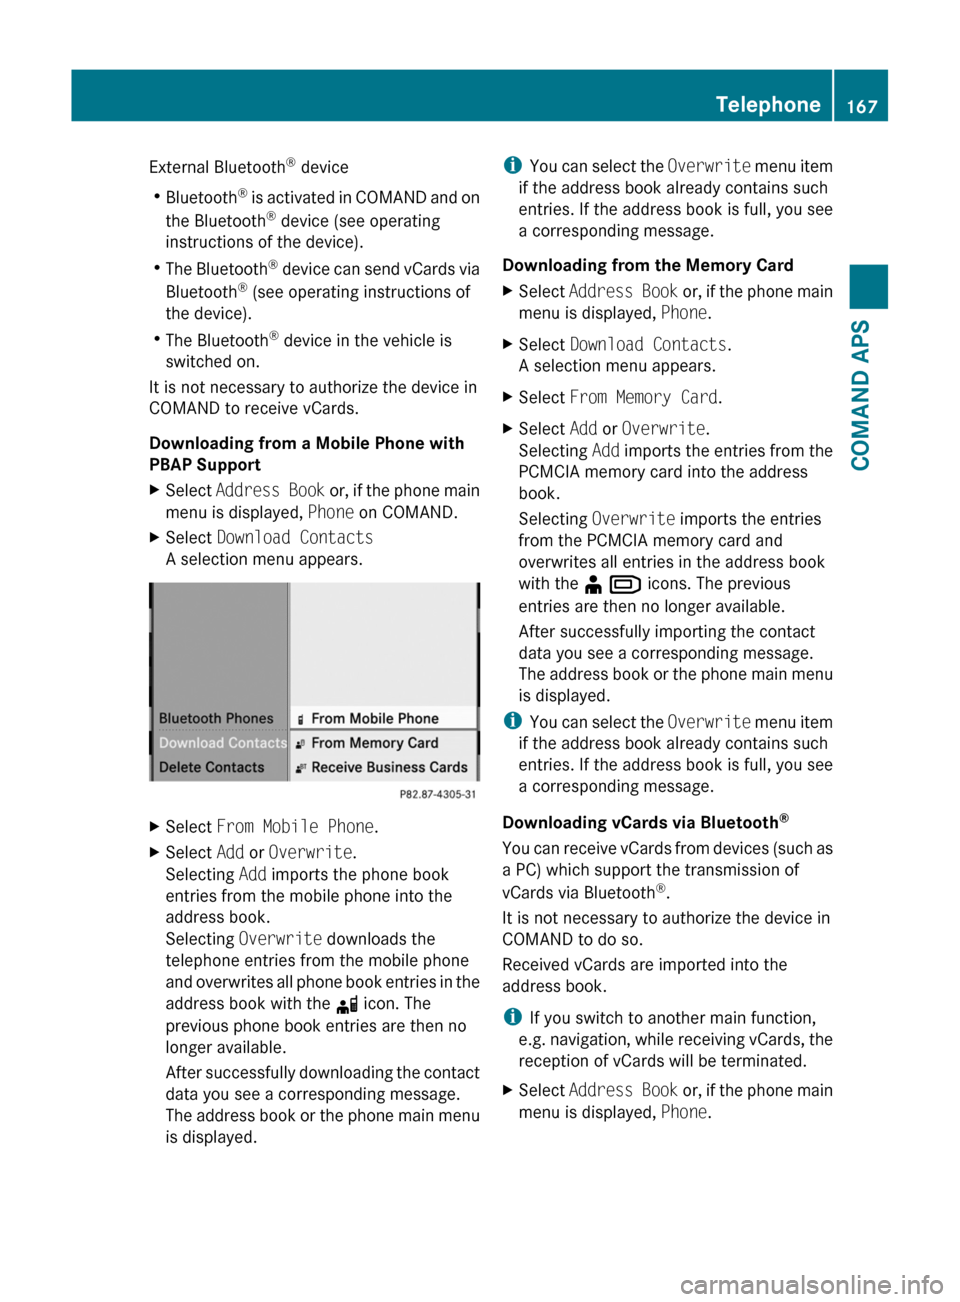
XSelect Download Contacts
A selection menu appears.
XSelect From Mobile Phone.XSelect Add or Overwrite.
Selecting Add imports the phone book
entries from the mobile phone into the
address book.
Selecting Overwrite downloads the
telephone entries from the mobile phone
and overwrites all phone book entries in the
address book with the d icon. The
previous phone book entries are then no
longer available.
After successfully downloading the contact
data you see a corresponding message.
The address book or the phone main menu
is displayed.
iYou can select the Overwrite menu item
if the address book already contains such
entries. If the address book is full, you see
a corresponding message.
Downloading from the Memory Card
XSelect Address Book or, if the phone main
menu is displayed, Phone.
XSelect Download Contacts.
A selection menu appears.
XSelect From Memory Card.XSelect Add or Overwrite.
Selecting Add imports the entries from the
PCMCIA memory card into the address
book.
Selecting Overwrite imports the entries
from the PCMCIA memory card and
overwrites all entries in the address book
with the ¥ Â icons. The previous
entries are then no longer available.
After successfully importing the contact
data you see a corresponding message.
The address book or the phone main menu
is displayed.
iYou can select the Overwrite menu item
if the address book already contains such
entries. If the address book is full, you see
a corresponding message.
Downloading vCards via Bluetooth®
You can receive vCards from devices (such as
a PC) which support the transmission of
vCards via Bluetooth®.
It is not necessary to authorize the device in
COMAND to do so.
Received vCards are imported into the
address book.
iIf you switch to another main function,
e.g. navigation, while receiving vCards, the
reception of vCards will be terminated.
XSelect Address Book or, if the phone main
menu is displayed, Phone.
Telephone167COMAND APSBA 197 USA, CA Edition A 2011; 1; 27, en-UShereepeVersion: 3.0.3.52010-03-24T15:31:10+01:00 - Seite 167Z
Page 237 of 436
Vehicle equipment ............................236
Locking and unlocking .....................236
Starter switch positions ...................241
Seats .................................................. 243
Multifunction steering wheel ..........245
Mirrors ............................................... 246
Memory function .............................. 249
Lighting .............................................. 249
Wipers ................................................ 253
Power windows ................................. 255
Driving and parking ..........................257
AMG SPEEDSHIFT DCT 7-SPEED
Transmission ..................................... 263
Instrument cluster ............................271
Control system .................................. 272
Driving systems ................................ 290
Climate control system ....................298
Rear window defroster .....................304
Loading and storing ..........................304
Useful features ................................. 306235Controls in detailBA 197 USA, CA Edition A 2011; 1; 27, en-UShereepeVersion: 3.0.3.52010-03-24T15:31:10+01:00 - Seite 235
Page 249 of 436
rear view mirror and glance over your
shoulder before changing lanes.
iYou can store the settings for the exterior
rear view mirror position with the memory
function (Y page 249).
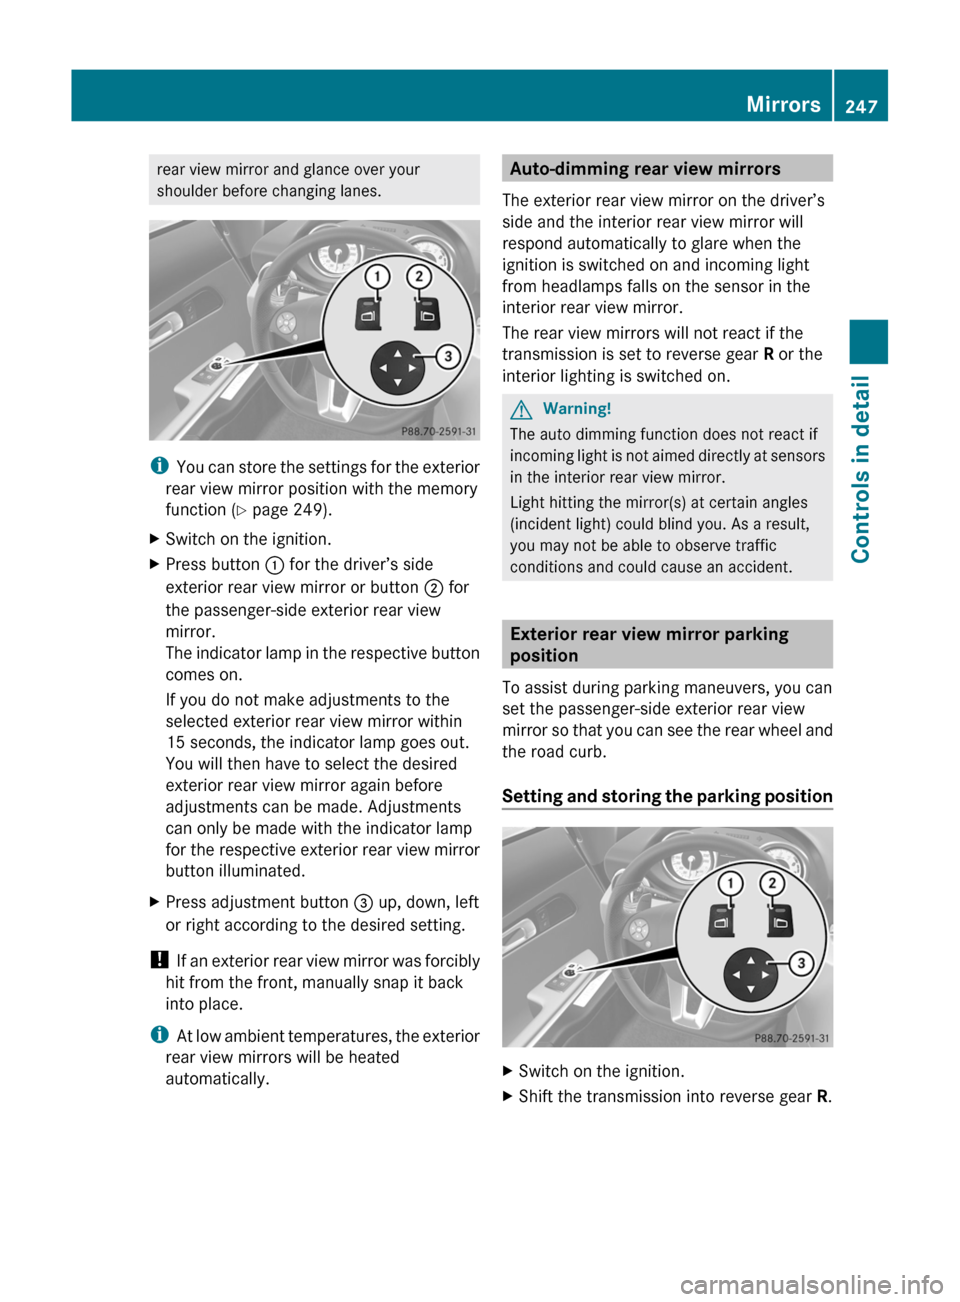
XSwitch on the ignition.XPress button : for the driver’s side
exterior rear view mirror or button ; for
the passenger-side exterior rear view
mirror.
The indicator lamp in the respective button
comes on.
If you do not make adjustments to the
selected exterior rear view mirror within
15 seconds, the indicator lamp goes out.
You will then have to select the desired
exterior rear view mirror again before
adjustments can be made. Adjustments
can only be made with the indicator lamp
for the respective exterior rear view mirror
button illuminated.
XPress adjustment button = up, down, left
or right according to the desired setting.
! If an exterior rear view mirror was forcibly
hit from the front, manually snap it back
into place.
iAt low ambient temperatures, the exterior
rear view mirrors will be heated
automatically.
Auto-dimming rear view mirrors
The exterior rear view mirror on the driver’s
side and the interior rear view mirror will
respond automatically to glare when the
ignition is switched on and incoming light
from headlamps falls on the sensor in the
interior rear view mirror.
The rear view mirrors will not react if the
transmission is set to reverse gear R or the
interior lighting is switched on.
GWarning!
The auto dimming function does not react if
incoming light is not aimed directly at sensors
in the interior rear view mirror.
Light hitting the mirror(s) at certain angles
(incident light) could blind you. As a result,
you may not be able to observe traffic
conditions and could cause an accident.
Exterior rear view mirror parking
position
To assist during parking maneuvers, you can
set the passenger-side exterior rear view
mirror so that you can see the rear wheel and
the road curb.
Setting and storing the parking position
XSwitch on the ignition.XShift the transmission into reverse gear R.Mirrors247Controls in detailBA 197 USA, CA Edition A 2011; 1; 27, en-UShereepeVersion: 3.0.3.52010-03-24T15:31:10+01:00 - Seite 247Z
Page 250 of 436

XPress button ;, to select the passenger-
side exterior rear view mirror.
XAdjust the passenger-side exterior rear
view mirror with adjustment button = so
that you see the rear wheel and the road
curb.
The exterior rear view mirror parking
position is stored.
iIf the exterior rear view mirror does move,
repeat the above steps. After the setting is
stored, you can move the exterior rear view
mirror again.
Calling up the parking position
XSwitch on the ignition.XShift the transmission into reverse gear R.
The passenger-side exterior rear view
mirror moves to the stored parking
position.
The passenger-side exterior rear view mirror
returns to its previously stored driving
position
R10 seconds after you have shift the
transmission out of reverse gear R
Rimmediately once your vehicle exceeds a
speed of approximately 6 mph (10 km/h)
Rimmediately when you press button : to
select the driver’s side exterior rear view
mirror
Power-folding exterior rear view
mirrors
! Before you drive the vehicle through an
automatic car wash, fold in the exterior rear
view mirrors. Otherwise they may get
damaged.
Folding in and out manually
iThe mirrors do not fold out if they have
been folded in manually. Please make sure
both mirrors are folded out before driving
off.
The exterior rear view mirrors can vibrate if
they are not folded out completely.
XSwitch on the ignition.XFolding in: Briefly press button :.
Both exterior rear view mirrors fold in.
iAt speeds above approximately 30 mph
(47 km/h), you will not be able to fold the
exterior mirrors in.
XFolding out: Briefly press button :.
Both exterior rear view mirrors fold out.
Synchronizing
The power-folding rear view mirrors may have
to be synchronized after the vehicle battery
has been disconnected or discharged. If the
exterior rear view mirrors do not fold properly
upon locking or unlocking the vehicle, do the
following:
XMake sure the power-folding function in the
control system is activated (Y page 286).
XSwitch on the ignition.XBriefly press button :.
When the exterior rear view mirrors fold
properly upon locking the vehicle, the exterior
mirrors are synchronized. Otherwise repeat
the above steps.
Folding in and out automatically
The function must be activated in the
Convenience submenu (Y page 287).
The exterior rear view mirrors fold in
automatically as soon as the vehicle is locked
from the outside.
248MirrorsControls in detail
BA 197 USA, CA Edition A 2011; 1; 27, en-UShereepeVersion: 3.0.3.52010-03-24T15:31:10+01:00 - Seite 248
Page 256 of 436

Switching on/off
Combination switch
1$ Windshield wipers off2Ä Slow intermittent wiping73Å Fast intermittent wiping84° Slow continuous wiping5¯ Fast continuous wipingBí Single wipe/ î Wiping with
washer fluid
XSwitch on the ignition.XTurn the combination switch to the desired
position, depending on the intensity of the
rain.
Intermittent wiping
Only switch on intermittent wiping under wet
weather conditions or in the presence of
precipitation.
When you select intermittent wiping, the rain
sensor is activated. The rain sensor sets a
suitable wiping interval depending on the
wetness of the sensor surface automatically.
! Do not leave windshield wipers on an
intermittent setting when the vehicle is
taken to an automatic car wash or during
windshield cleaning. Windshield wipers will
operate in the presence of water sprayed
on the windshield, and windshield wipers
may be damaged as a result.
! If you have set intermittent wiping, dirt on
the surface of the rain sensor or optical
effects may cause the windshield wipers to
wipe in an undesired fashion. This could
then damage the windshield wiper blades
or scratch the windshield. You should
therefore switch off the windshield wipers
when weather conditions are dry.
XTurn the combination switch to position
Ä or Å.
After the initial wipe, pauses between
wipes are controlled by the rain sensor
automatically.
Intermittent wiping is interrupted when the
vehicle is at a standstill and a door is opened.
This protects persons getting into or out of
the vehicle from being sprayed.
Intermittent wiping will be continued when all
doors are closed and
Rthe transmission is in drive position D or
reverse gear R
or
Rthe wiper setting is changed using the
combination switch
Single wipe
XPress the combination switch briefly in
direction of arrow B to the resistance
point.
The windshield wipers wipe one time
without washer fluid.
Wiping with washer fluid
XPress the combination switch in direction
of arrow B past the resistance point.
The windshield wipers operate with washer
fluid.
iTo prevent smears on the windshield or
noisy/chattering wiper blades, wipe with
washer fluid every now and then even when
it is raining.
7Rain sensor operation with low sensitivity.8Rain sensor operation with high sensitivity.
254WipersControls in detail
BA 197 USA, CA Edition A 2011; 1; 27, en-UShereepeVersion: 3.0.3.52010-03-24T15:31:10+01:00 - Seite 254