2011 MERCEDES-BENZ SLS lights
[x] Cancel search: lightsPage 286 of 436

XPress button a to change the setting.
Depending on the previous setting the
Display Unit Speed-/Odometer: will be
set to miles or km.
The selected display unit is valid for:
R Odometer and trip odometer
R Trip computer
R Digital speedometer in the trip menu
R Digital speedometer in the AMG menu
R Cruise control
R Navigation displays
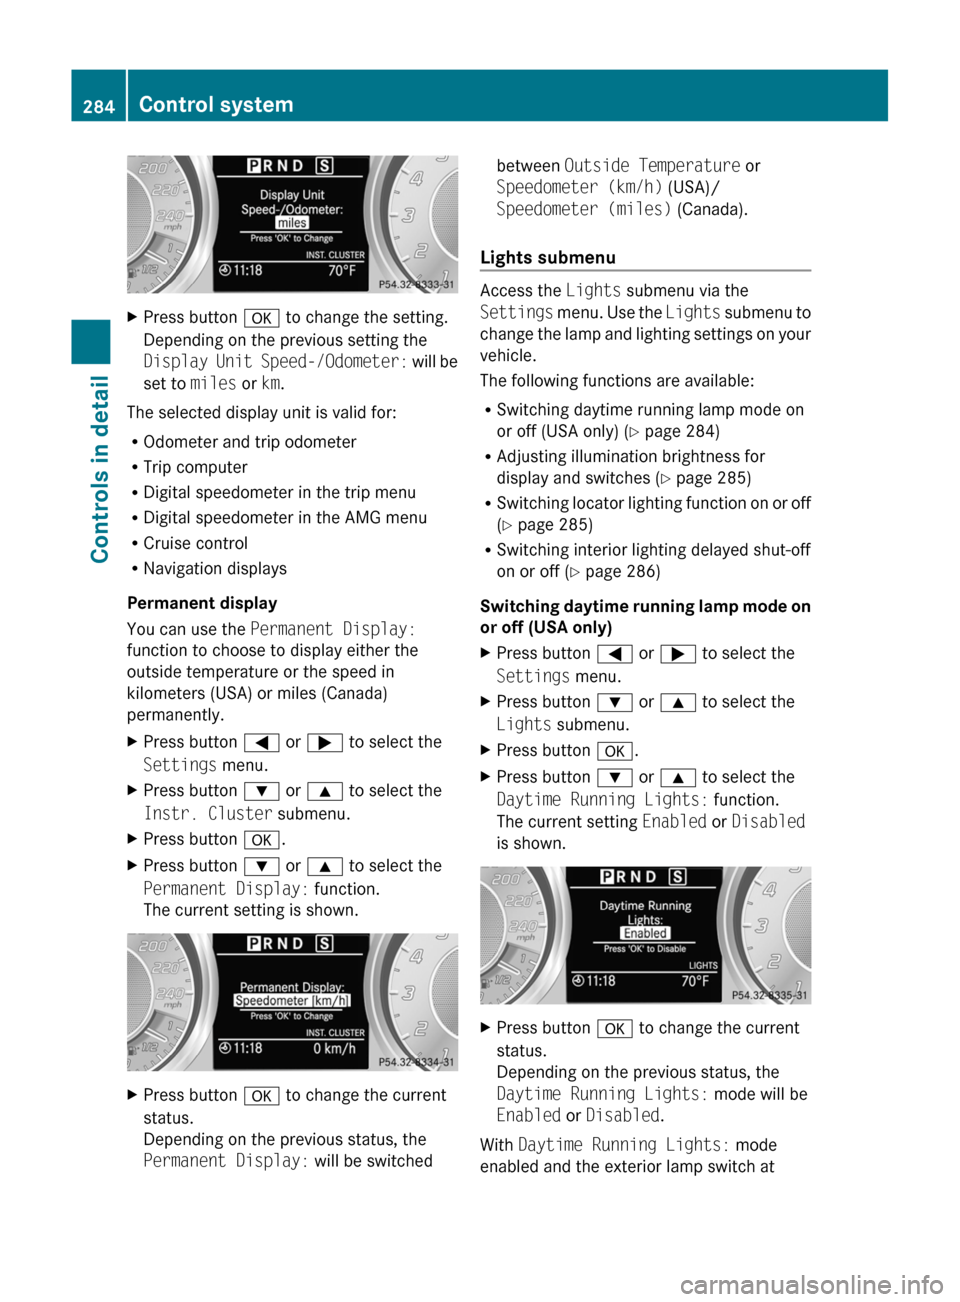
Permanent display
You can use the Permanent Display:
function to choose to display either the
outside temperature or the speed in
kilometers (USA) or miles (Canada)
permanently.
XPress button = or ; to select the
Settings menu.XPress button : or 9 to select the
Instr. Cluster submenu.XPress button a.XPress button : or 9 to select the
Permanent Display: function.
The current setting is shown.XPress button a to change the current
status.
Depending on the previous status, the
Permanent Display: will be switchedbetween Outside Temperature or
Speedometer (km/h) (USA)/
Speedometer (miles) (Canada).
Lights submenu
Access the Lights submenu via the
Settings menu. Use the Lights submenu to
change the lamp and lighting settings on your
vehicle.
The following functions are available:
R Switching daytime running lamp mode on
or off (USA only) ( Y page 284)
R Adjusting illumination brightness for
display and switches ( Y page 285)
R Switching locator lighting function on or off
( Y page 285)
R Switching interior lighting delayed shut-off
on or off ( Y page 286)
Switching daytime running lamp mode on
or off (USA only)
XPress button = or ; to select the
Settings menu.XPress button : or 9 to select the
Lights submenu.XPress button a.XPress button : or 9 to select the
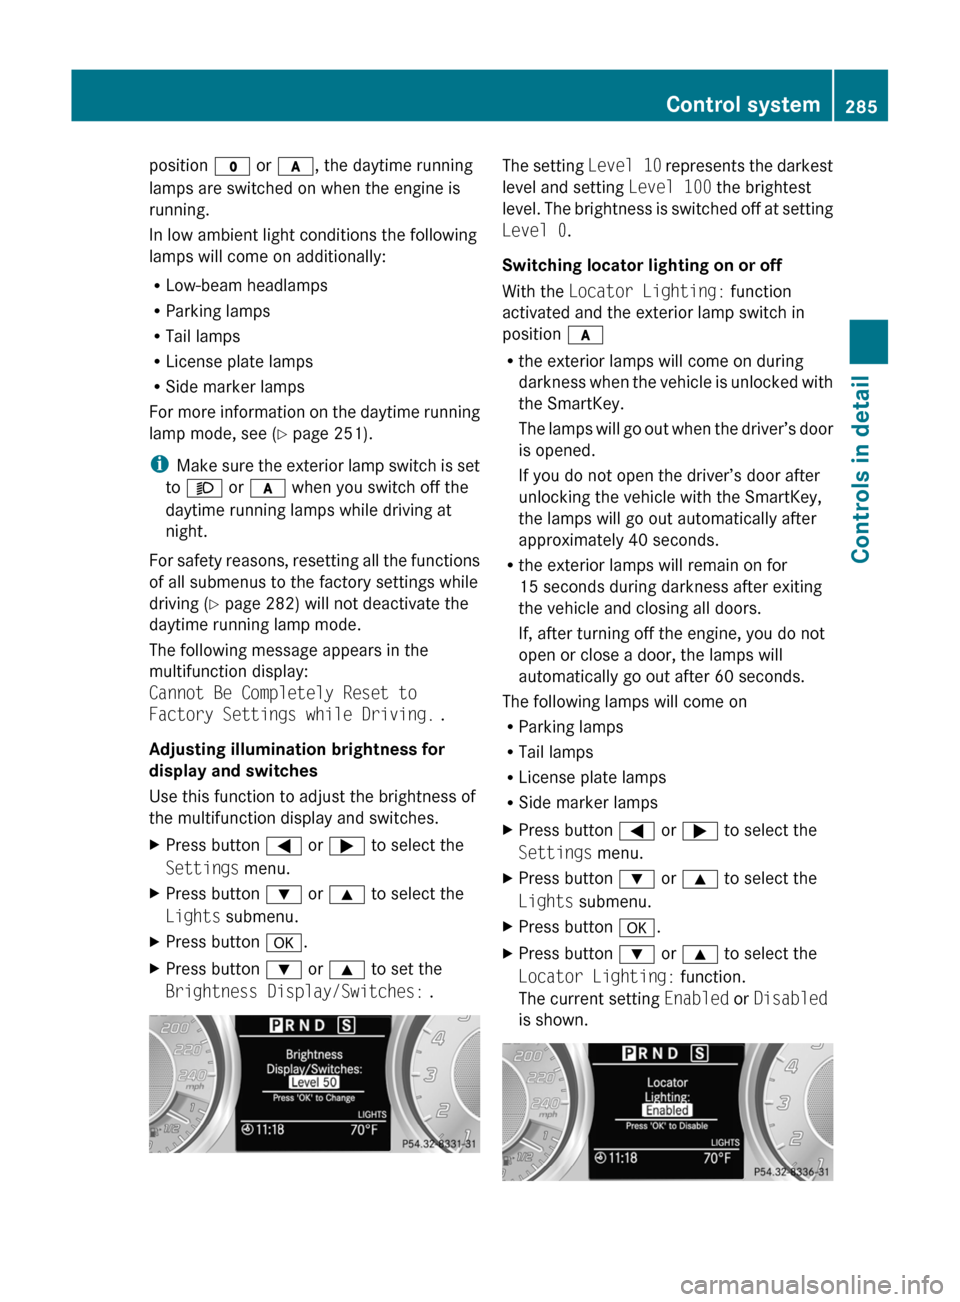
Daytime Running Lights: function.
The current setting Enabled or Disabled
is shown.XPress button a to change the current
status.
Depending on the previous status, the
Daytime Running Lights: mode will be
Enabled or Disabled .
With Daytime Running Lights: mode
enabled and the exterior lamp switch at
284Control systemControls in detail
BA 197 USA, CA Edition A 2011; 1; 27, en-UShereepeVersion: 3.0.3.52010-03-24T15:31:10+01:00 - Seite 284
Page 287 of 436

position $ or c , the daytime running
lamps are switched on when the engine is
running.
In low ambient light conditions the following
lamps will come on additionally:
R Low-beam headlamps
R Parking lamps
R Tail lamps
R License plate lamps
R Side marker lamps
For more information on the daytime running
lamp mode, see ( Y page 251).
i Make sure the exterior lamp switch is set
to M or c when you switch off the
daytime running lamps while driving at
night.
For safety reasons, resetting all the functions
of all submenus to the factory settings while
driving ( Y page 282) will not deactivate the
daytime running lamp mode.
The following message appears in the
multifunction display:
Cannot Be Completely Reset to
Factory Settings while Driving. .
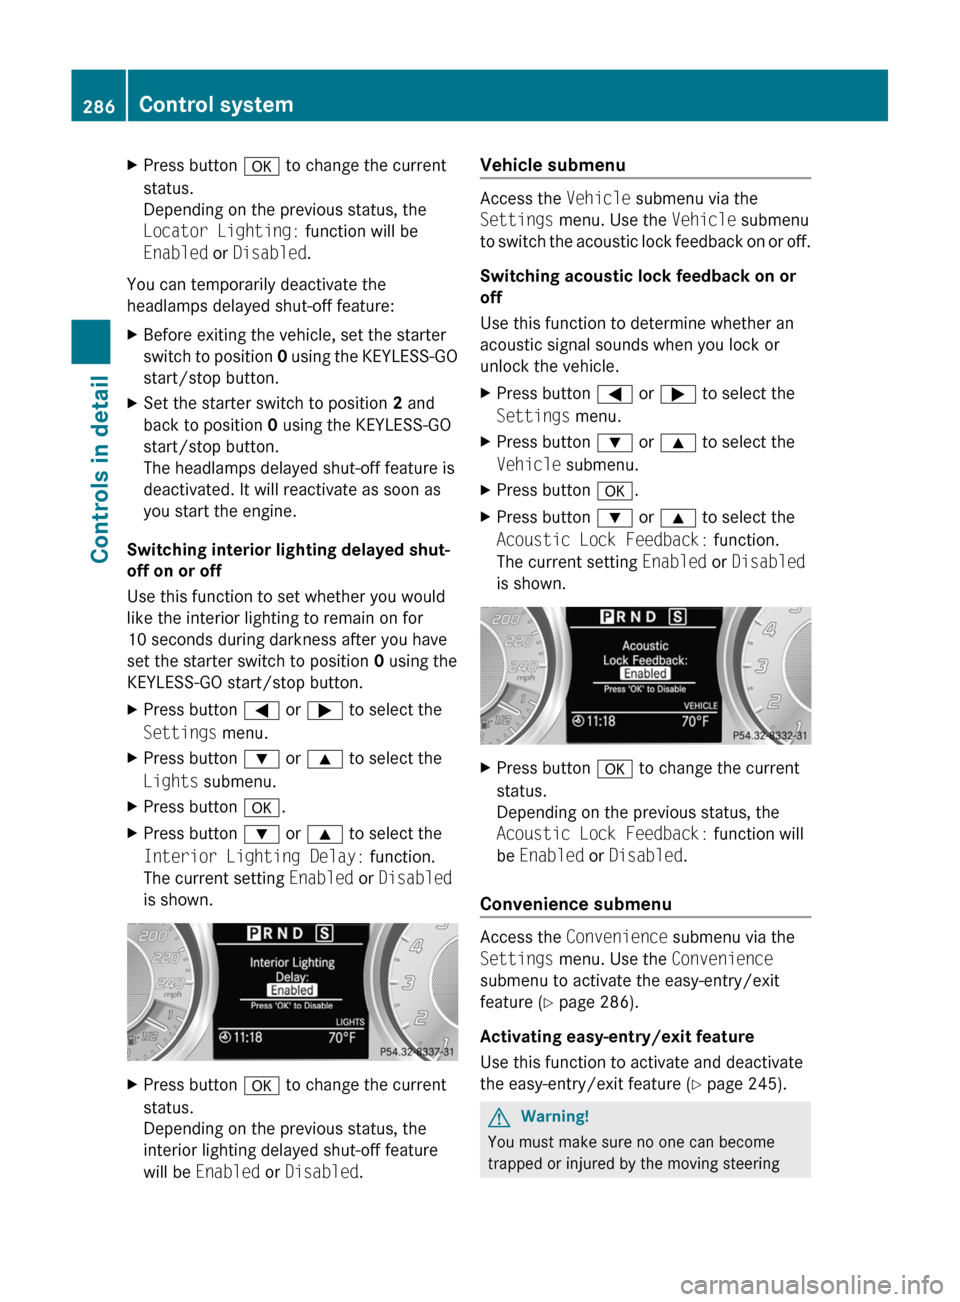
Adjusting illumination brightness for
display and switches
Use this function to adjust the brightness of
the multifunction display and switches.XPress button = or ; to select the
Settings menu.XPress button : or 9 to select the
Lights submenu.XPress button a.XPress button : or 9 to set the
Brightness Display/Switches: .The setting Level 10 represents the darkest
level and setting Level 100 the brightest
level. The brightness is switched off at setting
Level 0 .
Switching locator lighting on or off
With the Locator Lighting: function
activated and the exterior lamp switch in
position c
R the exterior lamps will come on during
darkness when the vehicle is unlocked with
the SmartKey.
The lamps will go out when the driver’s door
is opened.
If you do not open the driver’s door after
unlocking the vehicle with the SmartKey,
the lamps will go out automatically after
approximately 40 seconds.
R the exterior lamps will remain on for
15 seconds during darkness after exiting
the vehicle and closing all doors.
If, after turning off the engine, you do not
open or close a door, the lamps will
automatically go out after 60 seconds.
The following lamps will come on
R Parking lamps
R Tail lamps
R License plate lamps
R Side marker lampsXPress button = or ; to select the
Settings menu.XPress button : or 9 to select the
Lights submenu.XPress button a.XPress button : or 9 to select the
Locator Lighting: function.
The current setting Enabled or Disabled
is shown.Control system285Controls in detailBA 197 USA, CA Edition A 2011; 1; 27, en-UShereepeVersion: 3.0.3.52010-03-24T15:31:10+01:00 - Seite 285Z
Page 288 of 436

XPress button a to change the current
status.
Depending on the previous status, the
Locator Lighting: function will be
Enabled or Disabled .
You can temporarily deactivate the
headlamps delayed shut-off feature:
XBefore exiting the vehicle, set the starter
switch to position 0 using the KEYLESS-GO
start/stop button.XSet the starter switch to position 2 and
back to position 0 using the KEYLESS-GO
start/stop button.
The headlamps delayed shut-off feature is
deactivated. It will reactivate as soon as
you start the engine.
Switching interior lighting delayed shut-
off on or off
Use this function to set whether you would
like the interior lighting to remain on for
10 seconds during darkness after you have
set the starter switch to position 0 using the
KEYLESS-GO start/stop button.
XPress button = or ; to select the
Settings menu.XPress button : or 9 to select the
Lights submenu.XPress button a.XPress button : or 9 to select the
Interior Lighting Delay: function.
The current setting Enabled or Disabled
is shown.XPress button a to change the current
status.
Depending on the previous status, the
interior lighting delayed shut-off feature
will be Enabled or Disabled .Vehicle submenu
Access the Vehicle submenu via the
Settings menu. Use the Vehicle submenu
to switch the acoustic lock feedback on or off.
Switching acoustic lock feedback on or
off
Use this function to determine whether an
acoustic signal sounds when you lock or
unlock the vehicle.
XPress button = or ; to select the
Settings menu.XPress button : or 9 to select the
Vehicle submenu.XPress button a.XPress button : or 9 to select the
Acoustic Lock Feedback: function.
The current setting Enabled or Disabled
is shown.XPress button a to change the current
status.
Depending on the previous status, the
Acoustic Lock Feedback: function will
be Enabled or Disabled .
Convenience submenu
Access the Convenience submenu via the
Settings menu. Use the Convenience
submenu to activate the easy-entry/exit
feature ( Y page 286).
Activating easy-entry/exit feature
Use this function to activate and deactivate
the easy-entry/exit feature ( Y page 245).
GWarning!
You must make sure no one can become
trapped or injured by the moving steering
286Control systemControls in detail
BA 197 USA, CA Edition A 2011; 1; 27, en-UShereepeVersion: 3.0.3.52010-03-24T15:31:10+01:00 - Seite 286
Page 388 of 436

Display messagesPossible causes/consequences and M Solutionsb
Auto Lamp Function
InoperativeThe light sensor is malfunctioning. The headlamps come on
automatically. XContact an authorized Mercedes-Benz Center as soon as
possible.
To switch off the headlamps (U.S. vehicles only):
XSwitch off the daytime running lamp mode in the control system
( Y page 284).XSwitch off the headlamps using the exterior lamp switch
( Y page 250).b
Check Left Low Beam
or
Check Right Low
BeamThe left or right low-beam lamp is malfunctioning. XContact an authorized Mercedes-Benz Center as soon as
possible.b
Switch Off LightsYou have removed the SmartKey with KEYLESS-GO from the
vehicle and left the headlamps on or removed the SmartKey from
the starter switch, opened the driver’s door and left the headlamps
on.XTurn the exterior lamp switch to c (Y page 250).b
Check Left Tail
and Brake Lamps
or
Check Right Tail
and Brake LampsThe left or right tail lamp/brake lamp is malfunctioning. This
message will only appear if all LEDs have stopped working.XContact an authorized Mercedes-Benz Center as soon as
possible.b
Check Rear Left
Turn Signal
or
Check Rear Right
Turn SignalThe left or right rear turn signal lamp is malfunctioning.XContact an authorized Mercedes-Benz Center as soon as
possible.386Vehicle status messages in the multifunction displayPractical hints
BA 197 USA, CA Edition A 2011; 1; 27, en-UShereepeVersion: 3.0.3.52010-03-24T15:31:10+01:00 - Seite 386
Page 402 of 436

Replacing bulbs
Safety notes
Safe vehicle operation depends on proper
exterior lighting and signaling to a large
degree.
Correct headlamp adjustment is extremely
important. Have headlamps checked and
readjusted at regular intervals and when a
bulb has been replaced. Contact an
authorized Mercedes-Benz Center for
headlamp adjustment.
GWarning!
Bulbs and bulb sockets can be very hot. Allow
the lamp to cool down before changing a bulb.
Keep bulbs out of reach of children.
Halogen lamps contain pressurized gas. A
bulb can explode if you
R touch or move it when hot
R drop the bulb
R scratch the bulb
Wear eye and hand protection.
Because of high voltage in Xenon lamps, it is
dangerous to replace the bulb or repair the
lamp and its components. We recommend
that you have such work done by a qualified
technician.
i Since replacing bulbs is a technically
highly demanding process, we recommend
to have them replaced at an authorized
Mercedes-Benz Center.
i If the headlamps are fogged up on the
inside as a result of high humidity, driving
the vehicle a distance with the lights on
should clear up the fogging.
Replacing bulbs for front lamps
You cannot replace the bulbs in the front
lamps yourself. Contact an authorized
Mercedes-Benz Center or a qualified
workshop.
Replacing bulbs for rear lamps
Except for the license plate lamp bulbs, you
cannot replace the bulbs in the rear lamps
yourself.
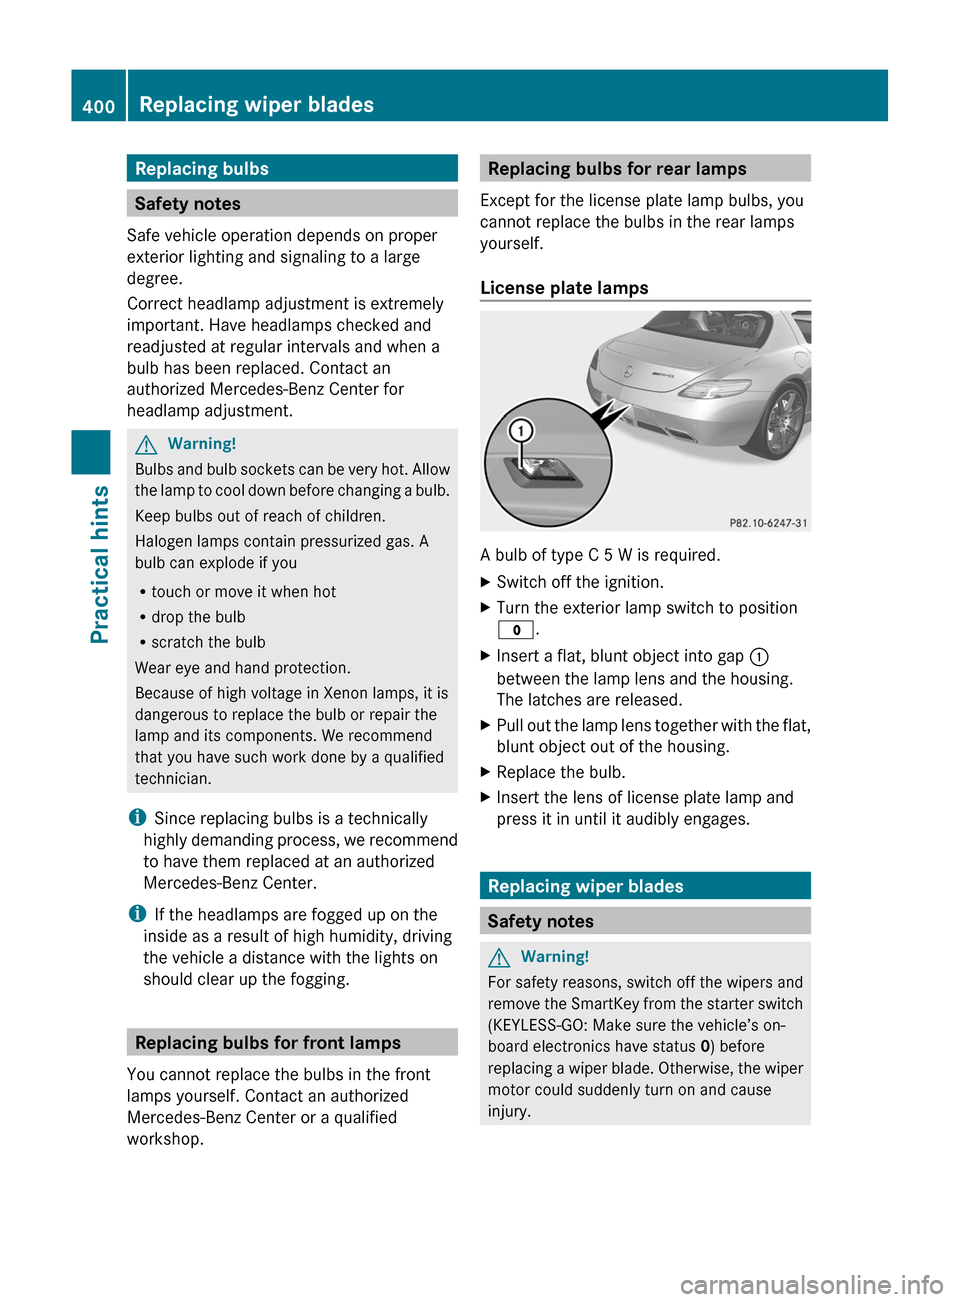
License plate lamps
A bulb of type C 5 W is required.
XSwitch off the ignition.XTurn the exterior lamp switch to position
$ .XInsert a flat, blunt object into gap :
between the lamp lens and the housing.
The latches are released.XPull out the lamp lens together with the flat,
blunt object out of the housing.XReplace the bulb.XInsert the lens of license plate lamp and
press it in until it audibly engages.
Replacing wiper blades
Safety notes
GWarning!
For safety reasons, switch off the wipers and
remove the SmartKey from the starter switch
(KEYLESS-GO: Make sure the vehicle’s on-
board electronics have status 0) before
replacing a wiper blade. Otherwise, the wiper
motor could suddenly turn on and cause
injury.
400Replacing wiper bladesPractical hints
BA 197 USA, CA Edition A 2011; 1; 27, en-UShereepeVersion: 3.0.3.52010-03-24T15:31:10+01:00 - Seite 400