2011 MERCEDES-BENZ SLS AMG engine
[x] Cancel search: enginePage 278 of 436
In the standard display, the trip
odometer 0046 and the main odometer 0047
appear in the multifunction display.
If another display appears instead of the
standard display:XPress button 0040 or 003E to select the
Trip menu.
or
XPress button 0041 repeatedly until the
standard display appears.
or
XPress and hold button 0041 until the
standard display appears.
Fuel consumption statistics since start
XPress button 0040 or 003E to select the
Trip menu.XPress button 003D or 003C to select From
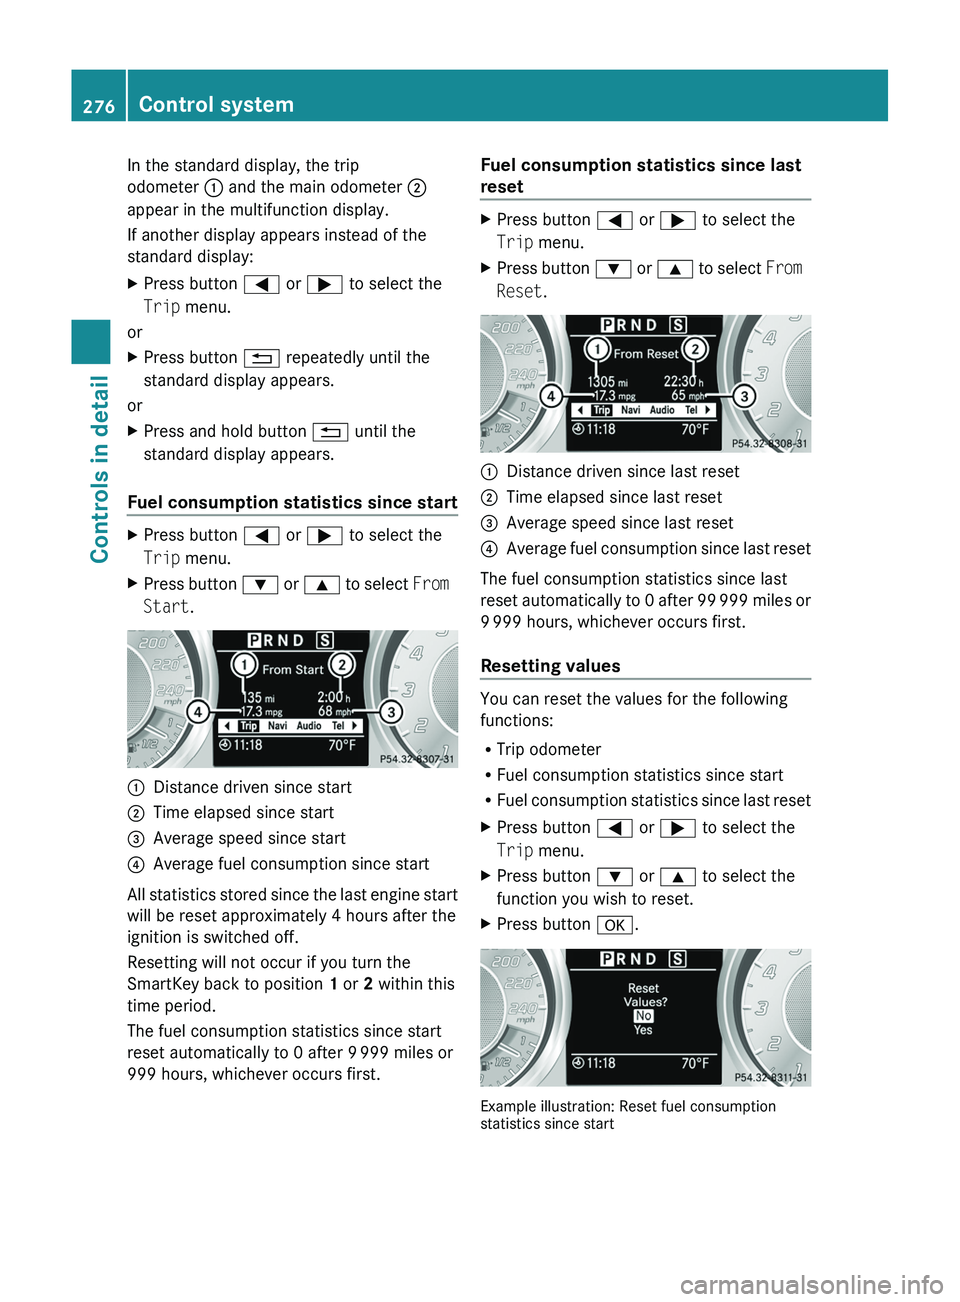
Start .0046Distance driven since start0047Time elapsed since start008AAverage speed since start0088Average fuel consumption since start
All statistics stored since the last engine start
will be reset approximately 4 hours after the
ignition is switched off.
Resetting will not occur if you turn the
SmartKey back to position 1 or 2 within this
time period.
The fuel consumption statistics since start
reset automatically to 0 after 9 999 miles or
999 hours, whichever occurs first.
Fuel consumption statistics since last
resetXPress button 0040 or 003E to select the
Trip menu.XPress button 003D or 003C to select From
Reset .0046Distance driven since last reset0047Time elapsed since last reset008AAverage speed since last reset0088Average fuel consumption since last reset
The fuel consumption statistics since last
reset automatically to 0 after 99 999 miles or
9 999 hours, whichever occurs first.
Resetting values
You can reset the values for the following
functions:
R Trip odometer
R Fuel consumption statistics since start
R Fuel consumption statistics since last reset
XPress button 0040 or 003E to select the
Trip menu.XPress button 003D or 003C to select the
function you wish to reset.XPress button 0064.
Example illustration: Reset fuel consumption
statistics since start
276Control systemControls in detail
BA 197 USA, CA Edition A 2011; 1; 27, en-UShereepeVersion: 3.0.3.52010-03-24T15:31:10+01:00 - Seite 276
Page 284 of 436
RVehicle status message memory
( Y page 282)
R Checking tire inflation pressure
electronically with the Advanced TPMS
( Y page 329)
R Calling up the maintenance service
indicator display ( Y page 353)
Vehicle status message memory
Use the vehicle status message memory
function to scan malfunction and warning
messages that may be stored in the system.
Such messages appear in the multifunction
display and are based on conditions or
system status the vehicle’s system has
recorded.
GWarning!
Malfunction and warning messages are only
indicated for certain systems and are
intentionally not very detailed. The
malfunction and warning messages are
simply a reminder with respect to the
operation of certain systems. They do not
replace the owner’s and/or driver’s
responsibility to maintain the vehicle’s
operating safety. Have all required
maintenance and safety checks performed on
the vehicle. Bring the vehicle to an authorized
Mercedes-Benz Center to address the
malfunction and warning messages.
XPress button 0040 or 003E to select the
Service menu.
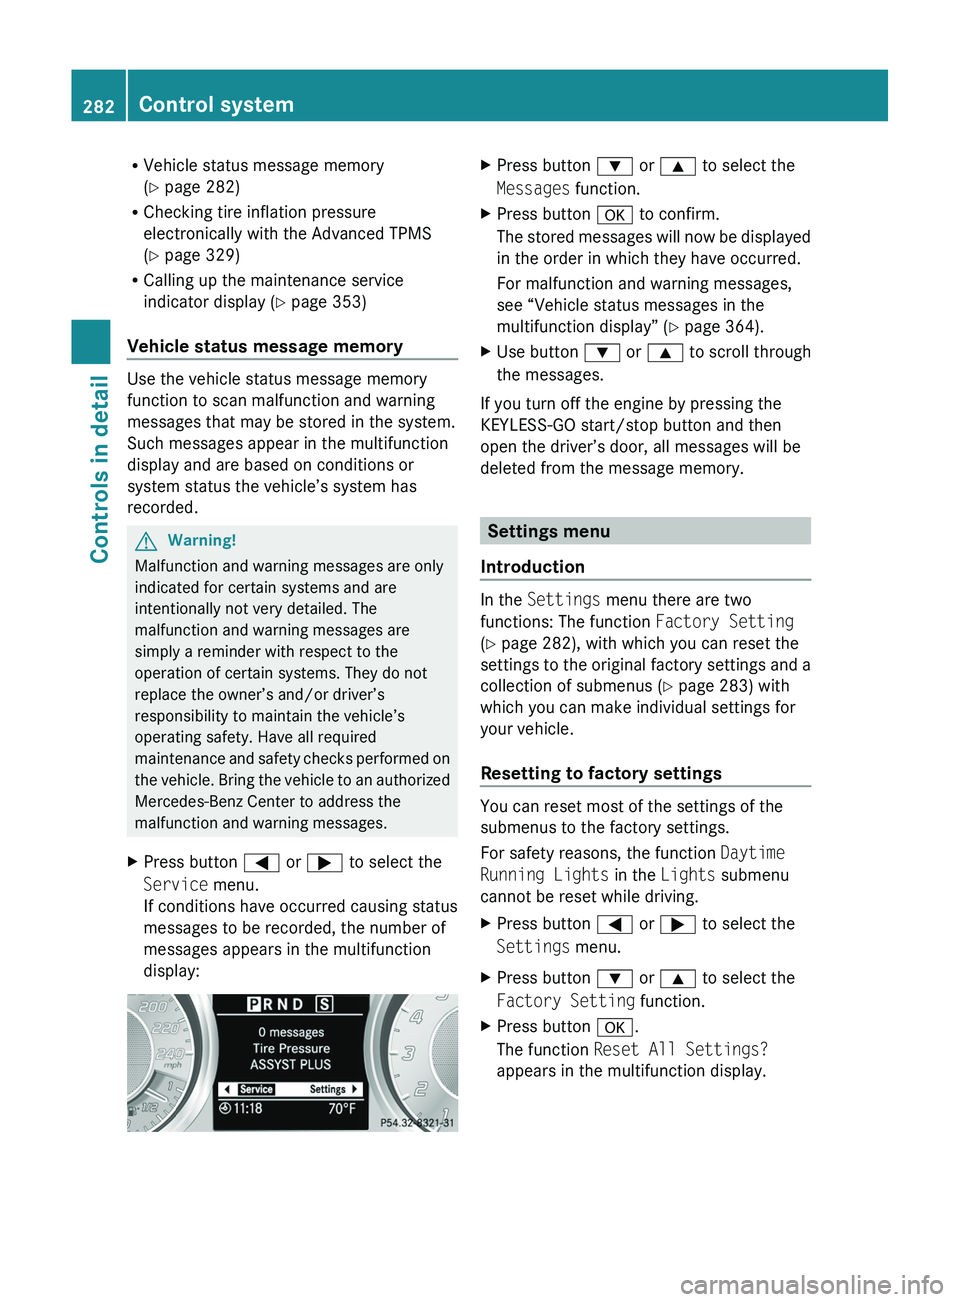
If conditions have occurred causing status
messages to be recorded, the number of
messages appears in the multifunction
display:XPress button 003D or 003C to select the
Messages function.XPress button 0064 to confirm.
The stored messages will now be displayed
in the order in which they have occurred.
For malfunction and warning messages,
see “Vehicle status messages in the
multifunction display” ( Y page 364).XUse button 003D or 003C to scroll through
the messages.
If you turn off the engine by pressing the
KEYLESS-GO start/stop button and then
open the driver’s door, all messages will be
deleted from the message memory.
Settings menu
Introduction
In the Settings menu there are two
functions: The function Factory Setting
( Y page 282), with which you can reset the
settings to the original factory settings and a
collection of submenus ( Y page 283) with
which you can make individual settings for
your vehicle.
Resetting to factory settings
You can reset most of the settings of the
submenus to the factory settings.
For safety reasons, the function Daytime
Running Lights in the Lights submenu
cannot be reset while driving.
XPress button 0040 or 003E to select the
Settings menu.XPress button 003D or 003C to select the
Factory Setting function.XPress button 0064.
The function Reset All Settings?
appears in the multifunction display.282Control systemControls in detail
BA 197 USA, CA Edition A 2011; 1; 27, en-UShereepeVersion: 3.0.3.52010-03-24T15:31:10+01:00 - Seite 282
Page 287 of 436
position 0027 or 0066 , the daytime running
lamps are switched on when the engine is
running.
In low ambient light conditions the following
lamps will come on additionally:
R Low-beam headlamps
R Parking lamps
R Tail lamps
R License plate lamps
R Side marker lamps
For more information on the daytime running
lamp mode, see ( Y page 251).
i Make sure the exterior lamp switch is set
to 0065 or 0066 when you switch off the
daytime running lamps while driving at
night.
For safety reasons, resetting all the functions
of all submenus to the factory settings while
driving ( Y page 282) will not deactivate the
daytime running lamp mode.
The following message appears in the
multifunction display:
Cannot Be Completely Reset to
Factory Settings while Driving. .
Adjusting illumination brightness for
display and switches
Use this function to adjust the brightness of
the multifunction display and switches.XPress button 0040 or 003E to select the
Settings menu.XPress button 003D or 003C to select the
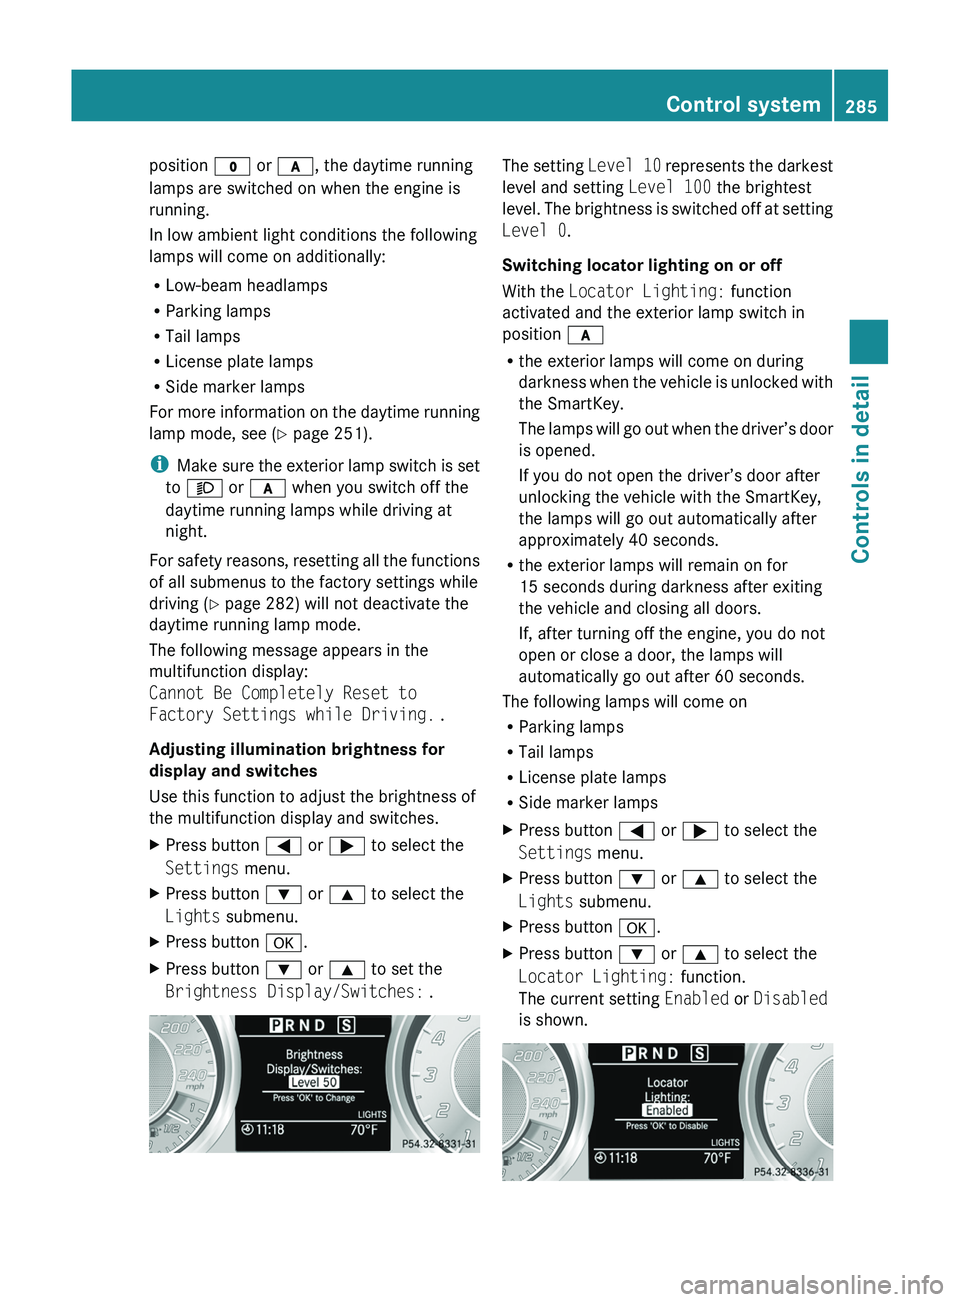
Lights submenu.XPress button 0064.XPress button 003D or 003C to set the
Brightness Display/Switches: .The setting Level 10 represents the darkest
level and setting Level 100 the brightest
level. The brightness is switched off at setting
Level 0 .
Switching locator lighting on or off
With the Locator Lighting: function
activated and the exterior lamp switch in
position 0066
R the exterior lamps will come on during
darkness when the vehicle is unlocked with
the SmartKey.
The lamps will go out when the driver’s door
is opened.
If you do not open the driver’s door after
unlocking the vehicle with the SmartKey,
the lamps will go out automatically after
approximately 40 seconds.
R the exterior lamps will remain on for
15 seconds during darkness after exiting
the vehicle and closing all doors.
If, after turning off the engine, you do not
open or close a door, the lamps will
automatically go out after 60 seconds.
The following lamps will come on
R Parking lamps
R Tail lamps
R License plate lamps
R Side marker lampsXPress button 0040 or 003E to select the
Settings menu.XPress button 003D or 003C to select the
Lights submenu.XPress button 0064.XPress button 003D or 003C to select the
Locator Lighting: function.
The current setting Enabled or Disabled
is shown.Control system285Controls in detailBA 197 USA, CA Edition A 2011; 1; 27, en-UShereepeVersion: 3.0.3.52010-03-24T15:31:10+01:00 - Seite 285Z
Page 288 of 436
XPress button 0064 to change the current
status.
Depending on the previous status, the
Locator Lighting: function will be
Enabled or Disabled .
You can temporarily deactivate the
headlamps delayed shut-off feature:
XBefore exiting the vehicle, set the starter
switch to position 0 using the KEYLESS-GO
start/stop button.XSet the starter switch to position 2 and
back to position 0 using the KEYLESS-GO
start/stop button.
The headlamps delayed shut-off feature is
deactivated. It will reactivate as soon as
you start the engine.
Switching interior lighting delayed shut-
off on or off
Use this function to set whether you would
like the interior lighting to remain on for
10 seconds during darkness after you have
set the starter switch to position 0 using the
KEYLESS-GO start/stop button.
XPress button 0040 or 003E to select the
Settings menu.XPress button 003D or 003C to select the
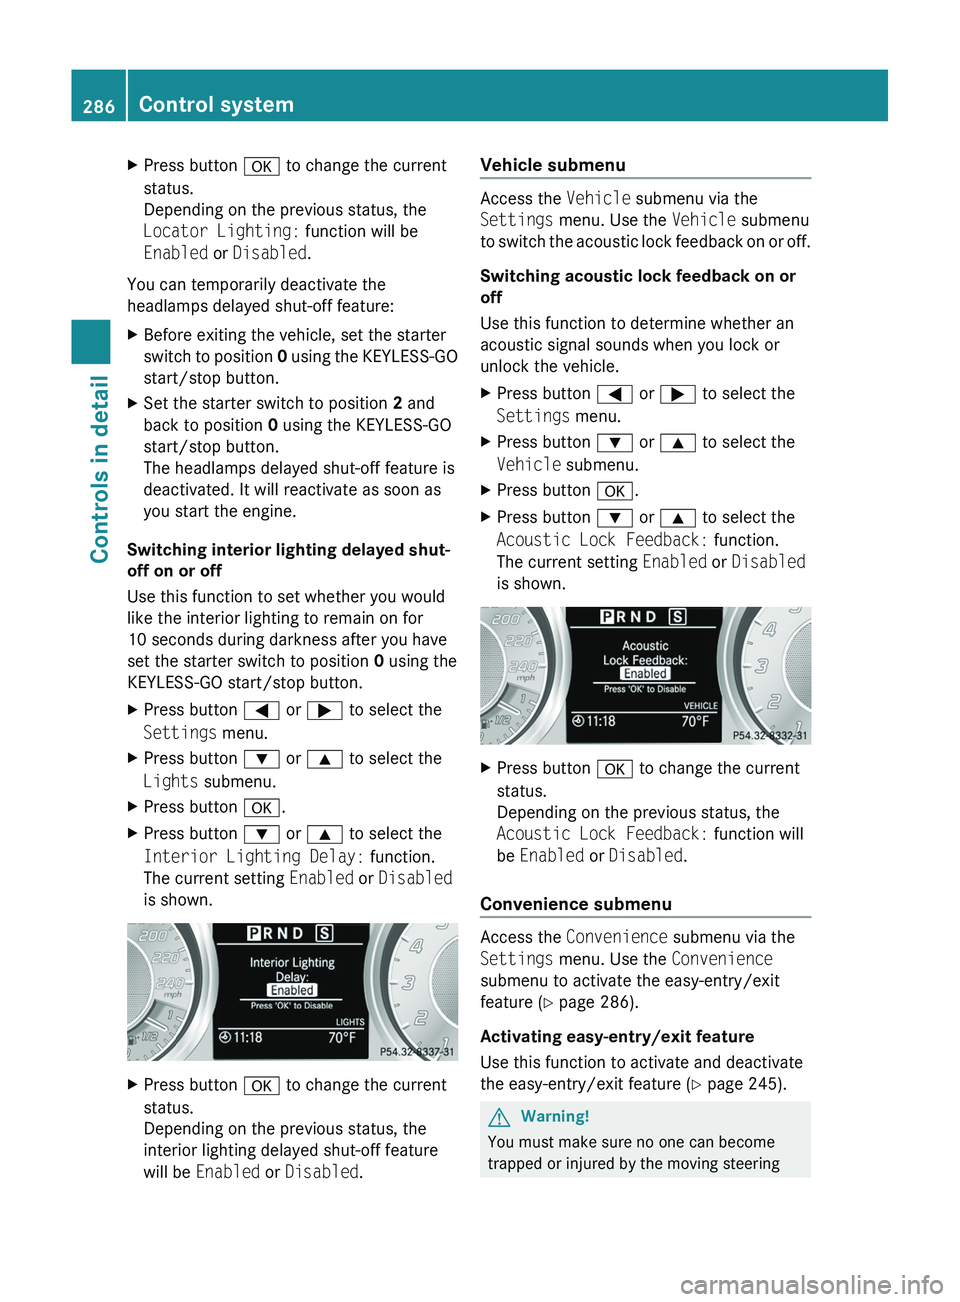
Lights submenu.XPress button 0064.XPress button 003D or 003C to select the
Interior Lighting Delay: function.
The current setting Enabled or Disabled
is shown.XPress button 0064 to change the current
status.
Depending on the previous status, the
interior lighting delayed shut-off feature
will be Enabled or Disabled .Vehicle submenu
Access the Vehicle submenu via the
Settings menu. Use the Vehicle submenu
to switch the acoustic lock feedback on or off.
Switching acoustic lock feedback on or
off
Use this function to determine whether an
acoustic signal sounds when you lock or
unlock the vehicle.
XPress button 0040 or 003E to select the
Settings menu.XPress button 003D or 003C to select the
Vehicle submenu.XPress button 0064.XPress button 003D or 003C to select the
Acoustic Lock Feedback: function.
The current setting Enabled or Disabled
is shown.XPress button 0064 to change the current
status.
Depending on the previous status, the
Acoustic Lock Feedback: function will
be Enabled or Disabled .
Convenience submenu
Access the Convenience submenu via the
Settings menu. Use the Convenience
submenu to activate the easy-entry/exit
feature ( Y page 286).
Activating easy-entry/exit feature
Use this function to activate and deactivate
the easy-entry/exit feature ( Y page 245).
GWarning!
You must make sure no one can become
trapped or injured by the moving steering
286Control systemControls in detail
BA 197 USA, CA Edition A 2011; 1; 27, en-UShereepeVersion: 3.0.3.52010-03-24T15:31:10+01:00 - Seite 286
Page 289 of 436
wheel when the easy-entry/exit feature is
activated.
To stop steering wheel movement, move
steering wheel adjustment stalk or press one
of the memory position buttons.
Do not leave children unattended in the
vehicle, or with access to an unlocked vehicle.
Children could open the driver’s door and
unintentionally activate the easy-entry/exit
feature, which could result in an accident
and/or serious personal injury.XPress button 0040 or 003E to select the
Settings menu.XPress button 003D or 003C to select the
Convenience submenu.XPress button 0064.XPress button 003D or 003C to select the
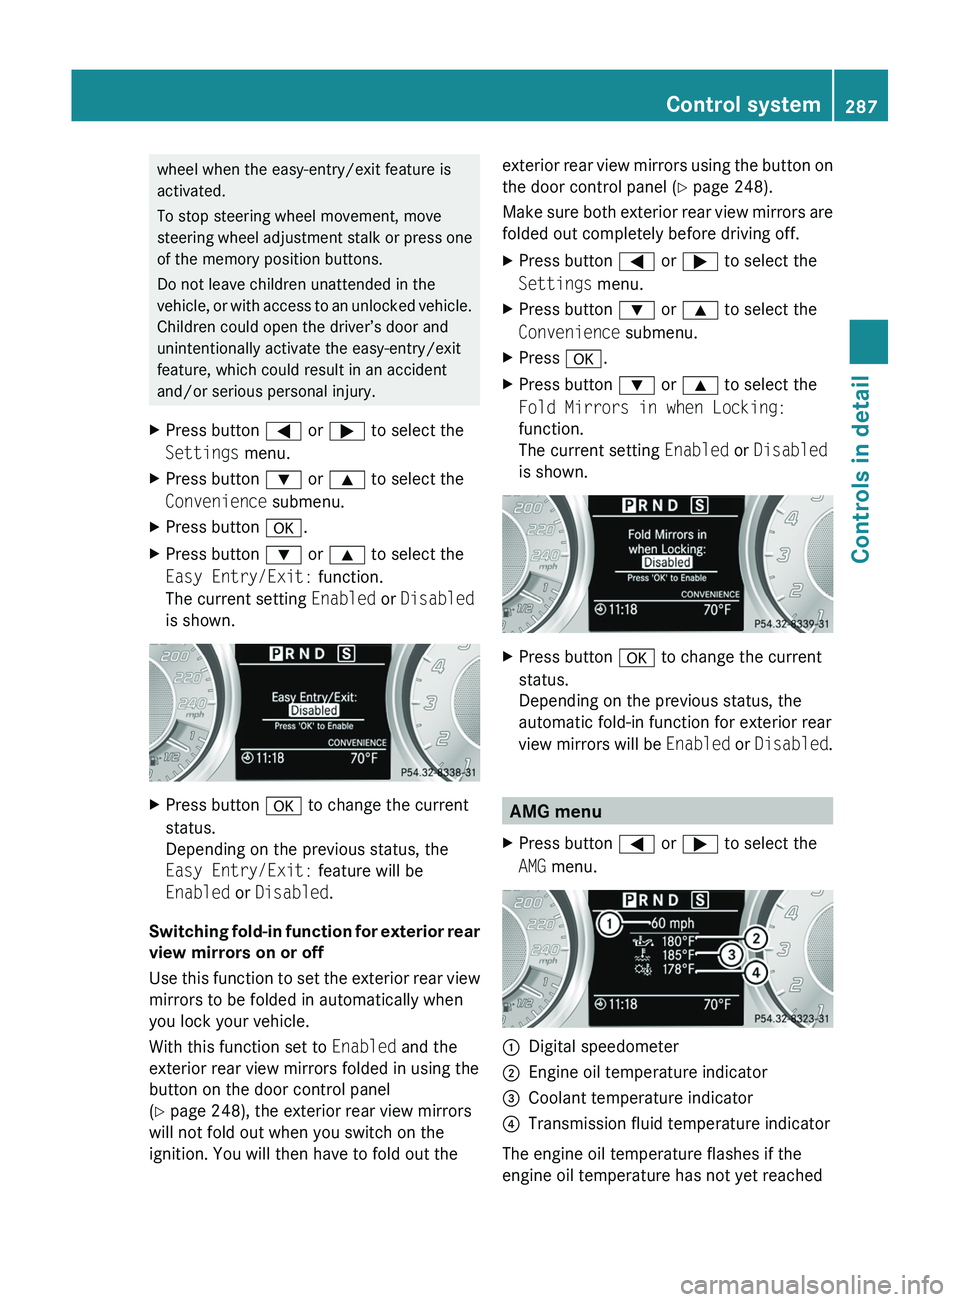
Easy Entry/Exit: function.
The current setting Enabled or Disabled
is shown.XPress button 0064 to change the current
status.
Depending on the previous status, the
Easy Entry/Exit: feature will be
Enabled or Disabled .
Switching fold-in function for exterior rear
view mirrors on or off
Use this function to set the exterior rear view
mirrors to be folded in automatically when
you lock your vehicle.
With this function set to Enabled and the
exterior rear view mirrors folded in using the
button on the door control panel
( Y page 248), the exterior rear view mirrors
will not fold out when you switch on the
ignition. You will then have to fold out the
exterior rear view mirrors using the button on
the door control panel ( Y page 248).
Make sure both exterior rear view mirrors are
folded out completely before driving off.XPress button 0040 or 003E to select the
Settings menu.XPress button 003D or 003C to select the
Convenience submenu.XPress 0064.XPress button 003D or 003C to select the
Fold Mirrors in when Locking:
function.
The current setting Enabled or Disabled
is shown.XPress button 0064 to change the current
status.
Depending on the previous status, the
automatic fold-in function for exterior rear
view mirrors will be Enabled or Disabled .
AMG menu
XPress button 0040 or 003E to select the
AMG menu.0046Digital speedometer0047Engine oil temperature indicator008ACoolant temperature indicator0088Transmission fluid temperature indicator
The engine oil temperature flashes if the
engine oil temperature has not yet reached
Control system287Controls in detailBA 197 USA, CA Edition A 2011; 1; 27, en-UShereepeVersion: 3.0.3.52010-03-24T15:31:10+01:00 - Seite 287Z
Page 290 of 436
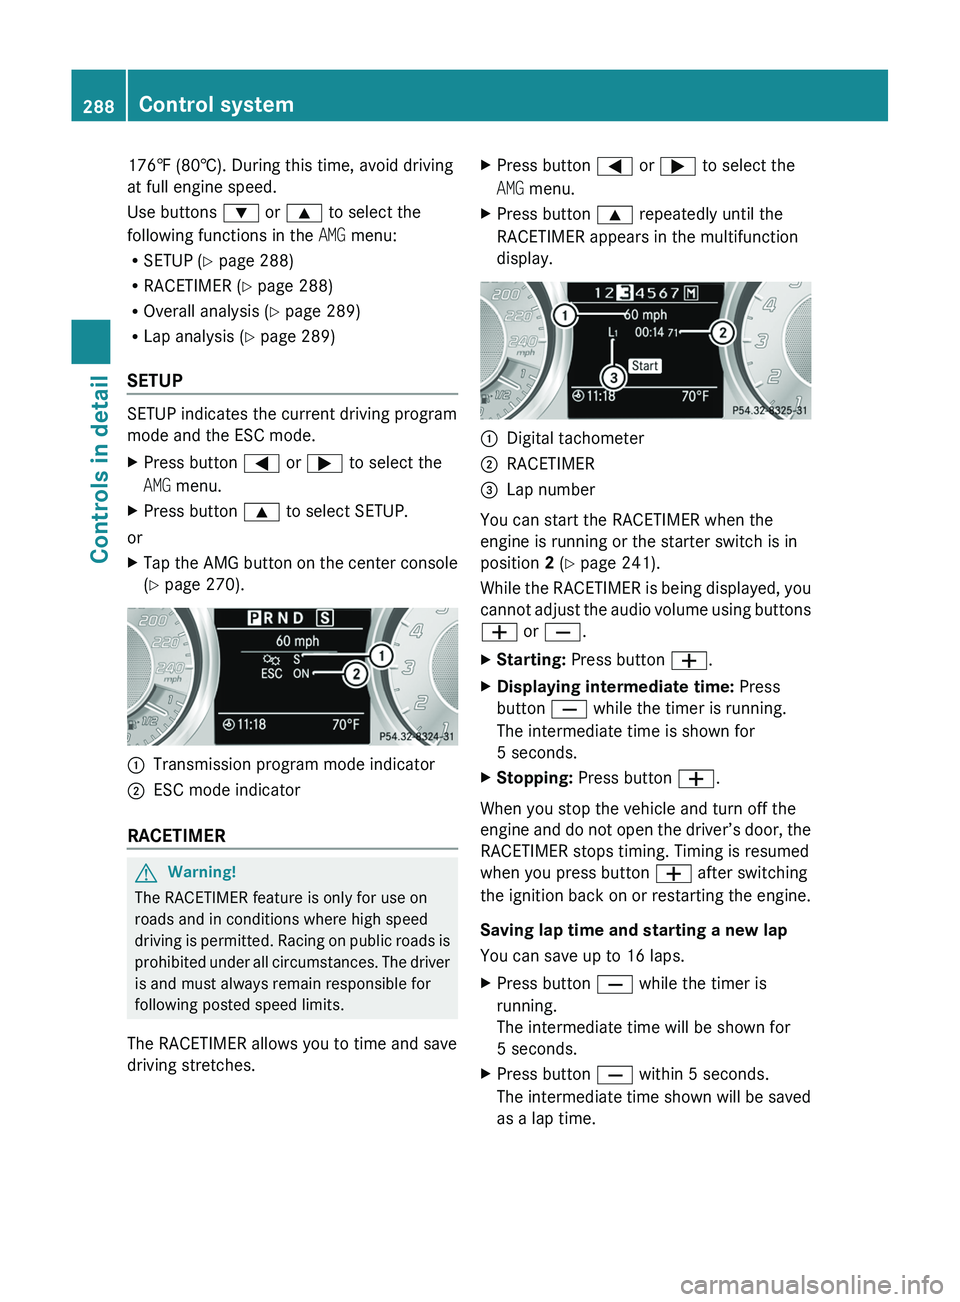
176‡ (80†). During this time, avoid driving
at full engine speed.
Use buttons 003D or 003C to select the
following functions in the AMG menu:
R SETUP ( Y page 288)
R RACETIMER ( Y page 288)
R Overall analysis ( Y page 289)
R Lap analysis ( Y page 289)
SETUP
SETUP indicates the current driving program
mode and the ESC mode.
XPress button 0040 or 003E to select the
AMG menu.XPress button 003C to select SETUP.
or
XTap the AMG button on the center console
( Y page 270).0046Transmission program mode indicator0047ESC mode indicator
RACETIMER
GWarning!
The RACETIMER feature is only for use on
roads and in conditions where high speed
driving is permitted. Racing on public roads is
prohibited under all circumstances. The driver
is and must always remain responsible for
following posted speed limits.
The RACETIMER allows you to time and save
driving stretches.
XPress button 0040 or 003E to select the
AMG menu.XPress button 003C repeatedly until the
RACETIMER appears in the multifunction
display.0046Digital tachometer0047RACETIMER008ALap number
You can start the RACETIMER when the
engine is running or the starter switch is in
position 2 (Y page 241).
While the RACETIMER is being displayed, you
cannot adjust the audio volume using buttons
005A or 005B .
XStarting: Press button 005A.XDisplaying intermediate time: Press
button 005B while the timer is running.
The intermediate time is shown for
5 seconds.XStopping: Press button 005A.
When you stop the vehicle and turn off the
engine and do not open the driver’s door, the
RACETIMER stops timing. Timing is resumed
when you press button 005A after switching
the ignition back on or restarting the engine.
Saving lap time and starting a new lap
You can save up to 16 laps.
XPress button 005B while the timer is
running.
The intermediate time will be shown for
5 seconds.XPress button 005B within 5 seconds.
The intermediate time shown will be saved
as a lap time.288Control systemControls in detail
BA 197 USA, CA Edition A 2011; 1; 27, en-UShereepeVersion: 3.0.3.52010-03-24T15:31:10+01:00 - Seite 288
Page 291 of 436
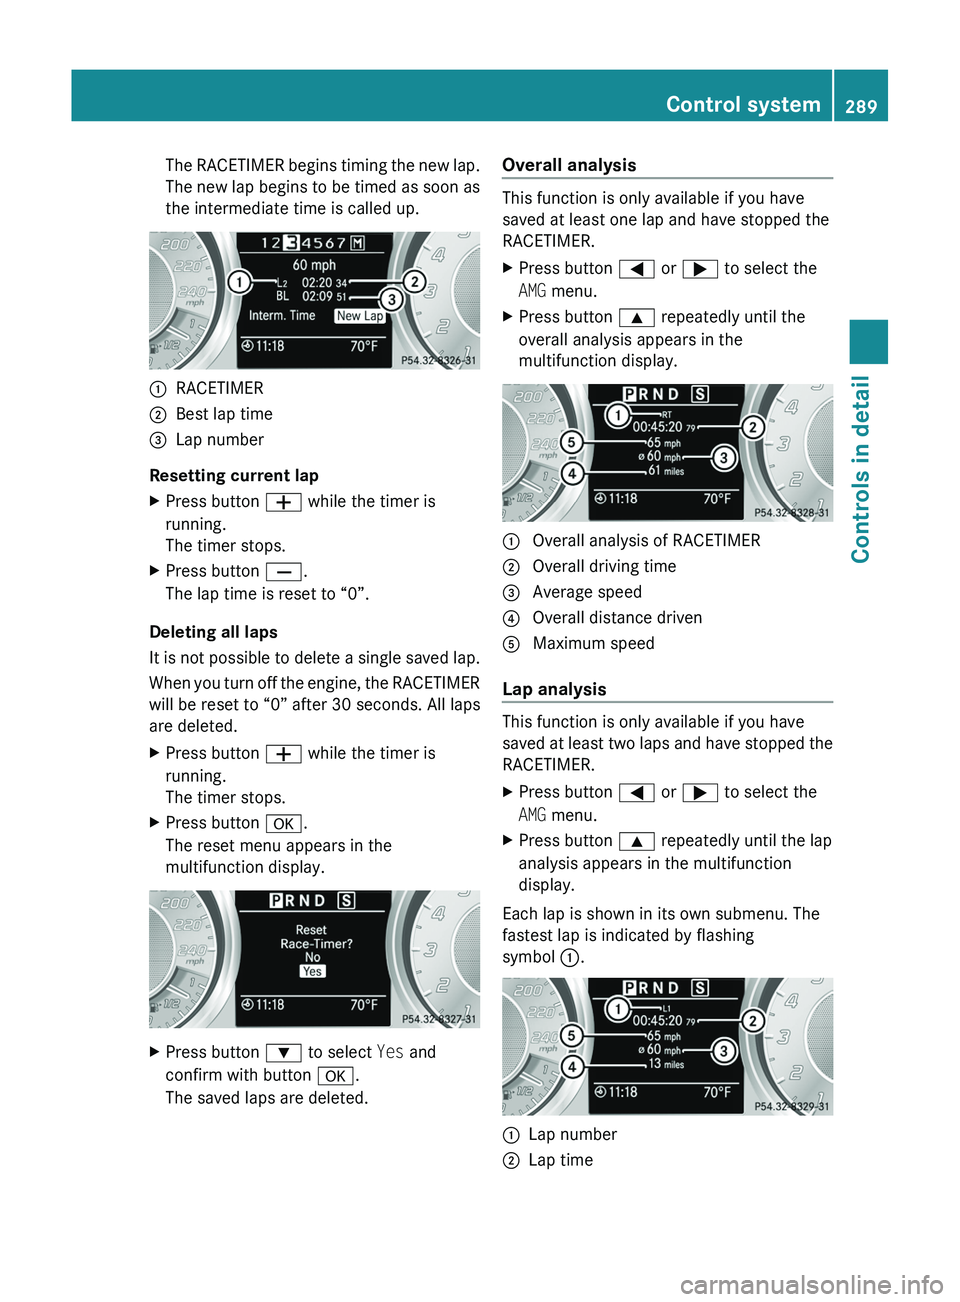
The RACETIMER begins timing the new lap.
The new lap begins to be timed as soon as
the intermediate time is called up.0046RACETIMER0047Best lap time008ALap number
Resetting current lap
XPress button 005A while the timer is
running.
The timer stops.XPress button 005B.
The lap time is reset to “0”.
Deleting all laps
It is not possible to delete a single saved lap.
When you turn off the engine, the RACETIMER
will be reset to “0” after 30 seconds. All laps
are deleted.
XPress button 005A while the timer is
running.
The timer stops.XPress button 0064.
The reset menu appears in the
multifunction display.XPress button 003D to select Yes and
confirm with button 0064.
The saved laps are deleted.Overall analysis
This function is only available if you have
saved at least one lap and have stopped the
RACETIMER.
XPress button 0040 or 003E to select the
AMG menu.XPress button 003C repeatedly until the
overall analysis appears in the
multifunction display.0046 Overall analysis of RACETIMER0047 Overall driving time008A Average speed0088 Overall distance driven0086 Maximum speed
Lap analysis
This function is only available if you have
saved at least two laps and have stopped the
RACETIMER.
XPress button 0040 or 003E to select the
AMG menu.XPress button 003C repeatedly until the lap
analysis appears in the multifunction
display.
Each lap is shown in its own submenu. The
fastest lap is indicated by flashing
symbol 0046.
0046Lap number0047Lap timeControl system289Controls in detailBA 197 USA, CA Edition A 2011; 1; 27, en-UShereepeVersion: 3.0.3.52010-03-24T15:31:10+01:00 - Seite 289Z
Page 293 of 436
Rwhen the transmission is in park position
P , reverse gear R, or neutral position N
R the ESC is switched off or has switched off
due to a malfunction
The vehicle speed displayed in the
speedometer can briefly vary from the speed
setting for the cruise control system.
Setting current speed XAccelerate or decelerate to the desired
speed.XBriefly lift the cruise control lever in
direction of arrow 0046 or press in direction
of arrow 0047.XRemove your foot from the accelerator
pedal.
i On uphill grades, the cruise control may
not be able to maintain the set speed. Once
the grade eases, the set speed will be
resumed.
On downhill grades, the cruise control
maintains the set speed by braking with the
vehicle’s brake system. In addition, on
longer downhill grades the transmission
will downshift automatically.
Canceling cruise control
XDepress the brake pedal.
or
XBriefly push the cruise control lever in
direction of arrow 008A.
The last set speed is stored for later use.
The last stored speed is deleted from memory
when the engine is turned off.
The cruise control switches off automatically
when you depress the brake pedal or you
engage the electronic parking brake.
The cruise control also switches off
automatically when
R the vehicle speed falls below 20 mph
(30 km/h)
R the ESC is in operation
R the ESC is switched off with the ESC switch
Rthe ESC has switched off due to a
malfunction
R you shift the transmission into neutral
position N while driving
An acoustic warning will sound. Observe
additional messages in the multifunction
display that may appear.
Depressing the accelerator pedal does not
deactivate the cruise control. After a brief
acceleration (e.g. for passing), the cruise
control will resume the last set speed.
Changing the set speed GWarning!
Keep in mind that it may take a brief moment
until the vehicle has made the necessary
adjustments.
Increase or decrease the set vehicle speed to
a value that the prevailing road conditions and
legal speed limits permit. Otherwise, sudden
and unexpected acceleration or deceleration
of the vehicle could cause an accident and/
or serious injury to you and others.
You can increase or decrease the set speed
in 1 mph (Canada: 1 km/h) increments or in
5 mph (Canada: 10 km/h) increments.
When you use the cruise control lever to
decelerate, the brake system will brake the
vehicle automatically if the engine’s braking
power does not brake the vehicle sufficiently.
XIncreasing: Lift the cruise control lever in
direction of arrow 0046 and hold it up until
the desired speed is reached.XDecreasing: Press the cruise control lever
in direction of arrow 0047 and hold it down
until the desired speed is reached.XRelease the cruise control lever.
The new speed is set and the vehicle will
accelerate or decelerate.
Adjustment in 1 mph (Canada: 1 km/h)
increments
i The set speed value is increased or
decreased in 1 mph (Canada: 1 km/h)
Driving systems291Controls in detailBA 197 USA, CA Edition A 2011; 1; 27, en-UShereepeVersion: 3.0.3.52010-03-24T15:31:10+01:00 - Seite 291Z