2011 MERCEDES-BENZ SLS AMG change time
[x] Cancel search: change timePage 292 of 436

008AAverage speed during lap0088Lap length0086Maximum speed during lapXPress button 003D or 003C to see other lap
analyses.
Driving systems
Introduction
This section describes the following driving
systems of your vehicle:
R Cruise control
R RACE START
R Hill-start assist system
R Parktronic system
R Rear view camera
The driving safety systems ABS, Adaptive
Brake, BAS, EBP, ESC and Trunk Wing are
described in the “Safety and security” section
( Y page 61).
Cruise control
The cruise control maintains the speed you
set for your vehicle automatically.
The use of the cruise control is recommended
for driving at a constant speed for extended
periods of time.
The currently set speed or last set speed
(“Resume” function) appears in the
multifunction display for approximately
5 seconds.
GWarning!
The cruise control is a convenience system
designed to assist the driver during vehicle
operation. The driver is and must always
remain responsible for the vehicle’s speed
and for safe brake operation.
Only use the cruise control if the road, traffic,
and weather conditions make it advisable to
travel at a constant speed.
R The use of the cruise control can be
dangerous on winding roads or in heavy
traffic because conditions do not allow safe
driving at a constant speed.
R The use of the cruise control can be
dangerous on slippery roads. Rapid
changes in tire traction can result in wheel
spin and loss of control.
R Deactivate the cruise control when driving
in fog.
The “Resume” function should only be
operated if the driver is fully aware of the
previously set speed and wishes to resume
this particular preset speed.GWarning!
The cruise control brakes automatically so
that the set speed is not exceeded.
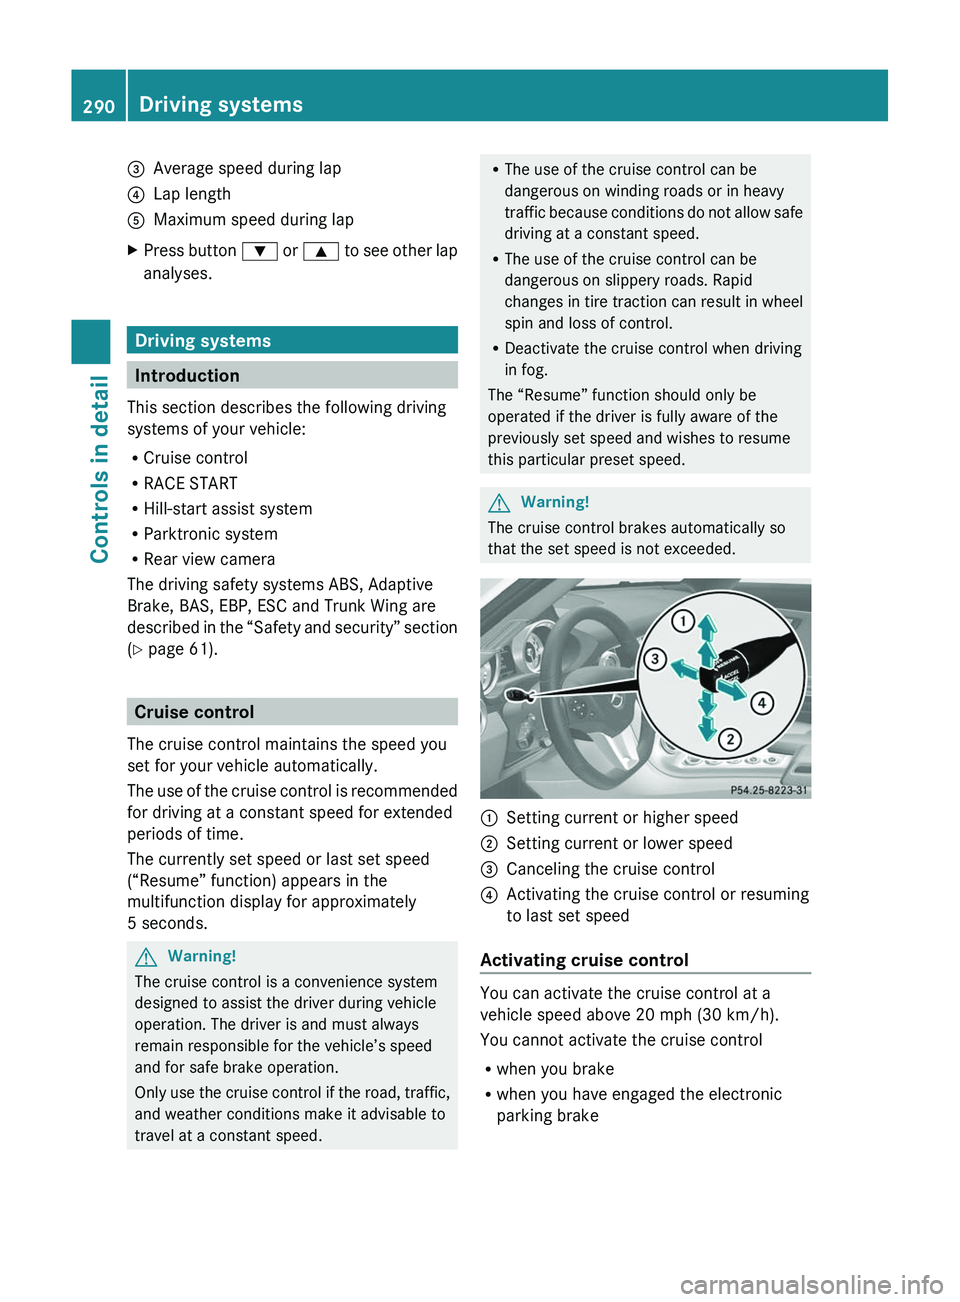
0046Setting current or higher speed0047Setting current or lower speed008ACanceling the cruise control0088Activating the cruise control or resuming
to last set speed
Activating cruise control
You can activate the cruise control at a
vehicle speed above 20 mph (30 km/h).
You cannot activate the cruise control
R when you brake
R when you have engaged the electronic
parking brake
290Driving systemsControls in detail
BA 197 USA, CA Edition A 2011; 1; 27, en-UShereepeVersion: 3.0.3.52010-03-24T15:31:10+01:00 - Seite 290
Page 299 of 436

GWarning!
The rear view camera is only an aid and may
display obstacles
R from a distorted perspective
R inaccurately
R may not display obstacles at all
The rear view camera does not relieve you of
the responsibility to be cautious. Take care
and pay careful attention. The rear view
camera may not show objects which are
R very close to the rear bumper
R under the rear bumper
You are responsible for safety at all times and
must continue to pay attention to the
immediate surroundings when parking and
maneuvering. This includes the area behind,
in front of, and beside the vehicle. Otherwise
you could endanger yourself and/or others.
GWarning!
The rear view camera either will not function
or will not function to its full capability if
R the trunk lid is open
R it is raining very hard, snowing or foggy
R it is night or you are parking/maneuvering
your vehicle in an area where it is very dark
R the camera is exposed to a very bright white
light
R the immediate surroundings are
illuminated with fluorescent light (the
COMAND system display can flicker)
R there is a sudden change in temperature,
e.g. if you drive into a heated garage from
the cold (lens condensation)
R the camera lens is dirty or covered
R the rear of your vehicle is damaged
In this case, have the position and setting
of the camera checked by a qualified
specialist workshop. Mercedes-Benz
recommends that you contact a Mercedes-
Benz Center for this purpose.
Do not use the rear view camera in these
situations. Otherwise you could injure
yourself or others and/or damage property
including your vehicle while parking/
maneuvering.
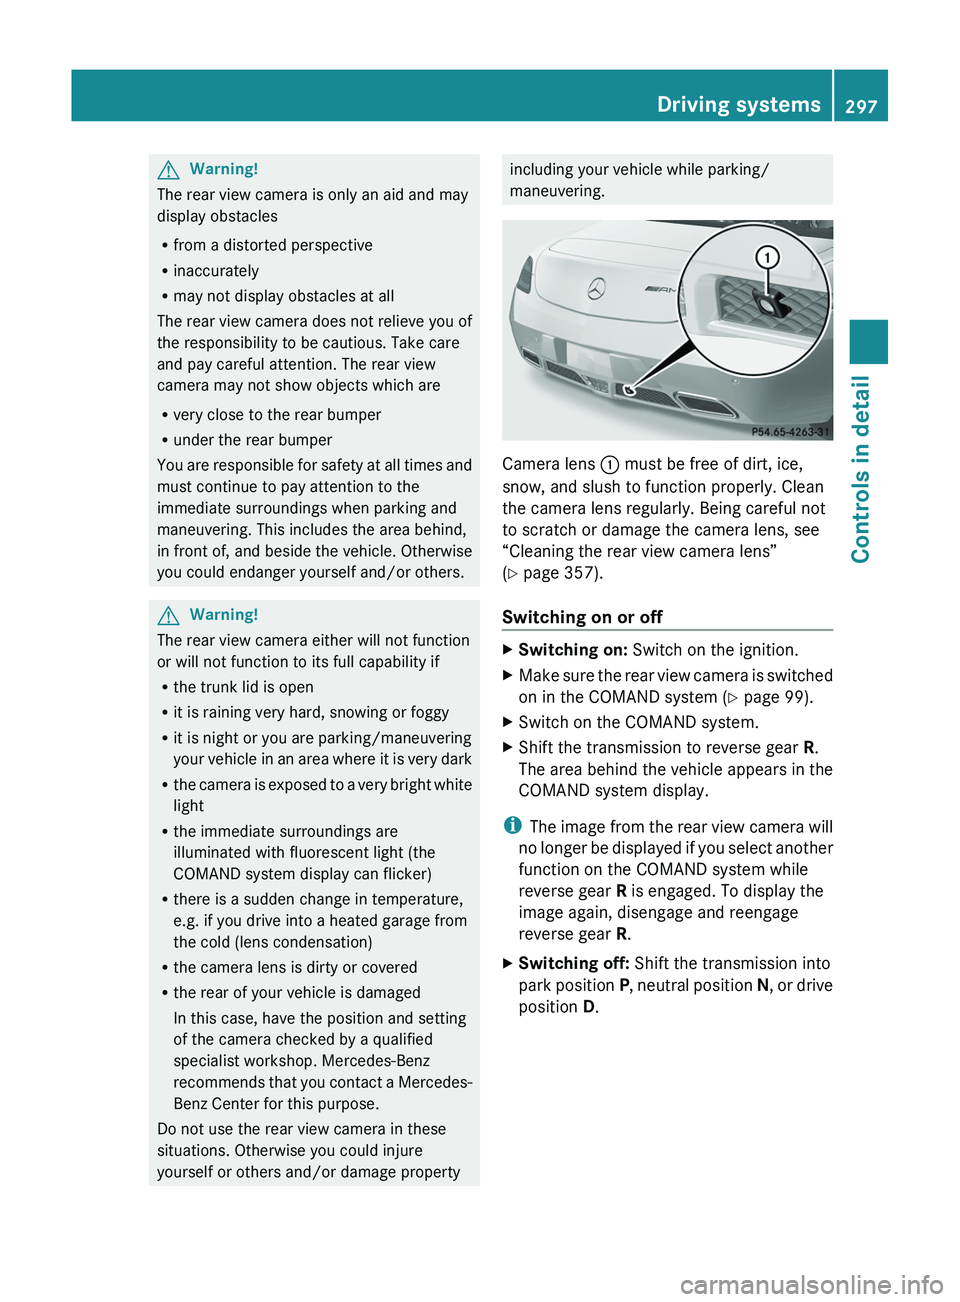
Camera lens 0046 must be free of dirt, ice,
snow, and slush to function properly. Clean
the camera lens regularly. Being careful not
to scratch or damage the camera lens, see
“Cleaning the rear view camera lens”
( Y page 357).
Switching on or off
XSwitching on: Switch on the ignition.XMake sure the rear view camera is switched
on in the COMAND system ( Y page 99).XSwitch on the COMAND system.XShift the transmission to reverse gear R.
The area behind the vehicle appears in the
COMAND system display.
i The image from the rear view camera will
no longer be displayed if you select another
function on the COMAND system while
reverse gear R is engaged. To display the
image again, disengage and reengage
reverse gear R.
XSwitching off: Shift the transmission into
park position P, neutral position N, or drive
position D.Driving systems297Controls in detailBA 197 USA, CA Edition A 2011; 1; 27, en-UShereepeVersion: 3.0.3.52010-03-24T15:31:10+01:00 - Seite 297Z
Page 316 of 436

When programming a garage door opener,
park vehicle outside the garage.
Do not run the engine while programming the
integrated remote control. Inhalation of
exhaust gas is hazardous to your health. All
exhaust gas contains carbon monoxide (CO),
and inhaling it can cause unconsciousness
and possible death.
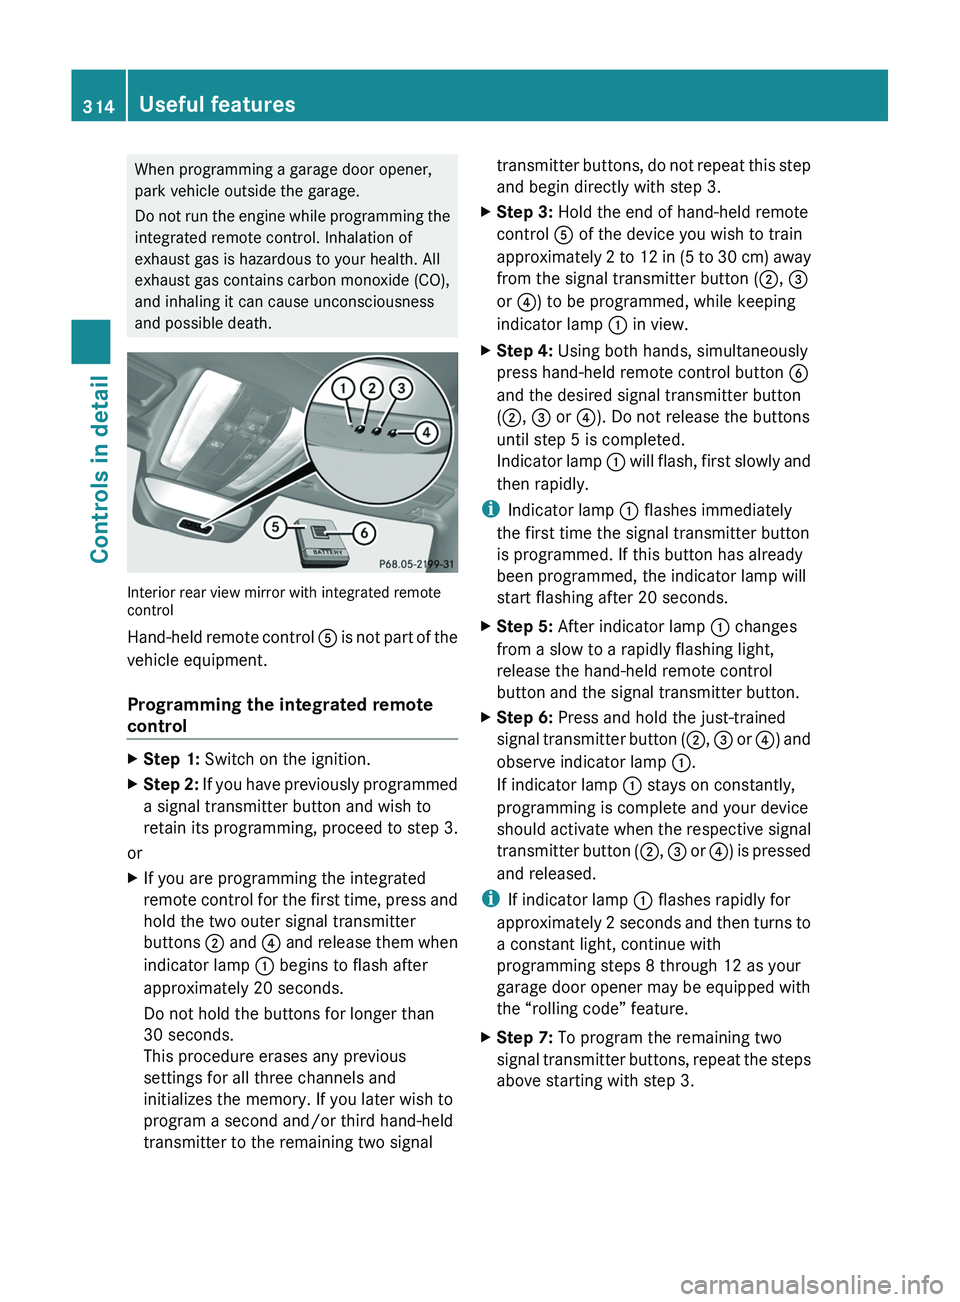
Interior rear view mirror with integrated remote
control
Hand-held remote control 0086 is not part of the
vehicle equipment.
Programming the integrated remote
control
XStep 1: Switch on the ignition.XStep 2: If you have previously programmed
a signal transmitter button and wish to
retain its programming, proceed to step 3.
or
XIf you are programming the integrated
remote control for the first time, press and
hold the two outer signal transmitter
buttons 0047 and 0088 and release them when
indicator lamp 0046 begins to flash after
approximately 20 seconds.
Do not hold the buttons for longer than
30 seconds.
This procedure erases any previous
settings for all three channels and
initializes the memory. If you later wish to
program a second and/or third hand-held
transmitter to the remaining two signaltransmitter buttons, do not repeat this step
and begin directly with step 3.XStep 3: Hold the end of hand-held remote
control 0086 of the device you wish to train
approximately 2 to 12 in (5 to 30 cm) away
from the signal transmitter button ( 0047, 008A
or 0088 ) to be programmed, while keeping
indicator lamp 0046 in view.XStep 4: Using both hands, simultaneously
press hand-held remote control button 0087
and the desired signal transmitter button
( 0047 , 008A or 0088). Do not release the buttons
until step 5 is completed.
Indicator lamp 0046 will flash, first slowly and
then rapidly.
i Indicator lamp 0046 flashes immediately
the first time the signal transmitter button
is programmed. If this button has already
been programmed, the indicator lamp will
start flashing after 20 seconds.
XStep 5: After indicator lamp 0046 changes
from a slow to a rapidly flashing light,
release the hand-held remote control
button and the signal transmitter button.XStep 6: Press and hold the just-trained
signal transmitter button ( 0047, 008A or 0088) and
observe indicator lamp 0046.
If indicator lamp 0046 stays on constantly,
programming is complete and your device
should activate when the respective signal
transmitter button ( 0047, 008A or 0088) is pressed
and released.
i If indicator lamp 0046 flashes rapidly for
approximately 2 seconds and then turns to
a constant light, continue with
programming steps 8 through 12 as your
garage door opener may be equipped with
the “rolling code” feature.
XStep 7: To program the remaining two
signal transmitter buttons, repeat the steps
above starting with step 3.314Useful featuresControls in detail
BA 197 USA, CA Edition A 2011; 1; 27, en-UShereepeVersion: 3.0.3.52010-03-24T15:31:10+01:00 - Seite 314
Page 422 of 436

Vehicle equipment
i This Operator’s Manual describes all
features, standard or optional, potentially
available for your vehicle at the time of
purchase. Please be aware that your
vehicle might not be equipped with all
features described in this manual.
Parts service
All authorized Mercedes-Benz Centers
maintain a stock of Genuine Mercedes-Benz
Parts required for maintenance and repair
work. In addition, strategically located parts
distribution centers provide quick and
reliable parts service.
More than 300 000 different parts for
Mercedes-Benz models are available.
Genuine Mercedes-Benz Parts are subjected
to stringent quality inspections. Each part has
been specifically developed, manufactured or
selected for and adapted to Mercedes-Benz
vehicles.
Therefore, Genuine Mercedes-Benz Parts
should be installed.
! Do not use non-genuine Mercedes-Benz
parts and accessories not authorized by
Mercedes-Benz. Doing so could damage
the vehicle, which is not covered by the
Mercedes-Benz Limited Warranty. Also, it
could compromise the vehicle’s durability
or safety.
Warranty coverage
Your vehicle is covered under the terms of the
warranties printed in the Service and
Warranty Information booklet.
Your authorized Mercedes-Benz Center will
exchange or repair any defective parts
originally installed in the vehicle in
accordance with the terms of the following
warranties:
R New Vehicle Limited Warranty
R Emission System Warranty
R Emission Performance Warranty
R California, Connecticut, Maine,
Massachusetts, New York, Pennsylvania,
Rhode Island, and Vermont Emission
Control Systems Warranty
R State Warranty Enforcement Laws (Lemon
Laws)
Replacement parts and accessories are
covered by the Mercedes-Benz Parts and
Accessories warranties, copies of which are
available at any authorized Mercedes-Benz
Center.
Loss of Service and Warranty
Information booklet
Should you lose your Service and Warranty
Information booklet, have an authorized
Mercedes-Benz Center arrange for a
replacement. It will be mailed to you.
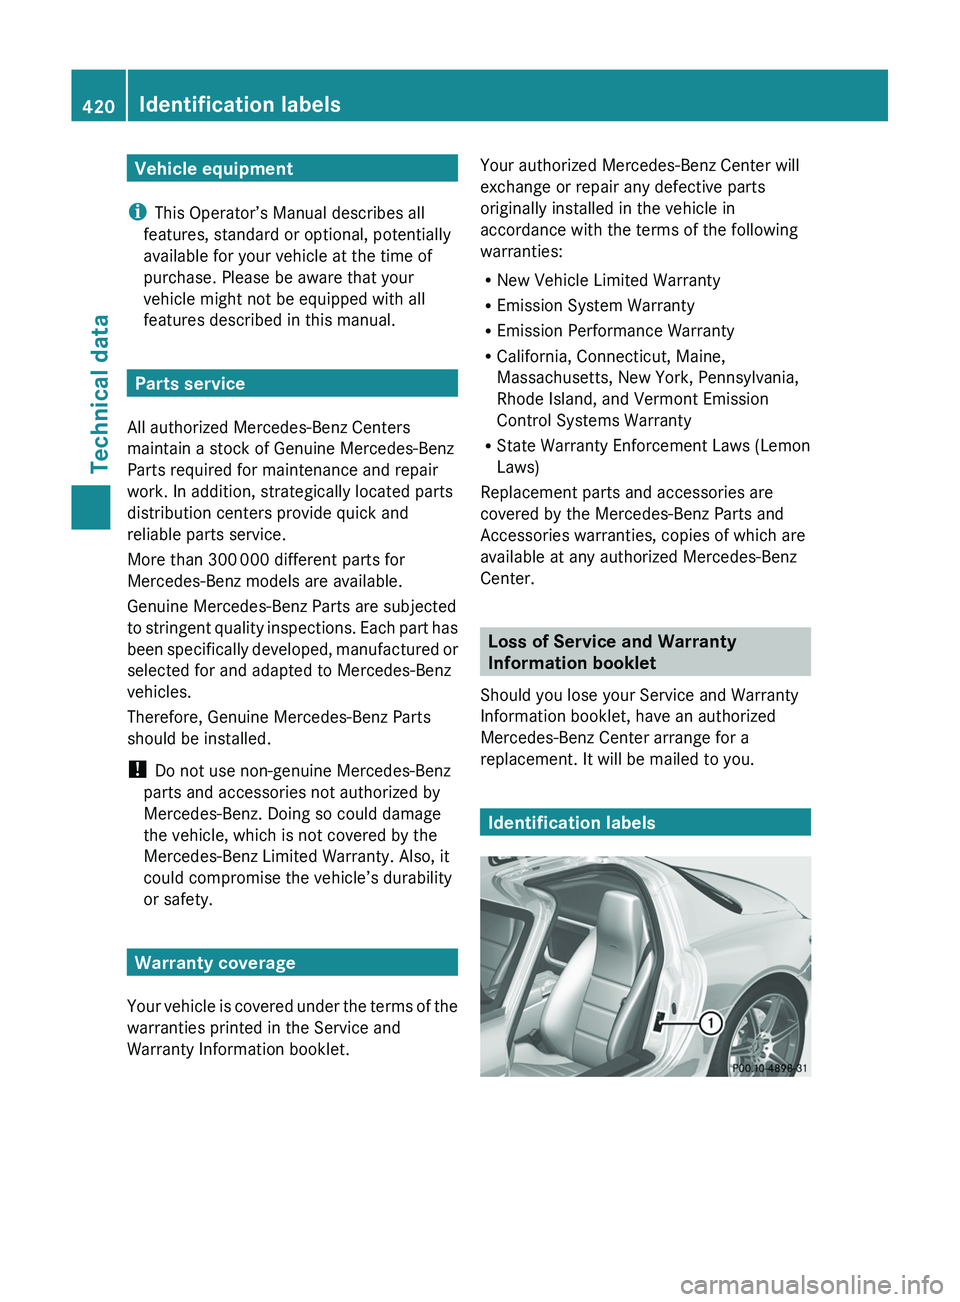
Identification labels
420Identification labelsTechnical data
BA 197 USA, CA Edition A 2011; 1; 27, en-UShereepeVersion: 3.0.3.52010-03-24T15:31:10+01:00 - Seite 420