2011 MERCEDES-BENZ SLS AMG start stop button
[x] Cancel search: start stop buttonPage 288 of 436
XPress button 0064 to change the current
status.
Depending on the previous status, the
Locator Lighting: function will be
Enabled or Disabled .
You can temporarily deactivate the
headlamps delayed shut-off feature:
XBefore exiting the vehicle, set the starter
switch to position 0 using the KEYLESS-GO
start/stop button.XSet the starter switch to position 2 and
back to position 0 using the KEYLESS-GO
start/stop button.
The headlamps delayed shut-off feature is
deactivated. It will reactivate as soon as
you start the engine.
Switching interior lighting delayed shut-
off on or off
Use this function to set whether you would
like the interior lighting to remain on for
10 seconds during darkness after you have
set the starter switch to position 0 using the
KEYLESS-GO start/stop button.
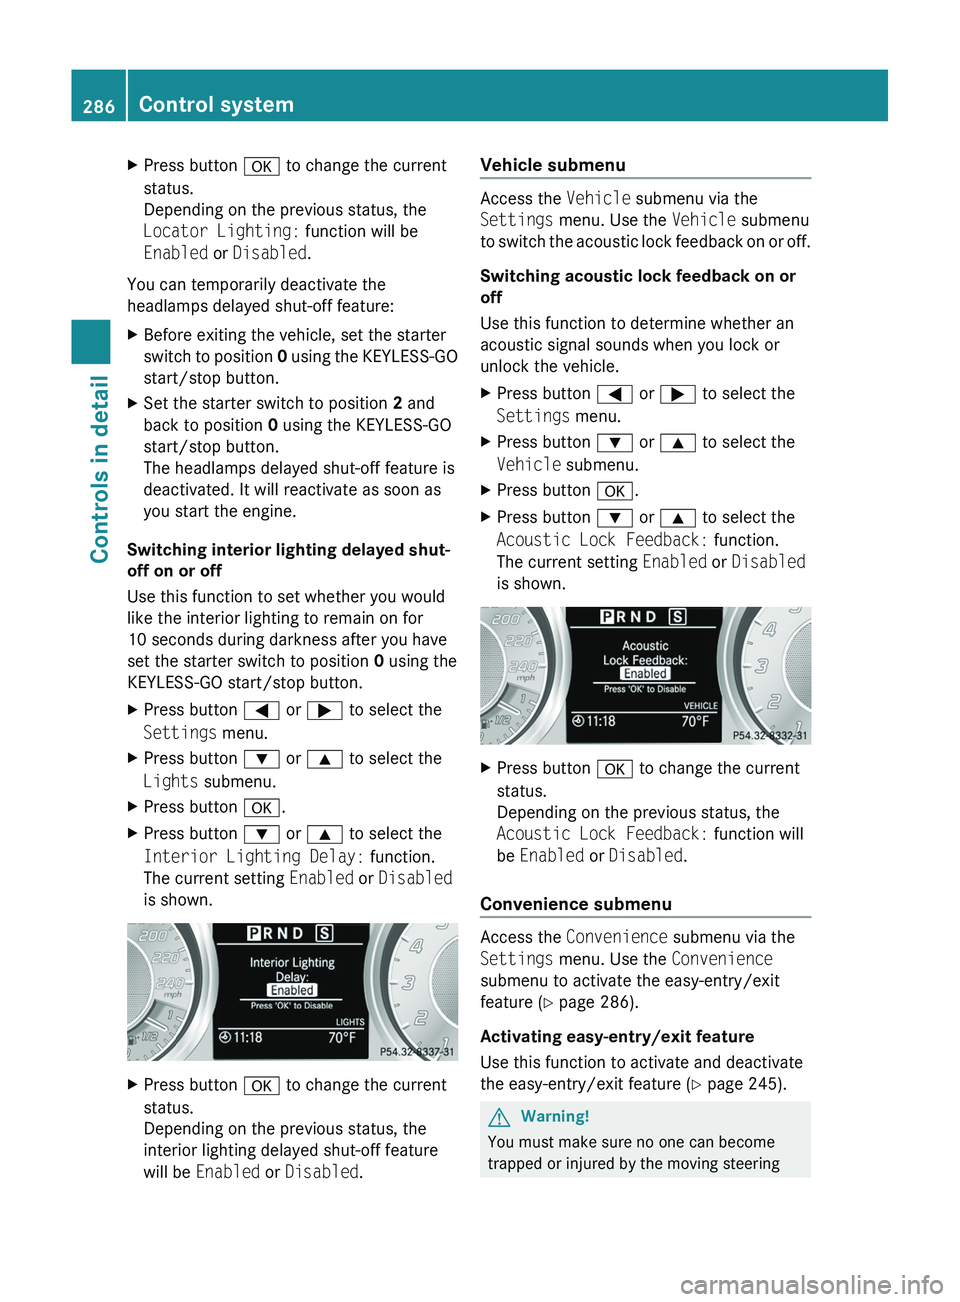
XPress button 0040 or 003E to select the
Settings menu.XPress button 003D or 003C to select the
Lights submenu.XPress button 0064.XPress button 003D or 003C to select the
Interior Lighting Delay: function.
The current setting Enabled or Disabled
is shown.XPress button 0064 to change the current
status.
Depending on the previous status, the
interior lighting delayed shut-off feature
will be Enabled or Disabled .Vehicle submenu
Access the Vehicle submenu via the
Settings menu. Use the Vehicle submenu
to switch the acoustic lock feedback on or off.
Switching acoustic lock feedback on or
off
Use this function to determine whether an
acoustic signal sounds when you lock or
unlock the vehicle.
XPress button 0040 or 003E to select the
Settings menu.XPress button 003D or 003C to select the
Vehicle submenu.XPress button 0064.XPress button 003D or 003C to select the
Acoustic Lock Feedback: function.
The current setting Enabled or Disabled
is shown.XPress button 0064 to change the current
status.
Depending on the previous status, the
Acoustic Lock Feedback: function will
be Enabled or Disabled .
Convenience submenu
Access the Convenience submenu via the
Settings menu. Use the Convenience
submenu to activate the easy-entry/exit
feature ( Y page 286).
Activating easy-entry/exit feature
Use this function to activate and deactivate
the easy-entry/exit feature ( Y page 245).
GWarning!
You must make sure no one can become
trapped or injured by the moving steering
286Control systemControls in detail
BA 197 USA, CA Edition A 2011; 1; 27, en-UShereepeVersion: 3.0.3.52010-03-24T15:31:10+01:00 - Seite 286
Page 290 of 436
176‡ (80†). During this time, avoid driving
at full engine speed.
Use buttons 003D or 003C to select the
following functions in the AMG menu:
R SETUP ( Y page 288)
R RACETIMER ( Y page 288)
R Overall analysis ( Y page 289)
R Lap analysis ( Y page 289)
SETUP
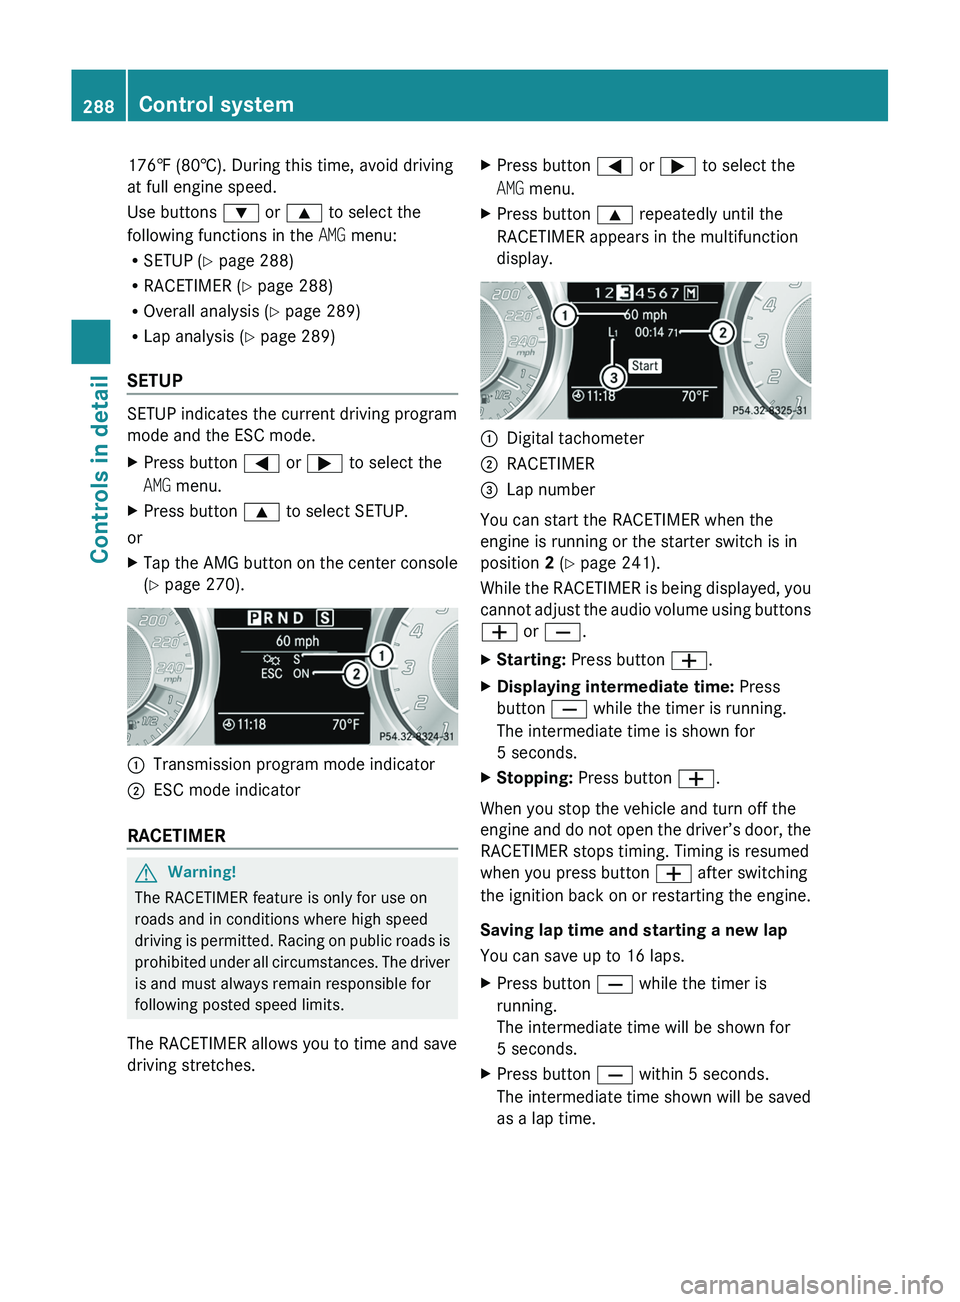
SETUP indicates the current driving program
mode and the ESC mode.
XPress button 0040 or 003E to select the
AMG menu.XPress button 003C to select SETUP.
or
XTap the AMG button on the center console
( Y page 270).0046Transmission program mode indicator0047ESC mode indicator
RACETIMER
GWarning!
The RACETIMER feature is only for use on
roads and in conditions where high speed
driving is permitted. Racing on public roads is
prohibited under all circumstances. The driver
is and must always remain responsible for
following posted speed limits.
The RACETIMER allows you to time and save
driving stretches.
XPress button 0040 or 003E to select the
AMG menu.XPress button 003C repeatedly until the
RACETIMER appears in the multifunction
display.0046Digital tachometer0047RACETIMER008ALap number
You can start the RACETIMER when the
engine is running or the starter switch is in
position 2 (Y page 241).
While the RACETIMER is being displayed, you
cannot adjust the audio volume using buttons
005A or 005B .
XStarting: Press button 005A.XDisplaying intermediate time: Press
button 005B while the timer is running.
The intermediate time is shown for
5 seconds.XStopping: Press button 005A.
When you stop the vehicle and turn off the
engine and do not open the driver’s door, the
RACETIMER stops timing. Timing is resumed
when you press button 005A after switching
the ignition back on or restarting the engine.
Saving lap time and starting a new lap
You can save up to 16 laps.
XPress button 005B while the timer is
running.
The intermediate time will be shown for
5 seconds.XPress button 005B within 5 seconds.
The intermediate time shown will be saved
as a lap time.288Control systemControls in detail
BA 197 USA, CA Edition A 2011; 1; 27, en-UShereepeVersion: 3.0.3.52010-03-24T15:31:10+01:00 - Seite 288
Page 352 of 436
advisable to brake the vehicle with
considerable force prior to parking. The heat
generated serves to dry the brakes.
Salt-covered roadsGWarning!
A layer of salt on the brake discs and the brake
linings may cause a delay in the braking
effect, resulting in a significantly increased
braking distance, which could lead to an
accident.
To avoid this danger, you should:
R occasionally brake carefully when you are
driving on salt-covered roads, so that any
layer of salt that may have built up on the
brake discs and the brake linings is
removed without putting other road users
at risk
R maintain a greater distance to the vehicle
ahead and drive with particular care
R carefully apply the brakes at the end of a
trip and immediately after commencing a
new trip, so that salt residues are removed
from the brake disc
Brake service
! The brake fluid level in the reservoir may
be too low if the red brake warning lamp in
the instrument cluster comes on while the
engine is running and an acoustic warning
sounds. Observe additional messages in
the multifunction display that may appear.
Brake pad wear or a leak in the system may
be the reason for low brake fluid in the
reservoir.
Have the brake system inspected
immediately. Contact an authorized
Mercedes-Benz Center.
All checks and service work on the brake
system should be carried out by qualified
technicians only. Contact an authorized
Mercedes-Benz Center.
Only install brake pads and use brake fluid
recommended by Mercedes-Benz.
GWarning!
If other than recommended brake pads are
installed, or other than recommended brake
fluid is used, the braking properties of the
vehicle can be degraded to an extent that safe
braking is substantially impaired. This could
result in an accident.
! Because the ESC operates automatically,
the engine and ignition must be shut off
(KEYLESS-GO start/stop button in position
0 or 1, or SmartKey in starter switch
position 0 or 1) when the electronic parking
brake is being tested on a brake test
dynamometer or when the vehicle is being
towed with the rear axle raised.
Active braking action through the ESC may
otherwise seriously damage the brake
system which is not covered by the
Mercedes-Benz Limited Warranty.
If your brake system is only subjected to
moderate loads, you should occasionally test
the effectiveness of the brakes by applying
above-normal braking pressure at higher
speeds. This will also enhance the grip of the
brake pads.
GWarning!
Make sure not to endanger any other road
users when carrying out these braking
maneuvers.
Refer to the description of the Brake Assist
System (BAS) ( Y page 62).
High-performance brake system and
ceramic brake system
GWarning!
New vehicle brake pads and disks, and
replacement brake pads and disks may take
several hundred miles of driving until they
provide optimum braking efficiency. Until that
time, you may need to use increased brake
pedal pressure while braking. Please be aware
of this and adjust your driving and braking
accordingly during this break-in period.
350Driving instructionsOperation
BA 197 USA, CA Edition A 2011; 1; 27, en-UShereepeVersion: 3.0.3.52010-03-24T15:31:10+01:00 - Seite 350
Page 360 of 436
XOnly use clean water and a soft, non-
scratching cloth to clean rear view camera
lens 0046.
Be careful not to apply wax to rear view
camera lens 0046 when waxing the vehicle. If
necessary, remove the wax using the
Mercedes-Benz approved Car Shampoo with
plenty of water.
! Do not clean the camera and the area
around the camera
R with a high-pressure cleaner
R with a dry cloth and strong pressure
R with aggressive cleaning agents
You could otherwise damage the camera.
Cleaning the windows and the wiper
blades
! The windshield wipers must be in a
vertical position before folding them away
from the windshield. They could otherwise
damage the hood.
Never open the hood when the wiper arms
are folded forward.
XMake sure the hood is fully closed.XSwitch on the ignition.XTurn combination switch to wiper setting
00B6 (Y page 253).XWith wiper arms in vertical position, switch
off the ignition.GWarning!
For safety reasons, switch off wipers and
remove SmartKey from starter switch before
cleaning the windshield and/or the wiper
blades. KEYLESS-GO: Make sure the vehicle’s
on-board electronics have status 0.
Otherwise, the wiper motor could suddenly
turn on and cause injury.
! Do not pull on the wiper blade inserts.
They could tear.
XFold the wiper arms forward until they snap
into place.XClean the windshield and the wiper blade
inserts with a clean cloth and mild
detergent solution.XUse a soft, clean cloth and a mild window
cleaning solution on all outside and inside
glass surfaces.
An automotive glass cleaner is
recommended.
! Fold the windshield wiper arms back onto
the windshield before pressing the
KEYLESS-GO start/stop button or turning
the SmartKey in the starter switch.
Hold on to the wiper when folding the wiper
arm back. If released, the force of the
impact from the tensioning spring could
crack the windshield.
! To clean the window interior, do not use
a dry cloth, abrasives, solvents or cleaners
containing solvents. Do not touch the
inside of the windows with hard objects
such as an ice scraper or ring. Doing so may
damage the windows.
Light alloy wheels
If possible, clean wheels once a week.
XUse Mercedes-Benz approved Wheel Care,
a soft bristle brush and a strong spray of
water for cleaning the light alloy wheels.
! Only use acid-free cleaning materials.
Acid may cause corrosion or damage the
clear coat.
! The vehicle should not be parked for an
extended period of time immediately after
it has been cleaned. This applies especially
after the wheel rims have been cleaned
with wheel rim cleaner. Wheel rim cleaners
can lead to increased corrosion of the
brake disks and brake pads. Non-approved
wheel cleaners may also damage the wheel
paint if the vehicle is not driven after
cleaning.
358Vehicle careOperation
BA 197 USA, CA Edition A 2011; 1; 27, en-UShereepeVersion: 3.0.3.52010-03-24T15:31:10+01:00 - Seite 358
Page 418 of 436
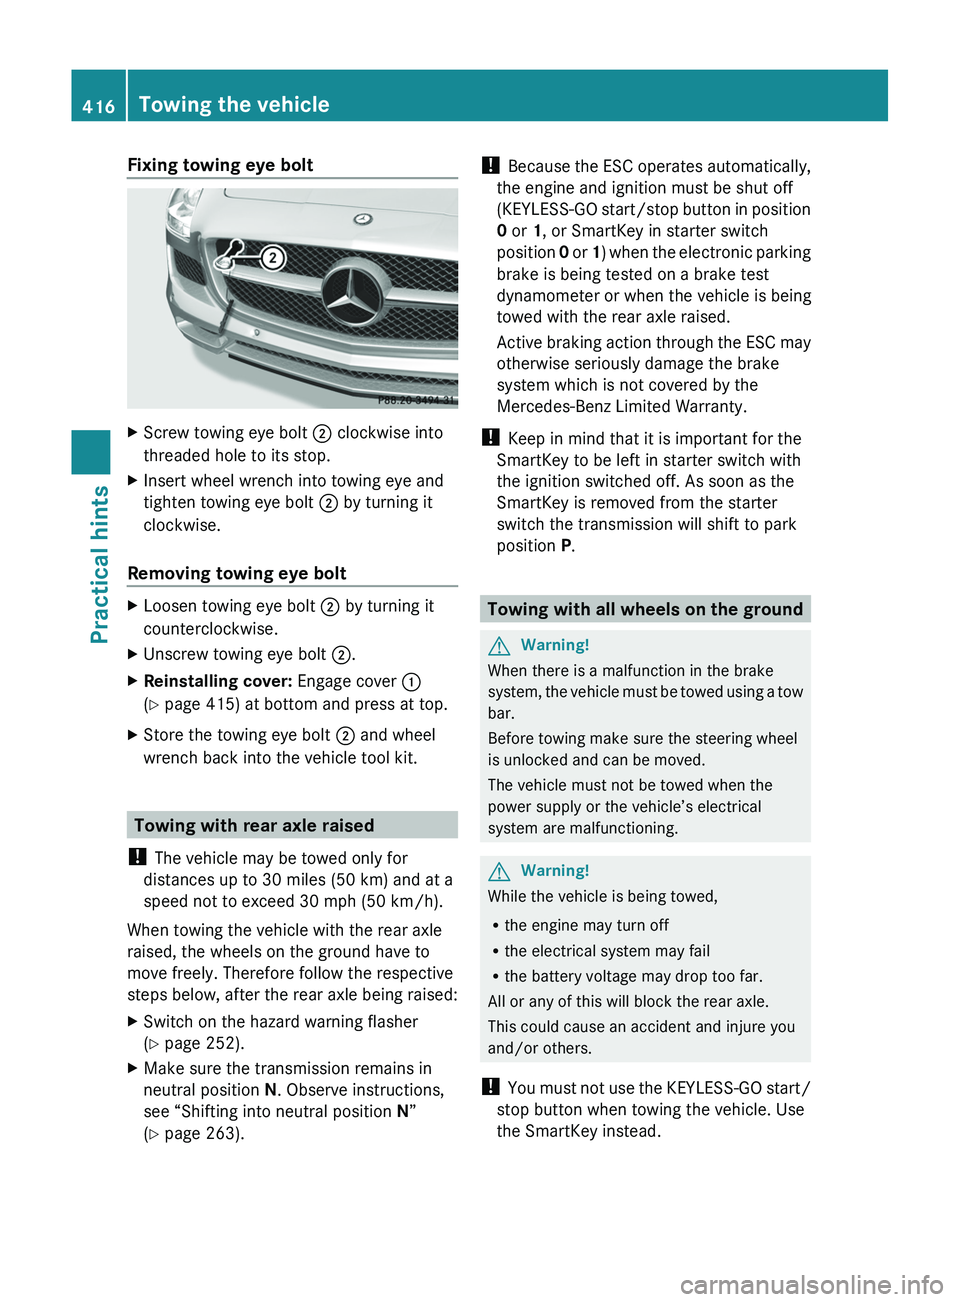
Fixing towing eye boltXScrew towing eye bolt 0047 clockwise into
threaded hole to its stop.XInsert wheel wrench into towing eye and
tighten towing eye bolt 0047 by turning it
clockwise.
Removing towing eye bolt
XLoosen towing eye bolt 0047 by turning it
counterclockwise.XUnscrew towing eye bolt 0047.XReinstalling cover: Engage cover 0046
( Y page 415) at bottom and press at top.XStore the towing eye bolt 0047 and wheel
wrench back into the vehicle tool kit.
Towing with rear axle raised
! The vehicle may be towed only for
distances up to 30 miles (50 km) and at a
speed not to exceed 30 mph (50 km/h).
When towing the vehicle with the rear axle
raised, the wheels on the ground have to
move freely. Therefore follow the respective
steps below, after the rear axle being raised:
XSwitch on the hazard warning flasher
( Y page 252).XMake sure the transmission remains in
neutral position N. Observe instructions,
see “Shifting into neutral position N”
( Y page 263).!
Because the ESC operates automatically,
the engine and ignition must be shut off
(KEYLESS-GO start/stop button in position
0 or 1, or SmartKey in starter switch
position 0 or 1) when the electronic parking
brake is being tested on a brake test
dynamometer or when the vehicle is being
towed with the rear axle raised.
Active braking action through the ESC may
otherwise seriously damage the brake
system which is not covered by the
Mercedes-Benz Limited Warranty.
! Keep in mind that it is important for the
SmartKey to be left in starter switch with
the ignition switched off. As soon as the
SmartKey is removed from the starter
switch the transmission will shift to park
position P.
Towing with all wheels on the ground
GWarning!
When there is a malfunction in the brake
system, the vehicle must be towed using a tow
bar.
Before towing make sure the steering wheel
is unlocked and can be moved.
The vehicle must not be towed when the
power supply or the vehicle’s electrical
system are malfunctioning.
GWarning!
While the vehicle is being towed,
R the engine may turn off
R the electrical system may fail
R the battery voltage may drop too far.
All or any of this will block the rear axle.
This could cause an accident and injure you
and/or others.
! You must not use the KEYLESS-GO start/
stop button when towing the vehicle. Use
the SmartKey instead.
416Towing the vehiclePractical hints
BA 197 USA, CA Edition A 2011; 1; 27, en-UShereepeVersion: 3.0.3.52010-03-24T15:31:10+01:00 - Seite 416