2011 MERCEDES-BENZ S-Class reset lock
[x] Cancel search: reset lockPage 9 of 524

CD/DVDEjecting (Rear Seat Entertainment
System) ......................................... 248
Inserting (Rear Seat
Entertainment System) ..................247
CD player/CD changer
Operation (COMAND) ....................217
Center console ..................................... 35
Central locking Activating/deactivating
(COMAND) ..................................... 261
SmartKey ......................................... 76
Changing bulbs
Headlamps ..................................... 278
Changing direction
Announcement phase ....................164
Change of direction phase .............165
Preparation phase .........................164
Changing gears .................................. 309
Changing the programming SmartKey ......................................... 79
Channel presets ................................ 209
Character entry ................................. 127
Characters Entering ................................. 128, 130
Child-proof locks
Rear doors ....................................... 65
Children
In the vehicle ................................... 60
Restraint systems ............................ 61
Child seat
LATCH-type (ISOFIX ) child seat
anchors ............................................ 63
Special seat belt retractor ...............62
Top Tether ....................................... 64
Cigarette lighter ................................ 431
City Entering ......................................... 152
Classification system for
occupants (OCS) Faults ............................................... 52
Operation ......................................... 48
System self-test ............................... 51
Climate control
Activating/deactivating .................288
Activating/deactivating air-
recirculation mode .........................293Automatic climate control .............287
COMAND ....................................... 261
Controlling automatically ...............289
Controlling centrally (COMAND) ....264
Cooling with air dehumidification ..289
Cooling with air dehumidification
(COMAND) ..................................... 263
Defrosting the windshield ..............292
Demisting the windows .................. 293
Important safety information .........286
Indicator lamp ................................ 289
Main menu ..................................... 263
Maximum cooling .......................... 292
Problems with "cooling with air
dehumidification" ........................... 289
Problems with the rear window
heating .......................................... 293
Rear compartment (COMAND) ......265
Rear control panel .........................288
Refrigerant ..................................... 514
Setting the air distribution .............291
Setting the airflow .........................292
Setting the airflow (COMAND) .......265
Setting the air vents ......................295
Setting the footwell temperature
(COMAND) ..................................... 264
Setting the temperature ................290
Setting the temperature (rear
compartment) ................................ 291
Switching the rear window
heating on/off ............................... 293
Switching the residual heat
function on/off .............................. 294
Coat hooks ......................................... 424
Cockpit ................................................. 31
COMAND Basic functions .............................. 131
Components .................................. 116
Function buttons ........................... 117
Switching on/off ........................... 131
COMAND controller ........................... 116
COMAND display ............................... 119
Cleaning instructions .....................123
Folding in and swiveling .................122
Setting ........................................... 141
COMAND menu
Automatic climate control .............261Index7
Page 23 of 524

Increased vehicle weight due to
optional equipment (definition) ......500
Kilopascal (kPa) (definition) ...........501
Labeling (overview) ........................495
Load bearing index (definition) ......502
Load index ..................................... 498
Load index (definition) ...................501
Maximum loaded vehicle weight
(definition) ..................................... 501
Maximum load on a tire
(definition) ..................................... 501
Maximum permissible tire
pressure (definition) ....................... 501
Maximum tire load .........................494
Maximum tire load (definition) .......501
Optional equipment weight
(definition) ..................................... 502
PSI (pounds per square inch)
(definition) ..................................... 501
Replacing ....................................... 502
Service life ..................................... 482
Sidewall (definition) .......................502
Speed index (definition) .................500
Storing ........................................... 503
Structure and characteristics
(definition) ..................................... 500
Temperature .................................. 495
TIN (Tire Identification Number)
(definition) ..................................... 502
Tire bead (definition) ......................502
Tire pressure (definition) ................501
Tire pressures (recommended) ......500
Tire size (data) ............................... 503
Tire size designation, load-bearing
capacity, speed index ....................496
Tire tread ....................................... 481
Tire tread (definition) .....................501
Total load limit (definition) .............502
Traction ......................................... 495
Traction (definition) .......................502
Tread wear ..................................... 495
Uniform Tire Quality Grading
Standards ...................................... 494
Uniform Tire Quality Grading
Standards (definition) ....................500
Unladen weight (definition) ............501
Wear indicator (definition) .............502
Wheel rim (definition) ....................500Tires and wheels (important safety
information) ....................................... 480
Toggling .............................................. 198
Tone settings Balance and fader ..........................133
Treble and bass ............................. 133
Top Tether ............................................ 64
Towing Important safety guidelines ...........473
Installing the towing eye ................474
Removing the towing eye ...............474
Track
Selecting ........................................ 248
Track information .............................. 250
Traffic jam function ........................... 168
Traffic Program Switching off .................................. 132
Traffic report
Real-time traffic report ..................174
Traffic report read-aloud function ... 172
Traffic reports .................................... 172
Transfer case ..................................... 313
Transmission position display ......... 308
Transmission positions .................... 309
Treble and bass Adjusting ....................................... 133
Trip computer (on-board
computer) .......................................... 368
Trip odometer Calling up ....................................... 368
Resetting (on-board computer) ......369
True Image™ ...................................... 135
Trunk Automatic opening ..................... 86, 87
Emergency release ..........................88
Important safety guidelines .............85
Limiting the opening angle ............. 261
Locking separately ...........................87
Trunk lid
Display message ............................ 410
Trunk lid opening height
restriction .......................................... 261
trunk load (maximum) ...................... 516
Turn signal (display message) ......... 394
Turn signals ....................................... 274
Type plate see Vehicle identification plate Index21
Page 55 of 524

PRE-SAFE®
systemGWarning
The PRE-SAFE ®
system reduces the impact of
an accident on vehicle occupants, as long as
their seat belts have been fastened correctly.
Although your vehicle is equipped with a PRE-
SAFE ®
system, the possibility of injury in the
event of an accident cannot be ruled out. You
should therefore always drive carefully and
adapt your driving style to the prevailing road,
weather and traffic conditions.
PRE-SAFE ®
takes pre-emptive measures to
protect occupants in certain hazardous
situations.
PRE-SAFE ®
intervenes:
R in emergency braking situations, e.g. if BAS
is activated or, in vehicles with DISTRONIC
PLUS, where BAS PLUS intervenes
powerfully
R if, on vehicles with DISTRONIC PLUS, the
radar sensor system detects an imminent
danger of collision in certain situations
R in critical driving situations, e.g. when
physical limits are exceeded and the
vehicle understeers or oversteers severely
or when having to swerve to avoid an
obstacle at a speed
PRE-SAFE ®
takes the following measures
depending on the hazardous situation
detected:
R the front seat belts are pre-tensioned.
R the front-passenger seat or the electrically
adjustable outer rear seats are adjusted if
they are in unfavorable position.
R on vehicles with a multicontour seat or an
active multicontour seat: the air pressure
in the side bolsters on the seat cushion and
the side bolsters on the backrest is
increased.
R on vehicles with multicontour seats in the
rear: the air pressure in the backrest side
bolsters of the outer seats in the rear is
increased.
R if the vehicle skids, the sliding sunroof,
panorama sliding sunroof and the side
windows are closed so that only a small gap
remains.
If the sliding sunroof, panorama roof with
power tilt/sliding panel or a side window is
obstructed when closing, the closing
procedure is stopped. The obstructed sliding
sunroof, panorama roof with power tilt/
sliding panel or side window then opens again
slightly.
If the hazardous situation passes without
resulting in an accident, PRE-SAFE ®
slackens
the belt pretensioning. The air pressure in the
side bolsters on the multicontour seat/active
multicontour seat is reduced again. All
settings made by PRE-SAFE ®
can then be
reversed.
If the seat belts are not released:XMove the backrest back slightly, but only
when the vehicle is stationary.
The belt pretensioning is reduced and the
locking mechanism is released.GWarning
Make sure that nobody can become trapped
as you adjust the seat.
! Make sure that there are no objects in the
footwell or behind the seats when resetting
the seats. There is a risk that the seats
and/or the objects could be damaged.
More information about seat-belt
adjustment, a convenience function
integrated into PRE-SAFE ®
, can be found in
the "Seat-belt adjustment" section
( Y page 58).
NECK-PRO head restraints/NECK-
PRO luxury head restraints
NECK-PRO head restraints/NECK-PRO luxury
head restraints increase protection of the
driver’s and front-passenger’s head and neck.
Occupant safety53SafetyZ
Page 73 of 524

GWarning
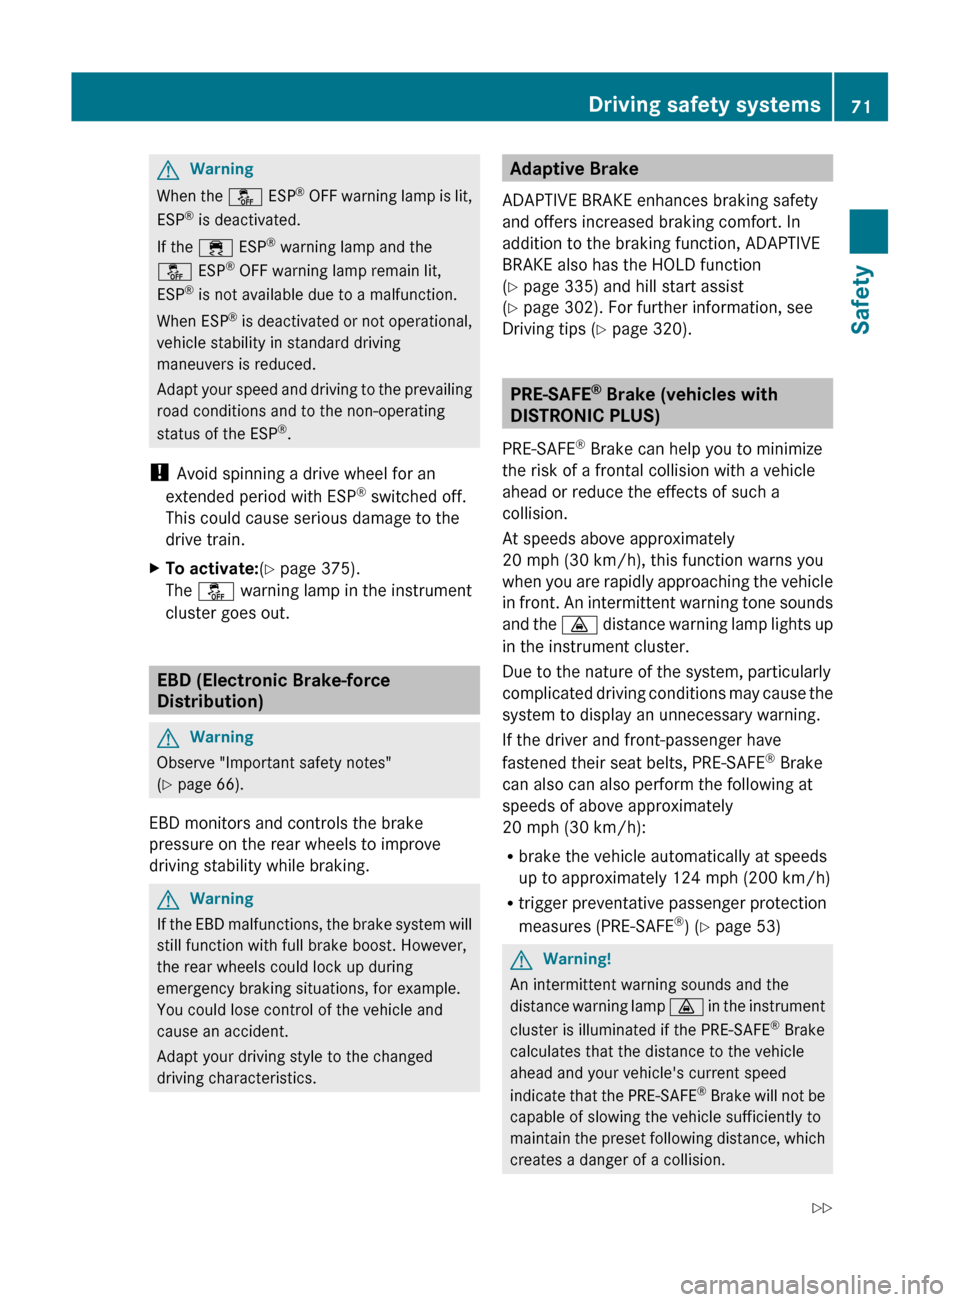
When the å ESP®
OFF warning lamp is lit,
ESP ®
is deactivated.
If the ÷ ESP®
warning lamp and the
å ESP®
OFF warning lamp remain lit,
ESP ®
is not available due to a malfunction.
When ESP ®
is deactivated or not operational,
vehicle stability in standard driving
maneuvers is reduced.
Adapt your speed and driving to the prevailing
road conditions and to the non-operating
status of the ESP ®
.
! Avoid spinning a drive wheel for an
extended period with ESP ®
switched off.
This could cause serious damage to the
drive train.
XTo activate: (Y page 375).
The å warning lamp in the instrument
cluster goes out.
EBD (Electronic Brake-force
Distribution)
GWarning
Observe "Important safety notes"
( Y page 66).
EBD monitors and controls the brake
pressure on the rear wheels to improve
driving stability while braking.
GWarning
If the EBD malfunctions, the brake system will
still function with full brake boost. However,
the rear wheels could lock up during
emergency braking situations, for example.
You could lose control of the vehicle and
cause an accident.
Adapt your driving style to the changed
driving characteristics.
Adaptive Brake
ADAPTIVE BRAKE enhances braking safety
and offers increased braking comfort. In
addition to the braking function, ADAPTIVE
BRAKE also has the HOLD function
( Y page 335) and hill start assist
( Y page 302). For further information, see
Driving tips ( Y page 320).
PRE-SAFE ®
Brake (vehicles with
DISTRONIC PLUS)
PRE-SAFE ®
Brake can help you to minimize
the risk of a frontal collision with a vehicle
ahead or reduce the effects of such a
collision.
At speeds above approximately
20 mph (30 km/h), this function warns you
when you are rapidly approaching the vehicle
in front. An intermittent warning tone sounds
and the · distance warning lamp lights up
in the instrument cluster.
Due to the nature of the system, particularly
complicated driving conditions may cause the
system to display an unnecessary warning.
If the driver and front-passenger have
fastened their seat belts, PRE-SAFE ®
Brake
can also can also perform the following at
speeds of above approximately
20 mph (30 km/h):
R brake the vehicle automatically at speeds
up to approximately 124 mph (200 km/h)
R trigger preventative passenger protection
measures (PRE-SAFE ®
) ( Y page 53)
GWarning!
An intermittent warning sounds and the
distance warning lamp · in the instrument
cluster is illuminated if the PRE-SAFE ®
Brake
calculates that the distance to the vehicle
ahead and your vehicle's current speed
indicate that the PRE-SAFE ®
Brake will not be
capable of slowing the vehicle sufficiently to
maintain the preset following distance, which
creates a danger of a collision.
Driving safety systems71SafetyZ
Page 85 of 524

Unlocking and opening the doors
from the inside
You can open a door from inside the vehicle
even if it has been locked, unless the child-
proof locks have been activated (Y page 65).
Open the door only when the traffic
conditions permit.
If the vehicle has been opened with the
SmartKey or KEYLESS-GO key, opening from
inside triggers the anti-theft alarm system.
Switch off the alarm (Y page 73).
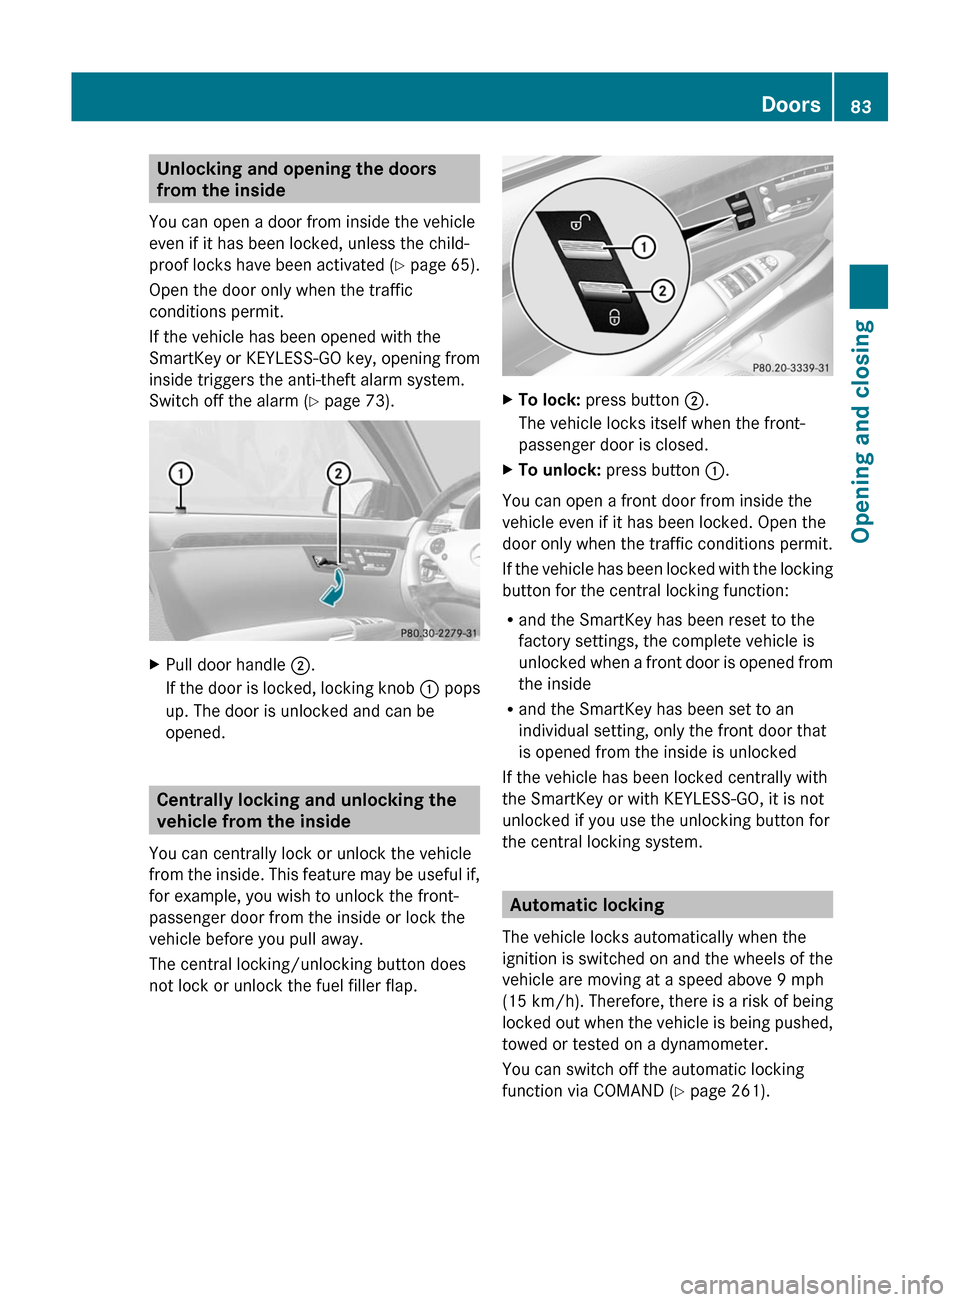
XPull door handle ;.
If the door is locked, locking knob : pops
up. The door is unlocked and can be
opened.
Centrally locking and unlocking the
vehicle from the inside
You can centrally lock or unlock the vehicle
from the inside. This feature may be useful if,
for example, you wish to unlock the front-
passenger door from the inside or lock the
vehicle before you pull away.
The central locking/unlocking button does
not lock or unlock the fuel filler flap.
XTo lock: press button ;.
The vehicle locks itself when the front-
passenger door is closed.
XTo unlock: press button :.
You can open a front door from inside the
vehicle even if it has been locked. Open the
door only when the traffic conditions permit.
If the vehicle has been locked with the locking
button for the central locking function:
Rand the SmartKey has been reset to the
factory settings, the complete vehicle is
unlocked when a front door is opened from
the inside
Rand the SmartKey has been set to an
individual setting, only the front door that
is opened from the inside is unlocked
If the vehicle has been locked centrally with
the SmartKey or with KEYLESS-GO, it is not
unlocked if you use the unlocking button for
the central locking system.
Automatic locking
The vehicle locks automatically when the
ignition is switched on and the wheels of the
vehicle are moving at a speed above 9 mph
(15 km/h). Therefore, there is a risk of being
locked out when the vehicle is being pushed,
towed or tested on a dynamometer.
You can switch off the automatic locking
function via COMAND (Y page 261).
Doors83Opening and closingZ
Page 94 of 524

XTouch sensor surface : on the door
handle until the side windows and the
sliding sunroof or the panorama roof with
power tilt/sliding panel are fully closed.
i Make sure you only touch sensor
surface :.
XMake sure that all the side windows and the
sliding sunroof or panorama roof with
power tilt/sliding panel are closed.XTo interrupt convenience closing:
release sensor surface : on the door
handle.
On vehicles with roller sunblinds:
XTouch the sensor surface on the door
handle again until the roller sunblinds
close.XTo interrupt the roller sunblind closing
procedure: pull the outside door handle
and hold firmly.
Resetting the side windows
You must reset each side window if:
R a side window cannot be closed
automatically.
R a side window opens again slightly after
being closed manually.
XClose all the doors.XTurn the SmartKey to position 1 in the
ignition lock.XPull the corresponding switch on the door
control panel until the side window is
completely closed. ( Y page 90)XHold the switch for an additional second.
If the side window opens again slightly:
XImmediately pull the corresponding switch
on the door control panel until the side
window is completely closed ( Y page 90).XHold the switch for an additional second.XIf the corresponding side window remains
closed after the button has been released,
the side window has been reset correctly.If this is not the case, repeat the steps
above again.
Problems with the side windows
Problem: a side window cannot be closed
because objects are trapped between the
side window and the door frame.
XRemove the objects.XClose the side window.
Problem: a side window cannot be closed
because objects in the guide rail are
preventing the window from being raised.
XRemove the objects.XClose the side window.
Problem: a side window cannot be closed,
and you cannot see the cause.
GWarning
Closing the side windows with increased force
or without the anti-entrapment feature could
lead to serious or even fatal injury. Make sure
that nobody can become trapped when
closing the side windows.
If a side window is obstructed during closing
and reopens again slightly:
XImmediately after the window blocks, pull
the corresponding switch again until the
side window has closed.
The side window is closed with increased
force.
If a side window is obstructed again during
closing and reopens again slightly:
XImmediately after the window blocks, pull
the corresponding switch again until the
side window has closed.
The side window is closed without the anti-
entrapment feature.GWarning!
Pulling and holding the switch to close the
door window immediately after it had been
blocked two times will cause the door window
92Side windowsOpening and closing
Page 96 of 524

Do not allow anything to protrude from the
sliding sunroof. Otherwise, the seals could
be damaged.
! If the sliding sunroof cannot be opened or
closed due to a malfunction, contact a
qualified specialist workshop, e.g. an
authorized Mercedes-Benz Center.
! Do not forget that the weather can
change abruptly. Make certain that the
sliding sunroof is closed when you leave the
vehicle. The vehicle electronics can be
damaged if water enters the vehicle
interior.
i Resonance noises can occur in addition
to the usual airflow noises when the sliding
sunroof is open. They are caused by minor
pressure fluctuations in the vehicle interior.
Change the position of the sliding sunroof
or open a side window slightly to reduce or
eliminate these noises.
Operating the sliding sunroof
Opening and closing
i You can continue to operate the sliding
sunroof after switching off the engine or
removing the SmartKey from the ignition.
This function remains active for five
minutes or until one of the front doors is
opened.
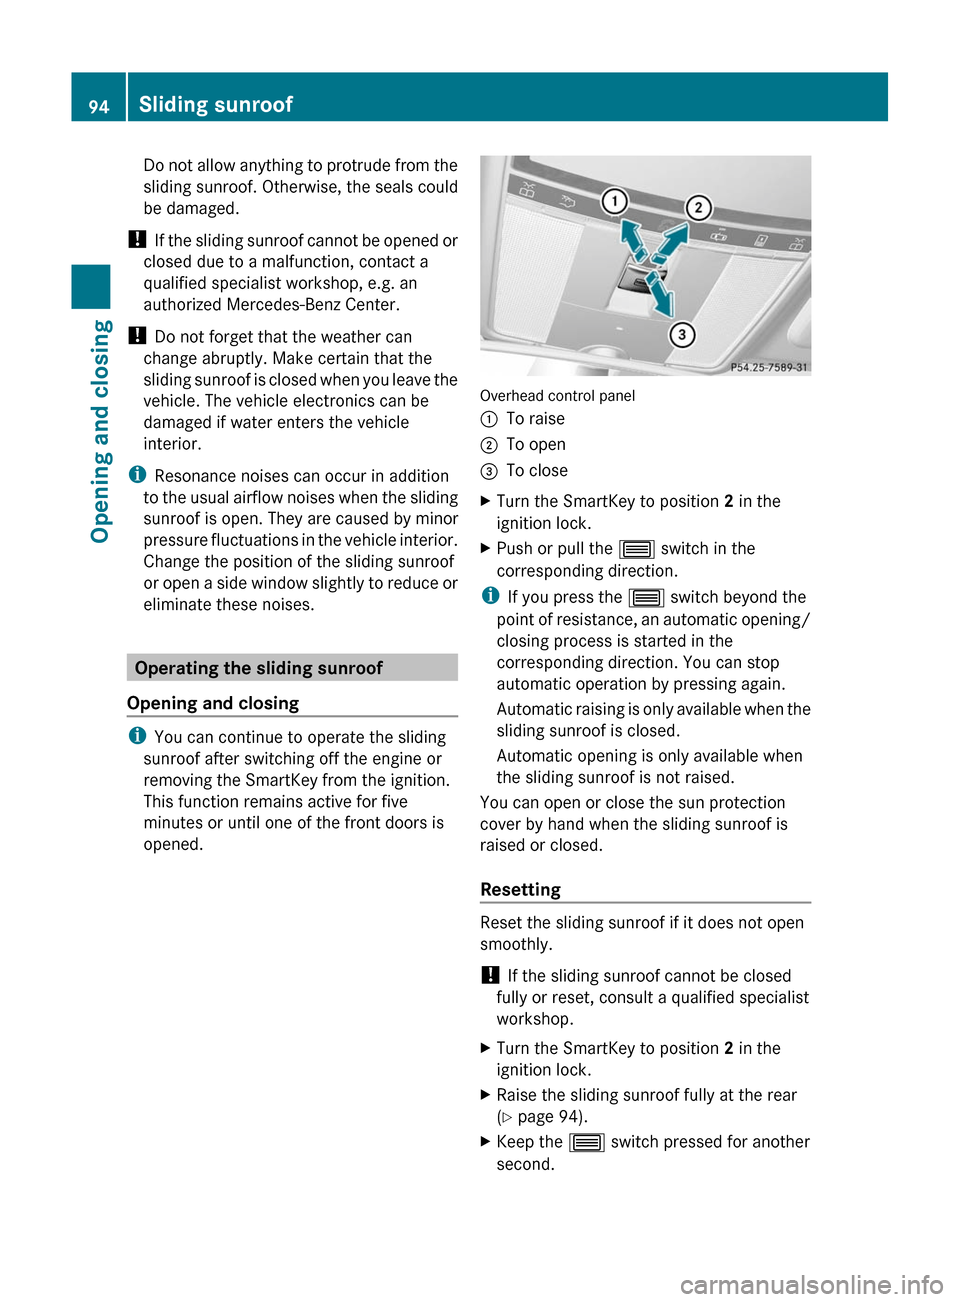
Overhead control panel
:To raise;To open=To closeXTurn the SmartKey to position 2 in the
ignition lock.XPush or pull the 3 switch in the
corresponding direction.
i If you press the 3 switch beyond the
point of resistance, an automatic opening/
closing process is started in the
corresponding direction. You can stop
automatic operation by pressing again.
Automatic raising is only available when the
sliding sunroof is closed.
Automatic opening is only available when
the sliding sunroof is not raised.
You can open or close the sun protection
cover by hand when the sliding sunroof is
raised or closed.
Resetting
Reset the sliding sunroof if it does not open
smoothly.
! If the sliding sunroof cannot be closed
fully or reset, consult a qualified specialist
workshop.
XTurn the SmartKey to position 2 in the
ignition lock.XRaise the sliding sunroof fully at the rear
( Y page 94).XKeep the 3 switch pressed for another
second.94Sliding sunroofOpening and closing
Page 97 of 524

XMake sure that the sliding sunroof can be
opened or closed fully again when operated
automatically ( Y page 94).XIf the sliding sunroof can be raised fully at
the rear, it has been reset correctly. If this
is not the case, repeat the steps above
again.
Operating the panorama sliding
sunroof
Opening and closing
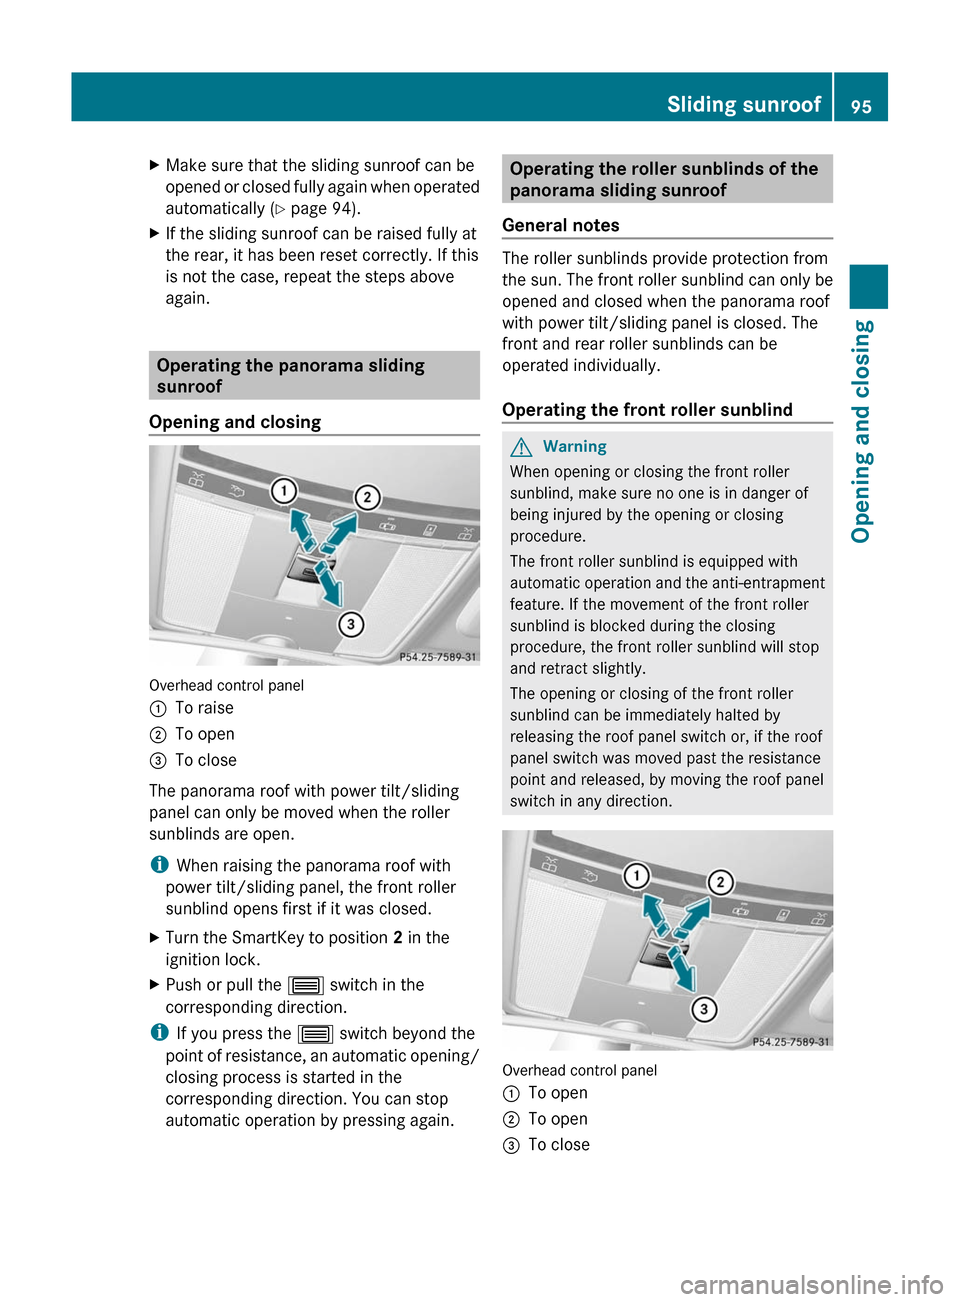
Overhead control panel
:To raise;To open=To close
The panorama roof with power tilt/sliding
panel can only be moved when the roller
sunblinds are open.
i When raising the panorama roof with
power tilt/sliding panel, the front roller
sunblind opens first if it was closed.
XTurn the SmartKey to position 2 in the
ignition lock.XPush or pull the 3 switch in the
corresponding direction.
i If you press the 3 switch beyond the
point of resistance, an automatic opening/
closing process is started in the
corresponding direction. You can stop
automatic operation by pressing again.
Operating the roller sunblinds of the
panorama sliding sunroof
General notes
The roller sunblinds provide protection from
the sun. The front roller sunblind can only be
opened and closed when the panorama roof
with power tilt/sliding panel is closed. The
front and rear roller sunblinds can be
operated individually.
Operating the front roller sunblind
GWarning
When opening or closing the front roller
sunblind, make sure no one is in danger of
being injured by the opening or closing
procedure.
The front roller sunblind is equipped with
automatic operation and the anti-entrapment
feature. If the movement of the front roller
sunblind is blocked during the closing
procedure, the front roller sunblind will stop
and retract slightly.
The opening or closing of the front roller
sunblind can be immediately halted by
releasing the roof panel switch or, if the roof
panel switch was moved past the resistance
point and released, by moving the roof panel
switch in any direction.
Overhead control panel
:To open;To open=To closeSliding sunroof95Opening and closingZ