2011 MERCEDES-BENZ S-Class reset lock
[x] Cancel search: reset lockPage 99 of 524

Resetting the panorama roof with
power tilt/sliding panel or the front
roller sunblind
Reset the panorama roof with power tilt/
sliding panel or the roller sunblinds if the
panorama roof with power tilt/sliding panel
or the roller sunblinds do not close smoothly.
! Do not open the panorama sliding sunroof
until it has been reset properly. Otherwise,
the panorama roof with power tilt/sliding
panel may lock in the open position.
If the panorama roof with power tilt/sliding
panel cannot be closed or adjusted,
contact a qualified specialist workshop,
e.g. a Mercedes-Benz Service Center.
XTurn the SmartKey to position 2 in the
ignition lock.
XPull the 3 switch repeatedly to the point
of resistance in the direction of arrow
=(Y page 95)until the panorama roof with
power tilt/sliding panel is fully closed.
XKeep the 3 switch pulled for an
additional second.
XPull the 3 switch in the direction of
arrow =(Y page 95) repeatedly until the
front roller sunblind is closed.
XKeep the 3 switch pulled for an
additional second.
XMake sure that the front roller sunblind can
be opened fully again (Y page 95).
XIf this is not the case, repeat the steps
above again.
XMake sure that the panorama roof with
power tilt/sliding panel can be opened fully
again (Y page 95).
XIf this is not the case, repeat the steps
above again.
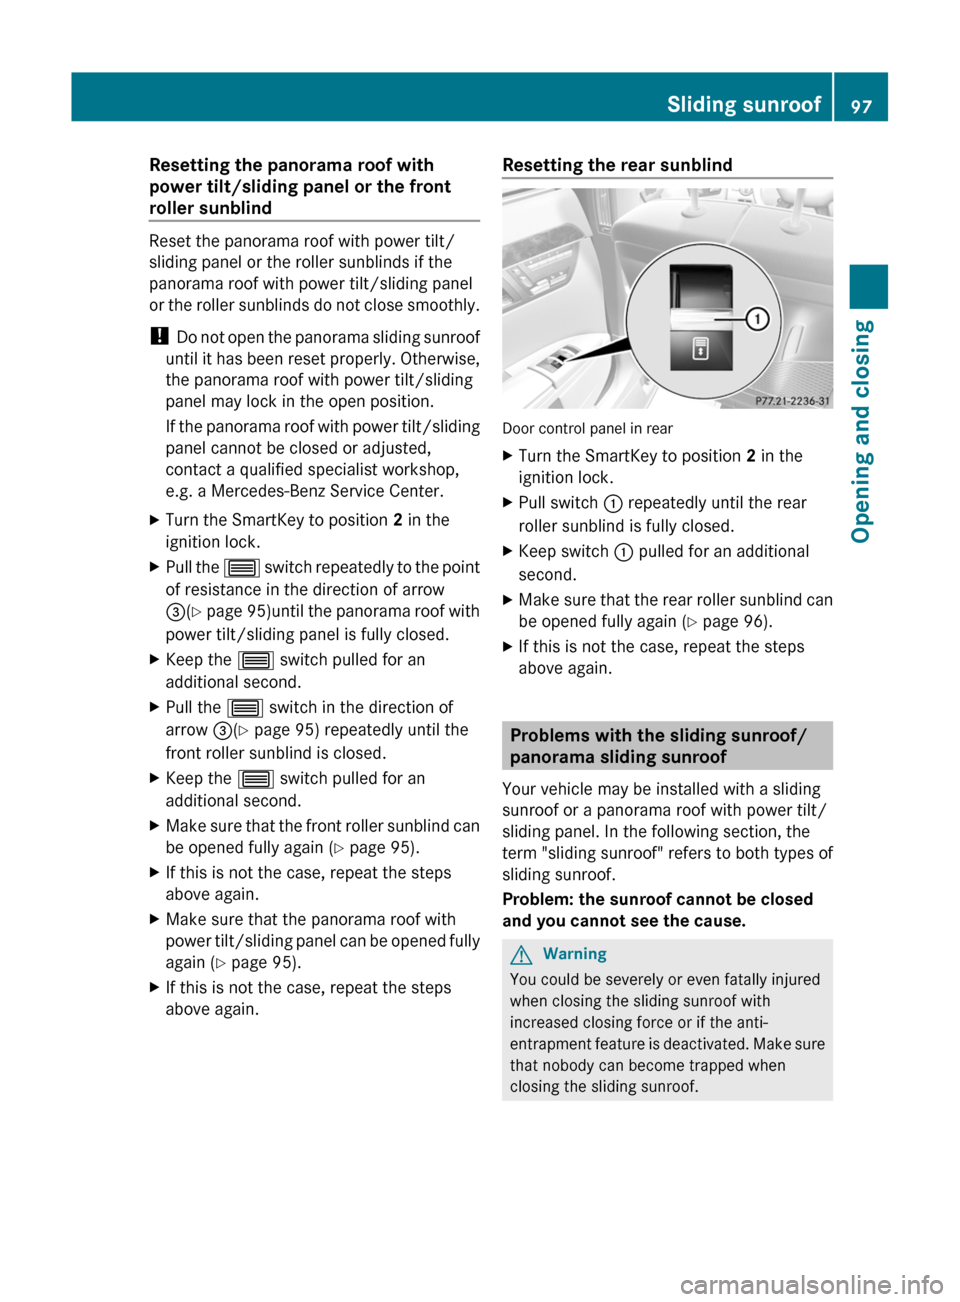
Resetting the rear sunblind
Door control panel in rear
XTurn the SmartKey to position 2 in the
ignition lock.
XPull switch : repeatedly until the rear
roller sunblind is fully closed.
XKeep switch : pulled for an additional
second.
XMake sure that the rear roller sunblind can
be opened fully again (Y page 96).
XIf this is not the case, repeat the steps
above again.
Problems with the sliding sunroof/
panorama sliding sunroof
Your vehicle may be installed with a sliding
sunroof or a panorama roof with power tilt/
sliding panel. In the following section, the
term "sliding sunroof" refers to both types of
sliding sunroof.
Problem: the sunroof cannot be closed
and you cannot see the cause.
GWarning
You could be severely or even fatally injured
when closing the sliding sunroof with
increased closing force or if the anti-
entrapment feature is deactivated. Make sure
that nobody can become trapped when
closing the sliding sunroof.
Sliding sunroof97Opening and closingZ
Page 107 of 524

XTo adjust the side bolsters of the head
restraint: push or pull side bolsters : into
the desired position.
XTo move forwards and backwards: pull
or push the NECK-PRO luxury head
restraints in the direction of arrow ;.
Resetting
The NECK-PRO luxury head restraints are
moved forwards in the event of a rear collision
in the direction of travel and have to be reset
afterwards (Y page 54).
Rear seat head restraints
GWarning!
For safety reasons, always drive with the rear
head restraints in the upright position when
the rear seats are occupied.
Keep the area around head restraints clear of
articles (e.g. clothing) to not obstruct the
folding operation of the head restraints.
GWarning!
Make sure the rear seat head restraints
engage when placing them upright manually.
Otherwise their protective function cannot be
ensured.
The back of the head will not be supported in
the event of a collision. That could cause
serious or even fatal injuries. Rear seat
occupants can be seriously injured or killed.
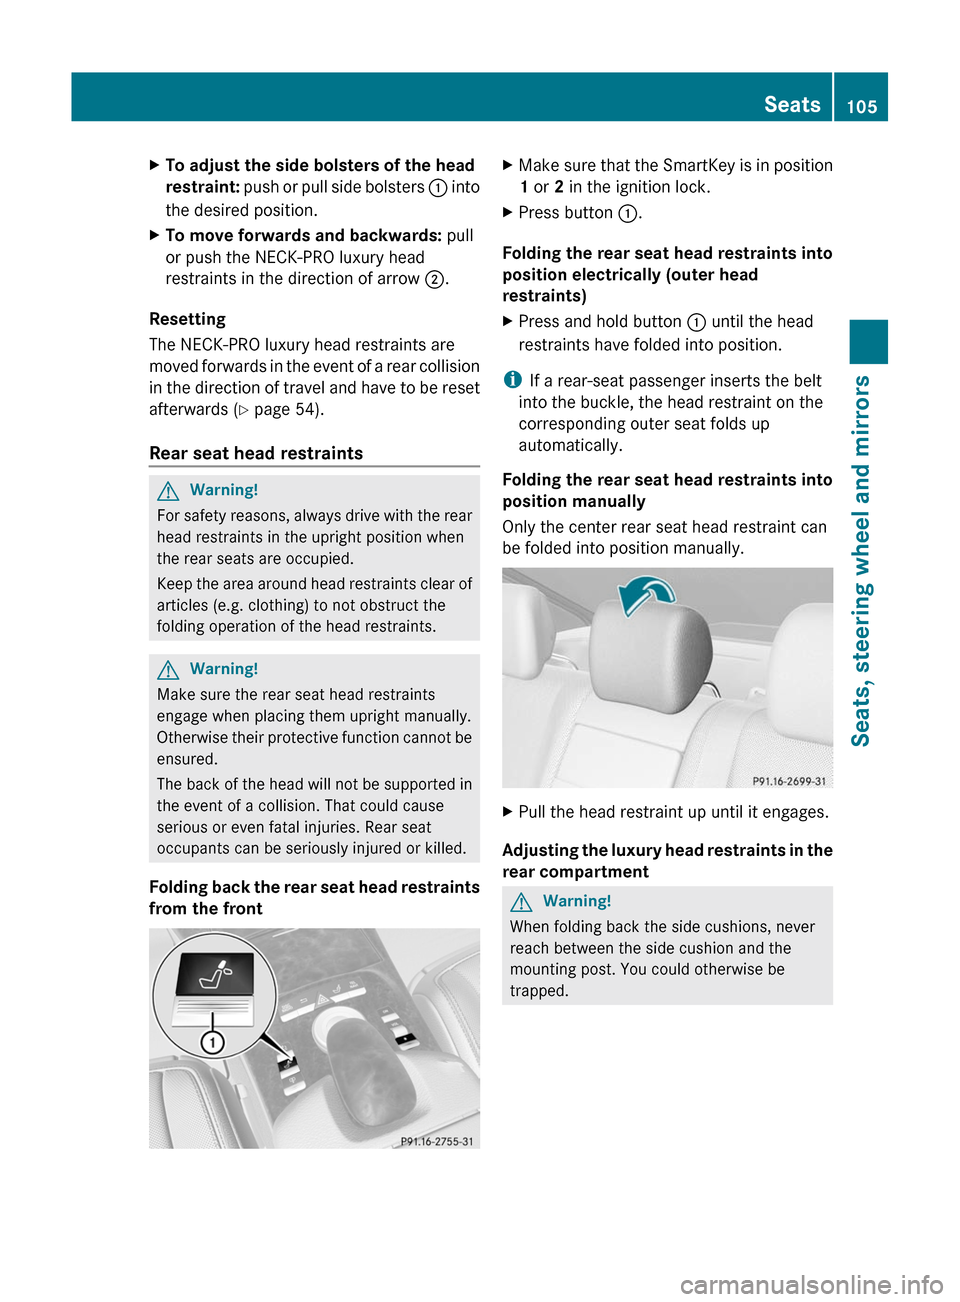
Folding back the rear seat head restraints
from the front
XMake sure that the SmartKey is in position
1 or 2 in the ignition lock.
XPress button :.
Folding the rear seat head restraints into
position electrically (outer head
restraints)
XPress and hold button : until the head
restraints have folded into position.
iIf a rear-seat passenger inserts the belt
into the buckle, the head restraint on the
corresponding outer seat folds up
automatically.
Folding the rear seat head restraints into
position manually
Only the center rear seat head restraint can
be folded into position manually.
XPull the head restraint up until it engages.
Adjusting the luxury head restraints in the
rear compartment
GWarning!
When folding back the side cushions, never
reach between the side cushion and the
mounting post. You could otherwise be
trapped.
Seats105Seats, steering wheel and mirrorsZ
Page 113 of 524

The mirrors do not go into anti-glare mode if
reverse gear is engaged or the interior lighting
is switched on.
Parking position for the exterior
mirror on the front-passenger side
Setting and storing the parking position
You can position the front-passenger side
exterior mirror in such a way that you can see
the rear wheel on that side as soon as you
engage reverse gear. You can store this
position.
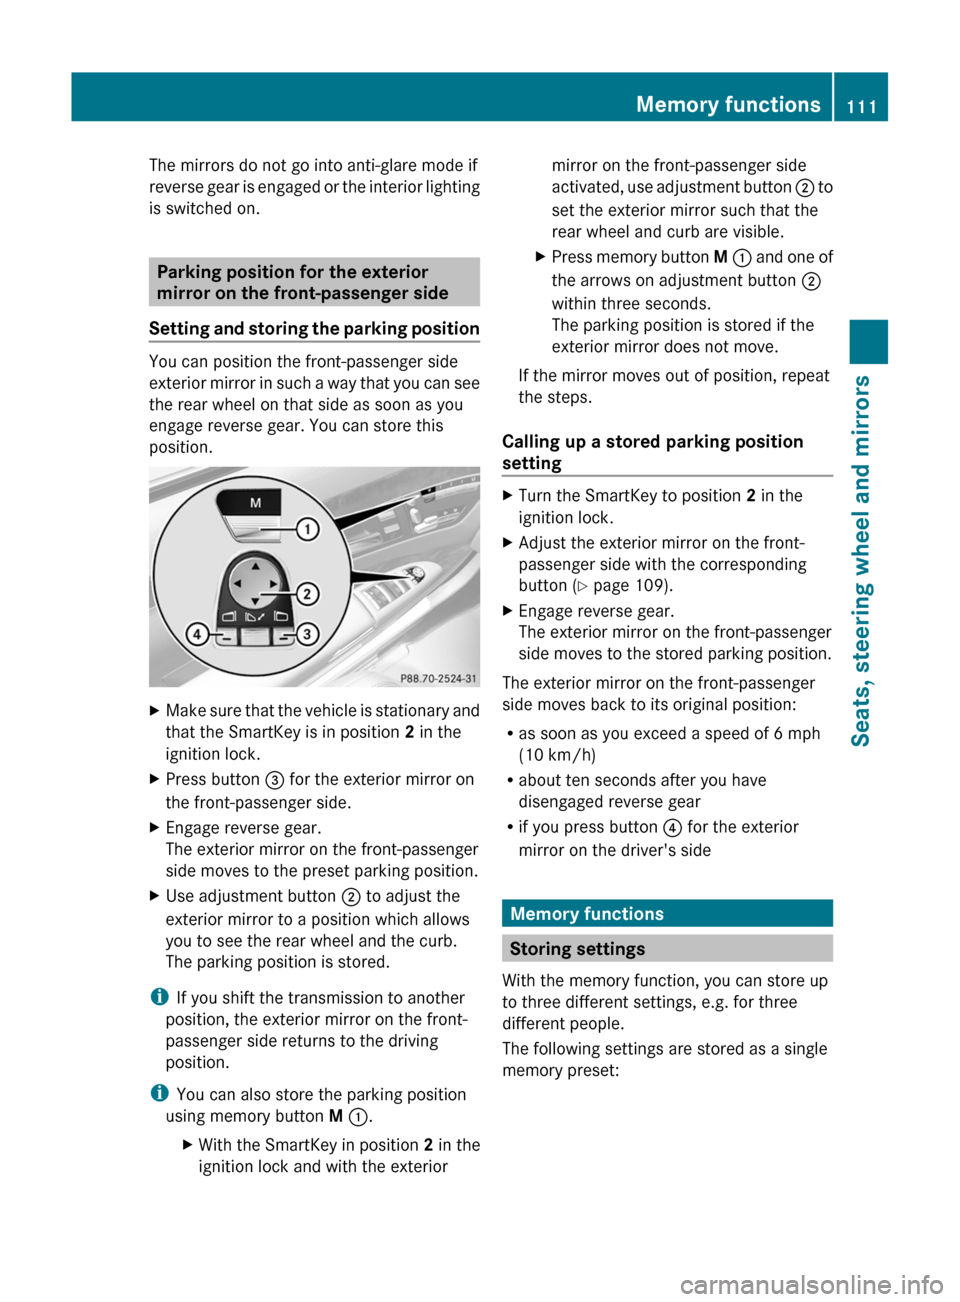
XMake sure that the vehicle is stationary and
that the SmartKey is in position 2 in the
ignition lock.
XPress button = for the exterior mirror on
the front-passenger side.
XEngage reverse gear.
The exterior mirror on the front-passenger
side moves to the preset parking position.
XUse adjustment button ; to adjust the
exterior mirror to a position which allows
you to see the rear wheel and the curb.
The parking position is stored.
iIf you shift the transmission to another
position, the exterior mirror on the front-
passenger side returns to the driving
position.
iYou can also store the parking position
using memory button M :.
XWith the SmartKey in position 2 in the
ignition lock and with the exterior
mirror on the front-passenger side
activated, use adjustment button ; to
set the exterior mirror such that the
rear wheel and curb are visible.
XPress memory button M : and one of
the arrows on adjustment button ;
within three seconds.
The parking position is stored if the
exterior mirror does not move.
If the mirror moves out of position, repeat
the steps.
Calling up a stored parking position
setting
XTurn the SmartKey to position 2 in the
ignition lock.
XAdjust the exterior mirror on the front-
passenger side with the corresponding
button (Y page 109).
XEngage reverse gear.
The exterior mirror on the front-passenger
side moves to the stored parking position.
The exterior mirror on the front-passenger
side moves back to its original position:
Ras soon as you exceed a speed of 6 mph
(10 km/h)
Rabout ten seconds after you have
disengaged reverse gear
Rif you press button ? for the exterior
mirror on the driver's side
Memory functions
Storing settings
With the memory function, you can store up
to three different settings, e.g. for three
different people.
The following settings are stored as a single
memory preset:
Memory functions111Seats, steering wheel and mirrorsZ
Page 126 of 524

ECOMAND: e.g. to select a station from
presets, select a track, enter directly,
enter a phone number. Rear Seat
Entertainment System: to select a
track, enter directlyFTo leave the menu (back)XPoint the remote control at the
corresponding screen and execute the
functions by pressing the corresponding
button.
i The remote control's function may be
restricted depending on the angle at which
it is pointed at the respective screen.
Selecting the screen for the remote
control
XTurn thumbwheel = until the desired
display is highlighted in the window.
Switching the screen on/off (Rear Seat
Entertainment System only)
If the key is in position 0 or 1 in the ignition
lock (see vehicle Operator's Manual), or the
key is not inserted, the screens in the rear will
switch off after 30 minutes. Before the
screens switch off, they show a message to
this effect.
You can switch the screens back on,
However, this will discharge the starter
battery.
XPoint the remote control at the rear-
compartment screen which has been
selected for remote operation.XPress button : on the remote control.
The respective rear screen switches on or
off.
i You can only switch the screens on using
the remote control if the ignition is
switched on.
Switching button lighting on/offXPress button ; on the remote control.
Depending on the previous status, the
button lighting is switched on or off.
i If you do not use the remote control for
about 15 seconds, the button lighting
switches off automatically.
Mute
XPress button B on the remote control.
The sound is switched on/off.
Adjusting the volume
This function is available for COMAND and for
the Rear Seat Entertainment System in
conjunction with corded headphones.
XPress one of buttons C on the remote
control.
The volume of the currently selected audio
or video source changes.
For COMAND, you can also adjust the
volume for phone calls and navigation
announcements.
Selecting a menu/menu item and
confirming your selection
XSelect a menu/menu item using the
=;9: buttons and press
the 9 button to confirm.124At a glanceCOMAND
Page 278 of 524

XPress the combination switch beyond the
pressure point in the direction of arrow :
(Y page 274).
When the low-beam headlamps are
switched on, the _ indicator lamp in the
instrument cluster lights up.
If you are driving at speeds above
approximately 28 mph (45 km/h):
the headlamp range is set automatically
depending on the distance between the
vehicle and other road users.
If you are driving at speeds above
approximately 35 mph (55 km/h) and no
other road users are detected:
the high-beam headlamps are switched on
automatically. The K indicator lamp in
the instrument cluster also lights up.
If you are driving at speeds below
approximately 30 mph (45 km/h) or other
road users are detected or the roads are
illuminated sufficiently:
the high-beam headlamps are switched off
automatically. The K indicator lamp in
the instrument cluster goes out. The _
indicator lamp in the instrument cluster
stays on.
XTo deactivate: move the combination
switch back to its normal position.
The _ indicator lamp in the instrument
cluster goes out.
High-beam flasher
XTo switch on: turn the key in the ignition
lock to position 1 or 2 or start the engine.
XPull the combination switch briefly in the
direction of arrow =.Hazard warning lamps
The hazard warning lamps automatically
switch on if:
Ran air bag is deployed.
Rthe vehicle decelerates rapidly from a
speed of more than 45 mph (70 km/h) and
comes to a standstill.
XTo switch on the hazard warning lamps:
press button :.
All turn signals flash. If you now switch on
a turn signal using the combination switch,
only the turn signal lamp on the
corresponding side of the vehicle will flash.
XTo switch off the hazard warning
lamps: press button :.
The hazard warning lamp switches off
automatically after full brake application if the
vehicle then reaches a speed of above 6 mph
(10 km/h).
iThe hazard warning lamps still operate if
the ignition is switched off.
Headlamp cleaning system
The headlamps are cleaned automatically if
the "Wipe with washer fluid" function is
operated ten times while the lights are on and
the engine is running (Y page 281). When you
switch off the ignition, the automatic
headlamp cleaning system is reset and
counting is resumed from 0.
276Exterior lightingLights and windshield wipers
Page 454 of 524

Further information can be obtained at an
authorized Mercedes-Benz Center or at
http://www.mbusa.com (USA only).
The service interval display informs you of the
next service due date.
If a service due date has been exceeded, you
also hear an acoustic signal.
The multifunction display shows a service
message for a few seconds, e.g.
Next Service A Due in .. days
Service A Due
Service A Exceeded By .. days
The letter indicates how much time the
workshop will require to carry out the service
work. The letters displayed range from A for
a short service duration to H for a long service
duration.
The service interval display does not take into
account any periods of time during which the
battery is disconnected.
Maintaining the time-dependent service
schedule:XNote down the service due date displayed
in the multifunction display before
disconnecting the battery.
or
XSubtract the battery disconnection periods
from the service date shown on the display
after reconnecting the battery.
Hiding a service message
XPress % or a on the steering wheel.
Displaying service messages
XSwitch on the ignition.XPress = or ; to select the Service
menu on the steering wheel.XPress 9 or : to select the ASSYST
PLUS submenu and press a to confirm.
The service due date appears in the
multifunction display.Points to remember
A qualified specialist workshop, e.g. a
Mercedes-Benz Service Center, will reset the
service interval display after the necessary
service work has been carried out.
You can obtain further information, e.g.
regarding service work, at an authorized
Mercedes-Benz Center or directly from
Mercedes-Benz.
! If the service interval indicator has been
inadvertently reset, this setting can be
corrected at an authorized Mercedes-Benz
Center.
Have the service work carried out as
described in the Service Booklet. There
may otherwise be increased wear, resulting
in damage to the vehicle or to the major
assemblies.
Care
Notes on care
Regular care of your vehicle is a condition for
retaining the quality in the long term.
Use care products and cleaning agents
recommended and approved by Mercedes-
Benz.
GWarning
Many cleaning products can be hazardous.
Some are poisonous, others are flammable.
Always follow the instructions on the
particular container. Always open your
vehicle's doors or windows when cleaning the
inside.
Never use fluids or solvents that are not
designed for cleaning your vehicle.
Always lock away cleaning products and keep
them out of reach of children.
! For cleaning your vehicle, do not use any
of the following:
R dry, rough or hard cloths
R abrasive cleaning agents
452CareMaintenance and care
Page 477 of 524

On vehicles with KEYLESS-GO, use the
SmartKey instead of the Start/Stop button
( Y page 299).XDepress and hold the brake pedal.XShift the automatic transmission to
position N.XRelease the brake pedal.XRelease the electric parking brake.XSwitch on the hazard warning flashers
( Y page 276).XLeave the SmartKey inserted in the ignition
lock in position 2.
i
When towing with the hazard warning
flashers switched on, use the combination
switch as usual to signal in which direction
you are changing. In this case, only the
indicator lamps for the direction of travel
flash. When you reset the combination
switch, the hazard warning flashers start
flashing again.
Transporting the vehicle
The towing eye can be used to pull the vehicle
onto a trailer or transporter for transporting
purposes.
XTurn the SmartKey to position 2 in the
ignition lock.XShift the automatic transmission to
position N.
As soon as the vehicle has been loaded:
XPrevent the vehicle from rolling away by
applying the electric parking brake.XShift the automatic transmission to
position P.XTurn the SmartKey to position 0 in the
ignition lock and remove the SmartKey.XSecure the vehicle.
! Only lash the vehicle down by the wheels
or wheel rims, not by parts of the vehicle
such as axle or steering components.
Otherwise, the vehicle could be damaged.
Fuses
Important safety notes
The fuses in your vehicle serve to close down
faulty circuits. If a fuse blows, all the
components on the circuit and their functions
will fail.
GWarning
Only use fuses approved by Mercedes-Benz
with the specified amperage for the system in
question and do not attempt to repair or
bridge a blown fuse. Using other than
approved fuses or using repaired or bridged
fuses may cause an overload leading to a fire,
and/or cause damage to electrical
components and/or systems. Have the cause
determined and remedied by an authorized
Mercedes-Benz Center.
Blown fuses must be replaced with fuses of
the same rating, which you can recognize by
the color and value. The fuse ratings are listed
in the fuse allocation chart. An authorized
Mercedes-Benz Center will be happy to
advise you.
i If a fuse has blown, visit a breakdown
service or an authorized Mercedes-Benz
Center.
If the newly inserted fuse also blows, have the
cause traced and rectified at a qualified
specialist workshop, e.g. an authorized
Mercedes-Benz Center.
! Only use fuses that have been approved
for Mercedes-Benz vehicles and which
have the correct fuse rating for the system
concerned. Otherwise, components or
systems could be damaged.
Before changing a fuse
XPark the vehicle and apply the electric
parking brake.XSwitch off all electrical consumers.XRemove the key from the ignition lock.Fuses475Roadside assistanceZ