2011 MERCEDES-BENZ S-Class ESP
[x] Cancel search: ESPPage 140 of 524

Remote control
Overview
:To switch the screen on/off;To switch button lighting on/off=To select the screen for remote control
operation (COMAND, SPLITVIEW, L
REAR and REAR R can be selected)
?To select a menu or menu itemATo confirm a selection or settingBTo switch sound on/off (for corded
headphones)
CTo adjust the volume (for corded
headphones)
DTo skip, fast-forward/fast-rewindETo select a track, to enter directlyFTo leave the menu (back)Selecting the screen for the remote
control
You can use the remote control to operate
one of the two rear screens at a time. To do
so, you must switch the remote control to the
desired screen.
XTo select the left-hand screen: turn
thumbwheel = until "L REAR" is
highlighted in the window.
XTo select the right-hand screen: turn
thumbwheel = until "REAR R" is
highlighted in the window.
Switching the screen on/off
If the key in the ignition lock is in position 0
or 1 or if the key is not in the ignition lock, the
rear screens will switch off after 30 minutes.
Before the screens switch off, they show a
message to this effect.
You can switch the screens back on,
However, this will discharge the starter
battery.
XPoint the remote control at the rear-
compartment screen which has been
selected for remote operation.
XPress button : on the remote control.
The respective rear screen switches on or
off.
iYou can only switch the screens on using
the remote control if the ignition is
switched on.
Switching button lighting on/off
XPress button ; on the remote control.
Depending on the previous status, the
button lighting is switched on or off.
iIf you do not use the remote control for
about 15 seconds, the button lighting
switches off automatically.
Switching the sound on/off (corded
headphones only)
XPress button B on the remote control.
The sound is switched on/off.
138At a glanceCOMAND
Page 147 of 524

XSelect Yes or No and press W to confirm.
If you select No, the process will be aborted.
If you select Yes, the individualization is
deleted. You will see a message to this
effect.
Bluetooth® settings
General information about Bluetooth®
Bluetooth® technology is the standard for
short-range wireless data transmission of up
to approximately 10 meters. Bluetooth®
allows, for example, the exchange of vCards.
Bluetooth® is a registered trademark of
Bluetooth Special Interest Group (SIG) Inc.
Requirements for a Bluetooth®
connection
You can connect mobile phones and
notebooks with COMAND.
To do so, the following conditions need to be
met:
RBluetooth®-capable devices, e.g. mobile
phones, must comply with a certain profile
in order to be connected to COMAND.
Every Bluetooth® device has its own
specific Bluetooth® name.
RBluetooth® must be activated in COMAND
and on the respective Bluetooth® device;
see the separate operating instructions.
Rthe Bluetooth® device must be "visible" to
COMAND in order for COMAND to find and
display it. For the setting procedures,
please see the operating instructions for
the Bluetooth® device.
iOnce a mobile phone has been
connected, reception and transmission
volume may change.
Activating/deactivating Bluetooth®
XSelect Vehicle in the main function bar by
turning cVd the COMAND controller and
press W to confirm.
XSelect System by turning cVd the
COMAND controller and press W to
confirm.
XSelect Bluetooth by turning cVd the
COMAND controller and press W to
confirm.
XSelect Bluetooth activated and press
W to confirm.
This switches Bluetooth® on O or off ª.
Connecting Bluetooth® devices
General information
Before using your Bluetooth® device with
COMAND for the first time, you will need to
connect it.
Connecting is comprised of:
Rsearching for a Bluetooth® device and
Rsubsequently authorizing it
iYou can connect up to ten devices to
COMAND.
For more information on suitable mobile
phones and on connecting a Bluetooth®-
capable mobile phone to COMAND, visit
http://www.mbusa-mobile.com or call
the Mercedes-Benz Customer Assistance
Center at
1-800-FOR-MERCedes(1-800-367-6372)
(US) or Customer Service at
1-800-387-0100 (Canada).
System settings145COMANDZ
Page 149 of 524

XTo enter a passcode in COMAND: press
the number keys in sequence.
¬ is highlighted after the first number
has been entered.
or
XSelect the digits one by one by turning
cVd the COMAND controller and press
W to confirm.XTo confirm an entry in COMAND: select
¬ using the COMAND controller and
press W to confirm.XEnter the same passcode into the
Bluetooth ®
device (see the operating
instructions for the respective device).
The device is authorized.
External authorization
If COMAND does not detect your
Bluetooth ®
device, this may be due to
particular security settings on your
Bluetooth ®
device. In this case, check
whether your Bluetooth ®
device can locate
the COMAND system. The Bluetooth ®
device
name of COMAND is "MB Bluetooth".
XIn the Bluetooth ®
device list, select the
desired device by turning cVd the
COMAND controller.XSelect Options by sliding VY the
COMAND controller and press W to
confirm.XSelect External authorization and
press W to confirm.XStart the Bluetooth ®
scan process on the
Bluetooth ®
device (see separate operating
instructions of the respective device).XSelect COMAND ("MB Bluetooth").XWhen prompted, enter the passcode on the
Bluetooth ®
device and then on COMAND.Displaying the details of a Bluetooth ®
deviceXIn the Bluetooth ®
device list, select the
desired device by turning cVd the
COMAND controller.XSelect Options by sliding VY the
COMAND controller and press W to
confirm.XSelect Details and press W to confirm.
The detailed view for this device appears.XTo close the detailed view: turn cVd or
slide XVY the COMAND controller.
De-authorizing (de-registering) a
Bluetooth ®
device
Mercedes-Benz USA, LLC recommends that
you de-authorize devices, e.g. mobile phones,
both in COMAND and on the respective
Bluetooth ®
device itself. Subsequent
authorization may otherwise fail.
XIn the Bluetooth ®
device list, select the
authorized device by turning cVd the
COMAND controller.XSelect Options by sliding VY the
COMAND controller and press W to
confirm.XSelect De-authorize and press W to
confirm.
A prompt appears asking whether you
really wish to revoke authorization for this
device.XSelect Yes or No and press W to confirm.
If you select Yes, the authorization for the
device will be revoked.
If you select No, the process will be aborted.
i
If a Bluetooth ®
device has been de-
authorized and is no longer in range, it will
no longer be shown in the Bluetooth ®
device list after the next search.
System settings147COMANDZ
Page 151 of 524
COMAND calculates the route to the
destination without taking account of the
following:
R Traffic lights
R Stop and right-of-way-signs
R Lane merging
R Parking or stopping prohibited areas
R Other road and traffic rules and regulations
R Narrow bridgesGWarning
COMAND may give incorrect navigation
commands if the data in the digital map does
not correspond with the actual road/traffic
situation. Digital maps do not cover all areas
nor all routes within an area. For example, if
the traffic routing has been changed or the
direction of a one-way road has been
reversed.
For this reason, you must always observe
applicable road and traffic rules and
regulations during your journey. Road and
traffic rules and regulations always have
priority over the navigation commands
generated by the system.
GWarning
Navigation announcements are intended to
direct you while driving without diverting your
attention from the road and driving.
Please always use this feature instead of
consulting the map display for directions.
Looking at the icons or map display can
distract you from traffic conditions and
driving, and increase the risk of an accident.
General information
Operational readiness of the navigation
system
The navigation system must determine the
position of the vehicle before first use or
whenever operational status is restored.
Therefore, you may have to drive for a while
before precise route guidance is possible.
GPS reception
Among other things, correct functioning of
the navigation system depends on GPS
reception. In certain situations, GPS
reception may be impaired, there may be
interference or there may be no reception at
all, e.g. in tunnels or parking garages.
Input restriction
On vehicles for certain countries, there is a
restriction on entering data.
The restriction is active at vehicle speeds
above approximately 3 mph (5 km/h). The
restriction is deactivated as soon as the
speed falls below 2 mph (3 km/h).
When the restriction is active, certain entries
cannot be made. This will be indicated by the
fact that certain menu items are grayed out
and cannot be selected.
The following entries are not possible, for
example:
R entering the destination city and street
R entering a destination via the map
R entering in the vicinity of a city or via a
name search
R editing entries
R direct entry using the number keypad
Other entries are still possible, such as
entering points of interest in the vicinity of the
destination or current position.
Switching on navigation modeXPress the S function button once or
twice.
or
XSelect Navi in the main function bar by
sliding ZV and turning cVd the COMAND
controller and press W to confirm.
In both cases, you will see the map either
with or without the menu shown.Navigation149COMANDZ
Page 155 of 524
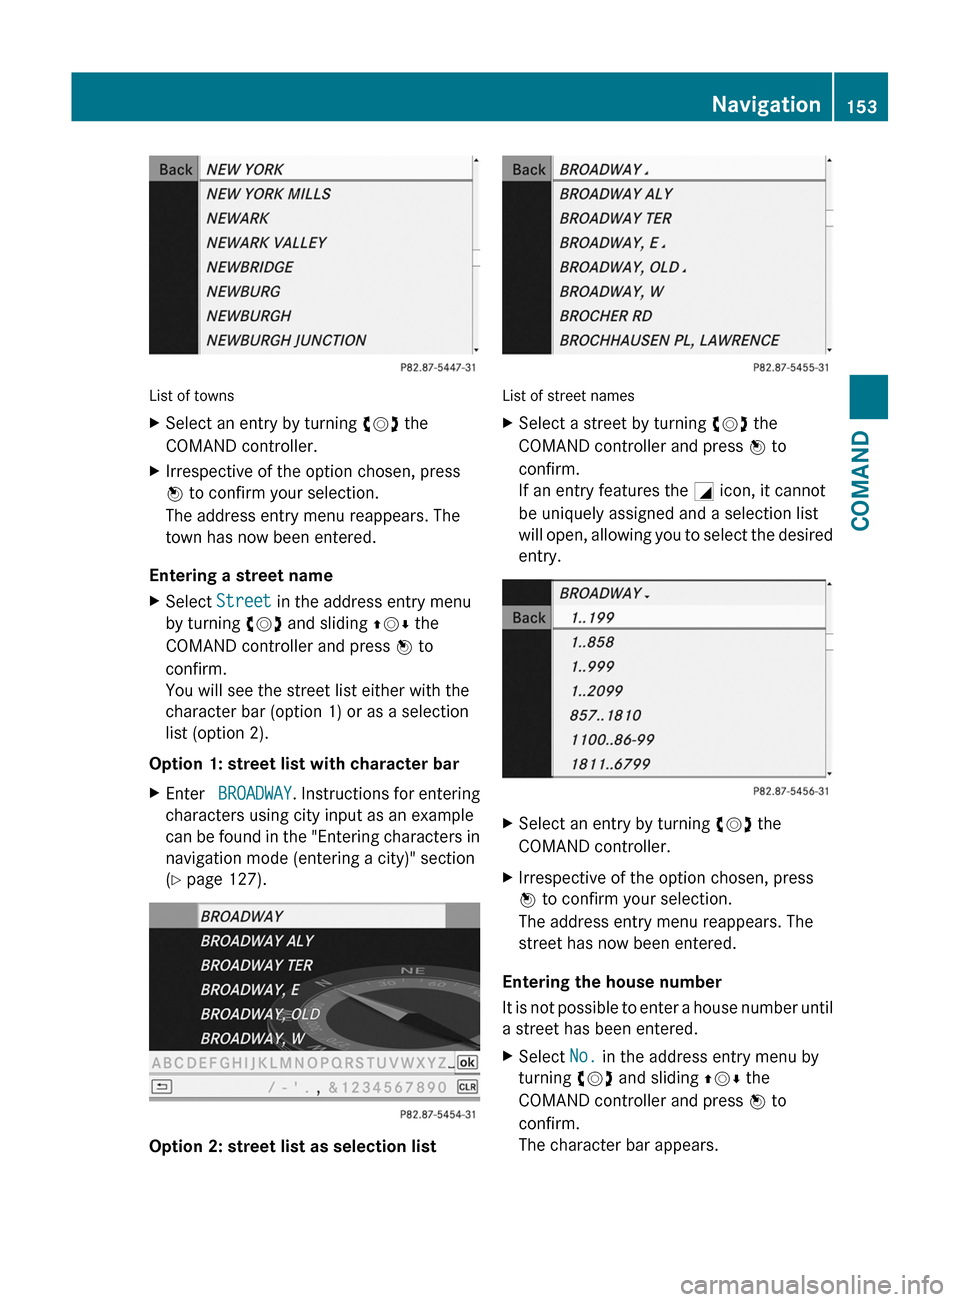
List of towns
XSelect an entry by turning cVd the
COMAND controller.
XIrrespective of the option chosen, press
W to confirm your selection.
The address entry menu reappears. The
town has now been entered.
Entering a street name
XSelect Street in the address entry menu
by turning cVd and sliding ZVÆ the
COMAND controller and press W to
confirm.
You will see the street list either with the
character bar (option 1) or as a selection
list (option 2).
Option 1: street list with character bar
XEnter BROADWAY. Instructions for entering
characters using city input as an example
can be found in the "Entering characters in
navigation mode (entering a city)" section
(Y page 127).
Option 2: street list as selection list
List of street names
XSelect a street by turning cVd the
COMAND controller and press W to
confirm.
If an entry features the G icon, it cannot
be uniquely assigned and a selection list
will open, allowing you to select the desired
entry.
XSelect an entry by turning cVd the
COMAND controller.
XIrrespective of the option chosen, press
W to confirm your selection.
The address entry menu reappears. The
street has now been entered.
Entering the house number
It is not possible to enter a house number until
a street has been entered.
XSelect No. in the address entry menu by
turning cVd and sliding ZVÆ the
COMAND controller and press W to
confirm.
The character bar appears.
Navigation153COMANDZ
Page 158 of 524
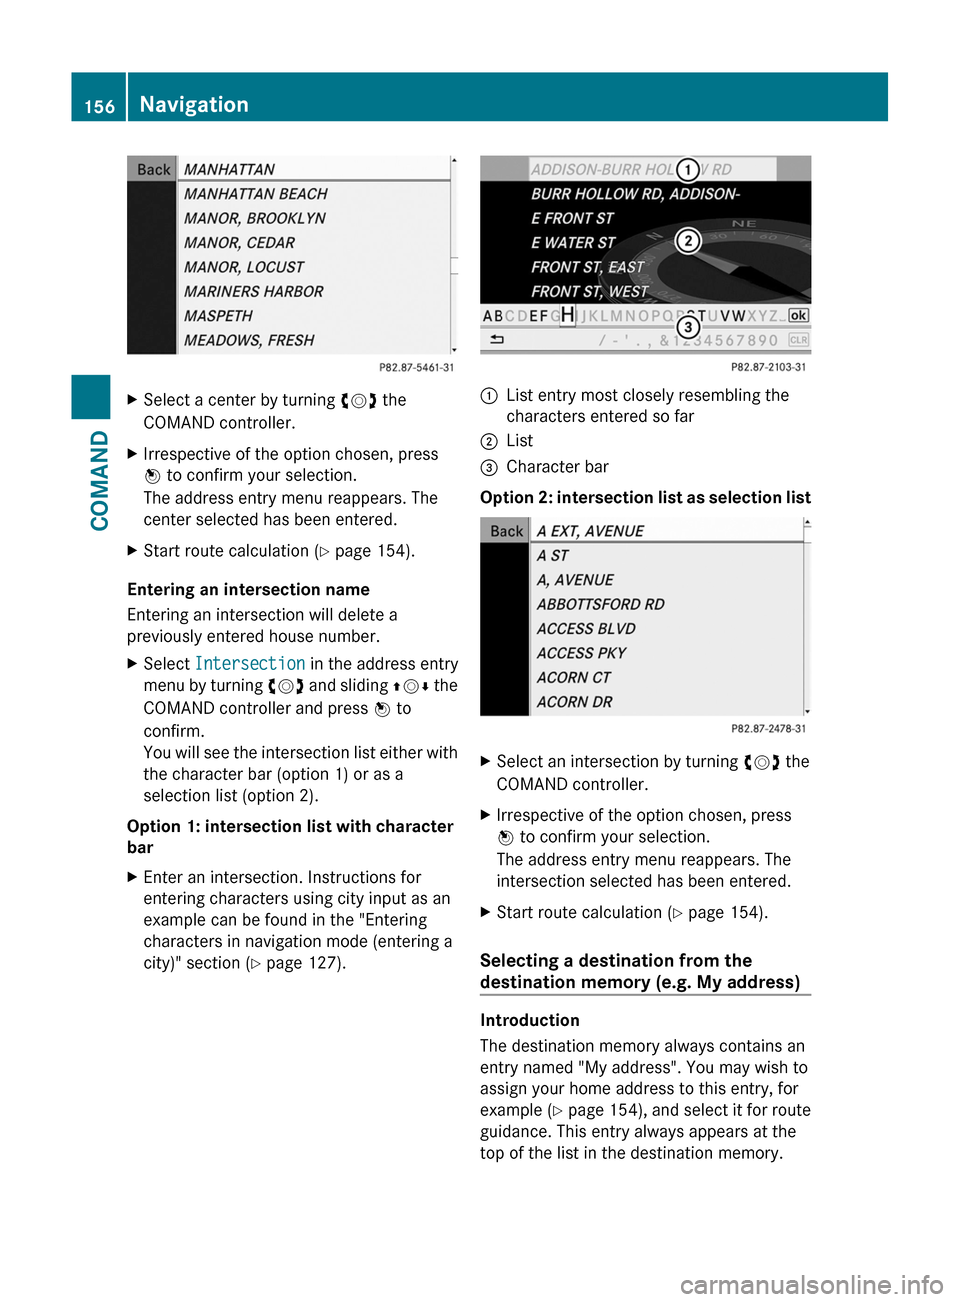
XSelect a center by turning cVd the
COMAND controller.
XIrrespective of the option chosen, press
W to confirm your selection.
The address entry menu reappears. The
center selected has been entered.
XStart route calculation (Y page 154).
Entering an intersection name
Entering an intersection will delete a
previously entered house number.
XSelect Intersection in the address entry
menu by turning cVd and sliding ZVÆ the
COMAND controller and press W to
confirm.
You will see the intersection list either with
the character bar (option 1) or as a
selection list (option 2).
Option 1: intersection list with character
bar
XEnter an intersection. Instructions for
entering characters using city input as an
example can be found in the "Entering
characters in navigation mode (entering a
city)" section (Y page 127).
:List entry most closely resembling the
characters entered so far
;List=Character bar
Option 2: intersection list as selection list
XSelect an intersection by turning cVd the
COMAND controller.
XIrrespective of the option chosen, press
W to confirm your selection.
The address entry menu reappears. The
intersection selected has been entered.
XStart route calculation (Y page 154).
Selecting a destination from the
destination memory (e.g. My address)
Introduction
The destination memory always contains an
entry named "My address". You may wish to
assign your home address to this entry, for
example (Y page 154), and select it for route
guidance. This entry always appears at the
top of the list in the destination memory.
156NavigationCOMAND
Page 159 of 524
XTo switch on navigation mode: press the
S function button once or twice.
XTo show the menu: press the COMAND
controller W.
XSelect Destination in the navigation
system menu bar by turning cVd the
COMAND controller and press W to
confirm.
XSelect From Memory and press W to
confirm.
XSelect My Address by turning cVd the
COMAND controller.
XIrrespective of the option chosen, press
W to confirm your selection.
"My address" has been entered.
XTo start route calculation: select Start
and press W to confirm.
Entering a destination from the list of
last destinations
XTo switch on navigation mode: press the
S function button once or twice.
XTo show the menu: press the COMAND
controller W.
XSelect Destination in the navigation
system menu bar by turning cVd the
COMAND controller and press W to
confirm.
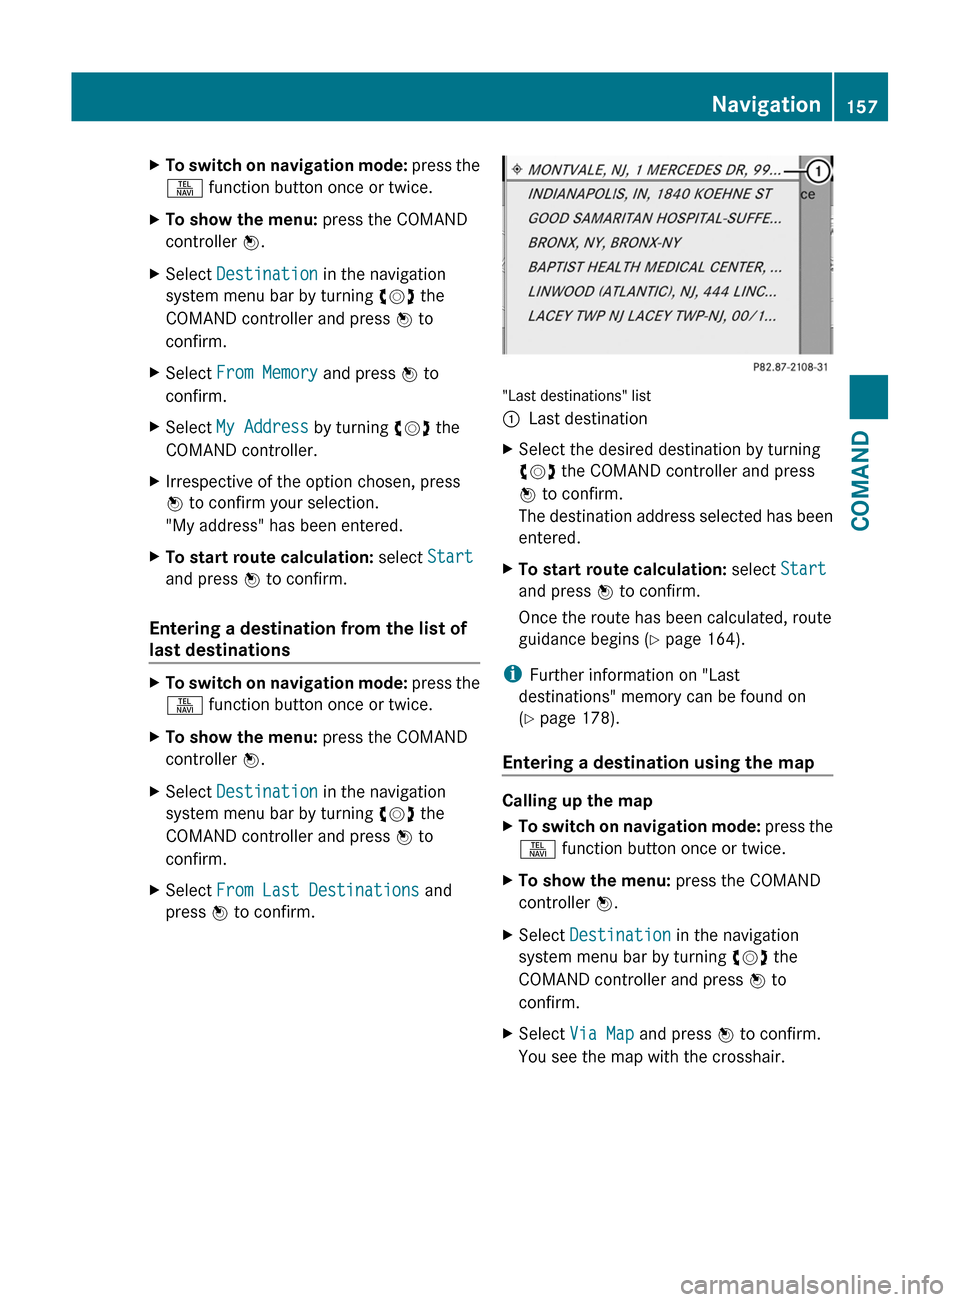
XSelect From Last Destinations and
press W to confirm.
"Last destinations" list
:Last destinationXSelect the desired destination by turning
cVd the COMAND controller and press
W to confirm.
The destination address selected has been
entered.
XTo start route calculation: select Start
and press W to confirm.
Once the route has been calculated, route
guidance begins (Y page 164).
iFurther information on "Last
destinations" memory can be found on
(Y page 178).
Entering a destination using the map
Calling up the map
XTo switch on navigation mode: press the
S function button once or twice.
XTo show the menu: press the COMAND
controller W.
XSelect Destination in the navigation
system menu bar by turning cVd the
COMAND controller and press W to
confirm.
XSelect Via Map and press W to confirm.
You see the map with the crosshair.
Navigation157COMANDZ
Page 166 of 524
Route guidance
General information
GWarning
COMAND calculates the route to the
destination without taking into account the
following, for example:
RTraffic lights
RStop and right-of-way signs
RLane merging
RParking or stopping prohibited areas
ROther road and traffic rules and regulations
RNarrow bridges
COMAND may give incorrect navigation
commands if the data in the digital map does
not correspond with the actual road/ traffic
situation. For example, if the traffic routing
has been changed or the direction of a one-
way road has been reversed.
For this reason, you must always observe
applicable road and traffic rules and
regulations during your journey. Road and
traffic rules and regulations always have
priority over the navigation commands
generated by the system.
Route guidance begins once a route has been
calculated (Y page 154).
COMAND guides you to your destination by
means of navigation commands in the form
of audible navigation announcements and
route guidance displays.
The route guidance displays can only be seen
if the display is switched to navigation mode.
If you do not follow the navigation
announcements or if you leave the calculated
route, COMAND automatically calculates a
new route to the destination.
If the digital map contains the corresponding
information, the following applies:
Rwhen selecting a route, COMAND tries to
avoid roads that only have limited access,
e.g. roads closed to through traffic and non-
residents.
Rroads that have time restrictions (e.g.
closed on Sundays and public holidays) are
avoided for route guidance.
Changing direction
Introduction
Changes of direction have three phases:
RPreparation phase
RAnnouncement phase
RChange-of-direction phase
Preparation phase
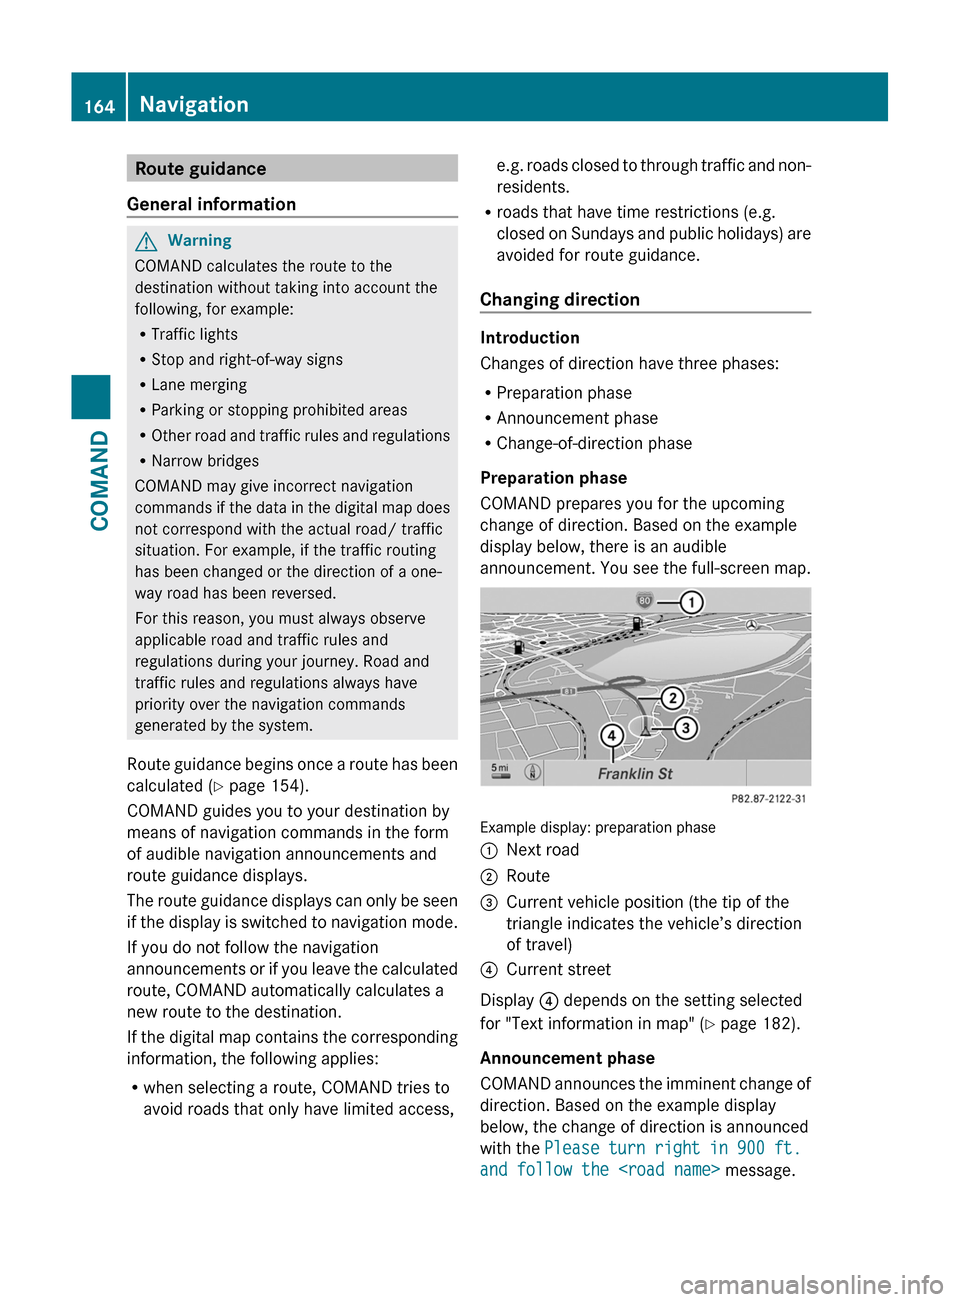
COMAND prepares you for the upcoming
change of direction. Based on the example
display below, there is an audible
announcement. You see the full-screen map.
Example display: preparation phase
:Next road;Route=Current vehicle position (the tip of the
triangle indicates the vehicle’s direction
of travel)
?Current street
Display ? depends on the setting selected
for "Text information in map" (Y page 182).
Announcement phase
COMAND announces the imminent change of
direction. Based on the example display
below, the change of direction is announced
with the Please turn right in 900 ft.
and follow the
164NavigationCOMAND