2011 MERCEDES-BENZ S-Class Video aux
[x] Cancel search: Video auxPage 18 of 524

Entering a phone number ..............161
Entering using the map ..................163
ZAGAT ®
rating service ...................163
Point of interest icon
Setting ........................................... 181
Point of interest list .......................... 162
Power closing feature ......................... 84
Power steering Filling capacity ............................... 511
Power washers .................................. 454
Power windows see Side windows
Pre-emptive occupant safety
system
see PRE-SAFE ®
system
PRE-SAFE ®
Brake (vehicles with
DISTRONIC PLUS) Activating/deactivating (on-
board computer) ............................ 376
Function/notes ................................ 71
PRE-SAFE ®
Brake (vehicles with
DISTRONIC PLUS) Display message ............................ 383
Warning lamp ................................. 419
PRE-SAFE ®
system
Display message ............................ 383
Operation ......................................... 53
Previous destinations ....................... 178
Product information ............................ 24
Programmable button ....................... 118
Program selector button .................. 310
Pulling away Automatic transmission .................301
PULSE
see Massage function
R
RACETIMER (on-board computer) .... 372
Radar sensor system Display message ............................ 403
Radar sensor system (on-board
computer) .......................................... 378
Radiator cover ................................... 447
Radio
Changing stations (on-board
computer) ...................................... 370
HD Radio™ .................................... 212
see separate operating instructions
Radio-controlled equipment
Assembly ....................................... 442
Radio mode
Switching to ................................... 208
Radio station
Storing ........................................... 210
Range (on-board computer) ............. 368
Read-aloud function .......................... 172
Read-aloud speed Setting ........................................... 143
Real-time traffic reports ........... 172, 175
Rear compartment Activating/deactivating climate
control ........................................... 289
Setting the airflow .........................292
Setting the air vents ..............295, 296
Setting the temperature ................291
Rear-compartment screens .............. 137
Rear-compartment seats .................. 102
Rear fog lamp (display message) ..... 396
Rear Seat Entertainment System Audio CD/DVD and MP3 mode .....247
AUX mode ............................. 139, 255
Changing the batteries ..................243
Remote control .............................. 138
Several users ................................. 245
System settings ............................. 246
Using headphones .........................244
Using the main loudspeaker ..........244
Video DVD mode ........................... 250
Wireless headphones .....................140
Rear seats
Overview .......................................... 39
Rear view camera .............................. 346
Rear view camera (cleaning
instructions) ...................................... 456
Rear-view mirror Dipping (automatic) .......................110
Rear window blind ............................ 429
see Rear window roller sunblind 16Index
Page 118 of 524

At a glance
COMAND operating system
Overview
FunctionPage:COMAND display120;COMAND controller and
function buttons116
=Telephone keypad118
Components of COMAND
COMAND consists of:
Rthe COMAND display/SPLITVIEW
Rthe DVD changer
Rthe COMAND controller
Rthe COMAND function buttons
Rthe telephone keypad
Rconnections in the glove box (USB,
additional USB, jack plug and iPod®
connection)
Ra remote control for the front passenger
and for use with the Rear Seat
Entertainment System
Rtwo sets of cordless headphones for the
Rear Seat Entertainment System
Rcordless headphones for the front
passenger
Rtwo screens (Rear Seat Entertainment
System)
RCD/DVD drive (Rear Seat Entertainment
System)
Raudio/video connections on the screen
(Rear Seat Entertainment System)
Raudio/video connections on the drive (Rear
Seat Entertainment System)
You can use COMAND to operate the
following main functions:
Rthe navigation system
Rthe audio functions in radio, SatRadio, disc
(audio CD/DVD and MP3 mode) SD
memory card (MP3 mode), MUSIC
REGISTER mode, Bluetooth® audio mode,
Media Interface mode and audio AUX mode
Rthe telephone and the address book
Rthe video function in video DVD and video
AUX mode
Rthe system settings
You can call up the main functions:
Rusing the corresponding buttons
Rusing the main function bar in the COMAND
display
COMAND controller
You can use the COMAND controller to select
the menu items in the COMAND display.
You can call up menus and lists, scroll through
menus or lists and exit menus and lists.
116At a glanceCOMAND
Page 122 of 524

NaviAudioTelephoneVideoVehicleModeFM/AM radioVideo DVDECOMap orientationSatRadioAUXMulticontour
seat/lumbar
settingsPoint of interest
symbols on the mapDiscVideo offRear window
blindRoad signs on the
mapMemory cardEASY-ENTRY/
EXIT systemText information on
mapMUSIC
REGISTERExterior
lighting
delayed
switch-off timeO Speed Limit AssistMedia
InterfaceInterior
lighting
delayed
switch-offO Topographical
mapUSBAmbient
lightingO City viewRearO Automatic
mirror fold-in
functionO Freeway
informationAUXO Locator
lightingO Audio fadeoutAudio offO Automatic
lockingSIRIUS serviceO Interior
motion sensorMap versionO Tow-away
protectionO Trunk lid
opening height
restrictionSPLITVIEW
SPLITVIEW allows the driver and front
passenger to use separate COMAND
functions at the same time. Depending on the
viewing angle of the display (from the driver's
seat or from the front passenger seat), you
will see two different displays.
For example, the "Navi" function can be
viewed from the driver's side while the video120At a glanceCOMAND
Page 123 of 524

DVD function can be viewed from the front
passenger side.
Use the SPLITVIEW remote control to operate
COMAND from the front passenger side.
Points to remember:
RYour vehicle may be equipped with
SPLITVIEW. The use of SPLITVIEW is
currently not permitted in the following
states: AL, CO, IL, LA, MA, MD, NH, PA, VA,
VT, WA, WI, and WV as well as in the
Canadian provinces Manitoba,
Newfoundland, New Brunswick, and Prince
Edward Island. The driver is responsible for
complying with ALL regional laws. If your
vehicle is registered in a state or province
where SPLITVIEW is not permitted, this
function must be deactivated. Please
consult an authorized Mercedes-Benz
center to verify if the use of SPLITVIEW is
permitted in your state/province.
RThe SPLITVIEW remote control can be used
to adjust the volume of the front-passenger
side headphones. Before putting on the
headphones, make certain that the volume
has not been set too high.
RYou can only use media from the driver's
and front-passenger sides separately if the
media are from different sources. Example:
on the driver's side, an audio CD is being
played on the DVD changer. This means
that on the front-passenger side, the DVD
changer cannot be used to play a different
medium, for instance a video DVD.
However, other media can be used at the
same time on the front-passenger side,
including radio, memory card, MUSIC
REGISTER, Media Interface, USB or AUX.
RIf you use the same medium on both sides,
you can both carry out the respective
settings.
RThere must be clear line of sight between
the headphones and the display so that
COMAND can optimally transmit music and
speech via the infrared signal on the front-
passenger's headphones. For this reason,
please also observe that the headphones
have left and right sides, and use them
correctly.
RUsing SPLITVIEW you can only use
entertainment functions separately, such
as audio and video functions.
RThe multifunction steering wheel can only
used for functions which relate to the
driver's side.
Switching SPLITVIEW on/off
XTo switch on SPLITVIEW: select
Vehicle from the main function bar by
turning cVd the COMAND controller and
press W to confirm.
The "Vehicle" menu appears.
XSelect SPLITVIEW on.
SPLITVIEW symbol : appears in the
display, and display ; switches to
SPLITVIEW off.
XTo switch off SPLITVIEW: select
Vehicle from the main function bar by
turning cVd the COMAND controller and
press W to confirm.
The "Vehicle" menu appears.
XSelect SPLITVIEW off.
Display ; switches to SPLITVIEW on.
iIf COMAND has already been switched
on, you can also use the remote control to
switch SPLITVIEW on and off
(Y page 123).
The SPLITVIEW screen remains on for
approximately 30 minutes after the key has
been turned to position 0 in the ignition lock.
After this time or after the key has been
At a glance121COMANDZ
Page 136 of 524

Surround sound
General notes
If your vehicle is equipped with the harman/
kardon® Logic 7® surround sound system,
you can set the optimum surround sound for
every passenger.
The harman/kardon® Logic 7® surround
sound system is available for the following
operating modes:
Rradio (FM only)
Rsatellite radio
Raudio CD
Raudio DVD (MLP, dts, PCM and Dolby
Digital audio formats)
RMP3 (including SD memory card)
RBluetooth® audio mode
RMedia Interface
Rvideo DVD (PCM, dts and Dolby Digital
audio formats)
RAUX
Because many DVDs contain both stereo and
multi-channel audio formats, it may be
necessary to set the audio format
(Y page 223).
iThe Logic7® On function enables
playback of, e.g. stereo recordings with a
surround sound experience for every
passenger. It enables optimum playback of
music and films on CD, audio DVD or video
DVD with multichannel audio formats, such
as MLP, dts or Dolby Digital. The resulting
audio experience reflects that intended by
the sound engineer during the original
recording.
iIf you select LOGIC7® Off, the sound
system plays the tracks as stored on the
medium. Due to the design of the
passenger compartment, an optimum
audio experience cannot be guaranteed for
all passengers.
iDiscs which support the audio formats
mentioned have the following logos:
Dolby Digital
dts
MLP
Switching surround sound on/off
Example: switching on surround sound for
radio mode
XPress the R function button.
The radio display appears. You will hear the
last station played on the last waveband
set.
134At a glanceCOMAND
Page 137 of 524

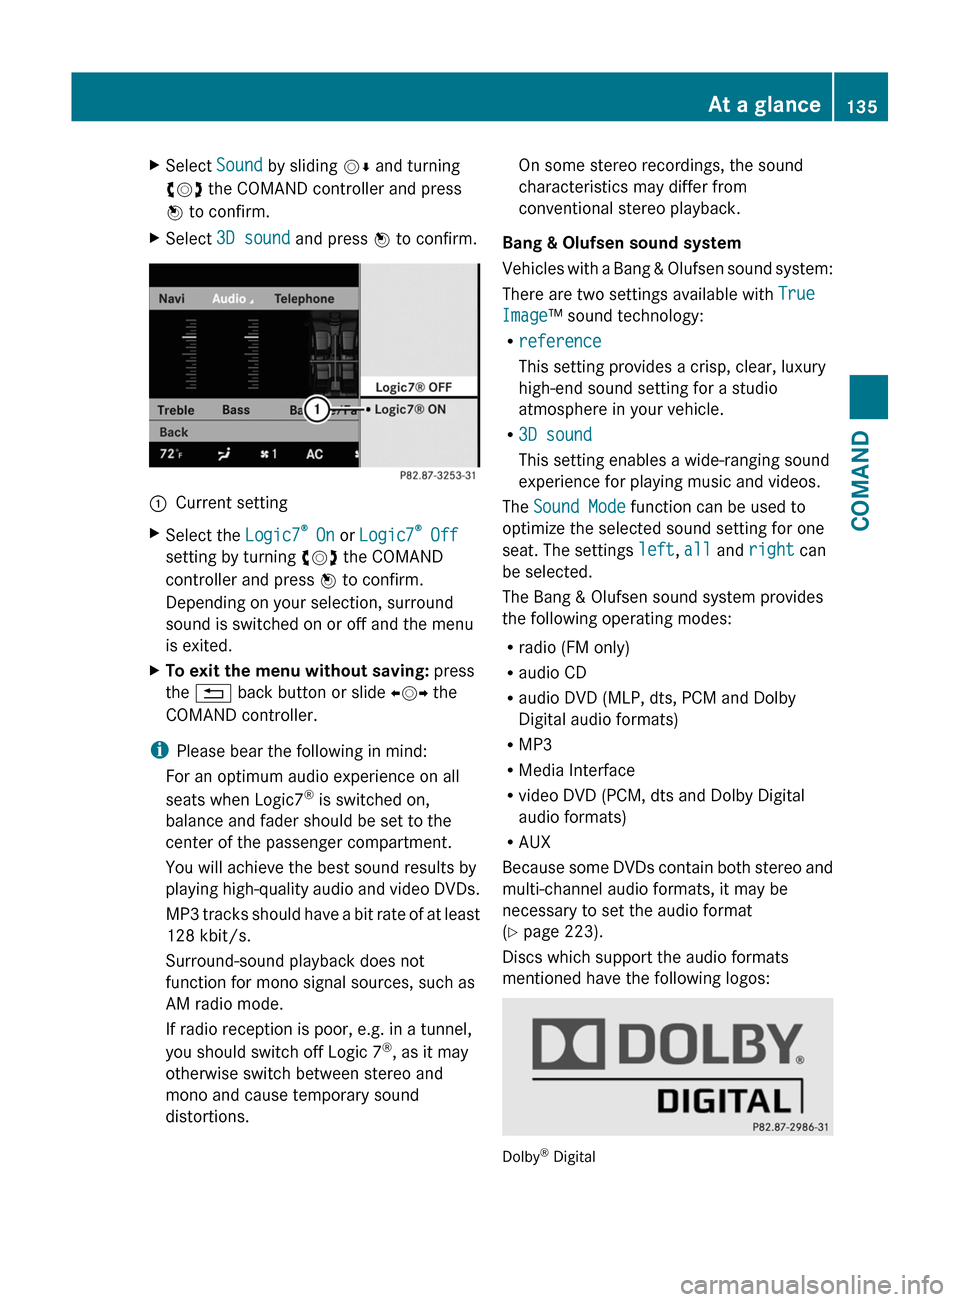
XSelect Sound by sliding VÆ and turning
cVd the COMAND controller and press
W to confirm.
XSelect 3D sound and press W to confirm.:Current settingXSelect the Logic7® On or Logic7® Off
setting by turning cVd the COMAND
controller and press W to confirm.
Depending on your selection, surround
sound is switched on or off and the menu
is exited.
XTo exit the menu without saving: press
the % back button or slide XVY the
COMAND controller.
iPlease bear the following in mind:
For an optimum audio experience on all
seats when Logic7® is switched on,
balance and fader should be set to the
center of the passenger compartment.
You will achieve the best sound results by
playing high-quality audio and video DVDs.
MP3 tracks should have a bit rate of at least
128 kbit/s.
Surround-sound playback does not
function for mono signal sources, such as
AM radio mode.
If radio reception is poor, e.g. in a tunnel,
you should switch off Logic 7®, as it may
otherwise switch between stereo and
mono and cause temporary sound
distortions.
On some stereo recordings, the sound
characteristics may differ from
conventional stereo playback.
Bang & Olufsen sound system
Vehicles with a Bang & Olufsen sound system:
There are two settings available with True
Image™ sound technology:
Rreference
This setting provides a crisp, clear, luxury
high-end sound setting for a studio
atmosphere in your vehicle.
R3D sound
This setting enables a wide-ranging sound
experience for playing music and videos.
The Sound Mode function can be used to
optimize the selected sound setting for one
seat. The settings left, all and right can
be selected.
The Bang & Olufsen sound system provides
the following operating modes:
Rradio (FM only)
Raudio CD
Raudio DVD (MLP, dts, PCM and Dolby
Digital audio formats)
RMP3
RMedia Interface
Rvideo DVD (PCM, dts and Dolby Digital
audio formats)
RAUX
Because some DVDs contain both stereo and
multi-channel audio formats, it may be
necessary to set the audio format
(Y page 223).
Discs which support the audio formats
mentioned have the following logos:
Dolby® Digital
At a glance135COMANDZ
Page 141 of 524

Selecting a menu/menu item and
confirming your selection
XSelect a menu/menu item using the
=;9: buttons and press
the 9 button to confirm.
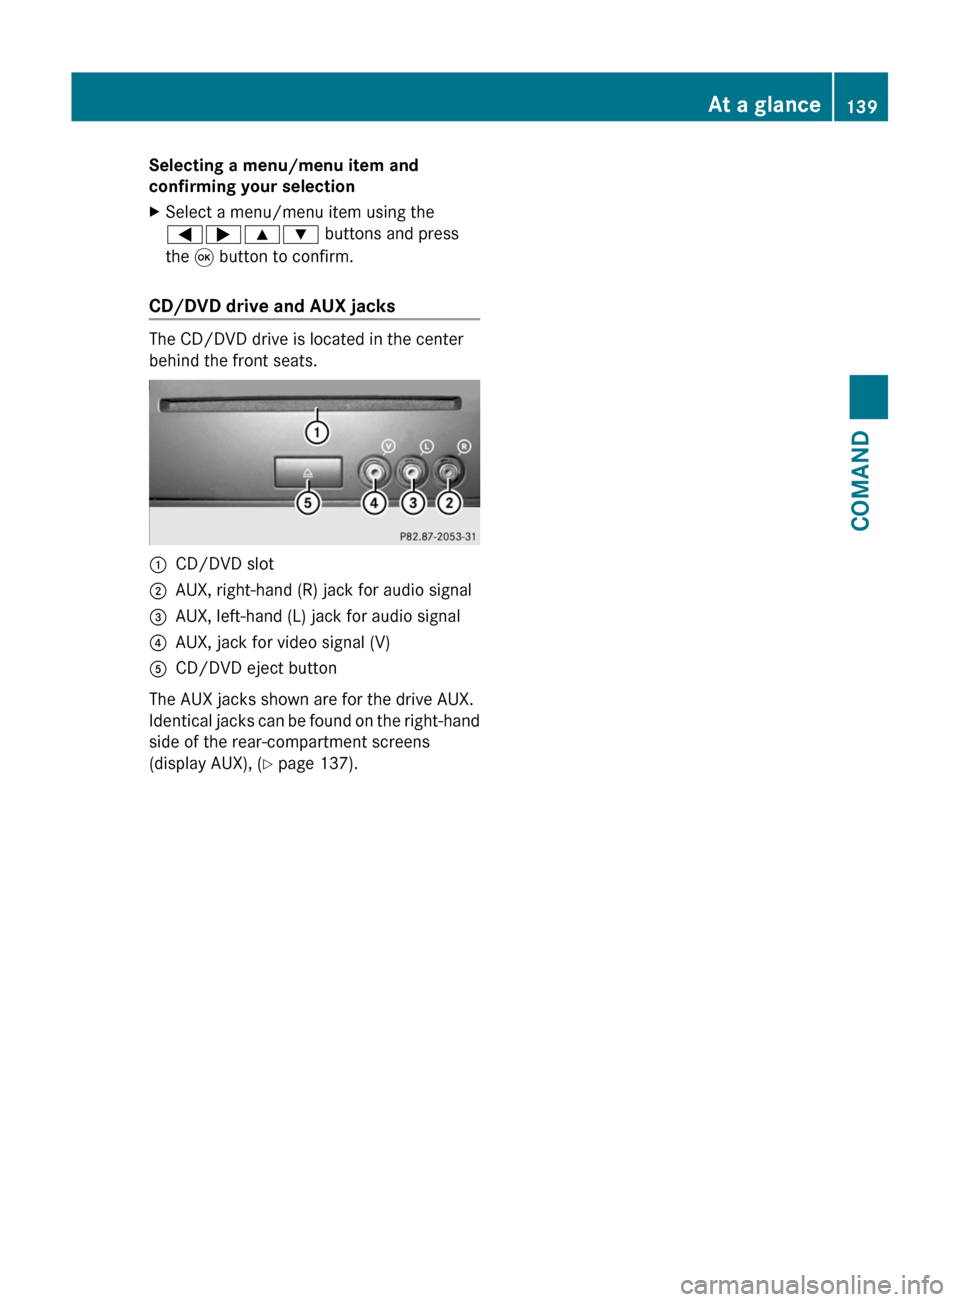
CD/DVD drive and AUX jacks
The CD/DVD drive is located in the center
behind the front seats.
:CD/DVD slot;AUX, right-hand (R) jack for audio signal=AUX, left-hand (L) jack for audio signal?AUX, jack for video signal (V)ACD/DVD eject button
The AUX jacks shown are for the drive AUX.
Identical jacks can be found on the right-hand
side of the rear-compartment screens
(display AUX), (Y page 137).
At a glance139COMANDZ
Page 237 of 524

If COMAND is equipped with a Media
Interface, external audio sources are
connected using the associated cable set.
The audio cable set then replaces the audio
AUX socket.
iYou can find more information on the
Internet at http://www.mercedes-
benz.com/connect and in the "Media
Interface mode" section (Y page 229).
Activating audio AUX mode
When you connect an external audio source,
audio AUX is not selected automatically.
XSelect Audio in the main function bar by
sliding ZV and turning cVd the COMAND
controller and press W to confirm.
XSelect Aux using cVd and press W to
confirm.
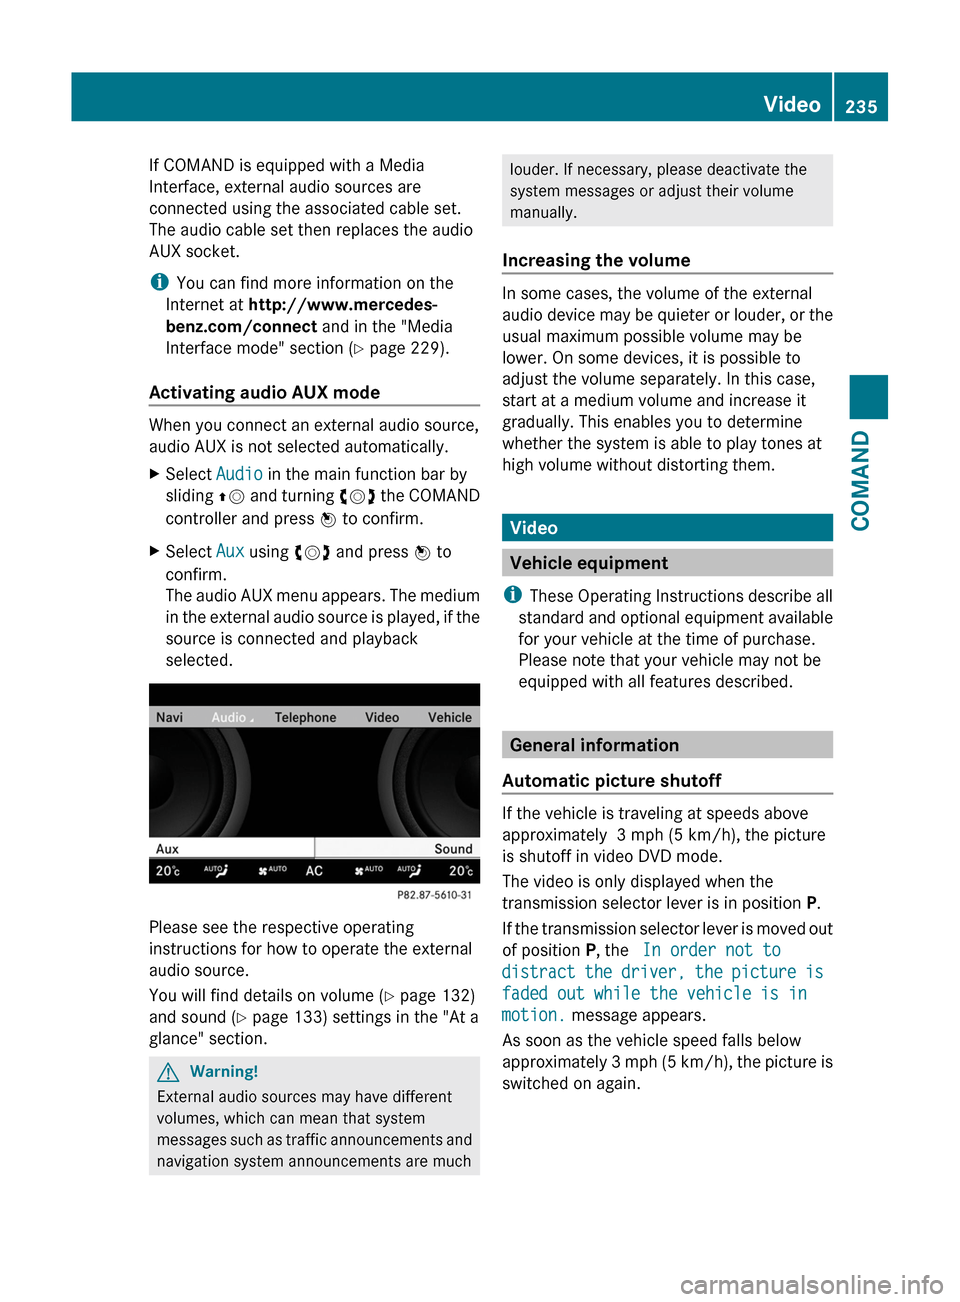
The audio AUX menu appears. The medium
in the external audio source is played, if the
source is connected and playback
selected.
Please see the respective operating
instructions for how to operate the external
audio source.
You will find details on volume (Y page 132)
and sound (Y page 133) settings in the "At a
glance" section.
GWarning!
External audio sources may have different
volumes, which can mean that system
messages such as traffic announcements and
navigation system announcements are much
louder. If necessary, please deactivate the
system messages or adjust their volume
manually.
Increasing the volume
In some cases, the volume of the external
audio device may be quieter or louder, or the
usual maximum possible volume may be
lower. On some devices, it is possible to
adjust the volume separately. In this case,
start at a medium volume and increase it
gradually. This enables you to determine
whether the system is able to play tones at
high volume without distorting them.
Video
Vehicle equipment
iThese Operating Instructions describe all
standard and optional equipment available
for your vehicle at the time of purchase.
Please note that your vehicle may not be
equipped with all features described.
General information
Automatic picture shutoff
If the vehicle is traveling at speeds above
approximately 3 mph (5 km/h), the picture
is shutoff in video DVD mode.
The video is only displayed when the
transmission selector lever is in position P.
If the transmission selector lever is moved out
of position P, the In order not to
distract the driver, the picture is
faded out while the vehicle is in
motion. message appears.
As soon as the vehicle speed falls below
approximately 3 mph (5 km/h), the picture is
switched on again.
Video235COMANDZ