2011 MERCEDES-BENZ S-Class buttons
[x] Cancel search: buttonsPage 133 of 524

Option 1XSelect 4 or 5 in the character bar and
press W to confirm.
The input menu shows the data field
selected.
:Cursor in next data field;To store an entry=4 and 5 icons to select a data field
Option 2
XSlide ZV the COMAND controller
repeatedly until the character bar
disappears.
XSelect the data field by sliding ZVÆ and
press W to confirm.
Storing an entry
XSelect ¬ in the character bar by turning
cVd the COMAND controller and press
W to confirm.
The entry is stored in the address book.
Further functions available in the
character bar
XTo switch the character bar to upper/
lower-case characters: select * or
E and press W to confirm.
XTo switch the character set: select
p and press W to confirm.
The character set switches between
upper/lower-case letters and digits.
XTo change the language of the
character bar: select B and press W
to confirm.
XSelect the language by turning cVd the
COMAND controller and press W to
confirm.
XTo reposition the cursor within the data
field: select 2 or 3 and press W to
confirm.
:Cursor (repositioned);2 and 3 icon to reposition the cursorXDelete the character/entry (Y page 129).
Basic functions of COMAND
Switching COMAND on/off
XPress the u function button on the
center console.
iIf you switch off COMAND, playback of
the current audio or video source will also
be switched off. You cannot switch off
COMAND while making a call via COMAND.
You can also make phone calls using the
buttons on the multifunction steering
wheel when COMAND is switched off
(Y page 365).
At a glance131COMANDZ
Page 141 of 524
Selecting a menu/menu item and
confirming your selection
XSelect a menu/menu item using the
=;9: buttons and press
the 9 button to confirm.
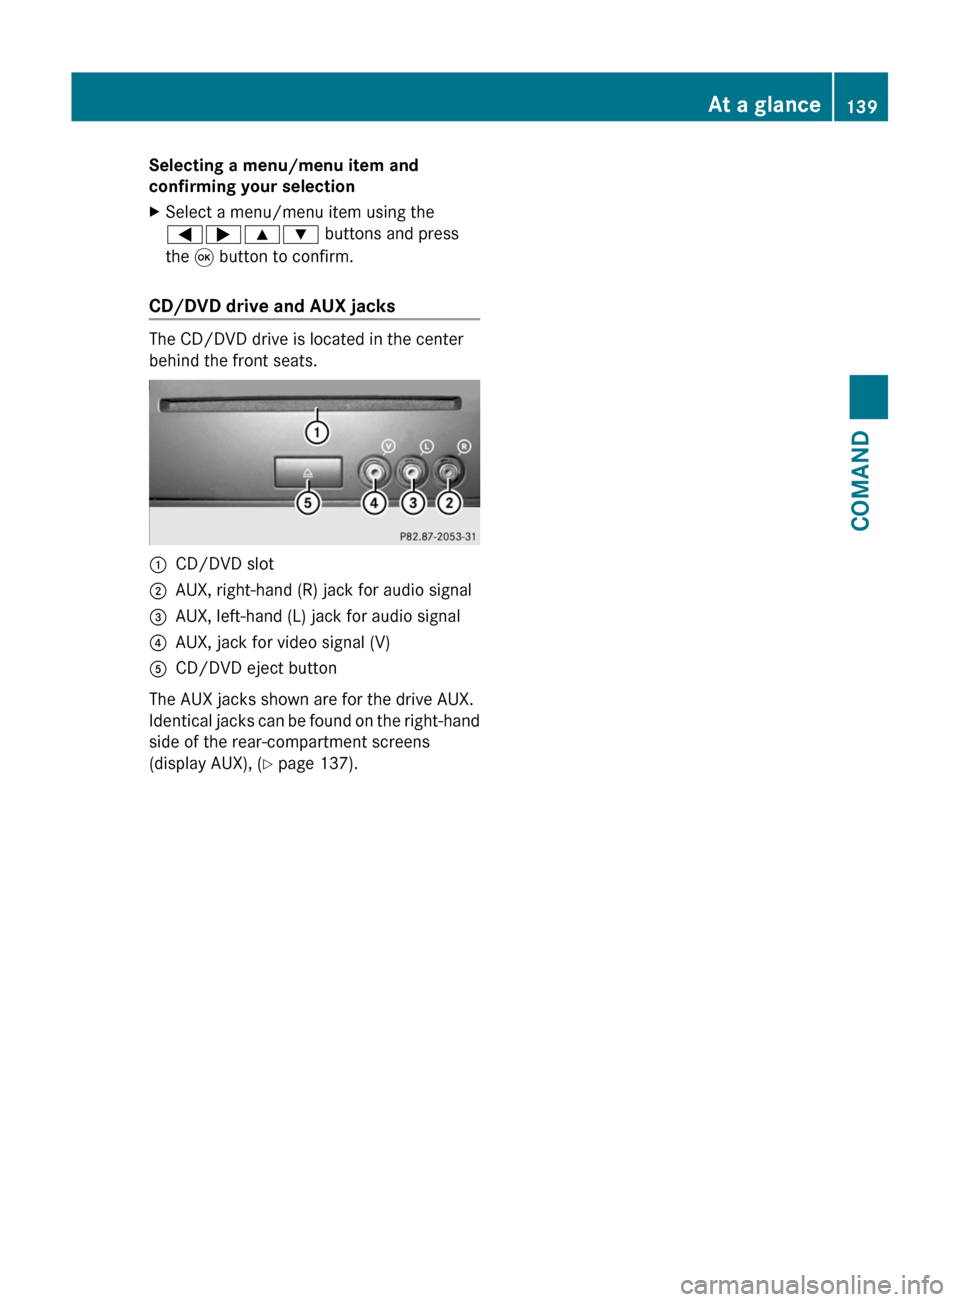
CD/DVD drive and AUX jacks
The CD/DVD drive is located in the center
behind the front seats.
:CD/DVD slot;AUX, right-hand (R) jack for audio signal=AUX, left-hand (L) jack for audio signal?AUX, jack for video signal (V)ACD/DVD eject button
The AUX jacks shown are for the drive AUX.
Identical jacks can be found on the right-hand
side of the rear-compartment screens
(display AUX), (Y page 137).
At a glance139COMANDZ
Page 142 of 524
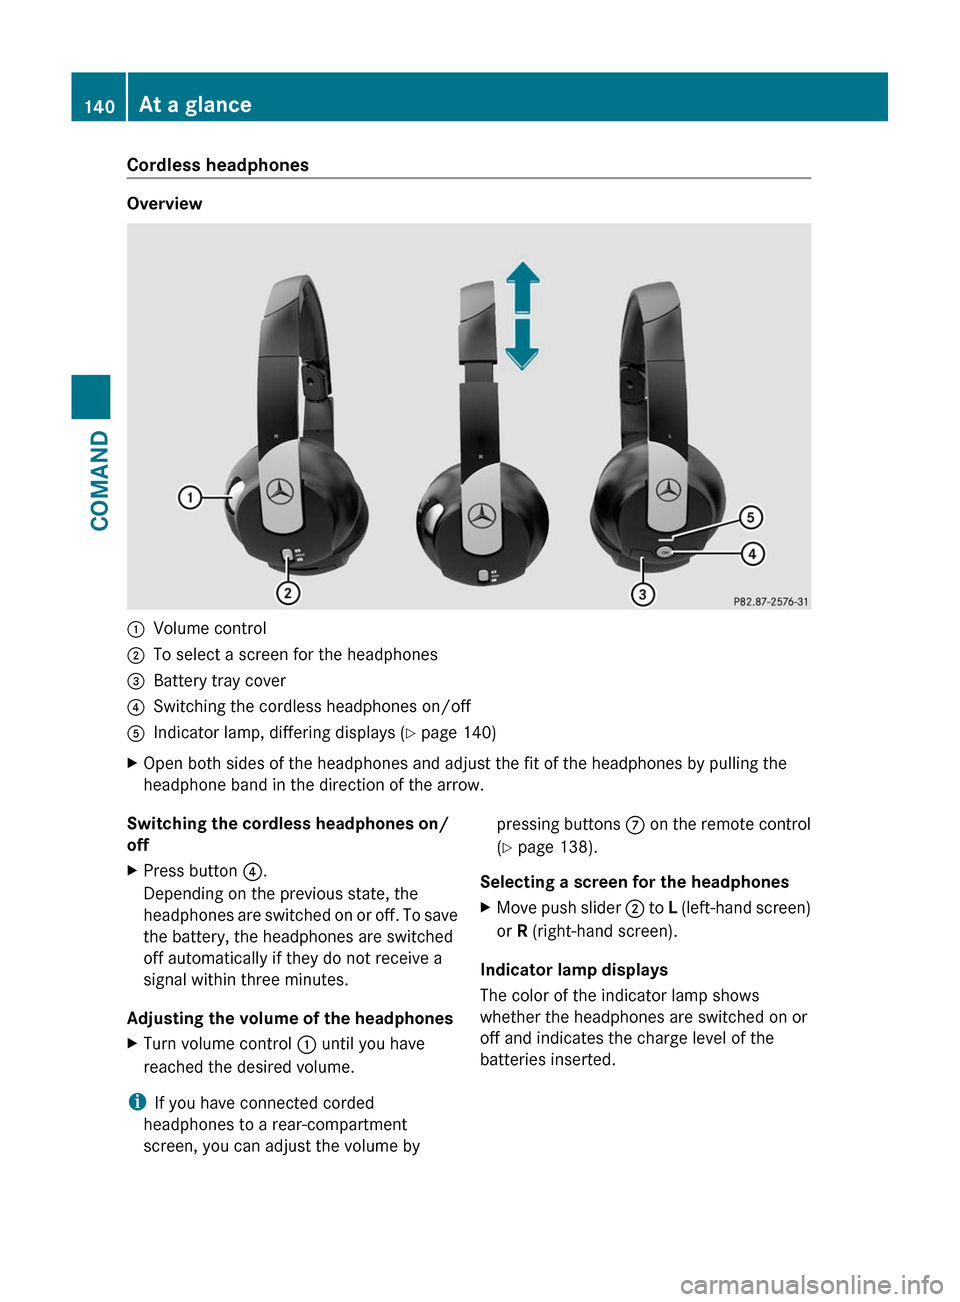
Cordless headphones
Overview
:Volume control;To select a screen for the headphones=Battery tray cover?Switching the cordless headphones on/offAIndicator lamp, differing displays (Y page 140)XOpen both sides of the headphones and adjust the fit of the headphones by pulling the
headphone band in the direction of the arrow.Switching the cordless headphones on/
offXPress button ?.
Depending on the previous state, the
headphones are switched on or off. To save
the battery, the headphones are switched
off automatically if they do not receive a
signal within three minutes.
Adjusting the volume of the headphones
XTurn volume control : until you have
reached the desired volume.
i If you have connected corded
headphones to a rear-compartment
screen, you can adjust the volume by
pressing buttons C on the remote control
( Y page 138).
Selecting a screen for the headphonesXMove push slider ; to L (left-hand screen)
or R (right-hand screen).
Indicator lamp displays
The color of the indicator lamp shows
whether the headphones are switched on or
off and indicates the charge level of the
batteries inserted.
140At a glanceCOMAND
Page 224 of 524
Selecting by track listXIn audio mode, select Search by sliding
VÆ or turning cVd the COMAND
controller and press W to confirm.
XSelect Current track list.
or
XPress W the COMAND controller in MP3
mode when the display/selection window
is active.
The track list appears. The # dot indicates
the current track.
XSelect the track by turning cVd and press
W to confirm.
iIn MP3 mode, the list shows all the tracks
in alphabetical order.
XOn the multifunction steering wheel:
switch COMAND to audio CD, audio DVD or
MP3 mode (Y page 218).
XUse = or ; to select the Audio
menu.
XPress and hold the 9 or : button
until the desired track has been reached.
If you hold down 9 or :, the system
runs through the list more quickly. Not all
audio drives or data carriers support this
function.
If track information is stored on the audio
drive or data storage device, the
multifunction display shows the number and
name of the track.
Selecting a track using the number
keypad
XPress the Ä button on the number pad.
A numerical entry field appears. The
number of positions offered corresponds to
the number of tracks on the CD/DVD. Only
numbers that correspond to a track
number on the CD/DVD can be entered.
XEnter the desired track number using the
number buttons.
Fast forward/rewindXWhile the display/selection window is
active, slide XVY and hold the COMAND
controller until the desired position has
been reached.
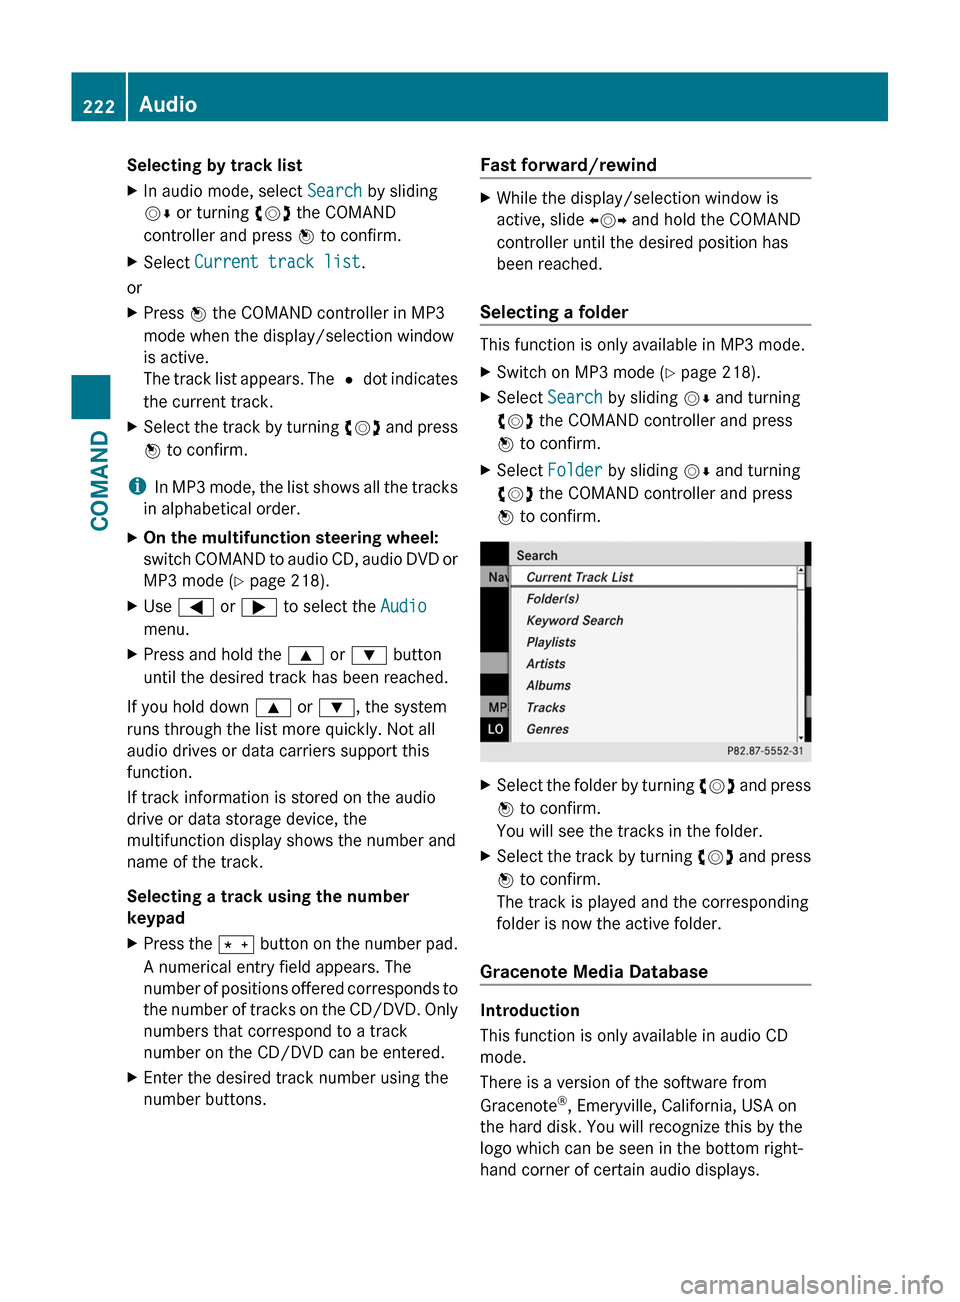
Selecting a folder
This function is only available in MP3 mode.
XSwitch on MP3 mode (Y page 218).XSelect Search by sliding VÆ and turning
cVd the COMAND controller and press
W to confirm.
XSelect Folder by sliding VÆ and turning
cVd the COMAND controller and press
W to confirm.
XSelect the folder by turning cVd and press
W to confirm.
You will see the tracks in the folder.
XSelect the track by turning cVd and press
W to confirm.
The track is played and the corresponding
folder is now the active folder.
Gracenote Media Database
Introduction
This function is only available in audio CD
mode.
There is a version of the software from
Gracenote®, Emeryville, California, USA on
the hard disk. You will recognize this by the
logo which can be seen in the bottom right-
hand corner of certain audio displays.
222AudioCOMAND
Page 247 of 524

XTo set on COMAND: press the R
function button once or twice to switch on
an audio mode.XSelect Audio by sliding ZV the COMAND
controller and press W to confirm.
The Audio menu appears.XSelect Rear by turning cVd the COMAND
controller and press W to confirm.
i
The headphones' volume setting does not
affect the main loudspeakers.
Adjusting the sound settings
You can select the sound settings in the audio
CD/DVD/MP3, video DVD and AUX modes.
XSwitch on an operating mode (e.g. audio
CD mode) ( Y page 248).XSelect Treble or Bass using
the :=; buttons on the remote
control and press the 9 button to confirm.
An adjustment scale appears.XSelect a setting using the 9:
buttons and press the 9 button to confirm.
Multiple users
Simultaneous use of the rear-
compartment disc drive
The two rear screens can be operated more
or less independently of one another.
However, there can be a conflict in some
menus if the two screens are used
simultaneously.
If the rear-compartment disc drive is being
used for both screens simultaneously,
selecting certain menus or settings on one of
the screens also affects the other screen.
The following functions affect both screens:
R changing playback options
R selecting a track (from a track list or folder)
R using the play, pause and stop functions
R fast forwarding/rewinding or scrolling
R calling up the DVD menu and navigating
within it
R setting the language, subtitles and camera
angle
R calling up interactive DVD content
The following functions affect only one
screen:
R audio and video functions as well as picture
settings
R switching between full screen and the
menu
Switching between operating modes
When you exit an operating mode (e.g. audio
CD mode), the current setting is saved. If you
call up this operating mode again later, there
are two possibilities:
R the operating mode has been changed on
the other screen.
R the operating mode has not been changed.
In the first case, the operating mode appears
as it is on the other screen.
In the second case, the setting appears on the
screen as it was when you last exited the
operating mode.
Picture settings
Overview
You can select these settings in video DVD
and AUX mode. Instructions for AUX mode
are detailed later ( Y page 139).
Adjusting the brightness, contrast and
color
XSwitch on video DVD mode ( Y page 250).XTo show the menu: press the 9 button
on the remote control.
or
XSelect Menu while the navigation menu
( Y page 237) is shown and press the 9
button to confirm.XIn both cases, select DVD-V using
the :=; buttons and press the
9 button to confirm.Rear Seat Entertainment System245COMANDZ
Page 248 of 524
XSelect Brightness, Contrast, color or
Auto using the 9: buttons and
press 9 to confirm.
An adjustment scale appears.
XSelect a setting using the 9:
buttons and press the 9 button to confirm.
Changing the picture format
XTo show the menu: press the 9 button
on the remote control.
or
XSelect Menu while the navigation menu
(Y page 237) is shown and press the 9
button to confirm.
XSelect DVD-V using the :=;
buttons and press the 9 button to confirm.
The ä icon in front of the 16:9
optimized, 4:3 or Widescreen menu item
indicates the format currently set.
XSelect a format using the 9:
buttons and press the 9 button to confirm.
System settings
Notes
You can adjust all system settings individually
for each screen without affecting the other
screen. You make these settings using the
remote control.
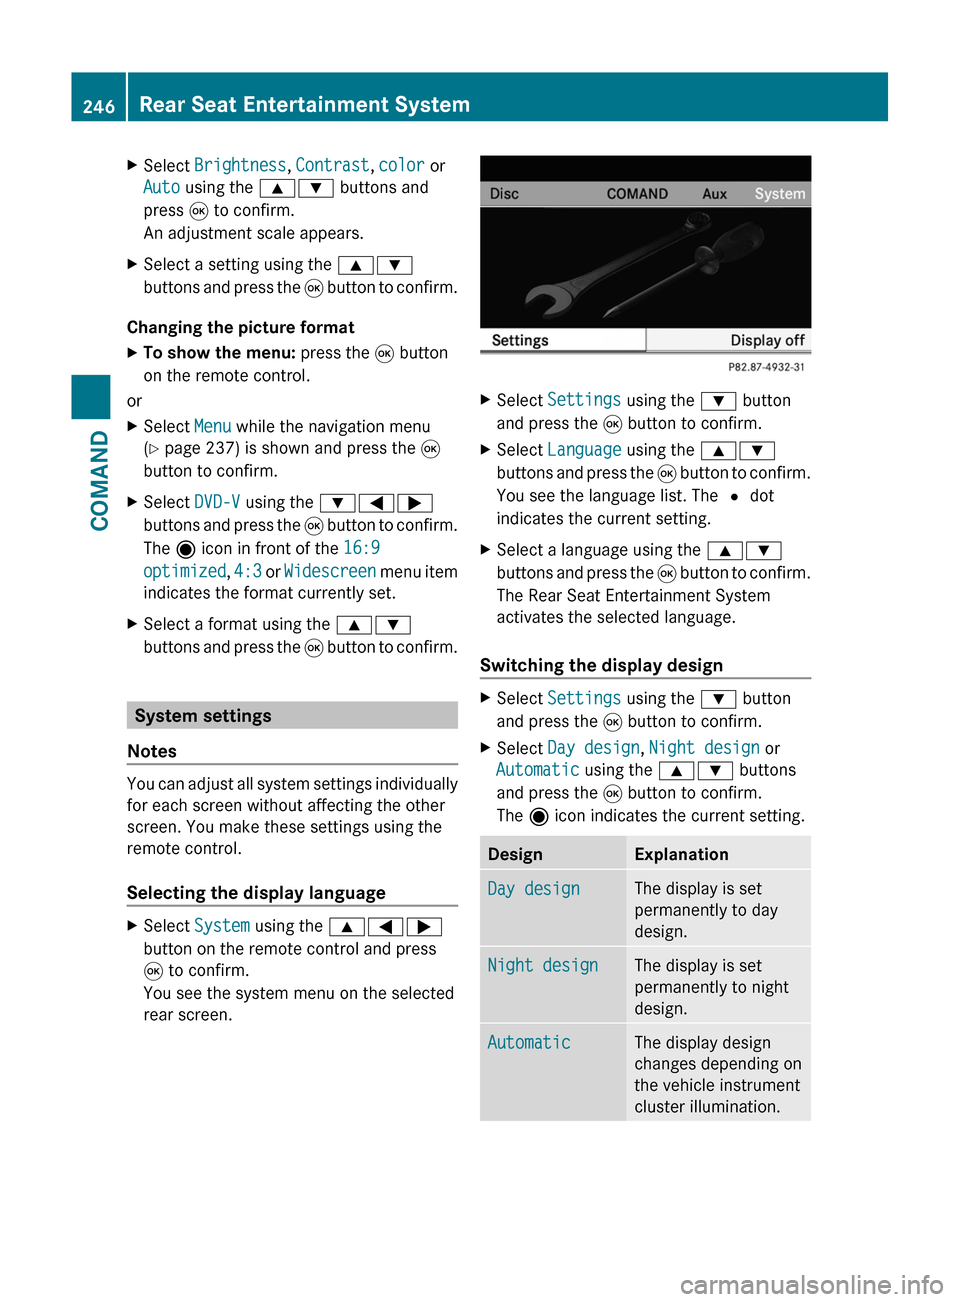
Selecting the display language
XSelect System using the 9=;
button on the remote control and press
9 to confirm.
You see the system menu on the selected
rear screen.
XSelect Settings using the : button
and press the 9 button to confirm.
XSelect Language using the 9:
buttons and press the 9 button to confirm.
You see the language list. The # dot
indicates the current setting.
XSelect a language using the 9:
buttons and press the 9 button to confirm.
The Rear Seat Entertainment System
activates the selected language.
Switching the display design
XSelect Settings using the : button
and press the 9 button to confirm.
XSelect Day design, Night design or
Automatic using the 9: buttons
and press the 9 button to confirm.
The ä icon indicates the current setting.
DesignExplanationDay designThe display is set
permanently to day
design.
Night designThe display is set
permanently to night
design.
AutomaticThe display design
changes depending on
the vehicle instrument
cluster illumination.
246Rear Seat Entertainment SystemCOMAND
Page 249 of 524
Setting the picture brightnessXSelect Settings using the : button
and press the 9 button to confirm.
XSelect Brightness using the 9:
buttons and press the 9 button to confirm.
A scale appears.
XAdjust the brightness using the 9:
buttons and press the 9 button to confirm.
The brightness bar moves up or down. The
picture becomes lighter or darker in
accordance with the scale.
Showing/hiding the picture
XTo hide the picture: select Display off
in the system menu using the :;
buttons on the remote control and press
the 9 button to confirm.
The picture is hidden.
XTo display the picture: press the 9
button.
Audio CD/DVD and MP3 mode
Safety note
GWarning
The RSE CD/DVD player is a Class 1 laser
product. There is a danger of invisible laser
radiation when you open or damage the cover.
Do not remove the cover. The RSE CD/DVD
player does not contain any parts which can
be serviced by the user. For safety reasons,
have any necessary service work performed
by qualified personnel.
General notes
You will find information on the following
topics in the Audio section:
Rnotes on CDs/DVDs (Y page 225)
Rnotes on MP3 mode (Y page 224)
Rnotes on copyright (Y page 225)
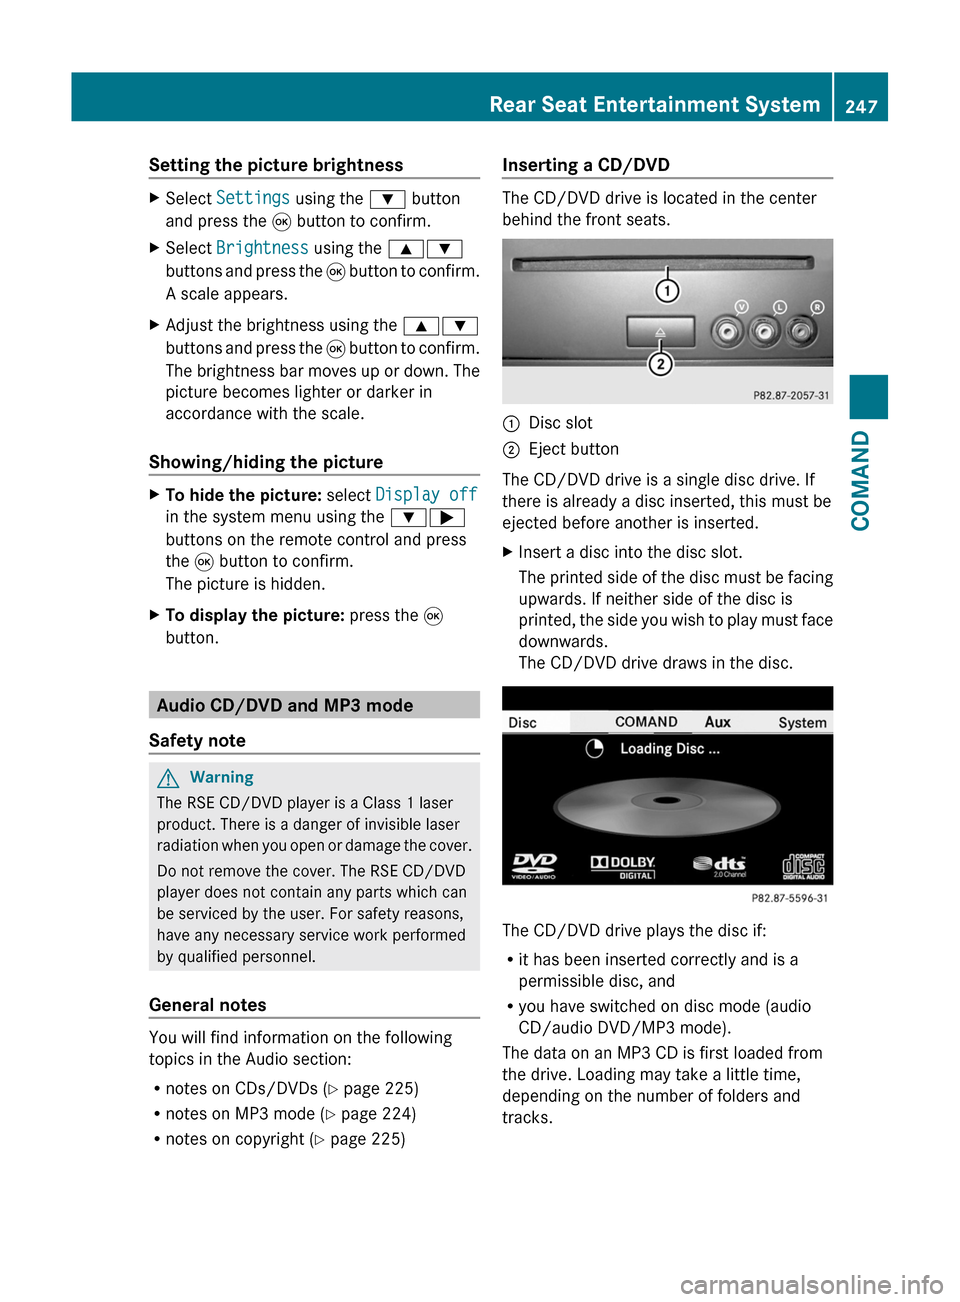
Inserting a CD/DVD
The CD/DVD drive is located in the center
behind the front seats.
:Disc slot;Eject button
The CD/DVD drive is a single disc drive. If
there is already a disc inserted, this must be
ejected before another is inserted.
XInsert a disc into the disc slot.
The printed side of the disc must be facing
upwards. If neither side of the disc is
printed, the side you wish to play must face
downwards.
The CD/DVD drive draws in the disc.
The CD/DVD drive plays the disc if:
Rit has been inserted correctly and is a
permissible disc, and
Ryou have switched on disc mode (audio
CD/audio DVD/MP3 mode).
The data on an MP3 CD is first loaded from
the drive. Loading may take a little time,
depending on the number of folders and
tracks.
Rear Seat Entertainment System247COMANDZ
Page 250 of 524

Removing the CD/DVDXPress the þ eject button.
The drive ejects the disc.XTake the disc out of the slot.
If you do not take the disc out of the slot,
the drive will draw it in again automatically
after a short while.
Switching on audio CD, audio DVD or
MP3 mode
XInsert a CD/DVD ( Y page 247).
The Rear Seat Entertainment System loads
the inserted disc.XSelect Disc in the menu using the
9=; buttons on the remote
control and press the 9 button to confirm.
The corresponding mode is switched on.
The Rear Seat Entertainment System plays
the disc.
i Variable bit rates in MP3 tracks can result
in the elapsed time shown being different
to the actual elapsed time.
Selecting a track
Selecting by skipping to a track
XTo skip forwards or backwards to a
track: press the = or ; button on
the remote control.
or
XPress the E or F button.
The skip forward function skips to the next
track.
Skipping backwards restarts the current
track (if it has been playing for more than
eight seconds) or starts the previous track
(if the current track has only been playing
for a shorter time).
If you have selected the playback options
Random tracks or Random folder , the
track order is random.Selecting by track list
In audio CD mode, the track list contains all
tracks on the disc currently playing.
In audio DVD mode, the track list contains all
tracks in the currently active group; see
"Setting the audio format" ( Y page 223).
In MP3 mode, the track list shows all tracks
in the currently active folder as well as the
folder structure, allowing you to select any
track on the MP3 CD.XSelect Track list (audio CD/DVD mode)
or Folder (MP3 mode) using
the :=; buttons on the remote
control and press the 9 button to confirm.
or
XPress the 9 button when the display/
selection window is active.
The track list appears. The # dot indicates
the current track.XSelect a track using the 9: buttons
and press the 9 button to confirm.
Making a selection by entering the track
number directly
XPress h on the remote control.
The track entry display appears.
Example: track 2
XPress the · number button.
Example: track 12
XPress the corresponding number keys in
rapid succession.
i You cannot enter numbers which are
higher than the number of tracks on the CD
or in the currently active folder.
XWait for approximately three seconds after
making the entry.
You will hear the track entered. The
respective basic menu is shown again.
Fast forward/rewind
XWith the display/selection window active,
press the = or ; button on the248Rear Seat Entertainment SystemCOMAND