2011 MERCEDES-BENZ S-Class SUN ROOF
[x] Cancel search: SUN ROOFPage 99 of 524
Resetting the panorama roof with
power tilt/sliding panel or the front
roller sunblind
Reset the panorama roof with power tilt/
sliding panel or the roller sunblinds if the
panorama roof with power tilt/sliding panel
or the roller sunblinds do not close smoothly.
! Do not open the panorama sliding sunroof
until it has been reset properly. Otherwise,
the panorama roof with power tilt/sliding
panel may lock in the open position.
If the panorama roof with power tilt/sliding
panel cannot be closed or adjusted,
contact a qualified specialist workshop,
e.g. a Mercedes-Benz Service Center.
XTurn the SmartKey to position 2 in the
ignition lock.
XPull the 3 switch repeatedly to the point
of resistance in the direction of arrow
=(Y page 95)until the panorama roof with
power tilt/sliding panel is fully closed.
XKeep the 3 switch pulled for an
additional second.
XPull the 3 switch in the direction of
arrow =(Y page 95) repeatedly until the
front roller sunblind is closed.
XKeep the 3 switch pulled for an
additional second.
XMake sure that the front roller sunblind can
be opened fully again (Y page 95).
XIf this is not the case, repeat the steps
above again.
XMake sure that the panorama roof with
power tilt/sliding panel can be opened fully
again (Y page 95).
XIf this is not the case, repeat the steps
above again.
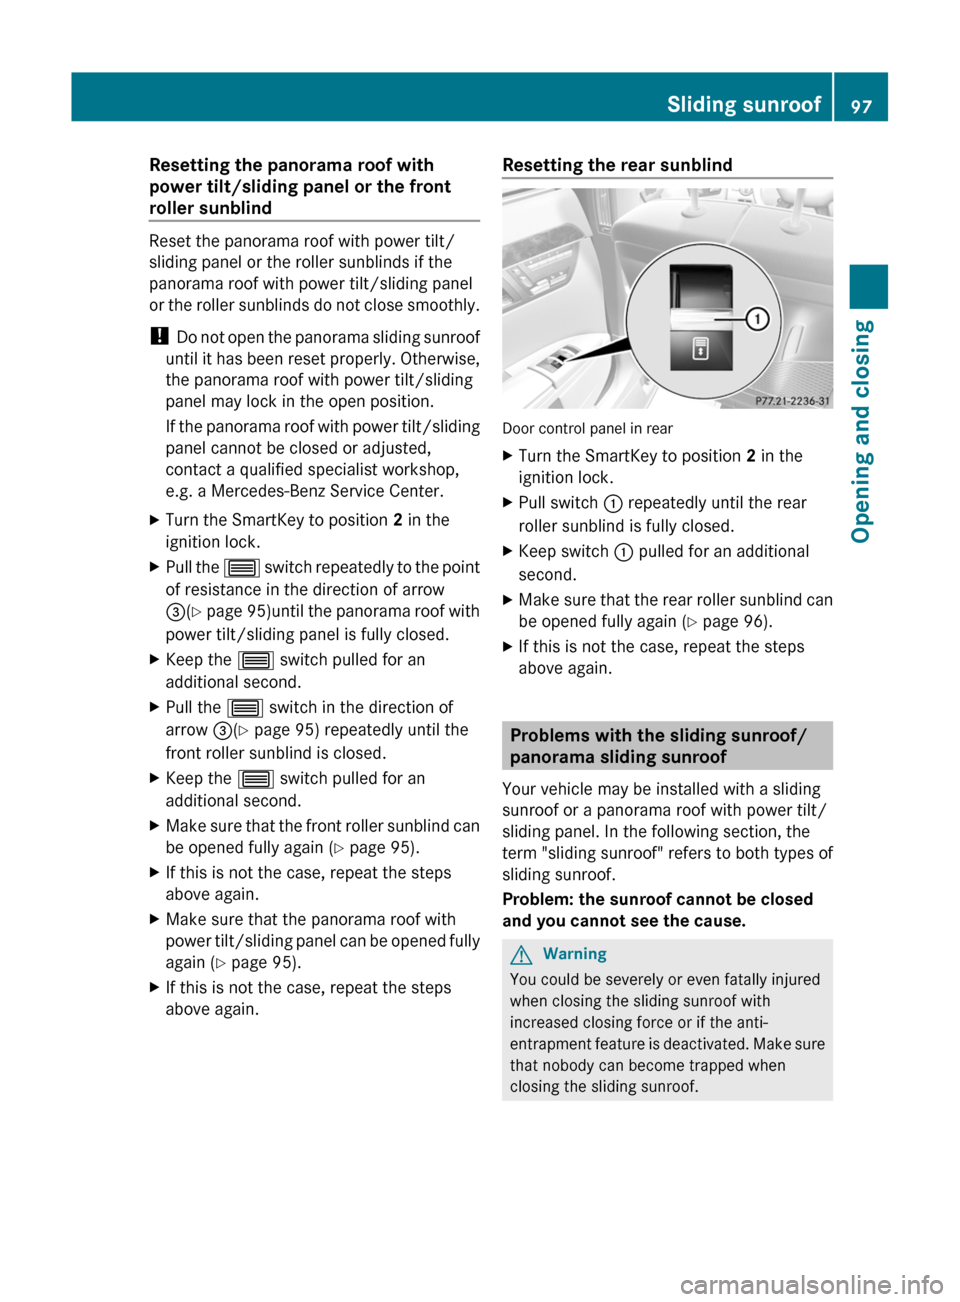
Resetting the rear sunblind
Door control panel in rear
XTurn the SmartKey to position 2 in the
ignition lock.
XPull switch : repeatedly until the rear
roller sunblind is fully closed.
XKeep switch : pulled for an additional
second.
XMake sure that the rear roller sunblind can
be opened fully again (Y page 96).
XIf this is not the case, repeat the steps
above again.
Problems with the sliding sunroof/
panorama sliding sunroof
Your vehicle may be installed with a sliding
sunroof or a panorama roof with power tilt/
sliding panel. In the following section, the
term "sliding sunroof" refers to both types of
sliding sunroof.
Problem: the sunroof cannot be closed
and you cannot see the cause.
GWarning
You could be severely or even fatally injured
when closing the sliding sunroof with
increased closing force or if the anti-
entrapment feature is deactivated. Make sure
that nobody can become trapped when
closing the sliding sunroof.
Sliding sunroof97Opening and closingZ
Page 100 of 524
If the sliding sunroof is obstructed during
closing and reopens again slightly:XImmediately after the sliding sunroof
blocks, pull the 3 switch in the
overhead control panel down to the point
of resistance and hold it until the sliding
sunroof is closed.
The sliding sunroof is closed with increased
force.
If the sliding sunroof is obstructed again
during closing and reopens again slightly:
XImmediately after the sliding sunroof
blocks, pull the 3 switch in the
overhead control panel down to the point
of resistance and hold it until the sliding
sunroof is closed.
The sliding sunroof is closed without the
anti-entrapment feature.GWarning!
Pressing and holding the sliding sunroof
switch to close the sliding sunroof
immediately after it had been blocked two
times will cause the sliding sunroof to close
without the anti-entrapment feature for as
long as you hold the switch.
98Sliding sunroofOpening and closing
Page 109 of 524
iIf the battery voltage is too low, the seat
heating may switch off.
The system automatically switches down
from level 3 to level 2 after approximately
eight minutes.
The system automatically switches down
from level 2 to level 1 after approximately ten
minutes.
The system automatically switches off
approximately 20 minutes after it is set to
level 1.
XMake sure that the SmartKey is in position
2 in the ignition lock.
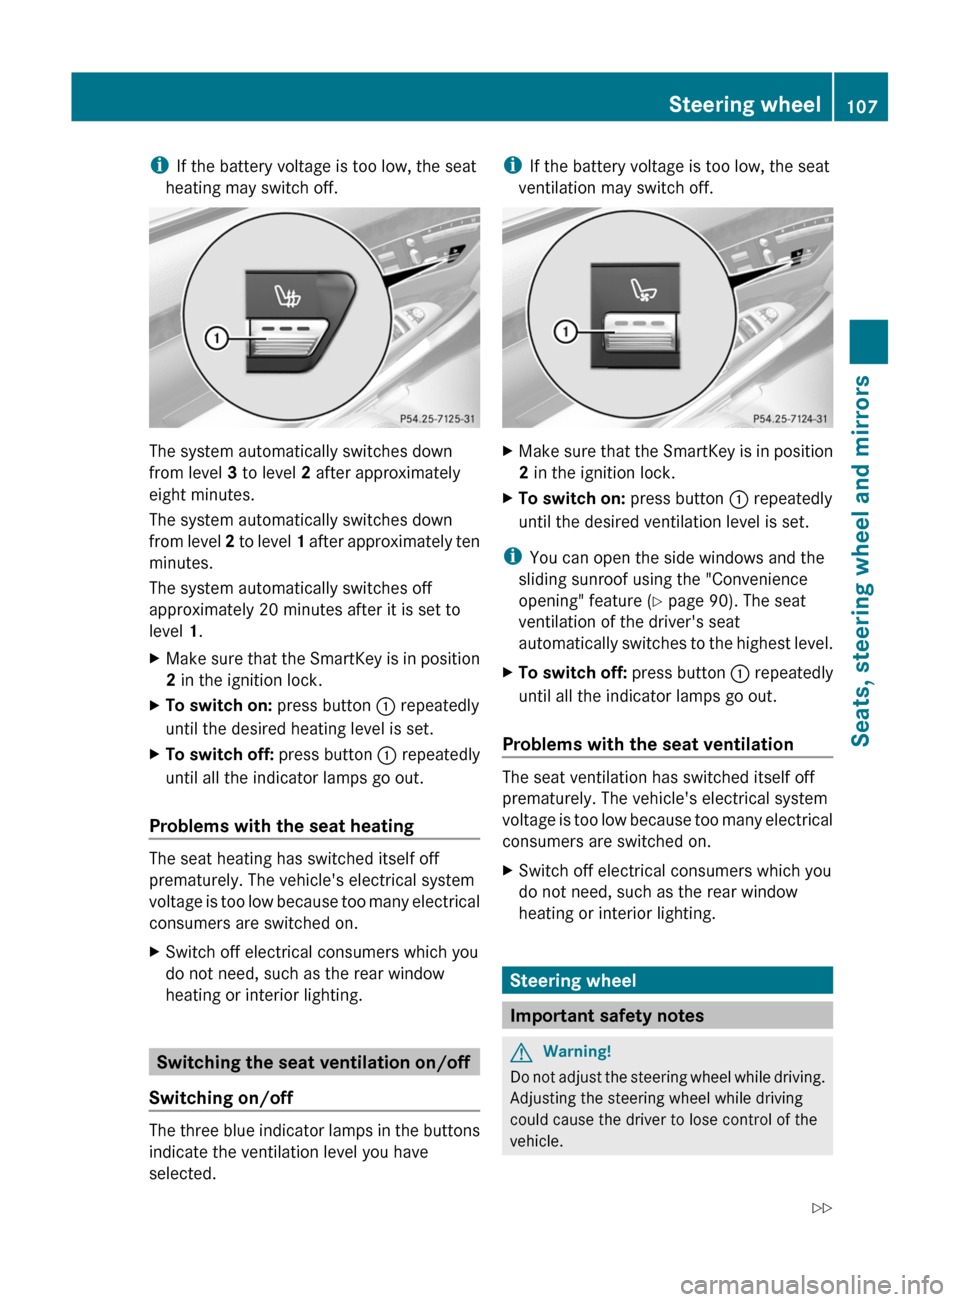
XTo switch on: press button : repeatedly
until the desired heating level is set.
XTo switch off: press button : repeatedly
until all the indicator lamps go out.
Problems with the seat heating
The seat heating has switched itself off
prematurely. The vehicle's electrical system
voltage is too low because too many electrical
consumers are switched on.
XSwitch off electrical consumers which you
do not need, such as the rear window
heating or interior lighting.
Switching the seat ventilation on/off
Switching on/off
The three blue indicator lamps in the buttons
indicate the ventilation level you have
selected.
iIf the battery voltage is too low, the seat
ventilation may switch off.
XMake sure that the SmartKey is in position
2 in the ignition lock.
XTo switch on: press button : repeatedly
until the desired ventilation level is set.
iYou can open the side windows and the
sliding sunroof using the "Convenience
opening" feature (Y page 90). The seat
ventilation of the driver's seat
automatically switches to the highest level.
XTo switch off: press button : repeatedly
until all the indicator lamps go out.
Problems with the seat ventilation
The seat ventilation has switched itself off
prematurely. The vehicle's electrical system
voltage is too low because too many electrical
consumers are switched on.
XSwitch off electrical consumers which you
do not need, such as the rear window
heating or interior lighting.
Steering wheel
Important safety notes
GWarning!
Do not adjust the steering wheel while driving.
Adjusting the steering wheel while driving
could cause the driver to lose control of the
vehicle.
Steering wheel107Seats, steering wheel and mirrorsZ
Page 288 of 524

Vehicle equipment
i This manual describes all the standard
and optional equipment of your vehicle
which was available at the time of
purchase. Country-specific differences are
possible. Bear in mind that your vehicle
may not feature all functions described
here. This also refers to safety-related
systems and functions.
Overview of climate control systems
Important safety notes
GWarning
Severe conditions (e.g. strong air pollution)
may require replacement of the filter before
its scheduled replacement interval. A clogged
filter will reduce the air volume to the interior
and the windows could fog up, impairing
visibility and endangering you and others.
Have a clogged filter replaced as soon as
possible at an authorized Mercedes-Benz
Center.
GWarning
Follow the recommended settings for heating
and cooling given on the following pages.
Otherwise, the windows could fog up,
impairing visibility and endangering you and
others.
Automatic climate control regulates the
temperature and the humidity in the vehicle
interior and filters undesirable substances
from the air.
Automatic climate control is only operational
when the engine is running 19
. Optimum
operation is only achieved when you drive
with the side windows and tilt/sliding
sunroof/panorama roof with power tilt/
sliding panel closed.
Some functions of automatic climate control
can also be set via COMAND ( Y page 261).
i
Ventilate the vehicle for a brief period
during warm weather, e.g. using the
convenience opening feature ( Y page 90).
This will speed up the cooling process and
the desired vehicle interior temperature
will be reached more quickly.
i The integrated filter can remove most
particles of dust and removes pollen
completely. A clogged filter reduces the
amount of air supplied to the vehicle
interior. For this reason, you should always
observe the interval for replacing the filter,
which is specified in the Service Booklet.
As it depends on environmental conditions,
e.g. heavy air pollution, the interval may be
shorter than stated in the Service Booklet.
i It is possible that the interior blower may
be activated automatically 40 minutes after
the SmartKey is removed. The vehicle is
then ventilated for 30 minutes to dry the
air-conditioning system.19 The "residual heat" function can only be switched on/off if the ignition is switched off.286Overview of climate control systemsClimate control
Page 295 of 524

This is the quickest way to cool the vehicle
interior when the sliding sunroof and the side
windows are closed.
Defrosting the windows
Windows fogged up on the inside
XActivate the "cooling with air
dehumidification" function via COMAND
( Y page 263).XActivate automatic mode Ã.XIf the windows continue to fog up, activate
the defrosting function ( Y page 292).
i
You should only select this setting until
the windshield is clear again.
Windows fogged up on the outside
XActivate the windshield wipers.XActivate automatic climate control.
i You should only select this setting until
the windshield is clear again.
Rear window defroster
Activating/deactivating
GWarning
Any accumulation of snow and ice should be
removed from the rear window before driving.
Visibility could otherwise be impaired,
endangering you and others.
The rear window heating has a high current
draw. You should therefore switch it off as
soon as the window is clear as it only switches
off automatically after several minutes.
If the battery voltage is too low, the rear
window heating may switch off.
XTurn the SmartKey to position 2 in the
ignition lock.XPress the ¤ rocker switch up or down.
The indicator lamp in the ¤ rocker
switch lights up or goes out.Problems with the rear window heating
The rear window heating has deactivated
itself prematurely or cannot be activated.
XSwitch off any consumers that are not
required, e.g. reading lamps or interior
lighting.
When the battery is sufficiently charged,
the rear window heating is activated again
automatically.
Activating/deactivating air-
recirculation mode
You can deactivate the flow of fresh air if
unpleasant odors are entering the vehicle
from outside. The air already inside the
vehicle will then be recirculated.
GWarning
Fogged windows impair visibility,
endangering you and others. If the windows
begin to fog on the inside, switching off the
air recirculation mode immediately should
clear interior window fogging. If interior
window fogging persists, make sure the air
conditioning is activated, or press the ¬
button.
XTurn the SmartKey to position 2 in the
ignition lock.XTo activate: press the g rocker switch
up or down.
The indicator lamp in the g rocker
switch lights up.
i Air-recirculation mode is activated
automatically at high outside
temperatures. The indicator lamp in the
g rocker switch is not lit when
automatic air-recirculation mode is
activated.
Outside air is added after about 30
minutes.
Operating the climate control systems293Climate controlZ
Page 429 of 524
Take into consideration that when the roof
rack is loaded, the handling characteristics
are different from those when operating the
vehicle without the roof rack loaded.
! Mercedes-Benz recommends that you
only use roof carriers that have been tested
and approved for Mercedes-Benz vehicles.
This helps to prevent damage to the
vehicle.
Position the load on the roof carrier in such
a way that the vehicle will not sustain
damage even when it is in motion.
Depending on the vehicle equipment,
ensure that when the roof carrier is
installed you can:
Rraise the sliding sunroof fully
Ropen the panorama roof with power tilt/
sliding panel fully
Ropen the trunk lid fully
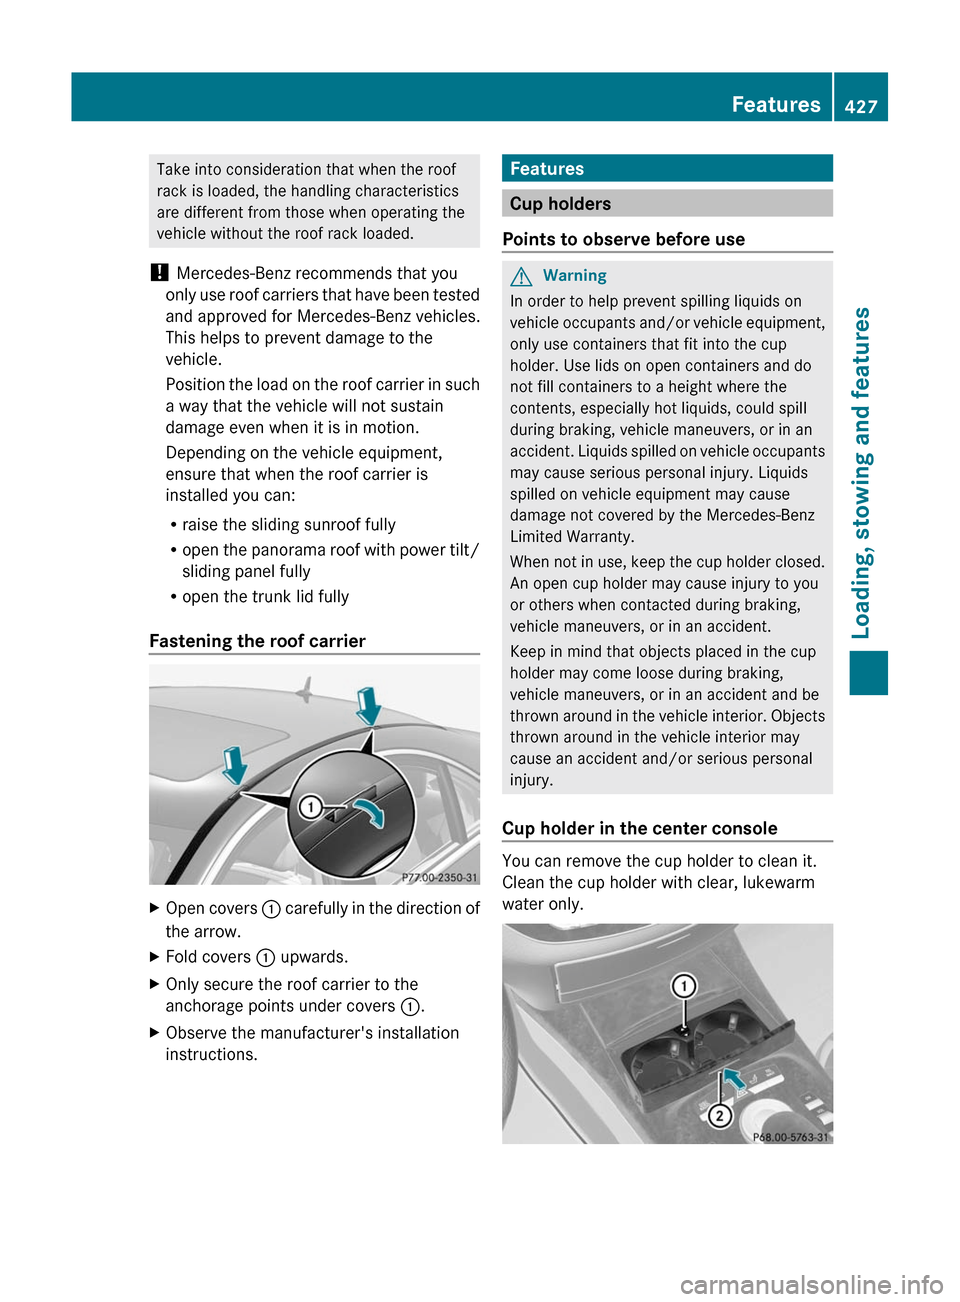
Fastening the roof carrier
XOpen covers : carefully in the direction of
the arrow.
XFold covers : upwards.XOnly secure the roof carrier to the
anchorage points under covers :.
XObserve the manufacturer's installation
instructions.Features
Cup holders
Points to observe before use
GWarning
In order to help prevent spilling liquids on
vehicle occupants and/or vehicle equipment,
only use containers that fit into the cup
holder. Use lids on open containers and do
not fill containers to a height where the
contents, especially hot liquids, could spill
during braking, vehicle maneuvers, or in an
accident. Liquids spilled on vehicle occupants
may cause serious personal injury. Liquids
spilled on vehicle equipment may cause
damage not covered by the Mercedes-Benz
Limited Warranty.
When not in use, keep the cup holder closed.
An open cup holder may cause injury to you
or others when contacted during braking,
vehicle maneuvers, or in an accident.
Keep in mind that objects placed in the cup
holder may come loose during braking,
vehicle maneuvers, or in an accident and be
thrown around in the vehicle interior. Objects
thrown around in the vehicle interior may
cause an accident and/or serious personal
injury.
Cup holder in the center console
You can remove the cup holder to clean it.
Clean the cup holder with clear, lukewarm
water only.
Features427Loading, stowing and featuresZ
Page 461 of 524
Cleaning results depend on the type of
dirt and how long it has been there.
R clean Alcantara® covers with a damp
cloth. Make sure you wipe entire seat
sections to avoid leaving visible lines.
i Note that regular care is essential to
ensure that the appearance and comfort of
the covers is retained over time.
Cleaning the seat beltsXUse clean, luke-warm water and soap
solution.
! Do not clean the seat belts using chemical
cleaning agents. Do not dry the seat belts
by warming them above 176 ‡ (80 †) or
placing them in direct sunlight.
GWarning
Do not bleach or dye seat belts as this may
severely weaken them. In a crash, they may
not be able to provide adequate protection.
Cleaning the roof lining and carpets
XRoof lining: use soft brushes or dry
shampoo if it is particularly dirty.XCarpets: use carpet and textile cleaners
that have been approved and
recommended by Mercedes-Benz.Care459Maintenance and careZ