2011 MERCEDES-BENZ S-Class Rear mirror
[x] Cancel search: Rear mirrorPage 113 of 524

The mirrors do not go into anti-glare mode if
reverse gear is engaged or the interior lighting
is switched on.
Parking position for the exterior
mirror on the front-passenger side
Setting and storing the parking position
You can position the front-passenger side
exterior mirror in such a way that you can see
the rear wheel on that side as soon as you
engage reverse gear. You can store this
position.
XMake sure that the vehicle is stationary and
that the SmartKey is in position 2 in the
ignition lock.
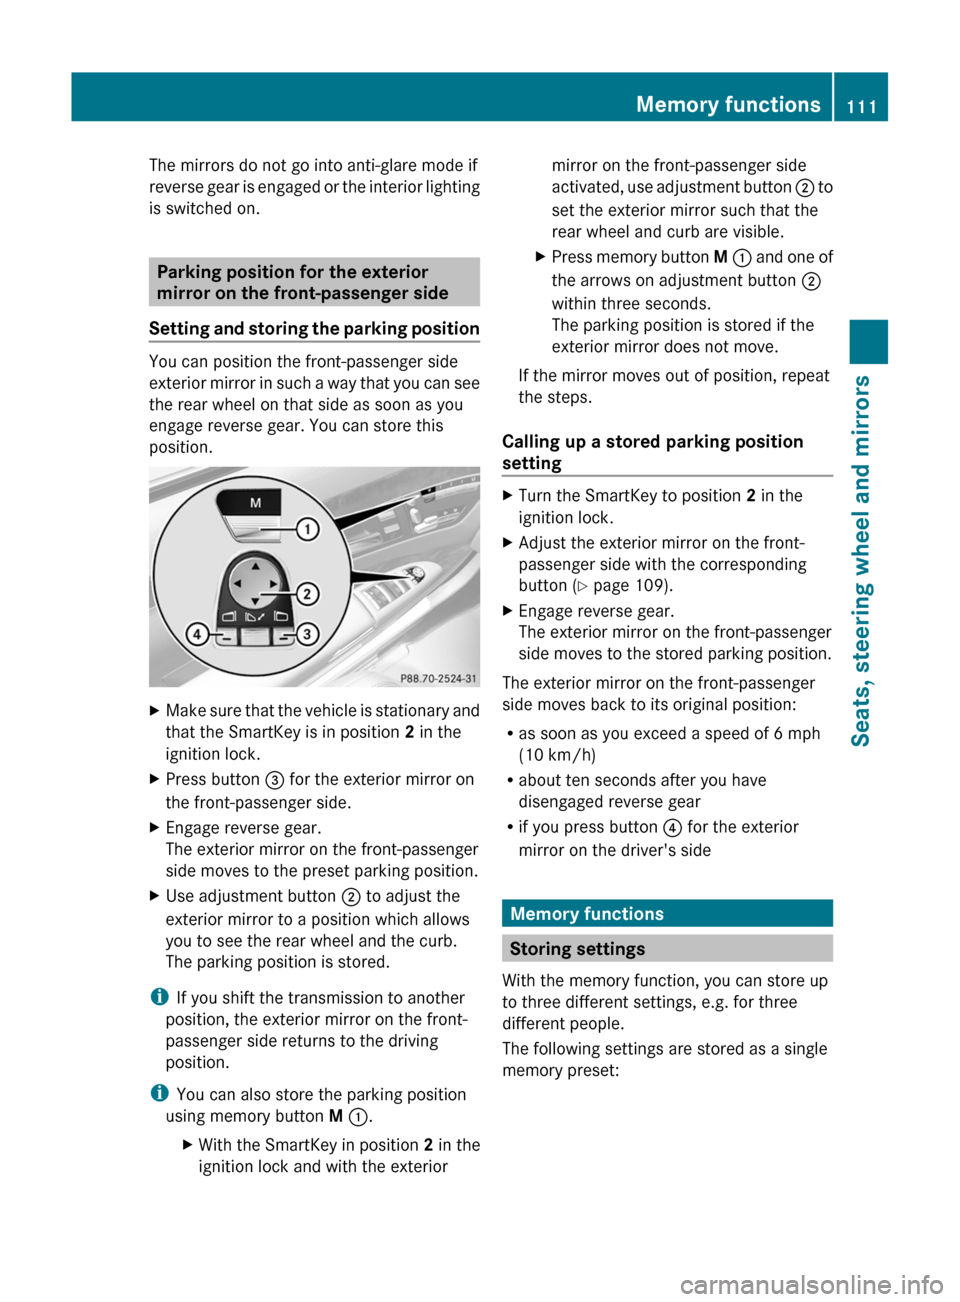
XPress button = for the exterior mirror on
the front-passenger side.
XEngage reverse gear.
The exterior mirror on the front-passenger
side moves to the preset parking position.
XUse adjustment button ; to adjust the
exterior mirror to a position which allows
you to see the rear wheel and the curb.
The parking position is stored.
iIf you shift the transmission to another
position, the exterior mirror on the front-
passenger side returns to the driving
position.
iYou can also store the parking position
using memory button M :.
XWith the SmartKey in position 2 in the
ignition lock and with the exterior
mirror on the front-passenger side
activated, use adjustment button ; to
set the exterior mirror such that the
rear wheel and curb are visible.
XPress memory button M : and one of
the arrows on adjustment button ;
within three seconds.
The parking position is stored if the
exterior mirror does not move.
If the mirror moves out of position, repeat
the steps.
Calling up a stored parking position
setting
XTurn the SmartKey to position 2 in the
ignition lock.
XAdjust the exterior mirror on the front-
passenger side with the corresponding
button (Y page 109).
XEngage reverse gear.
The exterior mirror on the front-passenger
side moves to the stored parking position.
The exterior mirror on the front-passenger
side moves back to its original position:
Ras soon as you exceed a speed of 6 mph
(10 km/h)
Rabout ten seconds after you have
disengaged reverse gear
Rif you press button ? for the exterior
mirror on the driver's side
Memory functions
Storing settings
With the memory function, you can store up
to three different settings, e.g. for three
different people.
The following settings are stored as a single
memory preset:
Memory functions111Seats, steering wheel and mirrorsZ
Page 122 of 524

NaviAudioTelephoneVideoVehicleModeFM/AM radioVideo DVDECOMap orientationSatRadioAUXMulticontour
seat/lumbar
settingsPoint of interest
symbols on the mapDiscVideo offRear window
blindRoad signs on the
mapMemory cardEASY-ENTRY/
EXIT systemText information on
mapMUSIC
REGISTERExterior
lighting
delayed
switch-off timeO Speed Limit AssistMedia
InterfaceInterior
lighting
delayed
switch-offO Topographical
mapUSBAmbient
lightingO City viewRearO Automatic
mirror fold-in
functionO Freeway
informationAUXO Locator
lightingO Audio fadeoutAudio offO Automatic
lockingSIRIUS serviceO Interior
motion sensorMap versionO Tow-away
protectionO Trunk lid
opening height
restrictionSPLITVIEW
SPLITVIEW allows the driver and front
passenger to use separate COMAND
functions at the same time. Depending on the
viewing angle of the display (from the driver's
seat or from the front passenger seat), you
will see two different displays.
For example, the "Navi" function can be
viewed from the driver's side while the video120At a glanceCOMAND
Page 259 of 524

Vehicle
Vehicle
General notes
In this menu, you can set the following vehicle
functions:
RECO
RMulticontour seat settings
RRear window blind
REASY-ENTRY/EXIT feature
RExterior lighting delayed switch-off time
RInterior lighting delayed switch-off
RAmbient lighting
RAutomatic folding mirror
RLocator lighting
RAutomatic locking feature
RTrunk lid opening height restriction
You can open the "Vehicle" menu in one of
two ways.
Opening the "Vehicle" menu from the
main area in the center of the display
:"Vehicle" menu item;Main areaXSelect Vehicle in the main function bar by
sliding XVY and turning cVd the
COMAND controller and press W to
confirm.
Main area ; is active.
XSelect the individual vehicle functions by
sliding XVY or turning cVd the COMAND
controller and press W to confirm.
Opening from the "Vehicle" menuXSelect Vehicle in the main function bar by
sliding XVY and turning cVd the
COMAND controller and press W to
confirm.
The "Vehicle" submenu opens.
XSelect the individual vehicle functions in
the menu by sliding XVY or turning cVd
the COMAND controller and press W to
confirm.
In the next section, it is the first procedure
that is always described.
Switching the ECO function on/off
The ECO start/stop function switches the
engine off automatically when the vehicle is
stopped under certain conditions. When
pulling away again, the engine starts
automatically (Y page 302). You can switch
the ECO start/stop function on and off using
COMAND.
If you switch the ECO start/stop function off
using COMAND, the function is switched on
again automatically when you switch the
ignition off and on again.
Vehicle257COMANDZ
Page 260 of 524

XTo switch the ECO start/stop function
on/off: select Vehicle in the main
function bar by sliding XVY and turning
cVd the COMAND controller and press
W to confirm.
The main area is active.
XSelect the ECO function by sliding XVY or
turning cVd the COMAND controller and
press W to confirm.
The ECO start/stop function is switched on
and off alternately.
Extending/retracting the rear window
blind
! Make sure that the rear window blind can
move freely. Otherwise, the blind or other
objects could be damaged.
iThe rear window blind is deactivated at
temperatures below -20 †.
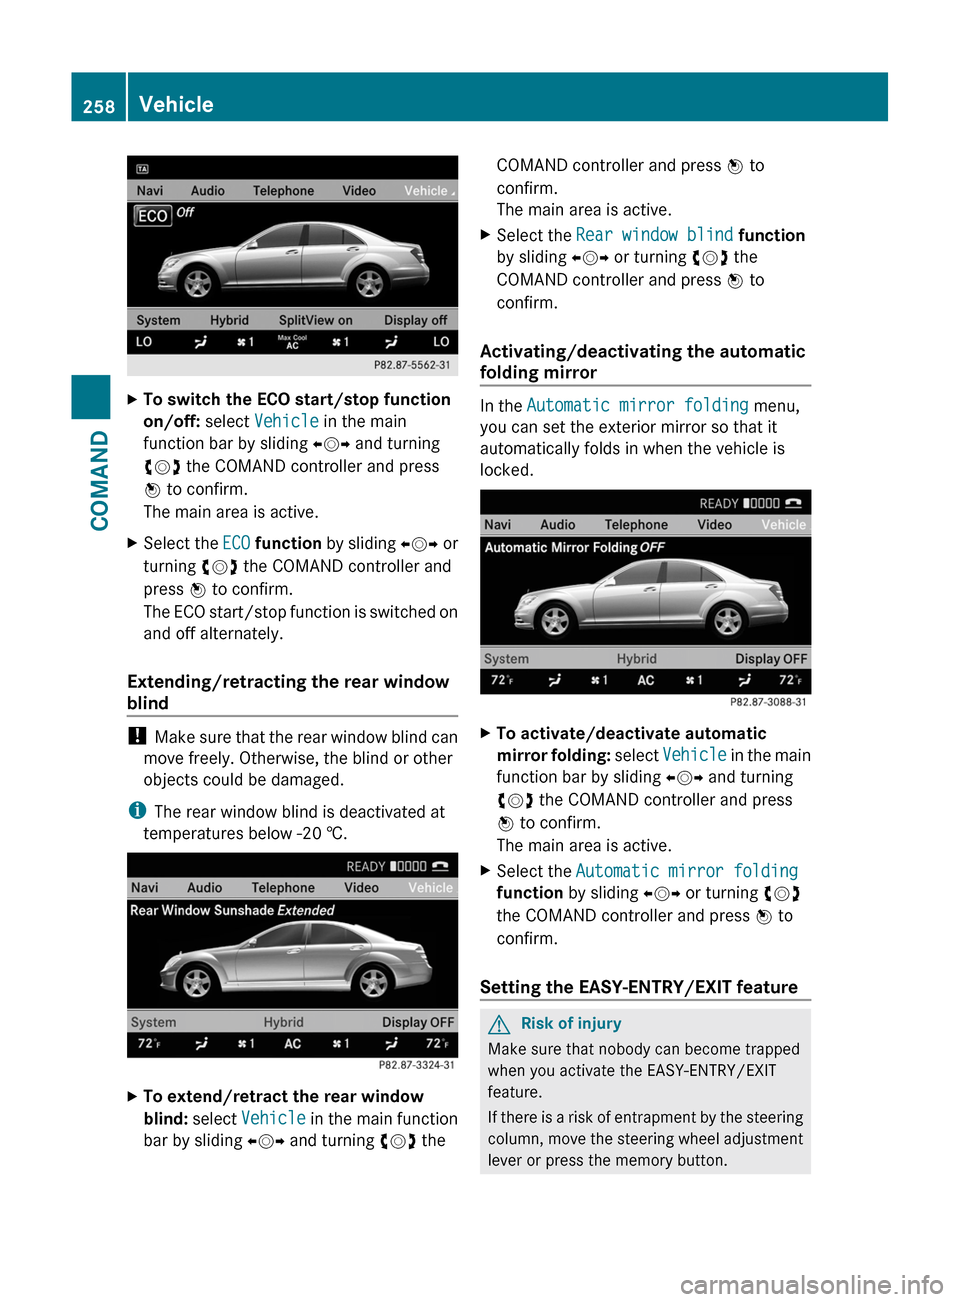
XTo extend/retract the rear window
blind: select Vehicle in the main function
bar by sliding XVY and turning cVd the
COMAND controller and press W to
confirm.
The main area is active.
XSelect the Rear window blind function
by sliding XVY or turning cVd the
COMAND controller and press W to
confirm.
Activating/deactivating the automatic
folding mirror
In the Automatic mirror folding menu,
you can set the exterior mirror so that it
automatically folds in when the vehicle is
locked.
XTo activate/deactivate automatic
mirror folding: select Vehicle in the main
function bar by sliding XVY and turning
cVd the COMAND controller and press
W to confirm.
The main area is active.
XSelect the Automatic mirror folding
function by sliding XVY or turning cVd
the COMAND controller and press W to
confirm.
Setting the EASY-ENTRY/EXIT feature
GRisk of injury
Make sure that nobody can become trapped
when you activate the EASY-ENTRY/EXIT
feature.
If there is a risk of entrapment by the steering
column, move the steering wheel adjustment
lever or press the memory button.
258VehicleCOMAND
Page 348 of 524

Canceling Parking GuidanceXPress the PARKTRONIC button on the
dashboard (Y page 341).
Parking Guidance is canceled immediately
and PARKTRONIC is deactivated.
Parking Guidance is canceled automatically if
it is no longer possible to guide you into the
parking space or if a malfunction occurs.
The parking space symbol disappears and the
Parking Guidance canceled message
appears in the multifunction display.
Rear view camera
Important safety guidelines
The rear view camera is an optical parking aid.
It shows the area behind your vehicle in the
COMAND display.
GWarning!
Make sure no persons or animals are in or
near the area in which you are parking/
maneuvering. Otherwise, they could be
injured.
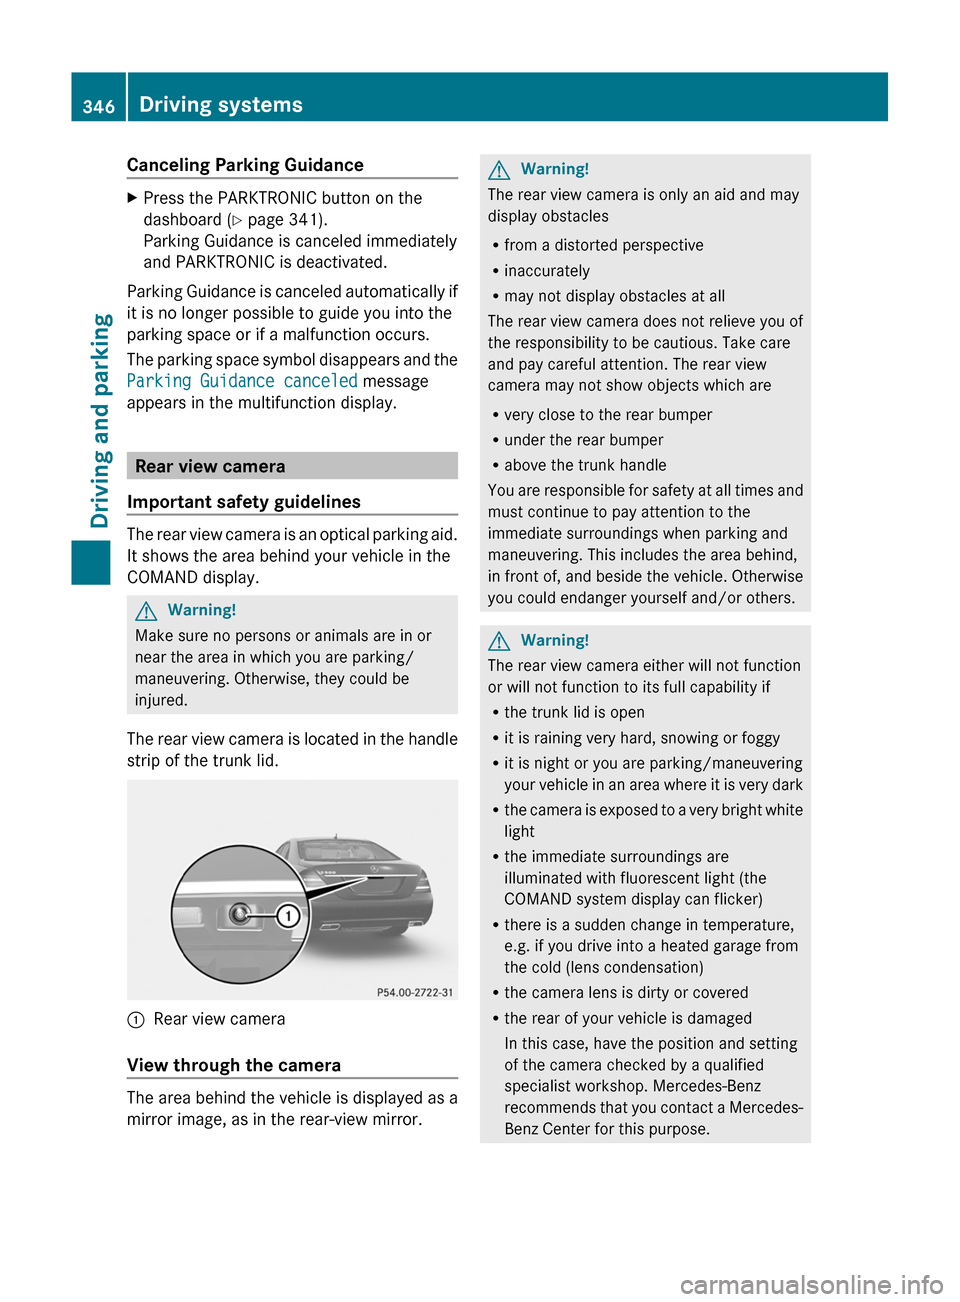
The rear view camera is located in the handle
strip of the trunk lid.
:Rear view camera
View through the camera
The area behind the vehicle is displayed as a
mirror image, as in the rear-view mirror.
GWarning!
The rear view camera is only an aid and may
display obstacles
Rfrom a distorted perspective
Rinaccurately
Rmay not display obstacles at all
The rear view camera does not relieve you of
the responsibility to be cautious. Take care
and pay careful attention. The rear view
camera may not show objects which are
Rvery close to the rear bumper
Runder the rear bumper
Rabove the trunk handle
You are responsible for safety at all times and
must continue to pay attention to the
immediate surroundings when parking and
maneuvering. This includes the area behind,
in front of, and beside the vehicle. Otherwise
you could endanger yourself and/or others.
GWarning!
The rear view camera either will not function
or will not function to its full capability if
Rthe trunk lid is open
Rit is raining very hard, snowing or foggy
Rit is night or you are parking/maneuvering
your vehicle in an area where it is very dark
Rthe camera is exposed to a very bright white
light
Rthe immediate surroundings are
illuminated with fluorescent light (the
COMAND system display can flicker)
Rthere is a sudden change in temperature,
e.g. if you drive into a heated garage from
the cold (lens condensation)
Rthe camera lens is dirty or covered
Rthe rear of your vehicle is damaged
In this case, have the position and setting
of the camera checked by a qualified
specialist workshop. Mercedes-Benz
recommends that you contact a Mercedes-
Benz Center for this purpose.
346Driving systemsDriving and parking
Page 354 of 524

Problems with Night View Assist PlusProblemPossible causes/consequences and M SolutionsThe picture quality of
Night View Assist Plus
has deteriorated.The windshield wipers are smearing the windshield.XReplace the wiper blades ( Y page 281).The windshield is smeared after the vehicle has been cleaned in a
car wash.XClean the windshield ( Y page 455).There is windshield chip damage in the camera's field of vision.XReplace the windshield.The windshield is fogged up on the inside.XDefrost the windshield ( Y page 293).The windshield is iced up.XDe-ice the windshield ( Y page 292).There is dirt on the inside of the windshield.XClean the inside of the windshield ( Y page 455).Driving Assistance package
General information
i The Driving Assistance package is only
available on vehicles with HYBRID.
The Driving Assistance package consists of
DISTRONIC PLUS ( Y page 325), Blind Spot
Assist ( Y page 352) and Lane Keeping Assist
( Y page 354).
Blind Spot Assist
Important safety guidelines
Blind Spot Assist uses a radar sensor system
to monitor the areas on both sides of your
vehicle. Blind Spot Assist provides assistance
at speeds higher than 20 mph (30 km/h). A
warning display in the exterior mirrors draws
your attention to vehicles in the monitored
area. If you then indicate a turn towards that
side before changing lanes, you will also
receive visual and audible collision warnings.
For this purpose, Blind Spot Assist uses
sensors in the rear bumper.GWarning
Blind Spot Assist is only an aid designed to
assist driving. It may fail to detect some
vehicles and is no substitute for attentive
driving.
Blind Spot Assist cannot detect road and
traffic conditions. It may fail to detect narrow
vehicles, such as motorcycles or bicycles, or
may only detect them too late.
Monitoring may be affected by dirty sensors,
strong spray or poor visibility caused by snow,
rain or mist, for example. In this case, vehicles
are detected late or not at all.
Always pay attention to traffic conditions and
your surroundings. Otherwise, you may fail to
recognize dangers in time, cause an accident
and injure yourself and others.
i USA only:
352Driving systemsDriving and parking
Page 358 of 524

Active Blind Spot Assist (Y page 356) and
Active Lane Keeping Assist ( Y page 359).
Active Blind Spot Assist
Important safety notes
Active Blind Spot Assist uses a radar sensor
system to monitor the side areas of your
vehicle. In addition, it uses the radar sensor
system to monitor the front area as well.
Active Blind Spot Assist is active at speeds
above approximately 20 mph (30 km/h). A
warning lamp in the exterior mirrors calls your
attention to a vehicle or certain obstacles in
the area monitored. If you switch on the
corresponding turn signal before changing
lane, you will also receive visual and audible
collision warnings. If a risk of lateral collision
is detected, corrective braking may help you
avoid a collision.
GWarning
Active Blind Spot Assist is only an aid, and
may detect vehicles/obstacles incorrectly or
not at all.
The system may be impaired or may not
function if:
R there is poor visibility, e.g. due to snow,
rain, fog or spray.
R the rear and/or front sensors are dirty.
Active Blind Spot Assist may not detect
narrow vehicles, such as motorcycles or
bicycles, or only detect them too late. It
cannot detect vehicles that are overtaken at
a small distance and then enter the blind spot
area.
Active Blind Spot Assist cannot detect road
and traffic conditions. It is not a substitute for
attentive driving. You are responsible for the
vehicle's speed, braking in good time, and
steering correctly. Always adapt your driving
style to suit the prevailing road and weather
conditions. Always pay attention to traffic
conditions and your surroundings. Otherwise,
you may fail to recognize dangers in time,
cause an accident and injure yourself and
others.
i USA only:
This device has been approved by the FCC
as a “Vehicular Radar System”. The radar
sensor is intended for use in an automotive
radar system only. Removal, tampering, or
altering of the device will void any
warranties, and is not permitted by the
FCC. Do not tamper with, alter, or use in
any non-approved way.
Any unauthorized modification to this
device could void the user’s authority to
operate the equipment.
For Active Blind Spot Assist to assist you
when driving, the radar sensor system must
be activated ( Y page 378) and operational.
Monitoring range
Active Blind Spot Assist monitors the area up
to 10 ft (3 m) behind your vehicle and directly
next to your vehicle as shown in the diagram.
For this purpose, Active Blind Spot Assist
uses sensors in the rear bumper.GWarning
Active Blind Spot Assist monitors certain
areas in the immediate vicinity of your vehicle.
Vehicles that approach and drive past at high
speeds are not detected. No visual nor
audible warnings are emitted and the system
does not brake the vehicle to correct your
course.
356Driving systemsDriving and parking
Page 359 of 524

If the lanes are very wide, it may not be
possible to monitor the complete width of the
neighboring lane. For this reason, vehicles in
the next lane may not be detected, especially
if they are driving in a staggered formation.
This may be the case if vehicles are driving at
the edge of their lane that is furthest away
from your vehicle.
Always pay attention to traffic conditions and
your surroundings. Otherwise, you may fail to
recognize dangers in time, cause an accident
and injure yourself and others.
If the lanes are narrow, the system may be
unable to distinguish the neighboring lane
from the one beyond it. For this reason,
vehicles in the farther lane may be indicated,
especially if the vehicles are driving in a
staggered formation in different lanes. In
particular, this may be the case if the vehicles
are driving at the edge of their lane nearest
your vehicle. Due to the nature of the system,
warnings may be issued in error when driving
close to crash barriers or similar solid lane
borders.
Two Active Blind Spot Assist sensors are
integrated into the front and rear bumpers
respectively. An additional sensor is located
behind the cover in the radiator grill. Make
sure that the bumpers are free from dirt, ice
or slush around the sensors. The rear radar
sensors must not be covered, for example by
bicycle racks or overhanging loads. Following
a severe impact or in the event of damage to
the bumpers, have the function of the radar
sensors checked at a qualified specialist
workshop, e.g. an authorized Mercedes-Benz
Center. Active Blind Spot Assist may
otherwise fail to work correctly.
Information and warning display:Yellow indicator lamp/red warning lamp
When Active Blind Spot Assist is activated,
indicator lamp : in the exterior mirrors lights
up in yellow at speeds of up to 20 mph
(30 km/h). At speeds above 20 mph
(30 km/h), the indicator lamp goes out and
Active Blind Spot Assist is operational.
If a vehicle is detected within the monitoring
range of Blind Spot Assist at speeds above
(30 km/h), warning lamp : on the
corresponding side lights up in red. This
warning is always emitted when a vehicle
enters the blind spot monitoring range from
behind or from the side. When you overtake
a vehicle, the warning only occurs if the
difference in speed is less than 7 mph
(12 km/h).
The yellow indicator lamp goes out if reverse
gear is engaged. Active Blind Spot Assist is
then no longer active.
The brightness of the indicator/warning
lamps is adjusted automatically according to
the ambient light.
GWarning
Active Blind Spot Assist is not active at speeds
lower than 20 mph (30 km/h). The indicator
lamps in the exterior mirrors are yellow.
Vehicles in the monitoring range are then not
indicated.
Always pay attention to traffic conditions and
your surroundings. Otherwise, you may fail to
recognize dangers in time, cause an accident
and injure yourself and others.
Driving systems357Driving and parkingZ