2011 MERCEDES-BENZ M-CLASS SUV change time
[x] Cancel search: change timePage 250 of 389
![MERCEDES-BENZ M-CLASS SUV 2011 Owners Manual X
Press :or9 to select the Perma‐ nent display function.
You will see the selected setting: outsidetemperat
ure or
Dig. speedo m[mph] .
X Press the abuttontos ave the setting.
Lights Switching the d MERCEDES-BENZ M-CLASS SUV 2011 Owners Manual X
Press :or9 to select the Perma‐ nent display function.
You will see the selected setting: outsidetemperat
ure or
Dig. speedo m[mph] .
X Press the abuttontos ave the setting.
Lights Switching the d](/manual-img/4/55578/w960_55578-249.png)
X
Press :or9 to select the Perma‐ nent display function.
You will see the selected setting: outsidetemperat
ure or
Dig. speedo m[mph] .
X Press the abuttontos ave the setting.
Lights Switching the day
time drivin glights on/
off
If you have activated the Daytime driving
lights function and the light switch is set to
Ã,t he daytim edriving lights are automat-
icall yswitched on during daylight hours when
the engine is running. When it is dark, the side
lamps and the dipped-beam headlamps are
also switched on automatically.
X Switc hoff th eengine.
X Pres sthe = or; button on the steer-
ing wheel to selec tthe Settings menu.
X Press the :or9 button to selec tthe
Light submenu.
X Press the abutton to con firm.
X Press the :or9 buttontos elect the
Daytim edriving lights function.
Yo uw ill see the selected setting: on or
off .
X Press the abutton to save the setting.
Switching the Intelligent Light System
on/off
If you activat ethe Intell .Light Sys‐ tem: function
,you activa te thefollowing
func tions:
R motorwa ymode
R active light func tion
R cornering light func tion
R exte nded range foglamps
X Press the =or; button on the steer-
ing wheel to select the Settings menu.
X Press the :or9 button to select the
Light submenu.
X Press the abutton to confirm. X
Press :or9 to select the Intell. Ligh
tSys. function.
Yo uw ill see the selected setting: on or
off .
X Press the abutton to save the setting.
If you set the dipped-bea mheadlamps for
driving on the right/left (Y page 247),the
multifunction displa yshows the Intell. Ligh
tSystem: System inoperative Inactiv
efor left-side traffic or
Intell. Light System: System inoper‐
ative Inactiv
efor right-side traf‐ fic displa
ymessage instead of the Intell. Ligh
tSystem: functio
nintheLight sub-
menu.
Setting th edipped-bea mheadlamp sfor
driving on the left/right
This function is only available on vehicles with
the Intelligent Light System.
You can use this function to switch between
symmetrical beam and asymmetrical dipped
beam (Y page 106).
If you set the dipped-beam headlamps for
driving on the right/left, then motorway
mode and the extended range foglamps are
not available.
X Press the =or; button on the steer-
ing wheel to select the Settings menu.
X Press the :or9 buttontos elect the
Light submenu.
X Press the abutton to confirm.
X Press :or9 to select the Dipped beam
sSetting for function.
Yo uw ill see the selected setting: Right- side traffic or
Left-s idet raffic .
X Press the abuttontos ave the setting.
When you change the setting, conversion
does not take place until the nex ttime the
vehicle is stationary.
You can also have the dipped-beam head-
lamps set for drivin gonthe right or lef tata
qualified specialist workshop. Menus and submenus
247On-board comp uter and displays Z
Page 253 of 389

The following system
sare switche doff when
th er adar senso rsystem is deactivated:
R DISTRONIC PLUS (Y page 174)
R BAS PLUS (Y page 62)
R PRE-SAFE ®
Brake (Y page 66)
R Blind Spot Assist (Y page 208)
R Active Blind Spot Assist (Y page 212)
X Press the =or; button on the steer-
ing whee ltoselect the Settings menu.
X Press the :or9 button to select the
Vehicle submenu.
X Press the abutton to confirm.
X Press the 9or: button to select
Rada rsensor (See Owner's Man.): .
Yo uw ill see the selected setting: on or
off .
X Press the abutton to save the setting.
Heating menu Auxiliary heating depa
rtur et ime
This function is only availa bleo nvehicles with
auxiliar yheatin g(Ypage 130).
In the Heating submenu, you can select a
stored departure tim eorchange adeparture
time.
The auxiliar yheatin gtimer func tion calcu-
lates the switch-on tim eaccording to the out-
sid etemperature so that the vehicle is pre-
heated by the departure time. When the
departure tim eisreached, the auxiliar yheat-
ing continues to heat for afurther five
minutes and then switches off. The auxiliary
heating adopts the THERMATI Cor
THERMOTRONI Ctemperature setting.
You can switc hoff th eauxiliary heating by
using the remote control or the auxiliary heat-
ing button on the centre console. G
WARNING
Exhaust fumes are produced when the auxili-
ary heating is in operation. Inhaling these
exhaust fumes can be poisonous. You should
therefore switch off the auxiliary heating in confined spaces without an extraction sys-
tem, e.g.
agarage. G
WARNING
When operating the auxiliary heating parts of
the vehicle can get very hot. Make sure that
the exhaust system does not under any cir-
cumstances come into contact with easily
ignitable material such as dry grass or fuels.
The material could otherwise ignite and set
the vehicle alight. Choos eyour parkin gspot
accordingly.
Operating the auxiliary heating is thus pro-
hibited at fillin gstations or when your vehicle
is being refuelled .You must therefore switch
off the auxiliar yheatin gatf illing stations.
! Operating the auxiliary heating/ventila-
tion draws on the vehicle battery. After you
have heated or ventilated the vehicle a
maximum of two times, drive for alonger
distan ce.
i Switch the auxiliary heating on regularly
once amonthfor about 10 minutes.
Selecting th edepartur etime or deactivat-
ing aselected depa rtur et ime
X Press the =or; button on the steer-
ing wheel to select the Settings menu.
X Press the :or9 button to select the
Heating submenu.
X Press the abutton to confirm.
You will see the selected setting.
X Press the abutton to confirm.
X Press the :or9 button to select
one of the three departur etimes or Timer off (no timer active).
X Press the abutton to confirm.
When adeparture tim eisselected, the yel-
low indicator lam plights up on the auxiliary
heating button. 250
Menus and submenusOn-board computer and displays
Page 254 of 389

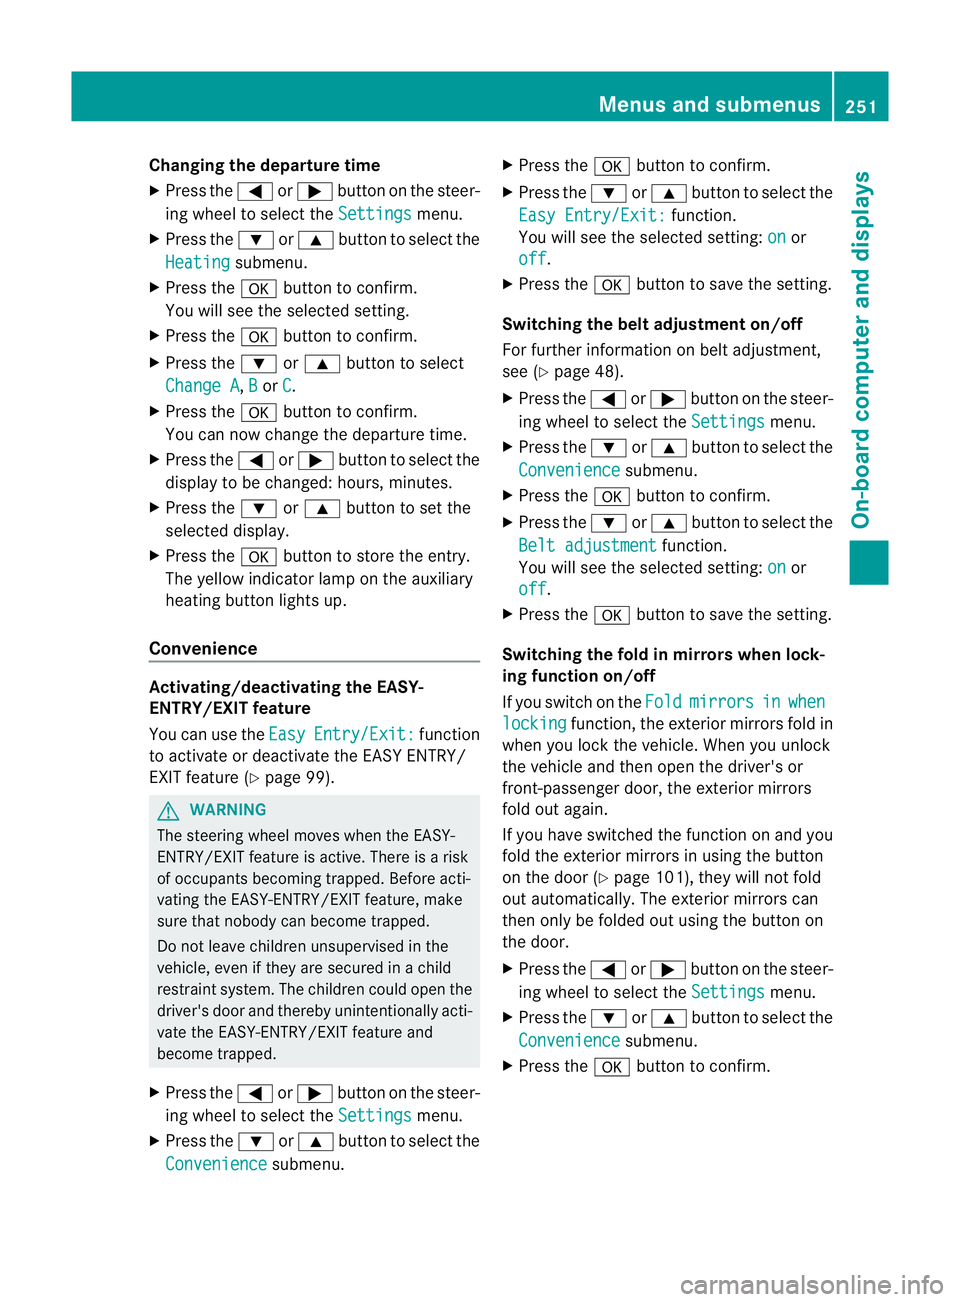
Changing th
edeparture time
X Pres sthe = or; button on th esteer-
ing wheel to selec tthe Settings menu.
X Press the :or9 button to selec tthe
Heating submenu.
X Press the abutton to confir m.
You will see the selected setting.
X Press the abutton to confirm.
X Press the :or9 button to select
Change A ,
B or
C .
X Press the abutton to confirm.
You can now change the departur etime.
X Press the =or; button to select the
displa ytobec hanged: hours, minutes.
X Press the :or9 button to set the
selected display.
X Press the abutton to stor ethe ent ry.
The yellow indicator lam ponthe auxiliary
heating button lights up.
Convenience Activating/deactivating th
eEASY-
ENTRY/EXIT featu re
You can use the Easy Entry/Exit: func
tion
to activate or deactivate the EAS YENTRY/
EXIT feature (Y page 99). G
WARNING
Th es teering whee lmoves when the EASY-
ENTRY/EXI Tfeatur eisa ctive. There is arisk
of occupant sbecoming trapped. Before acti-
vating the EASY-ENTRY/EXI Tfeature, make
sure that nobody can becom etrapped.
Do not leave children unsupervised in the
vehicle, eve nifthey ar esecured in achild
restraint system .The children coul dopen the
driver' sdoor and thereby unintentionally acti-
vat ethe EASY-ENTRY/EXI Tfeatur eand
become trapped.
X Pres sthe = or; button on the steer-
ing wheel to selec tthe Settings menu.
X Press the :or9 button to selec tthe
Convenience submenu.X
Press the abutton to confir m.
X Press the :or9 button to select the
Easy Entry/Exit: function.
You will see the selected setting: on or
off .
X Press the abutton to save the setting.
Switching th ebelt adjustment on/off
For further information on belt adjustment,
see (Y page 48).
X Press the =or; button on the steer-
ing wheel to select the Settings menu.
X Press the :or9 button to select the
Convenience submenu.
X Press the abutton to confir m.
X Press the :or9 button to select the
Belt adjustment function.
You will see the selected setting: on or
off .
X Press the abutton to save the setting.
Switching th efold in mirrors when lock-
ing function on/off
If you switch on the Fold mirrors in when
locking func
tion, the exterior mirror sfold in
when you lock the vehicle. When you unlock
the vehicle and then open the driver's or
front-passenger door, the exterior mirrors
fold out again.
If you have switched the func tion on and you
fold the exterior mirror sinusing the button
on the door (Y page 101), they will not fold
out automatically. The exterior mirrors can
then only be folded out usin gthe button on
the door.
X Press the =or; button on the steer-
ing wheel to selec tthe Settings menu.
X Press the :or9 button to selec tthe
Convenience submenu.
X Press the abutton to confir m. Menus and submenus
251On-boardcomputer and display s Z
Page 267 of 389

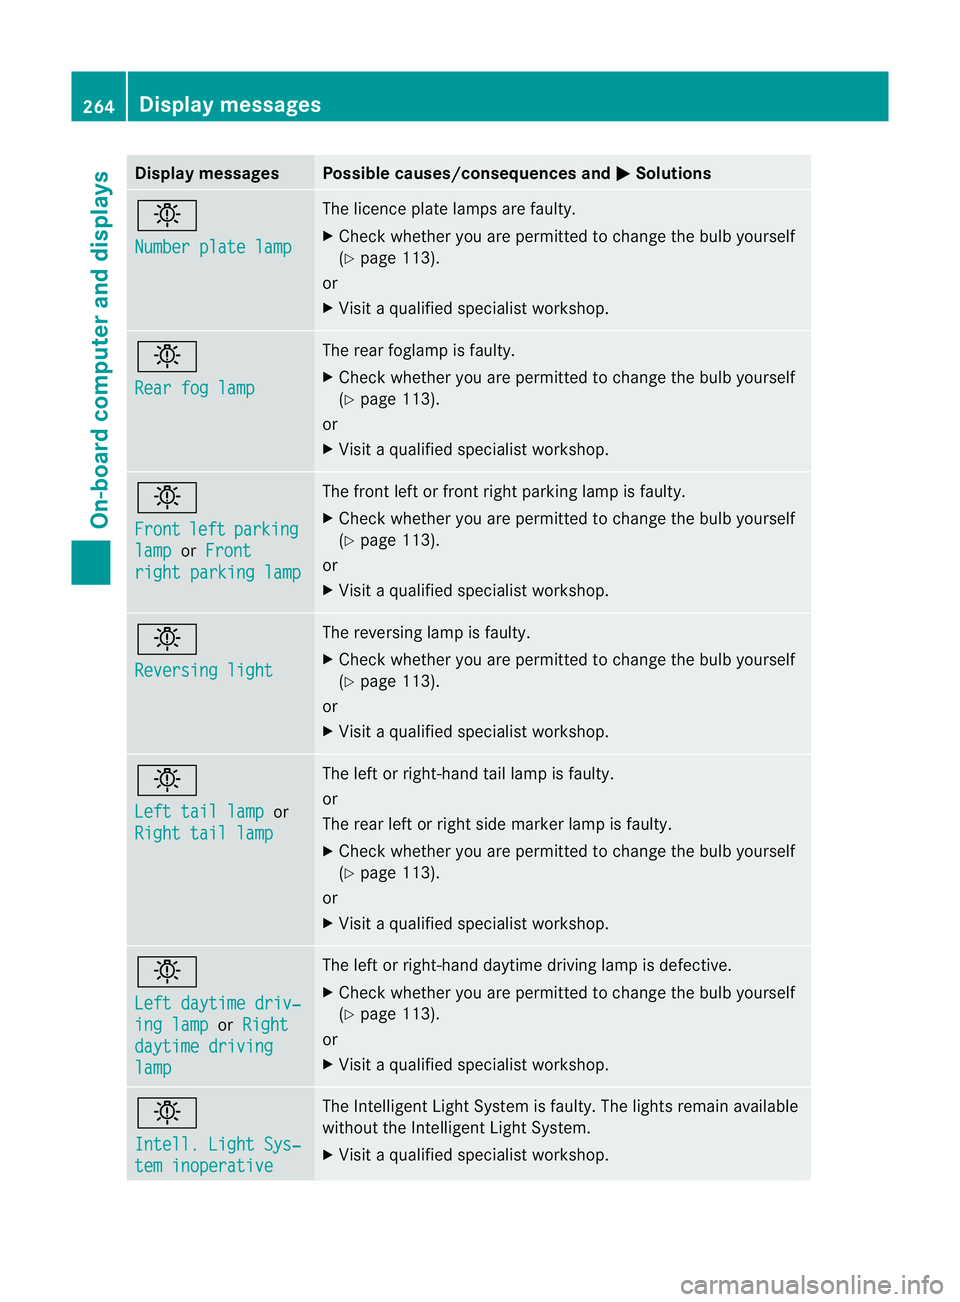
Displa
ymessages Possible causes/consequences and
M Solutions
b
Nu
mber plate lamp Th
elicence plat elamp sare faul ty.
X Chec kwhether you ar epermitted to change the bulb yourself
(Y page 113).
or
X Visit aqualified specialist workshop. b
Rear fo
glamp Th
er ear foglam pisfaulty.
X Check whethe ryou ar epermitted to change the bulb yourself
(Y page 113).
or
X Visit aqualified specialist workshop. b
Front
left parking
lamp or
Front righ
tparking lamp Th
ef ront left or fron tright parkin glamp is faulty.
X Check whethe ryou ar epermitted to change the bulb yourself
(Y page 113).
or
X Visit aqualified specialist workshop. b
Reversin
glight Th
er eversing lam pisfaulty.
X Check whethe ryou ar epermitted to change the bulb yourself
(Y page 113).
or
X Visit aqualified specialist workshop. b
Left tail lamp
or
Righ ttail lamp Th
eleft or right-hand tail lam pisfaulty.
or
The rear left or right side marker lamp is faulty.
X Check whethe ryou ar epermitted to change the bulb yourself
(Y page 113).
or
X Visit aqualified specialist workshop. b
Left daytim
edriv‐ ing lamp or
Right daytime driving
lamp Th
eleft or right-hand daytime driving lam pisdefective.
X Check whether you are permitted to change the bulb yourself
(Y page 113).
or
X Visit aqualified specialist workshop. b
Intell
.Light Sys‐ tem inoperative Th
eI ntelligent Light Syste misfaulty. The lights remain available
without the Intelligent Light System.
X Visit aqualified specialist workshop. 264
Display messagesOn-board computer and displays
Page 299 of 389

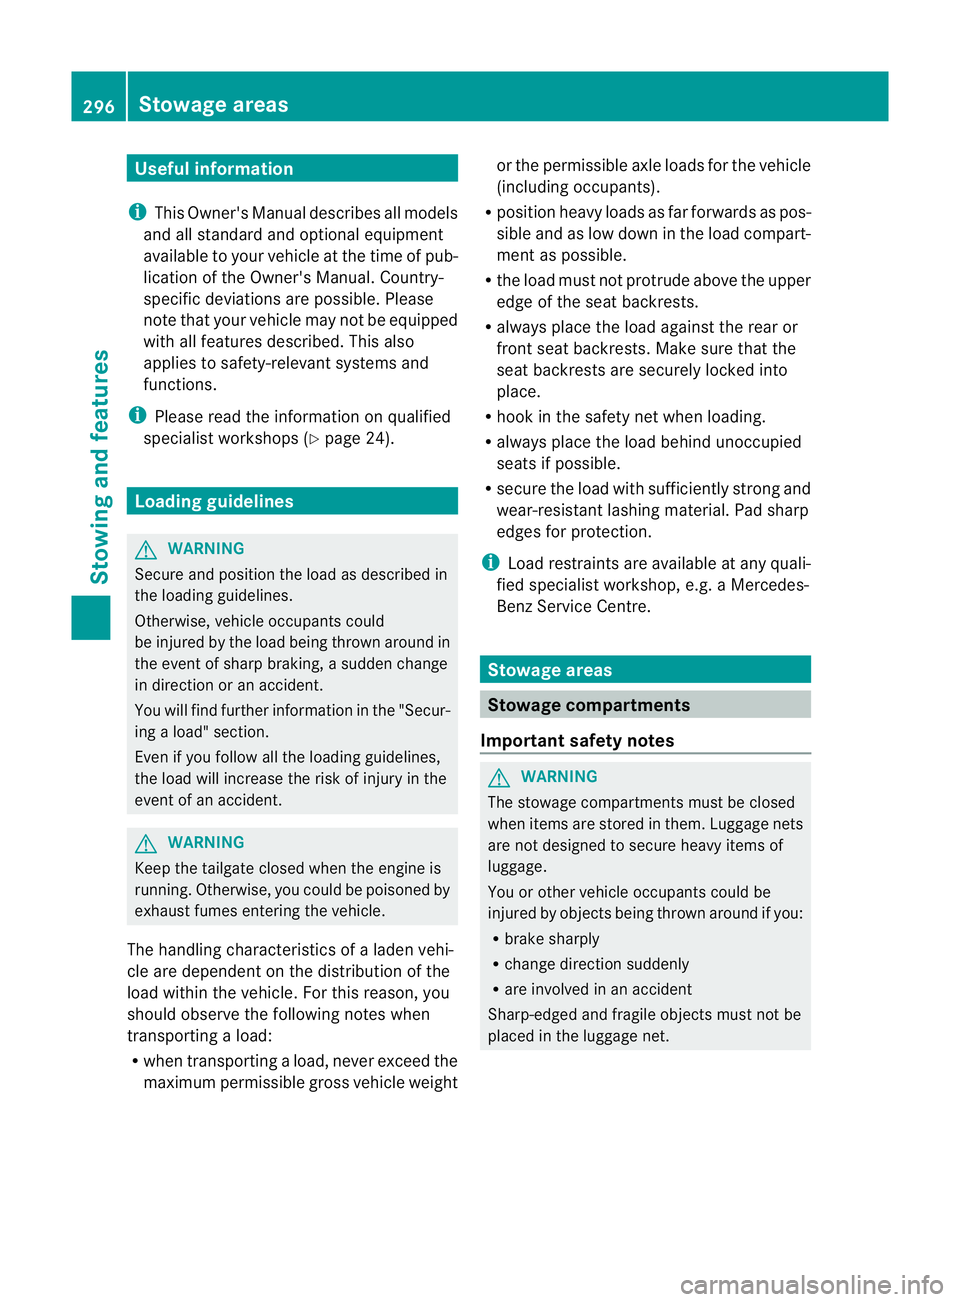
Usefu
linfor mati on
i This Owner's Manual describes all models
and all standard and optional equipment
available to your vehicle at the time of pub-
lication of the Owner's Manual. Country-
specific deviation sare possible .Please
not ethat your vehicle ma ynot be equipped
with all featur es described. This also
applies to safety-releva ntsystems and
functions.
i Please read the information on qualified
specialist workshops (Y page 24).Loading guidelines
G
WARNING
Secur eand position the load as described in
the loading guidelines.
Otherwise, vehicl eoccupan tscould
be injured by the loa dbeingthrown around in
th ee vent of sharp braking ,asudden change
in directio noranaccident.
You wil lfind further information in the "Secur-
ing aload" section.
Even if you follow all the loadin gguidelines,
the load will increase the risk of injury in the
event of an accident. G
WARNING
Keep the tailgate closed when the engine is
running. Otherwise, you could be poisoned by
exhaust fumes enterin gthe vehicle.
The handling characteristics of aladen vehi-
cle are dependent on the distribution of the
load within the vehicle. For this reason, you
should observe the following notes when
transporting aload:
R when transpor ting aload, never exceed the
maximum permissible gross vehicle weight or the permissible axle loads for the vehicle
(includin goccupants).
R position heavy loads as far forward saspos-
sible and as low down in the load compart-
men tasp ossible.
R the load must not protrude abov ethe upper
edge of the seat backrests.
R always plac ethe load against the rea ror
front seat backrests .Make sure that the
seat backrests are securely locked into
place.
R hook in the safety net when loading.
R always place the load behind unoccupied
seats if possible.
R secure the load with sufficiently stron gand
wear-resistant lashing material. Pad sharp
edges for protection.
i Load restraints are available at any quali-
fied specialis tworkshop, e.g. aMercedes-
Benz Servic eCentre. Stowage areas
Stowage compartments
Important safety notes G
WARNING
The stowage compartments must be closed
when item sare store dinthem. Luggage nets
ar en ot designed to secur eheavy item sof
luggage.
You or other vehicle occupant scould be
injure dbyo bjectsbeing thrown around if you:
R brak esharply
R change direction suddenly
R arei nvolved in an accident
Sharp-edge dand fragile object smust not be
placed in the luggag enet. 296
Stowage areasStowing and features
Page 342 of 389

the whee
lthat is diagona llyo pposite the
wheel you wish to change. Securing the vehicle on slight downhil
lgradients
X On downhill gradients: place chocks or
othe rsuitabl eitems in front of the wheels
of the front and rear axle.
Raisin gthe vehicle G
WARNING
Th ejack is intended only for lifting the vehicle
briefly for wheel changes.
The vehicle must be placed on stands if you
intend to work under it.
Make sure that the jack is placed on afirm,
non-slip, level surface. Do not use wooden
blocks or similar objects as ajack underlay.
The vehicle could otherwise slip off the jack
and seriousl yinjure you.
Do not start the engine at any time whil ethe
wheel is being changed.
Do not lie unde rthe vehicle when it is being
supported by the jack. If you do not raise the
vehicle as described, it coul dslip off the jack
(e.g. if the engine is started or adoor or the
tailgate is opened or closed) and seriously
injure you. G
WARNING
If you fai ltoposition the jac kcorrectly, the
vehicle may:
R slip off the jack
R injure you or others
R be damaged. Therefore, mak
esure that the jack is posi-
tioned correctly in the respective jacking
points. Before positioning the jack, remove
any dirt that may have collected in the jacking
points. Pleas enote that you must position the
jac kint he openin gofthe jackin gpoint. X
Usin gwheel wrench :,loosen the bolts on
the wheel you wish to change by about one
full turn. Do not unscrew th ebolts com-
pletely.
The jacking points are locate djustb ehind the
fron twheel arches and just in front of the rear
wheel arches (arrows). X
Take the ratchet ring spanner out of the
vehicle tool kit and plac eitont he hexagon
nut of the jac ksothat the letters AUFare
visible. Flat ty
re
339Breakd ownassistance Z
Page 363 of 389

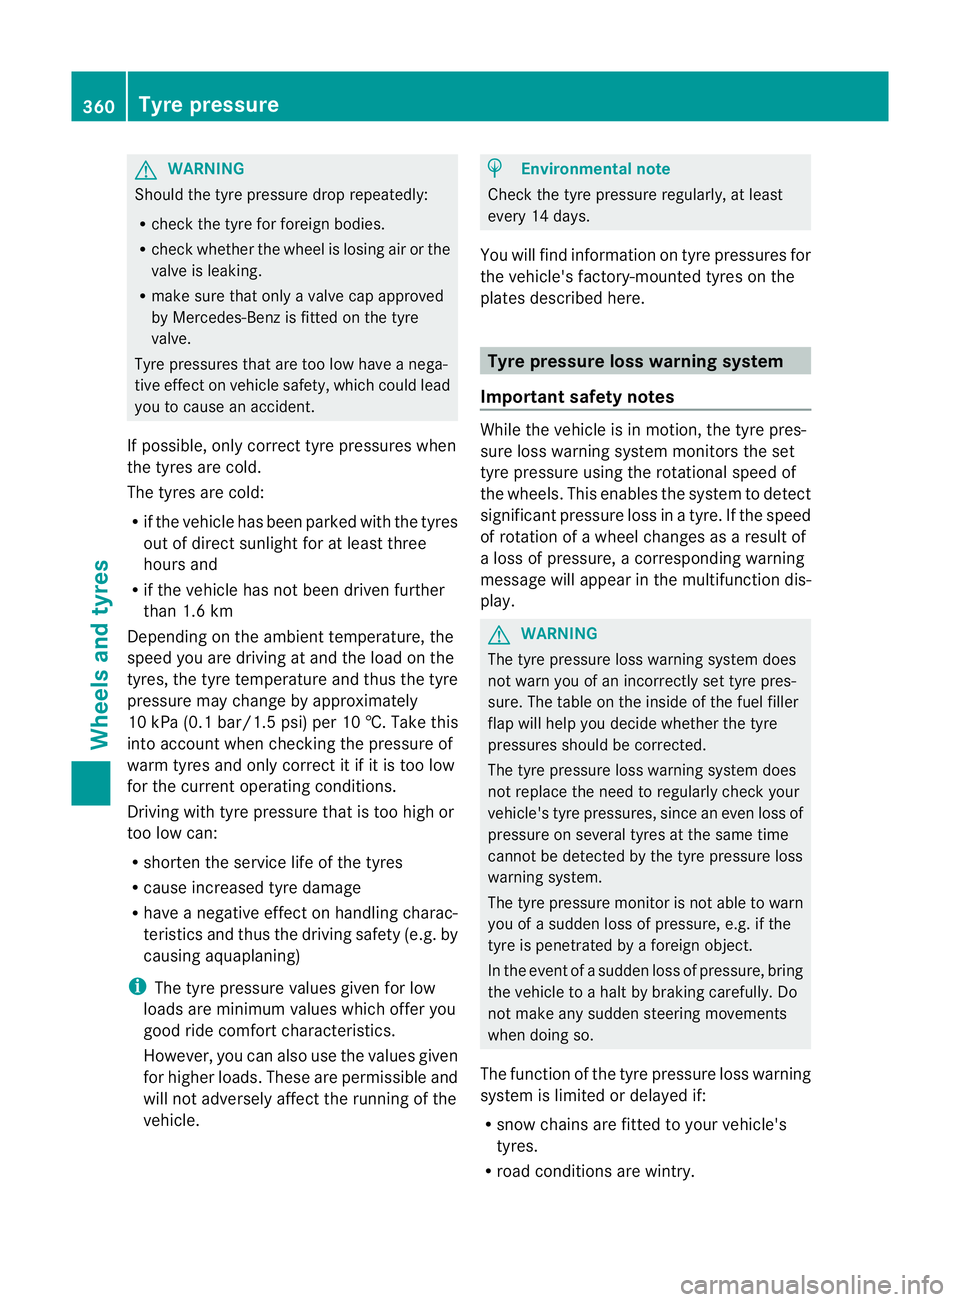
G
WARNING
Shoul dthe tyr epressure dro prepeatedly:
R check the tyr efor foreign bodies.
R check whether the wheel is losing air or the
valve is leaking.
R make sure that only avalve cap approved
by Mercedes-Benz is fitted on the tyre
valve.
Tyre pressures that are too low have anega-
tiv ee ffect on vehicl esafety, which could lead
you to cause an accident.
If possible, only correc ttyre pressures when
the tyres are cold.
The tyres are cold:
R if the vehicl ehas been parked wit hthe tyres
out of direc tsunlight for at least three
hours and
R if the vehicle has not been driven further
than 1. 6km
Depe nding on the ambient temperature, the
speed you are drivin gatand the load on the
tyres, the tyre temperature and thus the tyre
pressure may chang ebyapproximately
10 kPa (0. 1bar/1 .5psi) per 10 †. Take this
int oa ccount whe nchecking the pressur eof
warm tyres and only correc titifitist oo low
for the curren toperating conditions.
Drivin gwith tyre pressure that is too high or
too low can:
R shorten the servic elife of the tyres
R cause increased tyre damage
R have anegativ eeffect on handling charac-
teristics and thus th edriving safet y(e.g. by
causin gaquaplaning)
i The tyr epressure values given for low
load sare minimum values which offe ryou
good rid ecomfort characteristics.
However, you can also use the values given
for higher loads. These ar epermissible and
will not adversely affect the running of the
vehicle. H
Environmenta
lnote
Check the tyre pressure regularly, at least
every 14 days.
You will find information on tyre pressures for
the vehicle's factory-mounted tyres on the
plates described here. Tyr
epressure loss warning system
Important safety notes Whil
ethe vehicle is in motion, the tyr epres-
sure loss warning system monitors th eset
tyr ep ressure using th erotational speed of
the wheels. This enables the system to detect
significant pressure loss in atyre. If the speed
of rotation of awheel changes as aresult of
al oss of pressure, acorrespondin gwarning
message will appea rinthe multifunction dis-
play. G
WARNING
The tyr epressure loss warning system does
not warn you of an incorrectly se ttyre pres-
sure. The table on the insid eofthe fuel filler
fla pw ill help you decide whether the tyre
pressures should be corrected.
The tyre pressure loss warnin gsystem does
not replace the need to regularly check your
vehicle's tyre pressures, since an even loss of
pressure on several tyres at the same time
cannot be detecte dbythe tyr epressure loss
warning system.
Th et yre pressure monitor is not able to warn
you of asudden loss of pressure, e.g. if the
tyre is penetrated by aforeign objec t.
In the event of asudden loss of pressure, bring
the vehicle to ahalt by braking carefully. Do
not make any sudden steering movements
when doing so.
The function of the tyre pressure loss warning
system is limited or delayed if:
R snow chains are fitted to your vehicle's
tyres.
R road conditions are wintry. 360
Tyr
epressureWheels and tyres
Page 365 of 389

tyre is penetrated by
aforeign object .Inthe
event of asudden loss of pressure, bring the
vehicl etoah altbyb rakingcarefully. Do not
make any sudden steering movements when
doing so.
Informatio nontyre pressures is displayed in
the multifunction display. After afew minutes
of driv ing, the curren ttyre pressure of each
tyre is sho wn inthe multifunction display.
i Thet yre pressure values indicated by the
on-board computer may differ from those
measured at afilling station with apressure
gauge. Th etyre pressures shown by the on-
board computer refer to thos emeasured at
sea level. At high altitudes, the tyr epres-
sure values indicated by apressure gauge
are higher than thos eshown by the on-
boar dcomputer .Inthis case ,donot reduce
the tyr epressures.
i Theo peration of the tyr epressure moni-
to rc an be affected by interference from
radio transmitting equipment (e.g. radio
headphones ,two-way radios) that may be
being operated in or near the vehicle.
Checking tyr epressure electronically X
Make sure that the key is in position 2
(Y page 139) in the ignitio nlock.
X Press the =or; button on the steer-
ing wheel to select the Serv. menu.
X Press the 9or: button to select
Tyre pressure .
X Press the abutton.
The curren ttyre pressure for each wheel
will be displayed in the multifunction dis-
play.
If the vehicle has been parked for longe rthan
20 minutes, the Tyre pressures will be
displaye
dafter afew minutes of driving message appe
ars.
After ateach-in period, the tyr epressure
monito rautomatically recognise snew
wheels or new sensors. As long as aclear
allocation of the tyre pressure values to the individual wheels is not possible
,the Tyre pressure monito
ractive displa
ymes-
sage is shown instead of the tyr epressure
display. Th etyre pressures are already being
monitored.
i Ifas pare wheel/emergenc yspare wheel
is fitted, the system may continue to show
the tyr epressure of th ewheel that has
been removed for afew minutes. If this
occurs, note that the value displayed for
the position where the spare wheel/emer-
gency spare wheel is fitted is not the same
as the spare wheel/emergenc yspare
wheel's current tyr epressure.
Tyre pressure monito rwarning mes-
sages If the tyre pressure monitor detects
asignifi-
cant pressure loss on one or more tyres, a
warnin gmessage is shown in the multifunc-
tion display. Awarning ton ealso sounds and
th et yrep ressure warning lamp ligh tsup in
the instrumen tcluster.
Eac htyret hat is affected by asignificant loss
of pressure is highlighted in th epressure dis-
play.
If the Please correc ttyrep ressure messag
eappear sinthe multifunctio ndis-
play:
X Chec kthe tyr epressure on all fou rwheels
and correc titifn ecessary.
i If the wheel positions on the vehicle are
inter changed, the tyre pressures may be
displ ayed for th ewrong positions for a
short time .This is rectified after afew
minutes of driving, and the tyr epressures
are displayed for th ecorrect positions.
Restarting th etyre pressure monitor When yo
urestar tthe tyr epressure monitor,
all existing warning message sare deleted and
th ew arning lamps go out. The monitor uses
the currently set tyre pressures as the refer-
ence values for monitoring. In most cases, the
tyre pressure monitor will automatically 362
Tyr
epressureWheels and tyres