2011 MERCEDES-BENZ M-CLASS SUV tailgate
[x] Cancel search: tailgatePage 86 of 389
!
When opening, the tailgate swings up and
out. Therefore, mak esure that there is suf-
ficient clearance above and behind the tail-
gate.
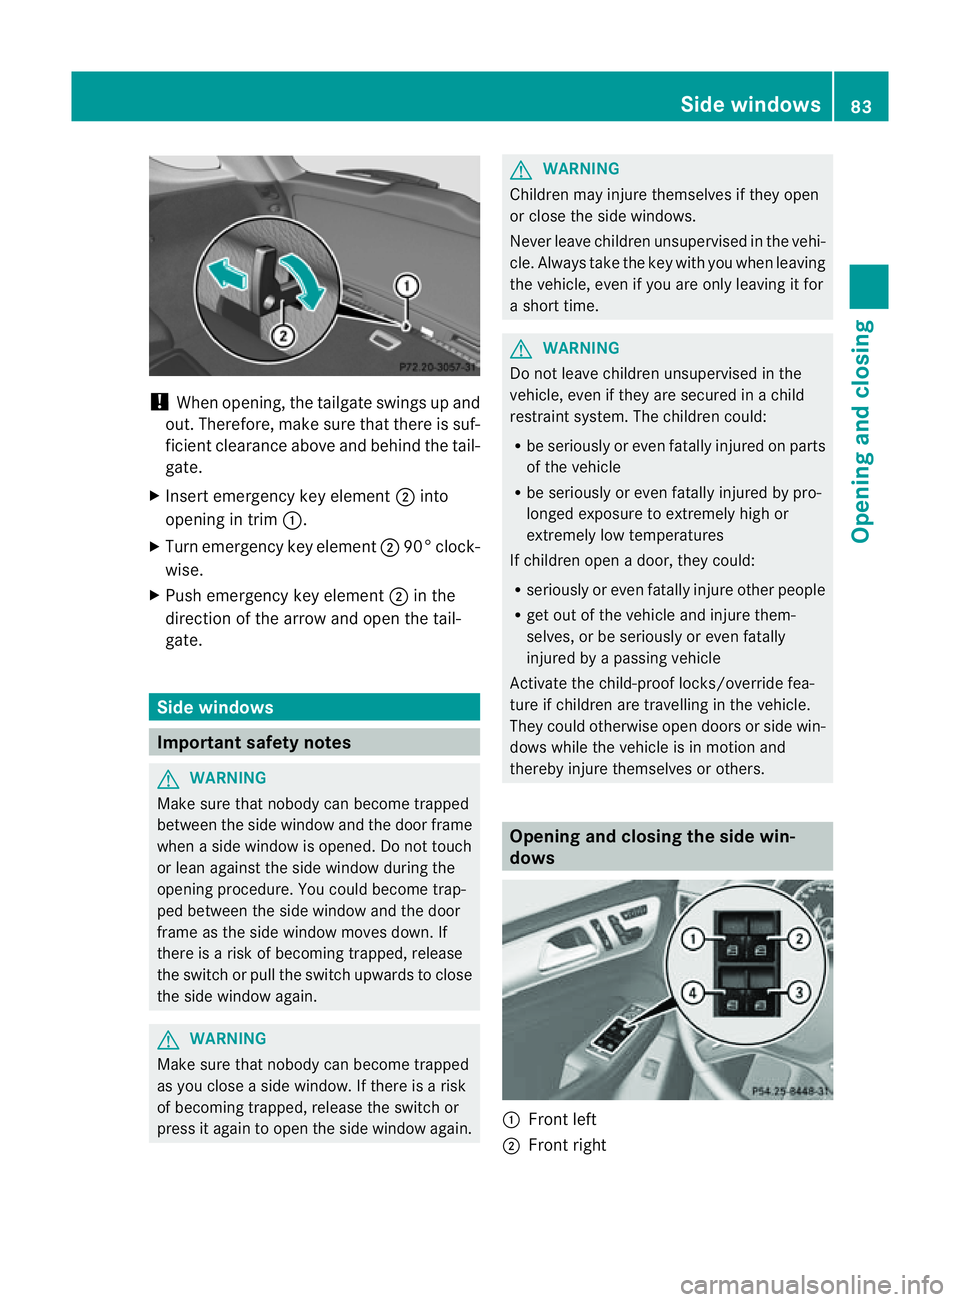
X Insert emergency key element ;into
opening in trim :.
X Turn emergency key element ;90° clock-
wise.
X Push emergency key element ;in the
direction of the arrow and open the tail-
gate. Side windows
Important safety notes
G
WARNING
Make sure that nobody can become trapped
between the side window and the door frame
when aside window is opened. Do not touch
or lean against the side window during the
opening procedure. You could become trap-
ped between the side window and the door
frame as the side window moves down. If
there is arisk of becoming trapped, release
the switch or pull the switch upwards to close
the side window again. G
WARNING
Make sure that nobody can become trapped
as you close aside window. If there is arisk
of becoming trapped, release the switch or
press it agai ntoopen the side window again. G
WARNING
Children may injur ethemselves if they open
or close the side windows.
Never leav echildren unsupervised in the vehi-
cle. Always tak ethe key with you when leaving
the vehicle, even if you ar eonly leaving it for
as hort time. G
WARNING
Do not leav echildren unsupervised in the
vehicle, even if they ar esecured in achild
restraint system .The children could:
R be seriously or even fatall yinjured on parts
of the vehicle
R be seriously or even fatally injured by pro-
longed exposure to extremely hig hor
extremely low temperatures
If children open adoor, they could:
R seriously or even fatally injure other people
R get out of the vehicle and injure them-
selves, or be seriously or even fatally
injure dbya passing vehicle
Activat ethe child-proof locks/overrid efea-
tur eifc hildren ar etravelling in th evehicle.
They could otherwise open doors or side win-
dows while the vehicle is in motion and
thereby injure themselves or others. Opening and closing the side win-
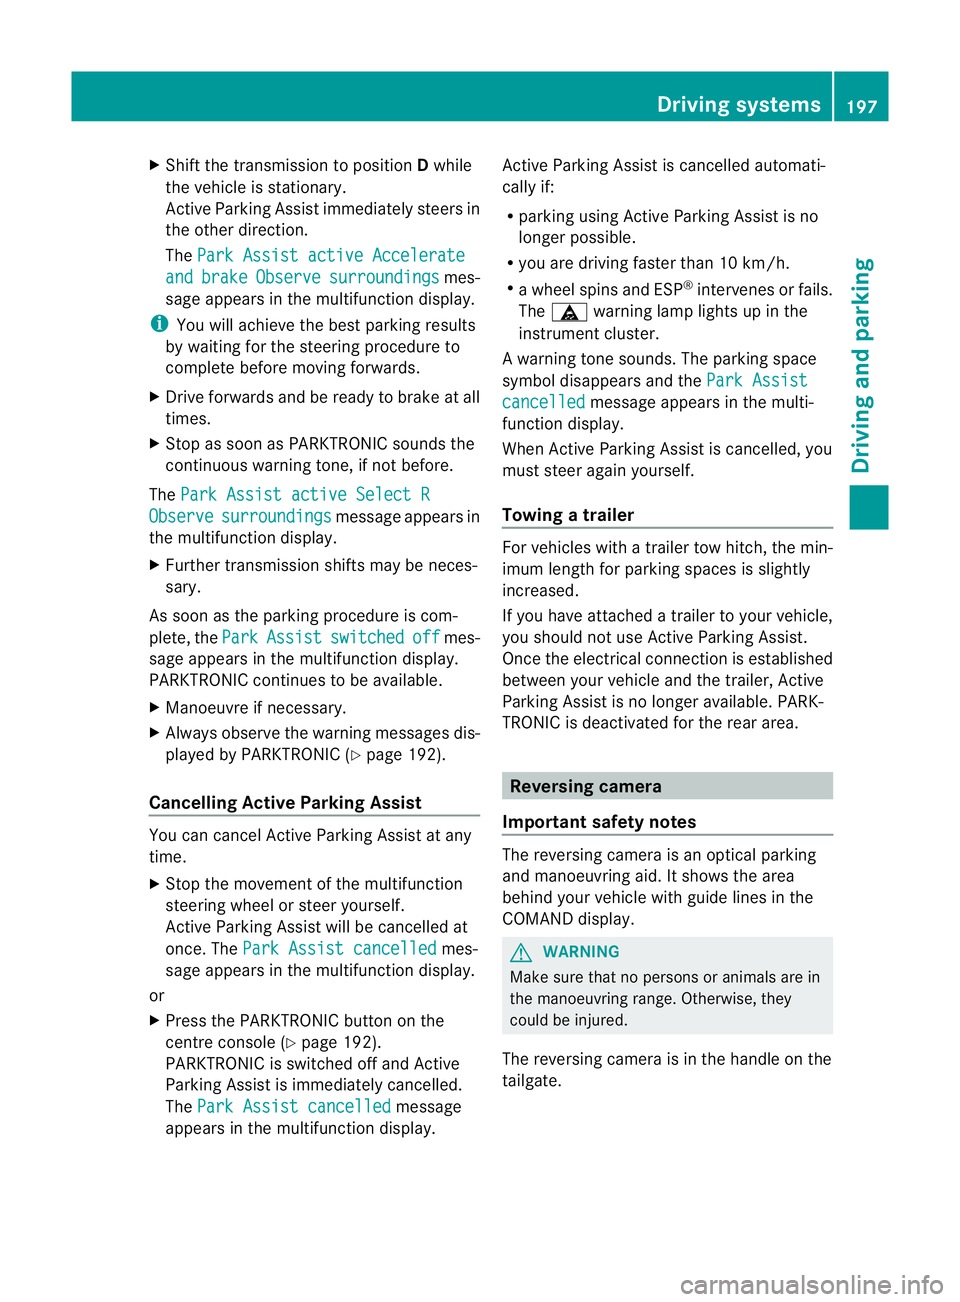
dows :
Fron tleft
; Fron tright Side windows
83Openingand closing Z
Page 200 of 389
X
Shift the transmissio ntoposition Dwhile
the vehicle is stationary.
Active Parkin gAssist immediately steer sin
the othe rdirection.
The Park Assist active Accelerate and brake Observe surroundings mes-
sage appears in the multifunction display.
i You will achieve the best parkin gresults
by waiting for the steerin gprocedure to
complete before moving forwards.
X Drive forward sand be ready to brake at all
times.
X Stop as soon as PARKTRONIC sounds the
continuou swarning tone, if not before.
The Park Assist active Select R Observe surroundings message appears in
the multifunc tion display.
X Further transmission shift smay be neces-
sary.
As soon as the parking procedure is com-
plete, the Park Assist switched off mes-
sage appears in the multifunc tion display.
PARKTRONIC con tinues to be available.
X Manoeuvre if necessary.
X Always observe the warning message sdis-
played by PARKTRONI C(Ypage 192).
Cancell ingA ctive Parking Assist You can cancel Active Parking Assist at any
time.
X Stop the movemen tofthe multifunc tion
steerin gwheel or steer yourself.
Ac tive Parkin gAssist will be cancelled at
once. The Park Assist cancelled mes-
sage appears in the multifunc tion display.
or
X Press the PARKTRONIC button on the
cen trec onsole (Y page 192).
PARKTRONIC is switched off and Active
Parkin gAssist is immediately cancelled.
The Park Assist cancelled message
appears in the multifunc tion display. Active Parkin
gAssist is cancelled automati-
cally if:
R parkin gusing Ac tive Parkin gAssist is no
longe rpossible.
R you ar edriving faster than 10 km/h.
R aw heel spins and ESP ®
intervenes or fails.
The ä warnin glamp lights up in the
instrument cluster.
Aw arning ton esounds. The par king spa ce
sym boldisappear sand the ParkA ssist cancelled messag
eappear sinthe multi-
functio ndisplay.
When Activ eParking Assist is cancelled, you
must steer again yourself.
Towing atrailer For vehicles with
atrailer to whitch, the min-
imum length for parking spaces is slightly
increased.
If yo uhavea ttache datrailer to your vehicle,
yo us houl dnot us eActiv eParking Assist.
Once the electrica lconnection is established
between your vehicl eand the trailer, Active
Parking Assist is no longer available .PARK-
TRONIC is deactivated for the rear area. Reversin
gcamera
Important safety notes Th
er eversing camera is an optica lparking
and manoeuvring aid. It shows the area
behind your vehicle with guide lines in the
COMAND displ ay. G
WARNING
Make sure tha tnopersons or animals are in
the manoeuvring range. Otherwise, they
could be injured.
The reversing camera is in the handle on the
tailgate. Driving systems
197Drivingand park ing Z
Page 201 of 389
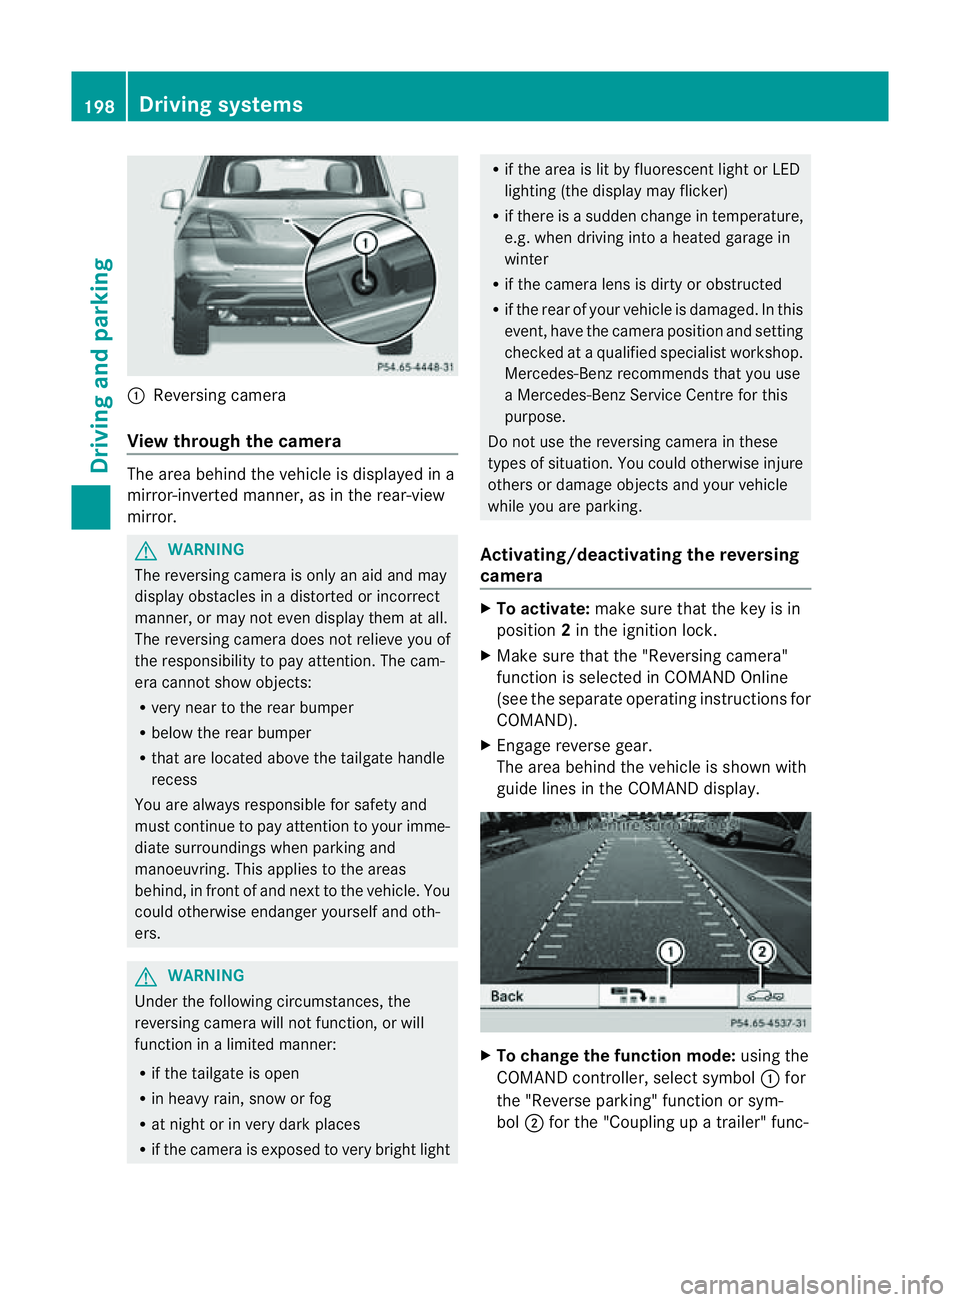
:
Reversin gcamera
View through th ecamera Th
ea rea behind the vehicle is displaye dina
mirror-inverted manner, as in the rea r-view
mirror. G
WARNING
The reversin gcamera is only an aid and may
display obstacles in adistorted or incorrect
manner, or may no teven display them at all.
Th er eversing camera does not relieve you of
the responsibility to pay attention. The cam-
era cannot show objects:
R ver ynear to the rear bumper
R belo wthe rea rbumper
R that are located above the tailgate handle
recess
You are alway sresponsible for safet yand
must continue to pay attentio ntoyourimme-
di at es urroundings when parking and
manoeuvring. This applie stothe areas
behind, in front of and nex ttothe vehicle. You
coul dotherwise endang er yourself and oth-
ers. G
WARNING
Under the following circumstances, the
reversing camera will not function, or will
function in alimited manner:
R if the tailgate is open
R in heavy rain, snow or fog
R at night or in very dark places
R if the camer aisexposed to very brigh tlight R
if the area is lit by fluorescen tlight or LED
lighting (the display may flicker)
R if there is asudden change in temperature,
e.g. when driving into aheated garage in
winter
R if the camera lens is dirt yorobstruc ted
R if the rear of your vehicle is damaged. In this
event ,have the camera positio nand setting
checked at aqualified specialist workshop.
Mercedes-Benz recommends that you use
aM ercedes-Benz Servic eCentr efor this
purpose.
Do not use the reversin gcamera in these
types of situation. You could otherwise injure
others or damage objects and your vehicle
while you are parking.
Activating/deactivating the reversing
camera X
To activate: make sure that the key is in
position 2in the ignition lock.
X Make sure that the "Reversing camera"
function is selected in COMAND Online
(see the separate operating instructions for
COMAND).
X Engage reverse gear.
The area behind the vehicle is shown with
guide lines in the COMAND display. X
To change the function mode: using the
COMAND controller, select symbol :for
the "Reverse parking" function or sym-
bol ;for the "Coupling up atrailer" func- 198
Dri
ving systemsDriving and parking
Page 231 of 389
Driving tips
R
Maintain agreater distanc efrom th evehi-
cle in front than when driv ingw ithou ta
trailer.
R Avoid braking abruptly .Ifpossible, brake
gentl yatfirst to allow the trailer to run on.
Then, increase the brakin gforc erapidly.
R The values given for gradient-climbing
capabilities from astandstill refer to sea
level. Whe ndriving in mountainou sareas,
note that th epower outpu tofthe engine,
and consequen tlyt he vehicle' sgradient-
climbing capability ,decrease with increas-
ing altitude.
If the trailer swings from side to side:
X Do not accelerate.
X Do not coun ter-steer.
X Brake if necessary. Folding ou
tthe bal lcoupling G
WARNING
Make sure that no persons or animals are in
the pivoting range of the ball coupling. Other-
wise, they could be injured.
Before you can tow atrailer wit hyour vehicle,
you must fold out the ball coupling.
X Make sure that the vehicle is stationary.
X Open the tailgate. G
WARNING
Make sur ethat the ball coupling is engaged,
either in its folded-ou torfolded-i nposition.
The indicator lam ponthe release knob is off.
Do not pull the ball coupling release switch
when atrailer is coupled or abicycle rack is
fitted.
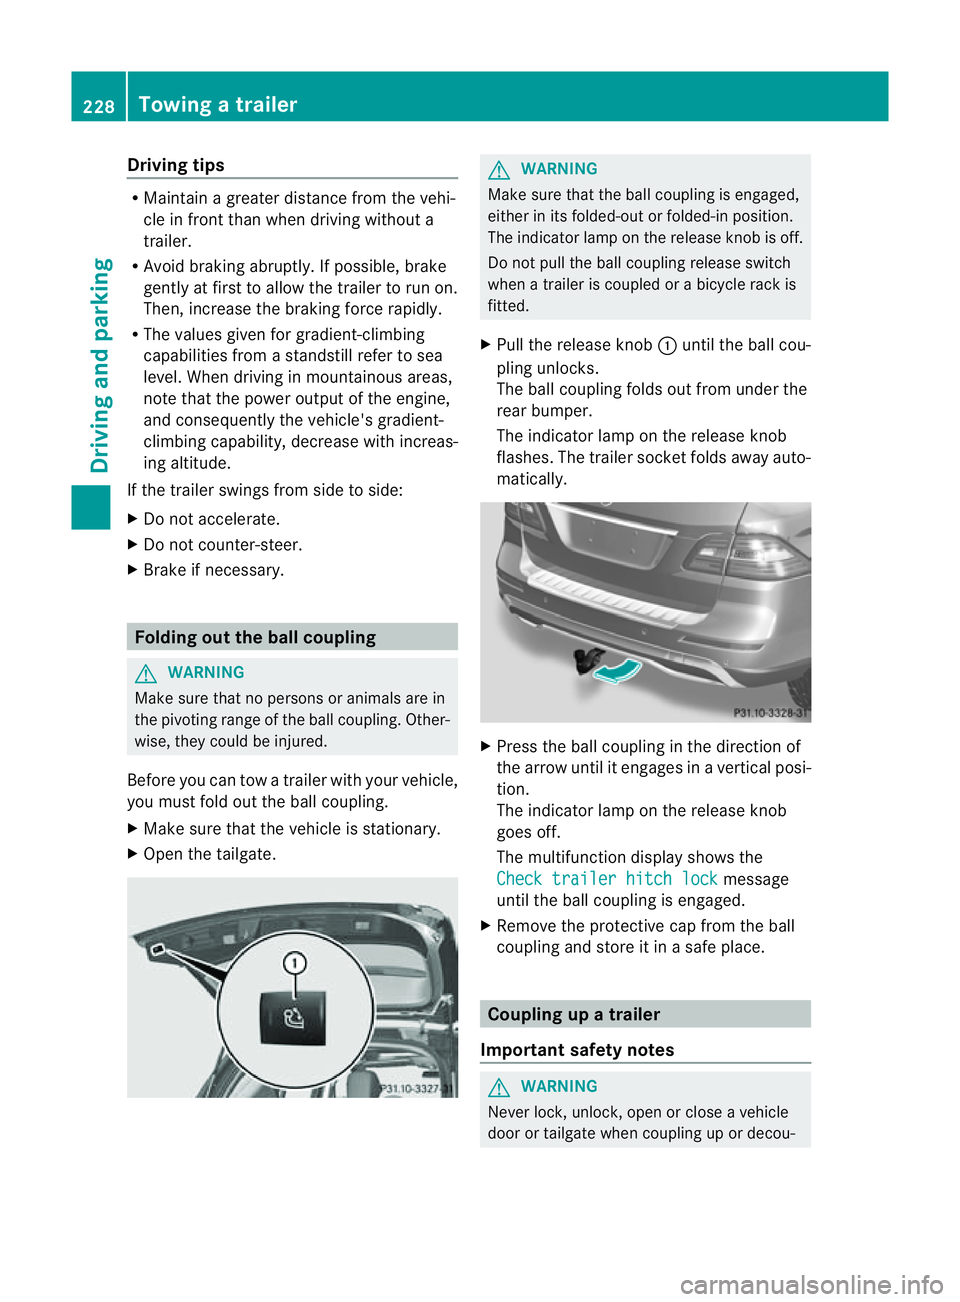
X Pull the release knob :until the ball cou-
pling unlocks.
The ball coupling folds out from under the
rear bumper.
The indicator lamp on the release knob
flashes. The trailer socket folds away auto-
matically. X
Press the ball coupling in the direction of
the arrow until it engages in avertical posi-
tion.
The indicator lam ponthe release knob
goes off.
The multifunc tion display shows the
Chec ktrailer hitch lock message
until th eball coupling is engaged.
X Remove the protective cap from the ball
coupling and store it in asafe place. Coupling up
atrai ler
Impor tant safety notes G
WARNI
NG
Neve rlock, unlock, open or close avehicle
door or tailgat ewhen coupling up or decou- 228
Towing
atrailerDriving and parking
Page 232 of 389

pling
atrailer. Th evehicle level could change
and you could endanger yourself or others.
Never press the ADS button or operate the
leve lcontrol while you are coupling up or
decoupling atrailer.
Steel-spring vehicles X
Make sure that th etransmission is in posi-
tion P.
X Engag ethe electric parkin gbrake.
X Positio nthe trailer level behind the vehicle.
X Coupl eupthe trailer.
X Establish the electrical con nection
betwee nthe vehicle and the trailer.
X Chec kthat the trailer lighting system is
working.
Vehicles wit hthe AIRMATIC package X
Make sure that th etransmission is in posi-
tion P.
X Engag ethe electric parkin gbrake.
X Start th eengine.
X Set the vehicl etohighway level
(Y page 189).
X Set the Adaptive Dampin gSystem (ADS )to
AUTO orCOMF(Y page 188).
X Switch off the engine.
X Close the doors and tailgate.
X Position the trailer level behind the vehicle.
X Couple up the trailer.
X Establish the electrical connection
betwee nthe vehicle and the trailer.
X Chec kthat the trailer lighting system is
working.
i If you hav ecoupled atrailer, th evehicle
will remain at highway level.
The vehicle automatically lowers to high-
way level if you driv efaster than 30 km/h
with atrailer. Th evehicle is not lowered to
high-speed level even if you are travelling
at higher speeds. This also applies when using accessories
that are plugged into the socket of the
trailer tow hitch (e.g. abicycle rack). Decoupling
atrailer
Important safety notes G
WARNING
Do not disconnect atrailer with an engaged
overru nbrake .Otherwise, you rhand could
becom etrapped between th ebumpe rand
drawbar. G
WARNING
As soo nasyou raise the trailer drawbar, the
unladen vehicle rises slightly .The vehicle then
lower stod riving level.
Make sure that nobod yisinthe vicinit yofthe
wheel arch or the underbody. You coul doth-
erwise trap yoursel forothers. G
WARNING
Th ev ehicle is lowered as soo nasyou discon-
nec tthe trailer cable. Make sur ethat nobody
is in the vicinit yofthe wheel arch or the
underbody. You coul dotherwis etrap yourse lf
or othe rs.
As soon as you decoupl ethe trailer ,the unla-
den vehicle rise sslightly. Make sure that you
or others are not injured in the process.
! Do not disconnect atrailer wit han
engaged overrun brake. Otherwise, your
vehicle could be damage dbythe rebound-
ing of the overru nbrake.
Steel-spring vehic les X
Ma ke sure that the transmission is in posi-
tion P.
X Engag ethe electric parkin gbrake.
X Secure th etrailer agains trollin gaway.
X Remove the trailer cable and decouple the
trailer. Towing
atrailer
229Driving andparki ng Z
Page 233 of 389
Vehicles with the AIRMATIC package
X
Make sure tha tthe transmission is in posi-
tion P.
X Engage the electric parkin gbrake.
X Start th eengine.
X Clos ethe doors and tailgate.
X Secur ethe trailer against rolling away.
X Remove the trailer cable and decouple the
trailer.
X Switc hoff th eengine. Folding in the ball coupling
i Fold the ball coupling back in if you are
not using the trailer tow hitch.
X Make sure that the vehicl eisstationary and
the trailer cables are disconnected.
X Place the protective cap on the ball cou-
pling.
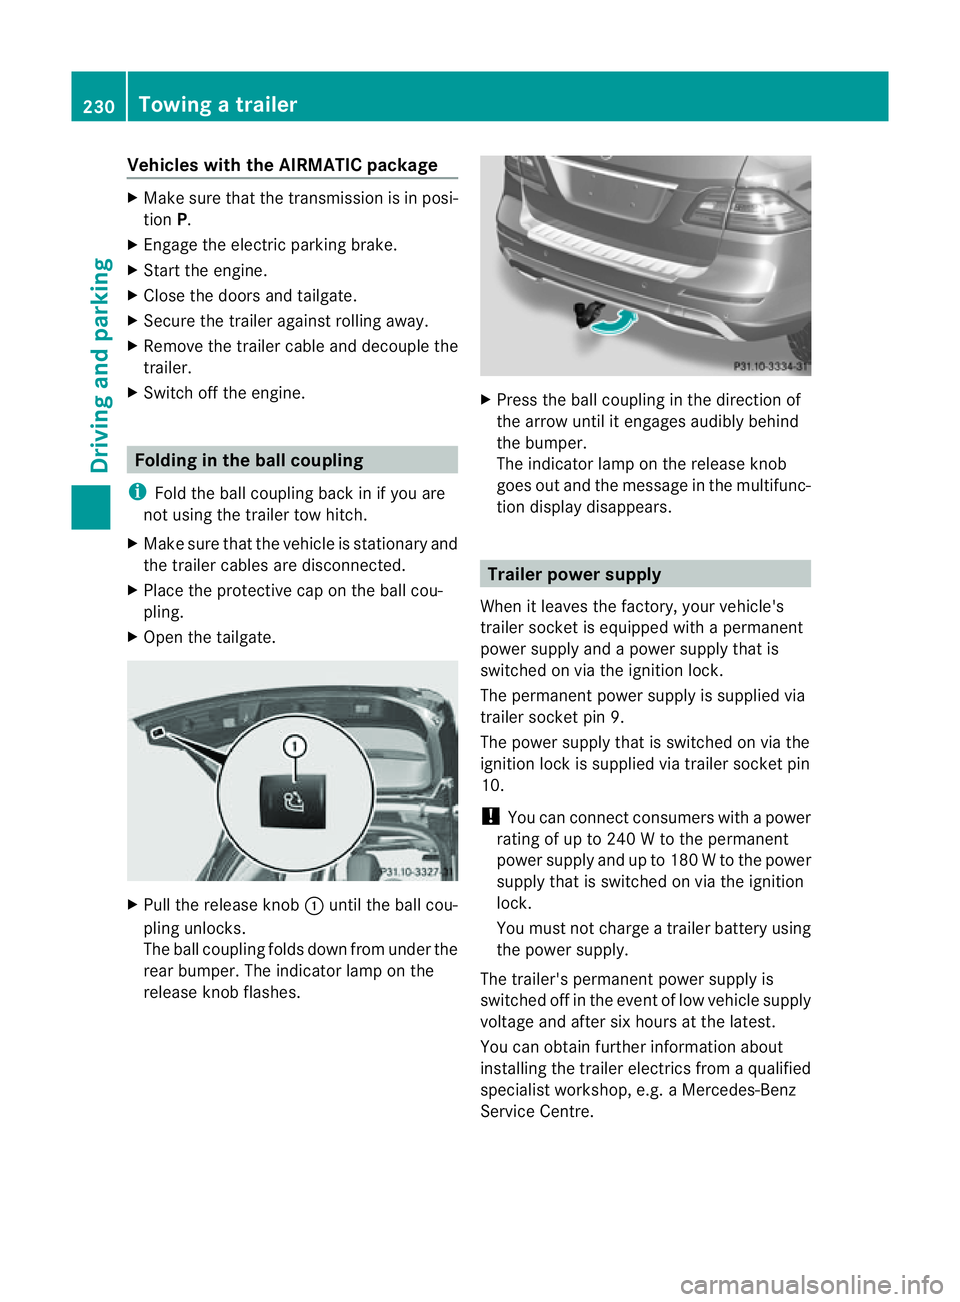
X Ope nthe tailgate. X
Pull the release knob :until the ball cou-
plin gunlocks.
The ball coupling folds dow nfrom under the
rea rbumper. The indicator lamp on the
release knob flashes. X
Press the ball coupling in the direction of
the arrow until it engage saudibly behind
the bumper.
The indicator lamp on the release knob
goes out and the messag einthe multifunc-
tion display disappears. Trailer power supply
When it leaves the factory ,your vehicle's
trailer socket is equipped with apermanent
power supply and apower supply that is
switched on via the ignition lock.
The permanen tpower supply is supplied via
trailer socket pin 9.
The power supply that is switched on via the
ignition lock is supplied via trailer socket pin
10.
! You can con nect consumers with apower
ratin gofupto2 40Wtot he permanent
power supply and up to 18 0Wto the power
supply that is switched on via the ignition
lock.
You must not charge atrailer battery using
th ep ower supply.
The trailer's permanen tpower supply is
switched off in the even toflow vehicle supply
voltage and after six hour satthe latest.
You can obtai nfurther information about
installing the trailer electrics from aqualified
specialist workshop, e.g. aMercedes-Benz
Ser vice Centre. 230
Towing
atrailerDriving and parking
Page 283 of 389
Vehicle
Display messages Possible caus
es/consequences and M Solutions
To start engine,
shift to either P
or N Yo
uh avea ttempte dtostart the engine with the transmission in
position Ror D.
X Shift the transmission to position Por N. Auxiliary battery
malfunction The auxiliary battery for the automatic transmission is no longer
being charged.
X Visit aquali fied sp ecialist worksho patthe nex toppor tunity.
X Until then, set the automatic transmission to position Pbefore
yo us witch off the engine.
X Before leaving the vehicle, appl ythe electr ic parking bra ke. Apply brake to
deselect Par
k(P) position Yo
uh ave attempted to mov ethe transmission selector lever to
position D,Ror Nwithout depressing the brake pedal.
X Depress the brake pedal. Vehicle
no
tinp osition P Th
ed river's door is open and th etransmission is in position R,N
or D.
Aw arning ton ealso sounds.
X Shift th etransmissio ntoposition P.
X Apply th eelectric parking brake. Wi
thoutc hanging gear,
consul
tworkshop Yo
uc annot change the transmission position due to amalfunction.
Aw arning ton ealso sounds.
If transmission position Dis selected:
X Drive to aqualified specialist workshop without shiftin gthe
transmissio nfromp osition D.
If transmission position R,Nor Pis selected:
X Consult aqualified specialist workshop. On
ly select Park (P)
whe
nv ehicl eis stationary Th
ev ehicle is moving.
X Pull ove rand sto pthe vehicle safel yassoonasp ossible, paying
attention to roa dand traffic conditions.
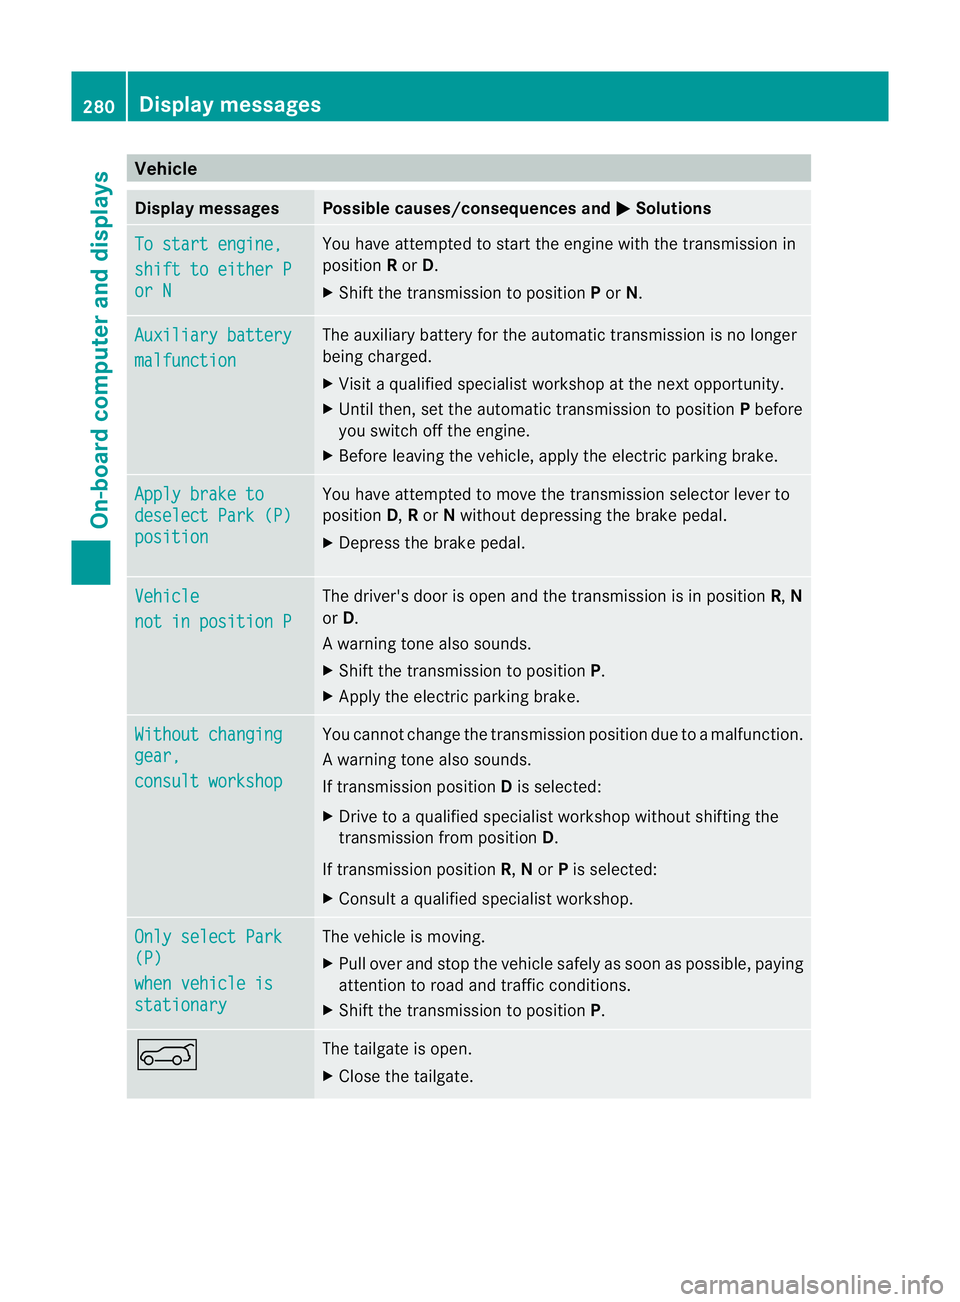
X Shift the transmissio ntoposition P. A The tailgate is open.
X Close the tailgate. 280
Display messagesOn-board computer and displays
Page 299 of 389
Usefu
linfor mati on
i This Owner's Manual describes all models
and all standard and optional equipment
available to your vehicle at the time of pub-
lication of the Owner's Manual. Country-
specific deviation sare possible .Please
not ethat your vehicle ma ynot be equipped
with all featur es described. This also
applies to safety-releva ntsystems and
functions.
i Please read the information on qualified
specialist workshops (Y page 24).Loading guidelines
G
WARNING
Secur eand position the load as described in
the loading guidelines.
Otherwise, vehicl eoccupan tscould
be injured by the loa dbeingthrown around in
th ee vent of sharp braking ,asudden change
in directio noranaccident.
You wil lfind further information in the "Secur-
ing aload" section.
Even if you follow all the loadin gguidelines,
the load will increase the risk of injury in the
event of an accident. G
WARNING
Keep the tailgate closed when the engine is
running. Otherwise, you could be poisoned by
exhaust fumes enterin gthe vehicle.
The handling characteristics of aladen vehi-
cle are dependent on the distribution of the
load within the vehicle. For this reason, you
should observe the following notes when
transporting aload:
R when transpor ting aload, never exceed the
maximum permissible gross vehicle weight or the permissible axle loads for the vehicle
(includin goccupants).
R position heavy loads as far forward saspos-
sible and as low down in the load compart-
men tasp ossible.
R the load must not protrude abov ethe upper
edge of the seat backrests.
R always plac ethe load against the rea ror
front seat backrests .Make sure that the
seat backrests are securely locked into
place.
R hook in the safety net when loading.
R always place the load behind unoccupied
seats if possible.
R secure the load with sufficiently stron gand
wear-resistant lashing material. Pad sharp
edges for protection.
i Load restraints are available at any quali-
fied specialis tworkshop, e.g. aMercedes-
Benz Servic eCentre. Stowage areas
Stowage compartments
Important safety notes G
WARNING
The stowage compartments must be closed
when item sare store dinthem. Luggage nets
ar en ot designed to secur eheavy item sof
luggage.
You or other vehicle occupant scould be
injure dbyo bjectsbeing thrown around if you:
R brak esharply
R change direction suddenly
R arei nvolved in an accident
Sharp-edge dand fragile object smust not be
placed in the luggag enet. 296
Stowage areasStowing and features