2011 MERCEDES-BENZ G55AMG Front
[x] Cancel search: FrontPage 111 of 288
Problems with the cooling with air
dehumidification function
If the indicator lamp in the Á button does
not go out or flashes when switched on, the
cooling with air dehumidification function is
switched off due to a malfunction. You can no
longer switch on the cooling with air
dehumidification function.
XConsult a qualified specialist workshop.
Setting climate control to automatic
GWarning
If you switch off the cooling function, the
vehicle will not be cooled when weather
conditions are warm. The windows can fog up
more quickly. Window fogging may impair
visibility and endanger you and others.
In automatic mode, the set temperature is
maintained automatically at a constant level.
The system automatically regulates the
temperature of the dispensed air, the airflow
and the air distribution.
Automatic mode will achieve optimal
operation if cooling with air dehumidification
is also activated. If desired, cooling with air
dehumidification can be deactivated.
XTurn the key to position 2 in the ignition
lock.XSet the desired temperature.XTo switch on: press the à button.
The indicator lamp in the à button lights
up. Automatic air distribution and airflow
are activated.XTo switch off: press the à button.
The indicator lamp in the à button goes
out. Automatic air distribution and airflow
are deactivated.
Setting the temperature
Different temperatures can be set for the
driver's and front-passenger sides.
XTurn the key to position 2 in the ignition
lock.XTo increase/reduce: turn controls ; and
= clockwise or counter-clockwise
( Y page 107).
Only change the temperature setting in
small increments. Start at 72 ‡ (22 †).
i If you turn the temperature control on one
side of the vehicle fully clockwise or
counter-clockwise, you will increase or
reduce the temperature on the other side
of the vehicle at the same time.
Setting the air distribution
You can set the air distribution for the entire
vehicle.
The symbols for the air distribution have the
following meanings:
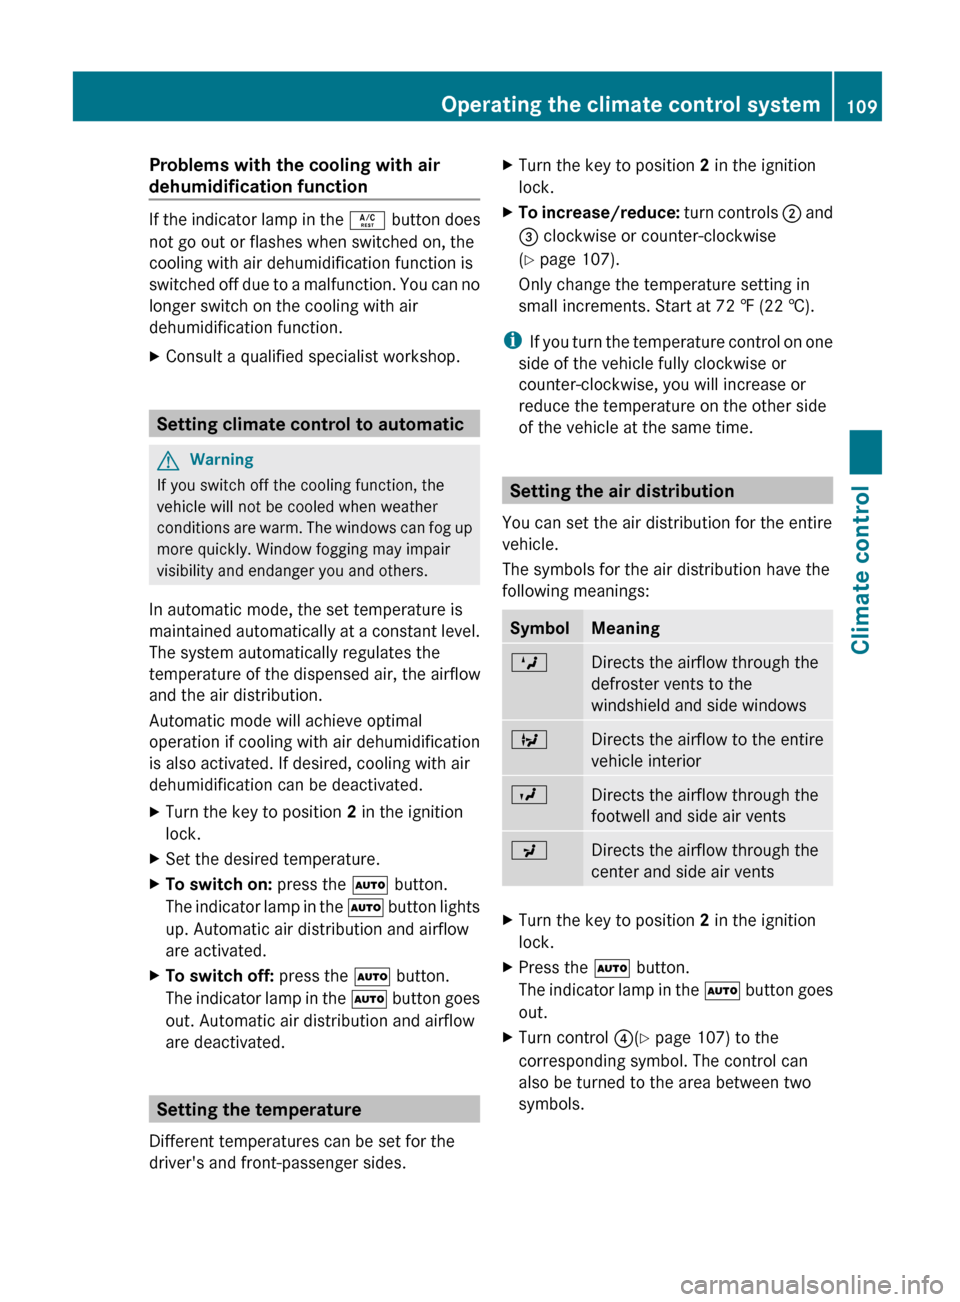
SymbolMeaningMDirects the airflow through the
defroster vents to the
windshield and side windowsQDirects the airflow to the entire
vehicle interiorODirects the airflow through the
footwell and side air ventsPDirects the airflow through the
center and side air ventsXTurn the key to position 2 in the ignition
lock.XPress the à button.
The indicator lamp in the à button goes
out.XTurn control ?(Y page 107) to the
corresponding symbol. The control can
also be turned to the area between two
symbols.Operating the climate control system109Climate controlZ
Page 112 of 288
Setting the airflowXTurn the key to position 2 in the ignition
lock.XPress the à button.
The indicator lamp in the à button goes
out.XTo increase/reduce: turn
thumbwheel : clockwise or counter-
clockwise ( Y page 107).
i
The airflow from the rear-compartment
vents and the center vents is the same.
Defrosting the windshield
You can use this function to defrost the
windshield or to defrost the inside of the
windshield and the side windows.
i You should only select the defrosting
function until the windshield is clear again.
i When you switch on the "defrosting"
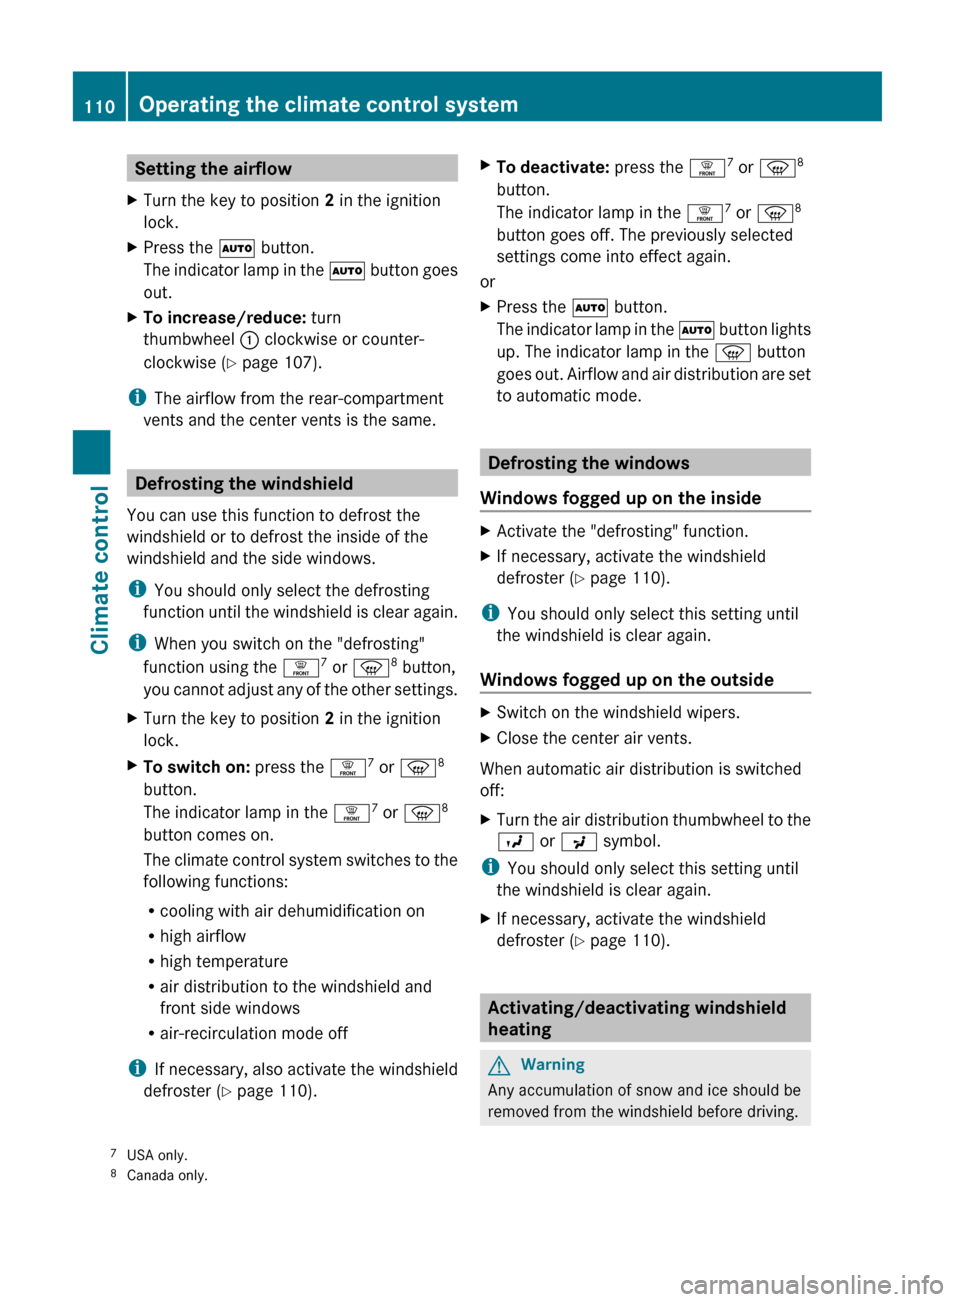
function using the ¥7
or z 8
button,
you cannot adjust any of the other settings.
XTurn the key to position 2 in the ignition
lock.XTo switch on: press the ¥7
or z 8
button.
The indicator lamp in the ¥7
or z 8
button comes on.
The climate control system switches to the
following functions:
R cooling with air dehumidification on
R high airflow
R high temperature
R air distribution to the windshield and
front side windows
R air-recirculation mode off
i If necessary, also activate the windshield
defroster ( Y page 110).
XTo deactivate: press the ¥7
or z 8
button.
The indicator lamp in the ¥7
or z 8
button goes off. The previously selected
settings come into effect again.
or
XPress the à button.
The indicator lamp in the à button lights
up. The indicator lamp in the z button
goes out. Airflow and air distribution are set
to automatic mode.
Defrosting the windows
Windows fogged up on the inside
XActivate the "defrosting" function.XIf necessary, activate the windshield
defroster ( Y page 110).
i
You should only select this setting until
the windshield is clear again.
Windows fogged up on the outside
XSwitch on the windshield wipers.XClose the center air vents.
When automatic air distribution is switched
off:
XTurn the air distribution thumbwheel to the
O or P symbol.
i
You should only select this setting until
the windshield is clear again.
XIf necessary, activate the windshield
defroster ( Y page 110).
Activating/deactivating windshield
heating
GWarning
Any accumulation of snow and ice should be
removed from the windshield before driving.
7 USA only.
8 Canada only.110Operating the climate control systemClimate control
Page 128 of 288
Problems with the automatic transmissionProblemPossible causes/consequences and M SolutionsThe acceleration ability
is deteriorating.
The transmission no
longer changes gear.The transmission is in emergency mode.
It is only possible to shift into second gear and reverse gear.XStop the vehicle.XShift the transmission to position P.XTurn the SmartKey to position 0 in the ignition lock.XWait at least 10 seconds before restarting the engine.XShift the transmission to position D or R.
If D is selected, the transmission shifts into second gear; if R is
selected, the transmission shifts into reverse gear.XHave the transmission checked at a qualified specialist
workshop, e.g. an authorized Mercedes-Benz Service Center,
immediately.You hear a warning
tone.You have:
R switched off the engine
R opened the driver's door
R not moved the selector lever to position PXMove the selector lever to P.Releasing the parking lock manually
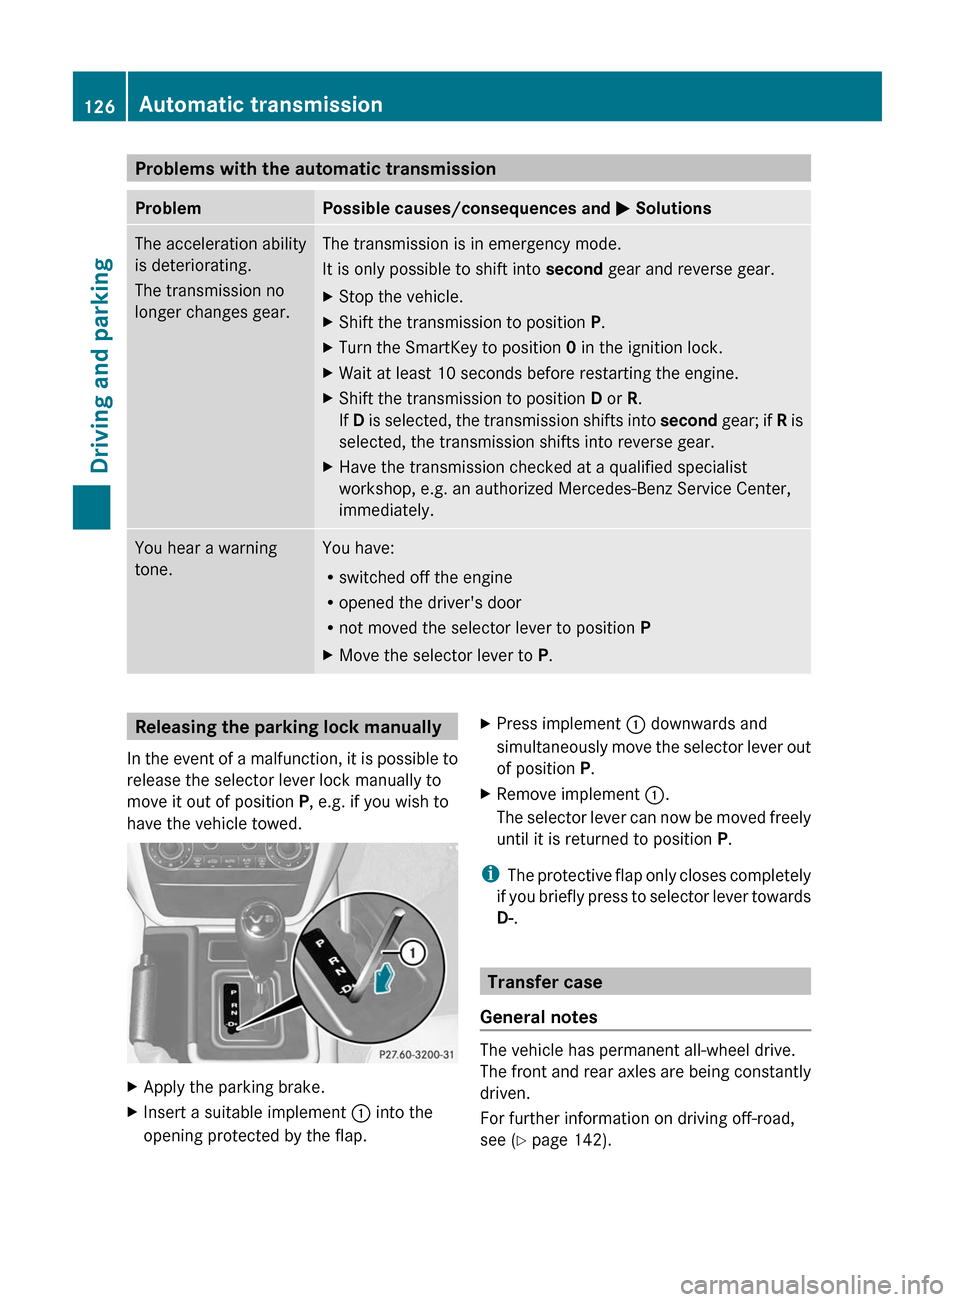
In the event of a malfunction, it is possible to
release the selector lever lock manually to
move it out of position P, e.g. if you wish to
have the vehicle towed.XApply the parking brake.XInsert a suitable implement : into the
opening protected by the flap.XPress implement : downwards and
simultaneously move the selector lever out
of position P.XRemove implement :.
The selector lever can now be moved freely
until it is returned to position P.
i
The protective flap only closes completely
if you briefly press to selector lever towards
D- .
Transfer case
General notes
The vehicle has permanent all-wheel drive.
The front and rear axles are being constantly
driven.
For further information on driving off-road,
see ( Y page 142).
126Automatic transmissionDriving and parking
Page 131 of 288
Differential locks
General notes
Differential locks improve the traction of the
vehicle.
GWarning!
Never drive on firm road surfaces with
differential locks engaged. Never drive on
narrow bends with front-axle differential locks
engaged. With differential locks engaged, the
vehicle's ability to steer is severely restricted
and the danger of accidents is therefore
higher.
Do not engage or disengage differential locks
while driving on a bend. The vehicle may
otherwise make a jerking movement. You
could thus lose control of the vehicle and
cause an accident.
If you select a differential lock, ABS, 4ETS,
ESP ®
and BAS will be deactivated.
Your vehicle is equipped with a differential
lock for:
R the transfer case: this controls the balance
between the front and rear axles.
R the rear axle: this controls the balance
between the wheels on the rear axle.
R the front axle: this controls the balance
between the wheels on the front axle.
! In order to avoid damage to the transfer
case, you must operate the vehicle on a
dynamometer (1-axle dynamometer) only
if:
R the axle not driven on is jacked up
or
R the corresponding propeller shaft is
disconnected
and
R the differential lock of the transfer case
is engaged.
Otherwise, the transfer case could be
damaged.
Information about differentials and
differential locks
When the vehicle is driving through a bend,
the wheels on the outside of the bend must
travel a longer distance and must thus turn
more quickly than the wheels on the inside.
The differential, a transmission in the
drivetrain, balances out the different
rotational speeds and therefore enables
driving through bends.
The disadvantage of differentials: the wheels
with the least road grip are driven the hardest.
Example: a wheel on a driven axle stands on
snow-covered ground and thus has no
traction. This wheel receives the strongest
driving power from the differential, as the
force progression takes the path of least
resistance. The opposite wheel on this axle,
however, which stands on firm ground and
could therefore allow traction, receives no
driving power. 4ETS eliminates this
disadvantage and provides good steerability
by automatically braking the spinning wheel,
thus directing more driving power to the
wheel standing on firm ground, which is
therefore able to provide traction.
ESP® and 4ETS are traction systems that are
ideal for road driving and suitable for light off-
road driving. Off-road gear LOW likewise
improves off-road capabilities.
Moreover, the more difficult conditions in off-
road driving require further measures such as
locking one or several differentials. Your
vehicle is equipped with three differential
locks: a central differential lock for the
transfer case, a differential lock for the front
axle, and a differential lock for the rear axle.
Each differential lock can be engaged with the
respective switch on the center console.
When the central differential lock for the
transfer case is locked, the speed of the front
wheels is equal to that of the rear wheels.
When the differential for the rear axle is
locked, both rear wheels turn equally fast,
independent of their respective torques.
Keep in mind that by engaging the differential
Automatic transmission129Driving and parkingZ
Page 132 of 288
locks, vehicle steerability is severely
restricted.
For your own safety, the safety of others, and
in order to avoid damage to the vehicle, the
differential locks must not be engaged when
driving on a firm road surface. Keep in mind
that when driving on firm road surfaces, the
unimpeded function of the differential is
necessary and must never be locked on firm
road surfaces. Vehicle steerability may
otherwise be lost and you may no longer be
able to steer the vehicle. For this reason, the
differential locks must be engaged
exclusively during off-road driving, and only
when activating the other driving systems
(4ETS, ESP ®
and off-road gear LOW) is no
longer sufficient.
Activating the differential lock
General notes
GWarning!
Never drive on firm road surfaces with
differential locks engaged. Never drive on
narrow bends with front-axle differential locks
engaged. With differential locks engaged, the
vehicle's ability to steer is severely restricted
and the danger of accidents is therefore
higher.
Do not engage or disengage differential locks
while driving on a bend. The vehicle may
otherwise make a jerking movement. You
could thus lose control of the vehicle and
cause an accident.
If you select a differential lock, ABS, 4ETS,
ESP ®
and BAS will be deactivated.
Activate the differential locks:
R off-road
R to deactivate ABS, 4ETS, ESP ®
and BAS
while off-road
R when fording
R on snow-covered, icy or dirty road surfaces
For further information on driving off-road,
see ( Y page 142).
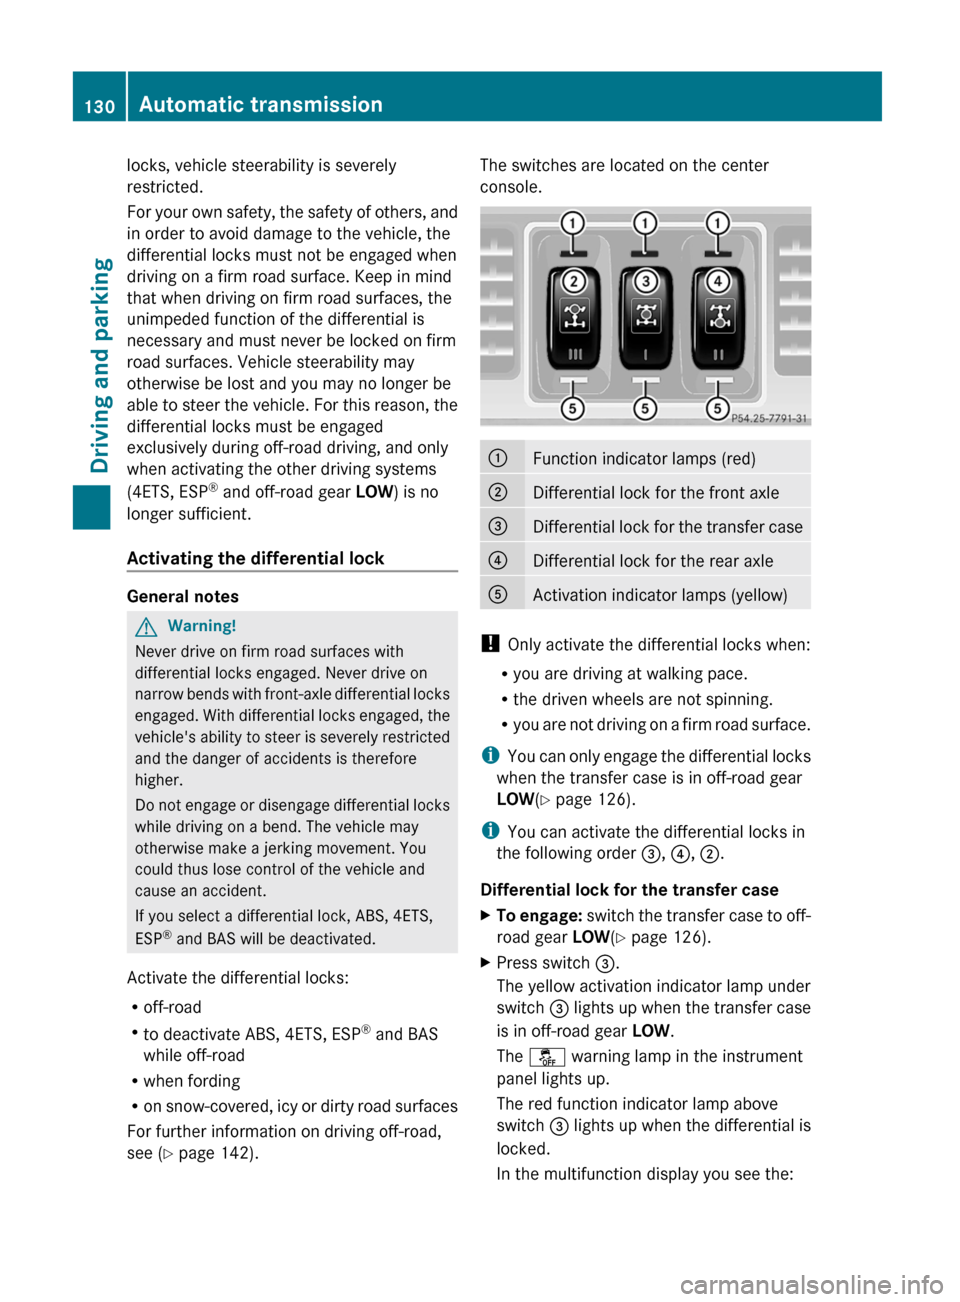
The switches are located on the center
console.:Function indicator lamps (red);Differential lock for the front axle=Differential lock for the transfer case?Differential lock for the rear axleAActivation indicator lamps (yellow)
! Only activate the differential locks when:
R you are driving at walking pace.
R the driven wheels are not spinning.
R you are not driving on a firm road surface.
i You can only engage the differential locks
when the transfer case is in off-road gear
LOW (Y page 126).
i You can activate the differential locks in
the following order =, ? , ; .
Differential lock for the transfer case
XTo engage: switch the transfer case to off-
road gear LOW(Y page 126).XPress switch =.
The yellow activation indicator lamp under
switch = lights up when the transfer case
is in off-road gear LOW.
The å warning lamp in the instrument
panel lights up.
The red function indicator lamp above
switch = lights up when the differential is
locked.
In the multifunction display you see the:130Automatic transmissionDriving and parking
Page 133 of 288
ABS not available Differential
Locked message.
The å!÷ warning lamps light up
in the instrument cluster.
The differential lock for the transfer case is
engaged.
4ETS, ESP ®
, BAS and ABS are deactivated.
The vehicle's ability to steer is severely
restricted. Drive carefully and accelerate
gently for optimum traction.
i You can now engage differential lock for
the rear axle ? and differential lock for the
front axle ; as desired.
Differential lock for the rear axle
XTo engage: press switch ?.
First, the yellow activation indicator lamp
lights up, followed by the red function
indicator lamp.
The differential lock for the rear axle is
engaged.
Differential lock for the front axle
XTo engage: press switch ;.
First, the yellow activation indicator lamp
lights up, followed by the red function
indicator lamp.
The differential lock for the front axle is
engaged.
Deactivating the differential lock
You can deactivate the differential locks in
the reverse order: ;, ? , = .
XTo simultaneously deactivate all
differential locks: press switch =.
Yellow activation indicator lamps A go
out. Red function indicator lamps : go out
once the differential locks have
disengaged.
After approximately three seconds of
normal driving, ABS, 4ETS, ESP ®
and BAS
are activated.
The ABS not available Differential
Locked message disappears from themultifunction display and the å, !
and ÷ warning lamps in the instrument
cluster go out.XSwitch the transfer case to road gear
HIGH (Y page 126).
i
If red function indicator lamps : do not
go out when you disengage the differential
locks, bring the vehicle to a stop in
accordance with the traffic conditions,
then begin driving again. The load change
can disengage the differential locks.
GWarning!
Always remember to disengage the
differential locks when returning to drive on
paved roads, see “A few words about
differentials and differential locks”.
Refueling
Important safety notes
GWarning
Gasoline is highly flammable and poisonous.
It burns violently and can cause serious
personal injury.
Never allow sparks, flames or smoking
materials near gasoline.
Turn off the engine before refueling.
Whenever you are around gasoline, avoid
inhaling fumes and any skin or clothing
contact.
Direct skin contact with fuels and the
inhalation of fuel vapors are damaging to your
health.
GWarning
Overfilling of the fuel tank may create
pressure in the system which could cause a
gas discharge. This could cause the gasoline
to spray back out when removing the fuel
pump nozzle, which could cause personal
injury.
Refueling131Driving and parkingZ
Page 136 of 288
Problems with the fuel and fuel tankProblemPossible causes/consequences and M SolutionsFuel is leaking from the
vehicle.GRisk of explosion or fire
The fuel line or the fuel tank is defective.
XTurn the key to position 0 (Y page 117) in the ignition lock
immediately and remove it.XDo not restart the engine under any circumstances.XConsult a qualified specialist workshop.The fuel filler flap
cannot be opened.The fuel filler flap is not unlocked.
or
The key batteries are discharged.XUnlock the vehicle ( Y page 62).
or
XUnlock the vehicle using the mechanical key ( Y page 63).XOpen the rear door.XManually unlock the fuel filler flap using the emergency release
( Y page 133).The fuel filler flap is unlocked, but the opening mechanism is
jammed.XManually unlock the fuel filler flap using the emergency release
( Y page 133).XConsult a qualified specialist workshop.Parking
Important safety notes
GWarning
Do not park this vehicle in areas where
combustible materials can come into contact
with the hot exhaust system. Do not park the
vehicle on dry grassland or harvested grain
fields. Combustible materials, such as grass,
hay or leaves could be ignited by the hot
exhaust system and cause a vehicle fire.
Unintended vehicle movement can cause
serious personal injury or damage to the
vehicle or the vehicle drivetrain. To reduce
such risks, always do the following before
turning off the engine and leaving the vehicle:
R keep your right foot on the brake pedal.
R engage the parking brake.
R shift the automatic transmission into park
position P.
R slowly release the brake pedal.
R when parked on an incline, always turn the
front wheels towards the road curb.134ParkingDriving and parking
Page 140 of 288
Wet road surfaceGWarning
After driving in heavy rain for some time
without applying the brakes or through water
deep enough to wet brake components, the
first braking action may be somewhat
reduced. You have to depress the brake pedal
more firmly. Maintain a safe distance from
vehicles in front.
After driving on a wet road or having the
vehicle washed, brake firmly while paying
attention to the traffic conditions. This will
warm up the brake discs, thereby drying them
more quickly and protecting them against
corrosion.
GWarning
Make sure that you do not endanger other
road users when you apply the brakes.
Limited braking performance on salt
treated roads
GWarning
The layer of salt on the brake discs and the
brake pads/linings may cause a delay in the
braking effect, resulting in a significantly
longer braking distance, which could lead to
an accident.
To avoid this danger, you should:
R occasionally brake carefully, without
putting other road users at risk, when you
are driving on salted roads. This helps to
remove any salt that may have started to
build up on the brake discs and the brake
pads/linings.
R maintain a greater distance to the vehicle
ahead and drive with particular care.
R carefully apply the brakes at the end of a
trip and immediately after commencing a
new trip, so that salt residues are removed
from the brake discs.
Brake maintenance
! If the brake warning lamp lights up in the
instrument cluster and you hear a warning
tone, even though the parking brake has
been released, the brake fluid level may be
too low. Observe additional warning
messages in the multifunction display.
The brake fluid level may be too low due to
brake pad wear or leaking brake lines.
Have the brake system checked
immediately. This work should be carried
out at an authorized Mercedes-Benz
Center.
All checks and maintenance work on the
brake system must be carried out at a
qualified specialist workshop only. Consult an
authorized Mercedes-Benz Center for this
purpose.
Have the brake pads and the brake fluid
replaced at a qualified specialist workshop,
e.g. an authorized Mercedes-Benz Center.
GWarning
If other than recommended brake pads are
installed, or other than recommended brake
fluid is used, the braking properties of the
vehicle can be degraded to an extent that safe
braking is substantially impaired. This could
result in an accident.
! A function or performance test may only
be carried out on a two-axle dynamometer.
If you are planning to have the vehicle
tested on such a dynamometer, contact an
authorized Mercedes-Benz Center to
obtain further information first. Otherwise,
the drive train or the brake system may
suffer damage.
! As the ESP ®
system operates
automatically, the engine and the ignition
must be switched off (the key must be in
position 0 or 1 in the ignition lock) if the
parking brake is tested on a brake
dynamometer (for a maximum of ten
seconds).
138Driving tipsDriving and parking