2011 KIA Sportage display
[x] Cancel search: displayPage 142 of 385
461
Features of your vehicle
4WD LOCK indicator (if equipped)
The 4WD LOCK indicator light is illumi-
nated when the 4WD LOCK button is
pushed. The purpose of this 4WD LOCK
mode is to increase the drive power
when driving on dry road surfaces, wet
pavement, snow-covered roads and/or
off-road. The 4WD LOCK indicator light is
turned off by pushing the button again.
LCD display warning (if equipped)
Key not in vehicle
If the smart key is not in the vehicle and
if any door is opened or closed with the
ENGINE START/STOP button in the
ACC, ON, or START position, the warn-
ing illuminates on the LCD display. Also,
the chime sounds for 5 seconds when
the smart key is not in the vehicle and the
door is closed.
Always have the smart key with you.
Key not detected
If the smart key is not in the vehicle or is
not detected and you press the ENGINE
START/STOP button, the warning illumi-
nates on the LCD display for 10 seconds.
Also, the immobilizer indicator and the
key holder light blinks for 10 seconds.
Low key battery
If the ENGINE START/STOP button turns
to the OFF position when the smart key
in the vehicle discharges, the warning
illuminates on the LCD display for about
10 seconds. Also, the warning chime
sounds once.
Replace the battery with a new one. Press brake pedal to start engine
If the ENGINE START/STOP button turns
to the ACC position twice by pressing the
button repeatedly without depressing the
brake pedal, the warning illuminates on
the LCD display for about 10 seconds to
indicate that you should depress the
brake pedal to start the engine.
Press cluch pedal to start engine
If the ENGINE START/STOP button turns
to the ACC position twice by pressing the
button repeatedly without depressing the
clutch pedal, the warning illuminates on
the LCD display for about 10 seconds to
indicate that you should depress the
clutch pedal to start the engine.
Remove key
When you turn off the engine with the
smart key in the smart key holder, the
warning illuminates on the LCD display
for about 10 seconds. Also, the smart key
holder light blinks for about 10 seconds.
To remove the smart key push the smart
key once and pull it out from the smart
key holder.
CAUTION
Do not use 4WD LOCK mode on dry
paved roads or highway, it cancause noise, vibration or damage of4WD related parts.
Page 143 of 385
Features of your vehicle
62
4
Insert key
If you press the ENGINE START/STOP
button while "Key is not detected" illumi-
nates on the LCD display, the warning
“Insert key” illuminates for about 10 sec-
onds. Also, the immobilizer indicator and
the key holder light blinks for about 10
seconds.
Shift to "P" position
If you try to turn off the engine without the
shift lever in the P (Park) position, the
ENGINE START/STOP button will turn to
the ACC position. If the button is pressed
once more it will turn to the ON position.
The warning illuminates on the LCD display
for about 10 seconds to indicate that you
should press the ENGINE START/STOP
button with the shift lever in the P (Park)
position to turn off the engine.
Also, the warning chime sounds for about
10 seconds. (if equipped)
Check stop lamp fuse
When the stop lamp fuse is disconnect-
ed, the warning illuminates for 10 sec-
onds on the LCD display.
Replace the fuse with a new one. If that
is not possible you can start the engine
by pressing the engine start/stop button
for 10 seconds with the engine start/stop
button in ACC. Press start button again
If you can not operate the ENGINE
START/STOP button when there is a
problem with the ENGINE START/STOP
button system, the warning illuminates
for 10 seconds and the chime sounds
continuously to indicate that you could
start the engine by pressing the ENGINE
START/STOP button once more.
The chime will stop if the ENGINE
START/STOP button system works nor-
mally or the theft alarm system is armed.
If the warning illuminates each time you
press the ENGINE START/STOP button,
take your vehicle to an authorized KIA
dealer and have the system checked.
Shift to "P" or "N" to start the engine
If you try to start the engine with the shift
lever not in the P (Park) or N (Neutral)
position, the warning illuminates for
about 10 seconds on the LCD display.
You can also start the engine with the
shift lever in the N (Neutral) position, but
for your safety start the engine with the
shift lever in the P (Park) position.
Press start button while turn steering
If the steering wheel does not unlock nor-
mally when the ENGINE START/STOP
button is pressed, the warning illumi-
nates for 10 seconds on the LCD display.
Also, the warning chime sounds once
and the ENGINE START/STOP button
light blinks for 10 seconds.
When you are warned, press the
ENGINE START/STOP button while turn-
ing the steering wheel right and left.
Check steering wheel lock
If the steering wheel does not lock nor-
mally when the ENGINE START/STOP
button turns to the OFF position, the
warning illuminates for 10 seconds on
the LCD display. Also, the warning chime
sounds for 3 seconds and the ENGINE
START/STOP button light blinks for 10
seconds.
Steering wheel unlock
If the steering wheel does not lock nor-
mally when the ENGINE START/STOP
button turns to the OFF position, the
warning illuminates for 10 minutes on the
LCD display. If locks when the door is
opened or when you pull out the smart
key from the smart key holder.
Page 147 of 385
Features of your vehicle
66
4
D330000AHM-EE
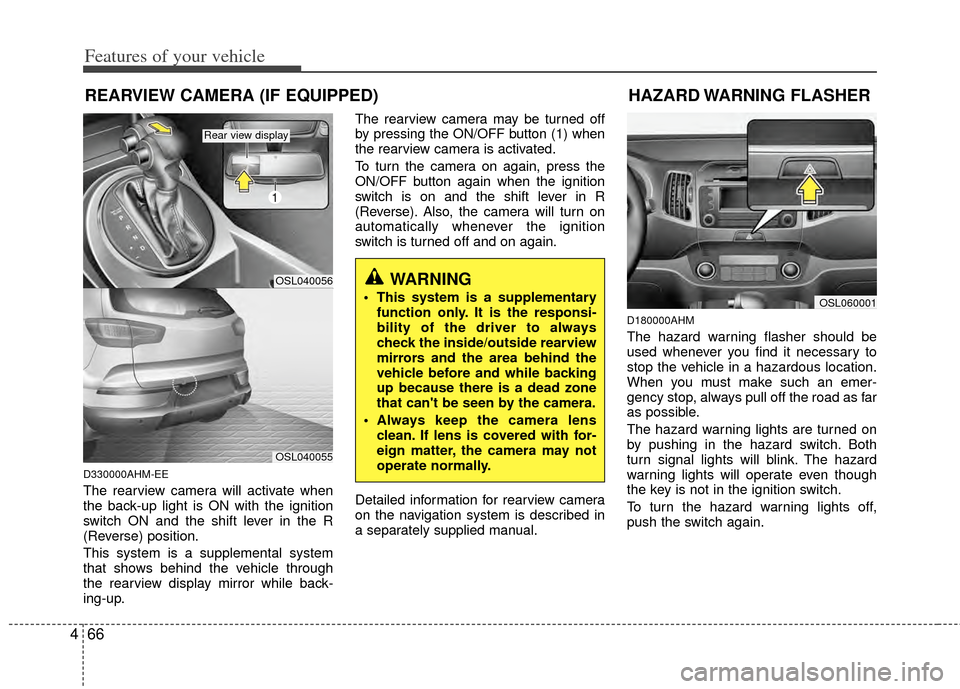
The rearview camera will activate when
the back-up light is ON with the ignition
switch ON and the shift lever in the R
(Reverse) position.
This system is a supplemental system
that shows behind the vehicle through
the rearview display mirror while back-
ing-up. The rearview camera may be turned off
by pressing the ON/OFF button (1) when
the rearview camera is activated.
To turn the camera on again, press the
ON/OFF button again when the ignition
switch is on and the shift lever in R
(Reverse). Also, the camera will turn on
automatically whenever the ignition
switch is turned off and on again.
Detailed information for rearview camera
on the navigation system is described in
a separately supplied manual.
D180000AHM
The hazard warning flasher should be
used whenever you find it necessary to
stop the vehicle in a hazardous location.
When you must make such an emer-
gency stop, always pull off the road as far
as possible.
The hazard warning lights are turned on
by pushing in the hazard switch. Both
turn signal lights will blink. The hazard
warning lights will operate even though
the key is not in the ignition switch.
To turn the hazard warning lights off,
push the switch again.
WARNING
This system is a supplementary
function only. It is the responsi-
bility of the driver to always
check the inside/outside rearview
mirrors and the area behind the
vehicle before and while backing
up because there is a dead zone
that can't be seen by the camera.
Always keep the camera lens clean. If lens is covered with for-
eign matter, the camera may not
operate normally.
REARVIEW CAMERA (IF EQUIPPED)
OSL060001
HAZARD WARNING FLASHER
OSL040056
1
OSL040055
Rear view display
Page 169 of 385
Features of your vehicle
88
4
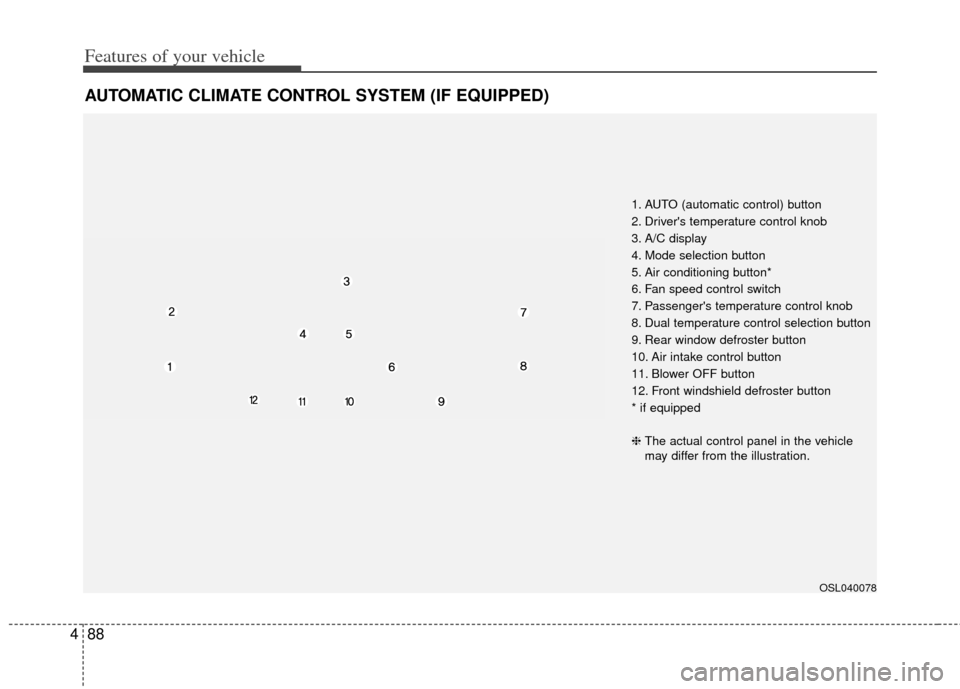
AUTOMATIC CLIMATE CONTROL SYSTEM (IF EQUIPPED)
OSL040078
1. AUTO (automatic control) button
2. Driver's temperature control knob
3. A/C display
4. Mode selection button
5. Air conditioning button*
6. Fan speed control switch
7. Passenger's temperature control knob
8. Dual temperature control selection button
9. Rear window defroster button
10. Air intake control button
11. Blower OFF button
12. Front windshield defroster button
* if equipped
❈ The actual control panel in the vehicle
may differ from the illustration.
Page 173 of 385
Features of your vehicle
92
4
Adjusting the driver and passenger side
temperature individually
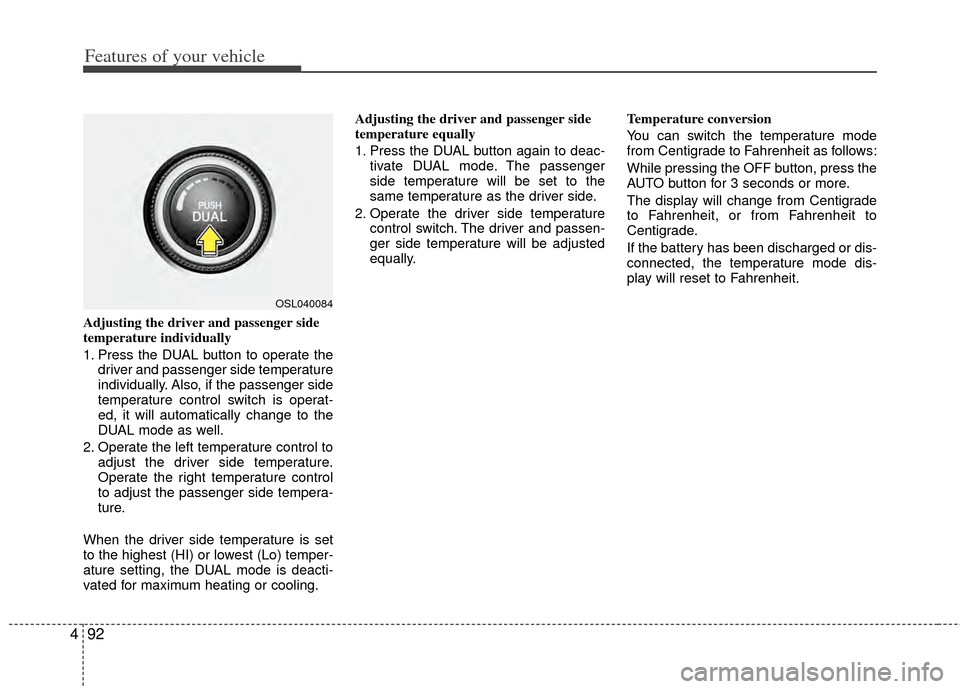
1. Press the DUAL button to operate the
driver and passenger side temperature
individually. Also, if the passenger side
temperature control switch is operat-
ed, it will automatically change to the
DUAL mode as well.
2. Operate the left temperature control to adjust the driver side temperature.
Operate the right temperature control
to adjust the passenger side tempera-
ture.
When the driver side temperature is set
to the highest (HI) or lowest (Lo) temper-
ature setting, the DUAL mode is deacti-
vated for maximum heating or cooling. Adjusting the driver and passenger side
temperature equally
1. Press the DUAL button again to deac-
tivate DUAL mode. The passenger
side temperature will be set to the
same temperature as the driver side.
2. Operate the driver side temperature control switch. The driver and passen-
ger side temperature will be adjusted
equally. Temperature conversion
You can switch the temperature mode
from Centigrade to Fahrenheit as follows:
While pressing the OFF button, press the
AUTO button for 3 seconds or more.
The display will change from Centigrade
to Fahrenheit, or from Fahrenheit to
Centigrade.
If the battery has been discharged or dis-
connected, the temperature mode dis-
play will reset to Fahrenheit.
OSL040084
Page 178 of 385
497
Features of your vehicle
Defogging logic
To reduce the possibility of fogging up
the inside of the windshield, the air intake
or air conditioning is controlled automati-
cally according to certain conditions such
as or position. To cancel or
return to the defogging logic, do the fol-
lowing.
Manual climate control system
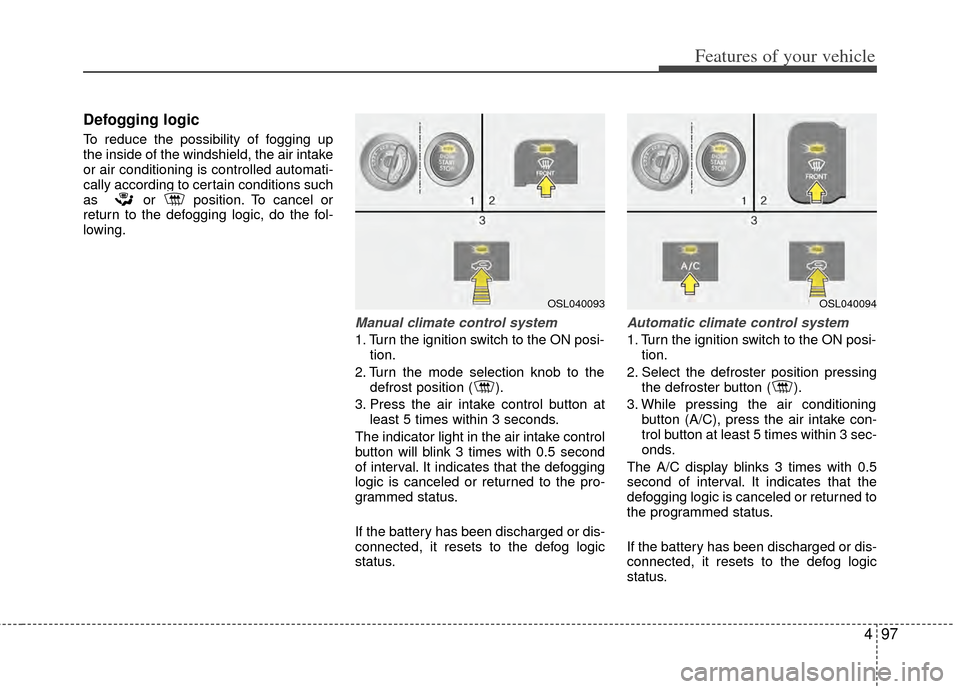
1. Turn the ignition switch to the ON posi-tion.
2. Turn the mode selection knob to the defrost position ( ).
3. Press the air intake control button at least 5 times within 3 seconds.
The indicator light in the air intake control
button will blink 3 times with 0.5 second
of interval. It indicates that the defogging
logic is canceled or returned to the pro-
grammed status.
If the battery has been discharged or dis-
connected, it resets to the defog logic
status.
Automatic climate control system
1. Turn the ignition switch to the ON posi- tion.
2. Select the defroster position pressing the defroster button ( ).
3. While pressing the air conditioning button (A/C), press the air intake con-
trol button at least 5 times within 3 sec-
onds.
The A/C display blinks 3 times with 0.5
second of interval. It indicates that the
defogging logic is canceled or returned to
the programmed status.
If the battery has been discharged or dis-
connected, it resets to the defog logic
status.
OSL040093OSL040094
Page 196 of 385
4115
Features of your vehicle
Using RADIO, SETUP, VOLUME
and AUDIO CONTROL
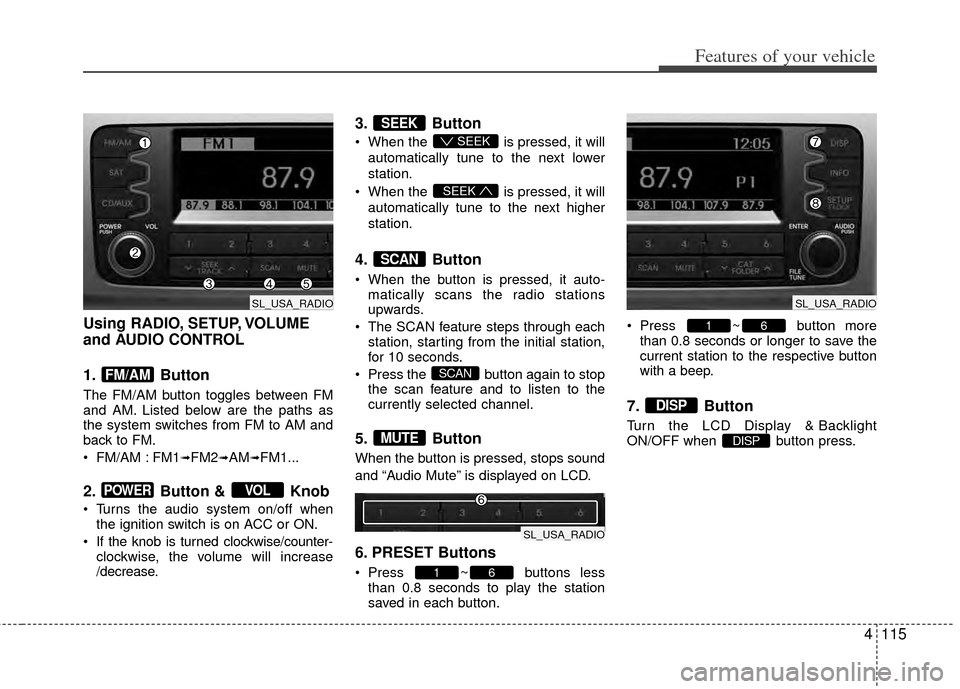
1. Button
The FM/AM button toggles between FM
and AM. Listed below are the paths as
the system switches from FM to AM and
back to FM.
FM/AM : FM1
➟FM2➟AM➟FM1...
2. Button & Knob
Turns the audio system on/off whenthe ignition switch is on ACC or ON.
If the knob is turned clockwise/counter- clockwise, the volume will increase
/decrease.
3. Button
When the is pressed, it will
automatically tune to the next lower
station.
When the is pressed, it will
automatically tune to the next higher
station.
4. Button
When the button is pressed, it auto- matically scans the radio stations
upwards.
The SCAN feature steps through each station, starting from the initial station,
for 10 seconds.
Press the button again to stop the scan feature and to listen to the
currently selected channel.
5. Button
When the button is pressed, stops sound
and “Audio Mute” is displayed on LCD.
6. PRESET Buttons
Press ~ buttons lessthan 0.8 seconds to play the station
saved in each button. Press ~ button more
than 0.8 seconds or longer to save the
current station to the respective button
with a beep.
7. Button
Turn the LCD Display & Backlight
ON/OFF when button press.DISP
DISP
61
61
MUTE
SCAN
SCAN
SEEK
SEEK
SEEK
VOLPOWER
FM/AM
SL_USA_RADIO
SL_USA_RADIO
SL_USA_RADIO
Page 197 of 385
Features of your vehicle
116
4
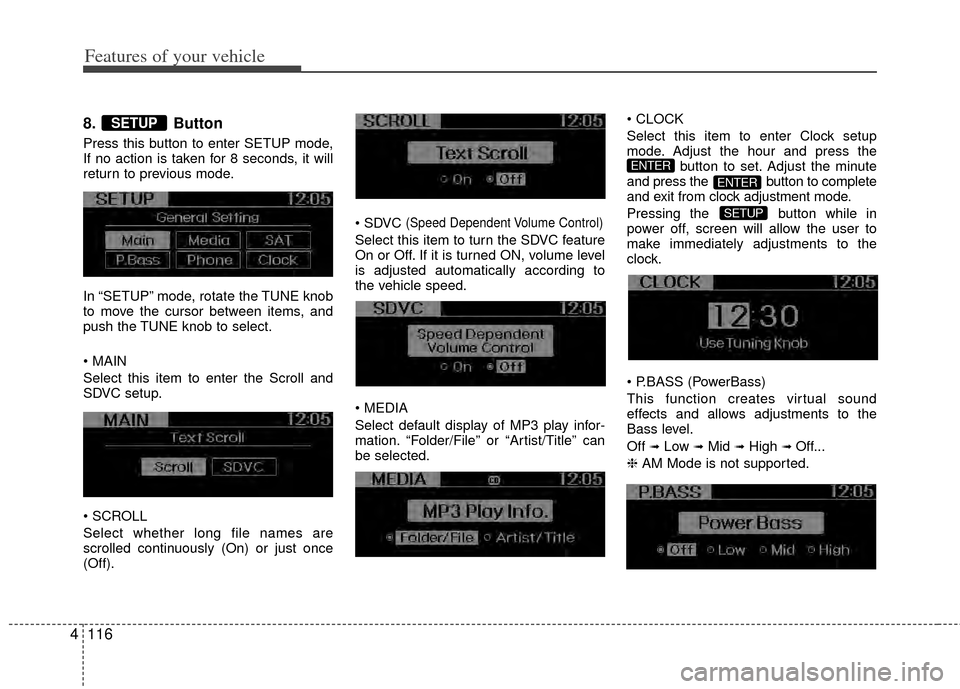
8. Button
Press this button to enter SETUP mode,
If no action is taken for 8 seconds, it will
return to previous mode.
In “SETUP” mode, rotate the TUNE knob
to move the cursor between items, and
push the TUNE knob to select.
Select this item to enter the Scroll and
SDVC setup.
Select whether long file names are
scrolled continuously (On) or just once
(Off).
(Speed Dependent Volume Control)
Select this item to turn the SDVC feature
On or Off. If it is turned ON, volume level
is adjusted automatically according to
the vehicle speed.
Select default display of MP3 play infor-
mation. “Folder/File” or “Artist/Title” can
be selected.
Select this item to enter Clock setup
mode. Adjust the hour and press the
button to set. Adjust the minute
and press the button to complete
and exit from clock adjustment mode.
Pressing the button while in
power off, screen will allow the user to
make immediately adjustments to the
clock.
(PowerBass)
This function creates virtual sound
effects and allows adjustments to the
Bass level.
Off
➟Low ➟Mid ➟High ➟ Off...
❈ AM Mode is not supported.
SETUP
ENTER
ENTER
SETUP