2011 KIA Sportage jump start
[x] Cancel search: jump startPage 247 of 385
525
Driving your vehicle
✽
✽NOTICE
• Do not drive in water if the level is
higher than the bottom of the vehicle.
• Check your brake condition once you are out of mud or water. Press the
brake pedal several times as you move
slowly until you feel normal braking
forces return.
• Shorten your scheduled maintenance interval if you drive in off-road condi-
tions such as sand, mud or water (see
“Maintenance under severe usage
conditions” in section 7). Always wash
your vehicle thoroughly after off-road
use, especially cleaning the bottom of
the vehicle.
• Since the driving torque is always applied to the 4 wheels the perform-
ance of the 4WD vehicle is greatly
affected by the condition of the tires.
Be sure to equip the vehicle with four
tires of the same size and type.
• A full time four wheel drive vehicle cannot be towed by an ordinary tow
truck. Make sure that the vehicle is
placed on a flat bed truck for moving.
CAUTION - Mud or snow
If one of the front or rear wheels
begins to spin in mud, snow, etc.the vehicle can sometimes be driv-en out by depressing the accelera-tor pedal further; however avoidrunning the engine continuously athigh rpm because doing so coulddamage the 4WD system.
WARNING - 4WD driving
Avoid high cornering speed.
Do not make quick steering wheel movements, such as sharp
lane changes or fast, sharp turns.
The risk of rollover is greatly increased if you lose control of
your vehicle at high speed.
In a collision, an unbelted person is significantly more likely to die
compared to a person wearing a
seat belt.
Loss of control often occurs if two or more wheels drop off the
roadway and the driver over-
steers to re-enter the roadway. In
the event your vehicle leaves the
roadway, do not steer sharply.
Instead, slow down before pulling
back into the travel lanes.
WARNING - Jacked vehicle
While the full-time 4WD vehicle is
being raised on a jack, never start
the engine or cause the tires to
rotate.
There is the danger that rotating
tires touching the ground could
cause the vehicle to go off the jack
and to jump forward.
Page 254 of 385
Driving your vehicle
32
5
✽
✽
NOTICE
When you jump start your vehicle
because of a drained battery, the engine
may not run as smoothly and the ABS
warning light may turn on at the same
time. This happens because of low bat-
tery voltage. It does not mean your ABS
has malfunctioned.
• Do not pump your brakes!
• Have the battery recharged before
driving the vehicle.
E070500AHM-EU
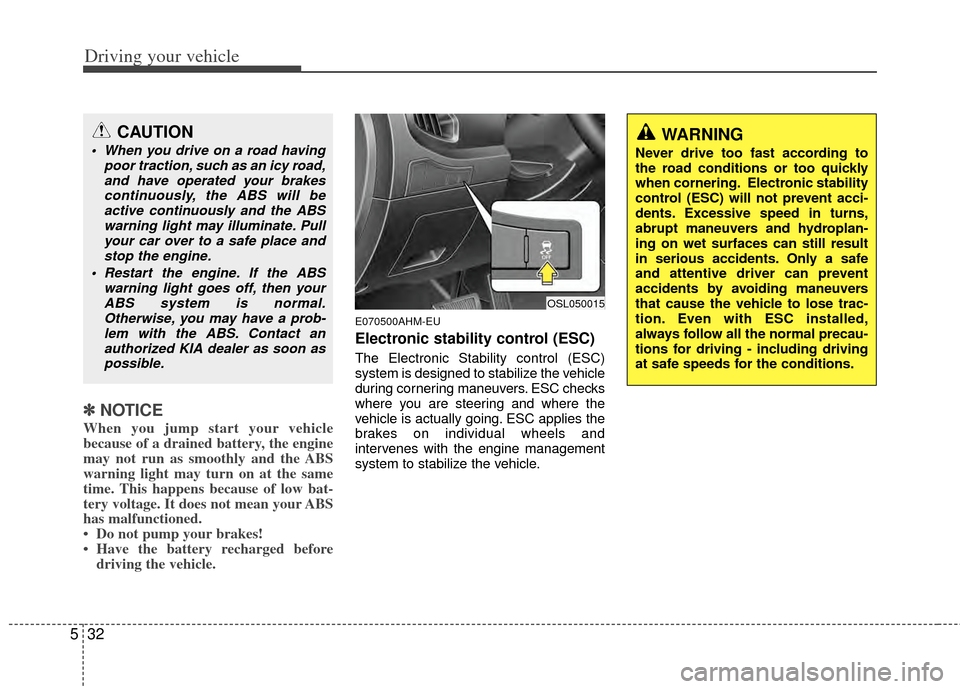
Electronic stability control (ESC)
The Electronic Stability control (ESC)
system is designed to stabilize the vehicle
during cornering maneuvers. ESC checks
where you are steering and where the
vehicle is actually going. ESC applies the
brakes on individual wheels and
intervenes with the engine management
system to stabilize the vehicle.
CAUTION
When you drive on a road having
poor traction, such as an icy road,and have operated your brakescontinuously, the ABS will beactive continuously and the ABS warning light may illuminate. Pullyour car over to a safe place andstop the engine.
Restart the engine. If the ABS warning light goes off, then yourABS system is normal.Otherwise, you may have a prob-lem with the ABS. Contact anauthorized KIA dealer as soon aspossible.WARNING
Never drive too fast according to
the road conditions or too quickly
when cornering. Electronic stability
control (ESC) will not prevent acci-
dents. Excessive speed in turns,
abrupt maneuvers and hydroplan-
ing on wet surfaces can still result
in serious accidents. Only a safe
and attentive driver can prevent
accidents by avoiding maneuvers
that cause the vehicle to lose trac-
tion. Even with ESC installed,
always follow all the normal precau-
tions for driving - including driving
at safe speeds for the conditions.
OSL050015
Page 293 of 385
63
What to do in an emergency
2. When the vehicle is stopped, turn onyour emergency hazard flashers, set
the parking brake and put the transaxle
in P (Park, automatic transaxle) or
reverse (manual transaxle).
3. Have all passengers get out of the vehicle. Be sure they all get out on the
side of the car that is away from traffic.
4. When changing a flat tire, follow the instruction provided later in this sec-
tion.
F020300AUN
If the engine stalls while driving
1. Reduce your speed gradually, keeping a straight line. Move cautiously off the
road to a safe place.
2. Turn on your emergency flashers.
3. Try to start the engine again. If your vehicle will not start, contact an
authorized KIA dealer or seek other
qualified assistance.
F030100AAM
If engine doesn't turn over or
turns over slowly
1. If your car has an automatic transaxle,be sure the shift lever is in N (Neutral)
or P (Park) and the emergency brake
is set.
2. Check the battery connections to be sure they are clean and tight.
3. Turn on the interior light. If the light dims or goes out when you operate the
starter, the battery is discharged.
4. Check the starter connections to be sure they are securely tightened.
5. Do not push or pull the vehicle to start it. See instructions for "Jump starting".
F030200AHM
If engine turns over normally but
does not start
1. Check the fuel level.
2. With the ignition switch in the LOCKposition, check all connectors at the
ignition coils and spark plugs.
Reconnect any that may be discon-
nected or loose.
3. Check the fuel line in the engine com- partment.
4. If the engine still does not start, call an authorized KIA dealer or seek other
qualified assistance.
IF THE ENGINE WILL NOT START
WARNING
If the engine will not start, do not
push or pull the vehicle to start it.
This could result in a collision or
cause other damage. In addition,
push or pull starting may cause the
catalytic converter to overload and
create a fire hazard.
Page 294 of 385
What to do in an emergency
46
EMERGENCY STARTING
F040000AUN
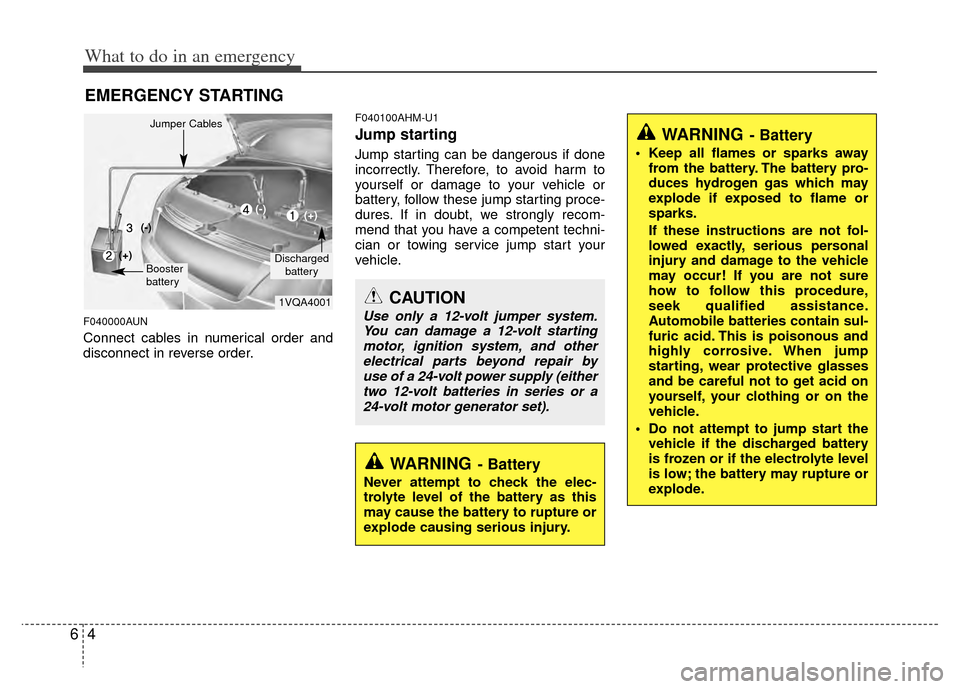
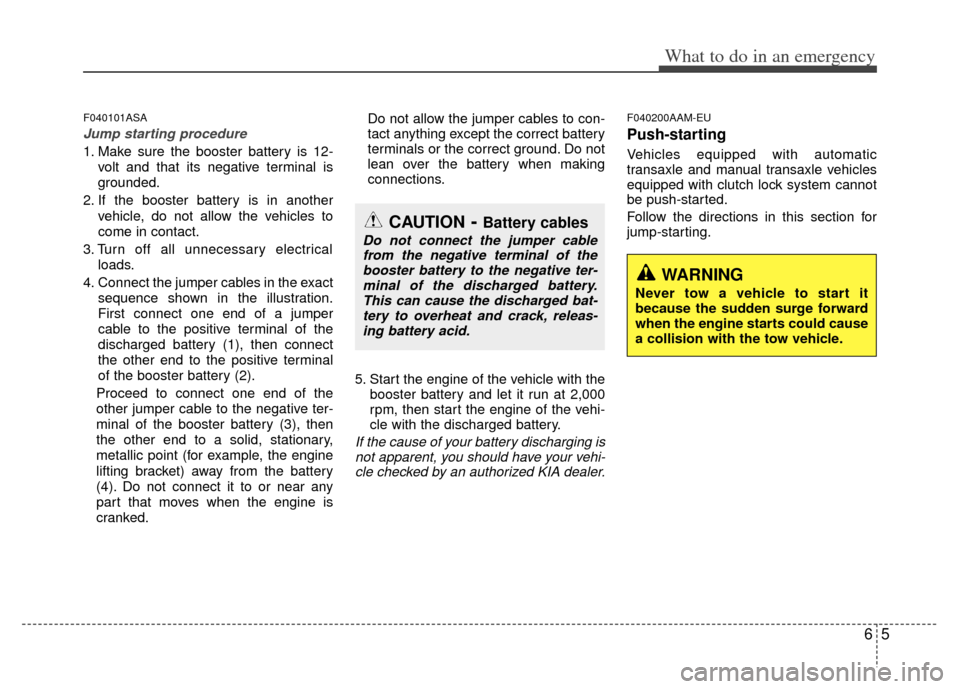
Connect cables in numerical order and
disconnect in reverse order.
F040100AHM-U1
Jump starting
Jump starting can be dangerous if done
incorrectly. Therefore, to avoid harm to
yourself or damage to your vehicle or
battery, follow these jump starting proce-
dures. If in doubt, we strongly recom-
mend that you have a competent techni-
cian or towing service jump start your
vehicle.
CAUTION
Use only a 12-volt jumper system.You can damage a 12-volt startingmotor, ignition system, and otherelectrical parts beyond repair by use of a 24-volt power supply (eithertwo 12-volt batteries in series or a24-volt motor generator set).
WARNING- Battery
• Keep all flames or sparks away from the battery. The battery pro-
duces hydrogen gas which may
explode if exposed to flame or
sparks.
If these instructions are not fol-
lowed exactly, serious personal
injury and damage to the vehicle
may occur! If you are not sure
how to follow this procedure,
seek qualified assistance.
Automobile batteries contain sul-
furic acid. This is poisonous and
highly corrosive. When jump
starting, wear protective glasses
and be careful not to get acid on
yourself, your clothing or on the
vehicle.
Do not attempt to jump start the vehicle if the discharged battery
is frozen or if the electrolyte level
is low; the battery may rupture or
explode.
WARNING- Battery
Never attempt to check the elec-
trolyte level of the battery as this
may cause the battery to rupture or
explode causing serious injury.
1VQA4001
Discharged
battery
Jumper Cables
Booster
battery
(-)
(+)
(+)(-)
Page 295 of 385
65
What to do in an emergency
F040101ASA
Jump starting procedure
1. Make sure the booster battery is 12-volt and that its negative terminal is
grounded.
2. If the booster battery is in another vehicle, do not allow the vehicles to
come in contact.
3. Turn off all unnecessary electrical loads.
4. Connect the jumper cables in the exact sequence shown in the illustration.
First connect one end of a jumper
cable to the positive terminal of the
discharged battery (1), then connect
the other end to the positive terminal
of the booster battery (2).
Proceed to connect one end of the
other jumper cable to the negative ter-
minal of the booster battery (3), then
the other end to a solid, stationary,
metallic point (for example, the engine
lifting bracket) away from the battery
(4). Do not connect it to or near any
part that moves when the engine is
cranked. Do not allow the jumper cables to con-
tact anything except the correct battery
terminals or the correct ground. Do not
lean over the battery when making
connections.
5. Start the engine of the vehicle with the booster battery and let it run at 2,000
rpm, then start the engine of the vehi-
cle with the discharged battery.
If the cause of your battery discharging isnot apparent, you should have your vehi-cle checked by an authorized KIA dealer.
F040200AAM-EU
Push-starting
Vehicles equipped with automatic
transaxle and manual transaxle vehicles
equipped with clutch lock system cannot
be push-started.
Follow the directions in this section for
jump-starting.
CAUTION- Battery cables
Do not connect the jumper cablefrom the negative terminal of thebooster battery to the negative ter- minal of the discharged battery.This can cause the discharged bat-tery to overheat and crack, releas-ing battery acid.
WARNING
Never tow a vehicle to start it
because the sudden surge forward
when the engine starts could cause
a collision with the tow vehicle.
Page 380 of 385
Index
4I
Economical operation ··················\
··················\
················5-44
Electric power steering ··················\
··················\
··············4-35
Electrochromic mirror (ECM) ··················\
··················\
···4-37
Electronic stability control (ESC) ··················\
···············5-32
Emergency starting ··················\
··················\
··················\
····6-4Jump starting ··················\
··················\
··················\
········6-4
Push starting ··················\
··················\
··················\
·········6-5
Emergency tailgate safety release ··················\
················4-21
Emergency towing ··················\
··················\
··················\
···6-17
Emergency while driving ··················\
··················\
·············6-2
Emission control system ··················\
··················\
············7-57 Crankcase emission control system ··················\
·······7-57
Evaporative emission control system ··················\
·····7-57
Exhaust emission control system ··················\
···········7-58
Engine compartment ··················\
··················\
············2-4, 7-2
Engine coolant ··················\
··················\
··················\
·········7-14
Engine number ··················\
··················\
··················\
···········8-7
Engine oil ··················\
··················\
··················\
·················7-13\
Engine overheats ··················\
··················\
··················\
········6-6
Engine start/stop button ··················\
··················\
···············5-7
Engine temperature gauge ··················\
··················\
·········4-47
Engine will not start ··················\
··················\
··················\
···6-3
Evaporative emission control system ··················\
··········7-57
Exhaust emission control system ··················\
·················7-58\
Explanation of scheduled maintenance items ········\
········7-10
Exterior care ··················\
··················\
··················\
·············7-51 Exterior features ··················\
··················\
··················\
·····4-107
Roof rack ··················\
··················\
··················\
··········4-107
Flat tire ··················\
··················\
··················\
··················\
······6-7 Changing tires ··················\
··················\
··················\
······6-8
Compact spare tire ··················\
··················\
···············6-13
Jack and tools ··················\
··················\
··················\
·······6-7
Removing and storing the spare tire ··················\
········6-8
Floor mat anchor(s) ··················\
··················\
·················4-10\
4
Fluid Washer fluid ··················\
··················\
··················\
·······7-18
Brake fluid ··················\
··················\
··················\
··········7-17
Folding the rear seat ··················\
··················\
··················\
3-12
Four wheel drive (4WD) ··················\
··················\
············5-21
Front seat adjustment - manual ···········\
··················\
···········3-4
Front seat adjustment - power ··················\
··················\
·····3-5
Fuel filler lid ··················\
··················\
··················\
············4-28
Fuel gauge ··················\
··················\
··················\
················4-48
Fuel requirements ··················\
··················\
··················\
······1-3
Fuses ·················\
··················\
··················\
··················\
·······7-42 Fuse/relay panel description ··················\
··················\
7-46
Main fuse··················\
··················\
··················\
·············7-45
Memory fuse ··················\
··················\
··················\
·······7-44
E
F
Page 382 of 385
Index
6I
Jack and tools ··················\
··················\
··················\
·············6-7
Jump starting ··················\
··················\
··················\
··············6-4
Key positions ··················\
··················\
··················\
·············5-4
Keys ··················\
··················\
··················\
··················\
·········4-2
LabelAir bag warning label ··················\
··················\
···········3-68
Tire sidewall labeling ··················\
··················\
···········7-35
Tire specification and pressure label ··················\
········8-7
Vehicle certification label ··················\
··················\
·······8-6
Latch system, see lower anchor system ··················\
·······3-39
Lighting ················\
··················\
··················\
··················\
····4-67 Battery saver function ··················\
··················\
··········4-67
Daytime running light ··················\
··················\
···········4-71
Headlight escort function ··················\
··················\
······4-67
Headlight welcome function ··················\
··················\
·4-67
Lubricants and capacities ··················\
··················\
·············8-4
Luggage net holder ··················\
··················\
··················\
4-104
Luggage rack, see roof rack ··················\
··················\
·····4-107
Lumbar support ··················\
··················\
··················\
··········3-7 Main fuse ··················\
··················\
··················\
················7-45
Maintenance
Explanation of scheduled maintenance items ···········7-10Maintenance services ··················\
··················\
············· 7-3
Normal maintenance schedule ··················\
··················\
7-6
Owner maintenance ··················\
··················\
················7-4
Tire maintenance ··················\
··················\
··················\
7-34
Maintenance services ··················\
··················\
··················\
·7-3
Manual climate control system ··················\
··················\
··4-80 Air conditioning ··················\
··················\
··················\
·4-84
Climate control air filter ··················\
··················\
·······4-87
Heating and air conditioning ··················\
··················\
4-80
Manual heating and air conditioning ··················\
···········4-90
Manual transaxle ··················\
··················\
··················\
······5-12
Memory fuse ··················\
··················\
··················\
············7-44
Mirrors ················\
··················\
··················\
··················\
·····4-37 Day/night rearview mirror ··················\
··················\
···4-37
Electric chromic mirror (ECM) ··················\
·············4-37
Inside rearview mirror ··················\
··················\
··········4-37
Outside rearview mirror ··················\
··················\
·······4-43
Moonroof, see panoramic sunroof ··················\
···············4-31
Neck restraints, see headrest ··················\
················3-7, 3-15
L
M
N
K
J