2011 KIA Soul ECO mode
[x] Cancel search: ECO modePage 1 of 356

k i a ,
t h e
c o m p a n y
Thank you for becoming the owner of a new Kia vehicle.
As a global car manufacturer focused on building high-quality, value
for money prices, Kia Motors is dedicated to providing you with a
customer service experience that exceeds your expectations.
All information contained in this Owner’s Manual is accurate at the
time of publication. However, Kia reserves the right to make changes
at any time so that our policy of continual product improvement can
be carried out.
This manual applies to all Kia models and includes descriptions and
explanations of optional as well as standard equipment. As a result,
you may encounter material in this manual that is not applicable to
your specific Kia vehicle.
Drive safely and enjoy your Kia!
Page 2 of 356
i
Thank you for choosing a KIA vehicle.
When you require service, remember that your KIA Dealer
knows your vehicle best. Your dealer has factory-trained tech-
nicians, recommended special tools, genuine KIA replacement
parts and is dedicated to your complete satisfaction.
Because subsequent owners require this important information
as well, this publication should remain with the vehicle if it is
sold.
This manual will familiarize you with operational, mainte-
nance and safety information about your new vehicle. It is sup-
plemented by a Warranty and Consumer Information manual
that provides important information on all warranties regarding
your vehicle.
We urge you to read these publications carefully and follow the
recommendations to help assure enjoyable and safe operation
of your new vehicle.
KIA offers a great variety of options, components and features
for its various models. Therefore, some of the equipment
described in this manual, along with the various illustrations,
may not be applicable to your particular vehicle.
The information and specifications provided in this manual
were accurate at the time of printing. KIA reserves the right to
discontinue or change specifications or design at any time
without notice and without incurring any obligation. If you
have questions, always check with your KIA dealer.
We assure you of our continuing interest in your motoring
pleasure and satisfaction in your KIA vehicle.
© 2011 Kia Canada Inc.
All rights reserved. Reproduction by any means, electronic or
mechanical, including photocopying, recording, or by any
information storage and retrieval system or translation in
whole or part is not permitted without written authorization
from Kia Canada Inc..
Printed in Korea
Foreword
Page 29 of 356
Safety features of your vehicle
16
3
C020106AUN
Seat belts - Front passenger and rear
seat 3-point system with combinationlocking retractor
To fasten your seat belt:
Combination retractor type seat belts are
installed in the rear seat positions to help
accommodate the installation of child
restraint systems. Although a combina-
tion retractor is also installed in the front
passenger seat position, it is strongly
recommended that children always be
seated in the rear seat. NEVER place
any infant restraint system in the front
seat of the vehicle.
This type of seat belt combines the fea-
tures of both an emergency locking
retractor seat belt and an automatic lock-
ing retractor seat belt. To fasten your seat
belt, pull it out of the retractor and insert
the metal tab into the buckle. There will
be an audible "click" when the tab locks
into the buckle. When not securing a
child restraint, the seat belt operates in
the same way as the driver's seat belt
(Emergency Locking Retractor Type). It
automatically adjusts to the proper length
only after the lap belt portion of the seat
belt is adjusted manually so that it fits
snugly around your hips. When the seat belt is fully extended from
the retractor to allow the installation of a
child restraint system, the seat belt oper-
ation changes to allow the belt to retract,
but not to extend (Automatic Locking
Retractor Type). Refer to “Using a child
restraint system” in this section.
✽ ✽
NOTICE
Although the combination retractor
provides the same level of protection for
seated passengers in either emergency
or automatic locking modes, it is recom-
mended that seated passengers use the
emergency locking feature for improved
convenience. The automatic locking
function is intended to facilitate child
restraint installation. To convert from
the automatic locking feature to the
emergency locking operation mode,
allow the unbuckled seat belt to fully
retract.
B200A02NF
WARNING
You should place the lap belt por-
tion as low as possible and snugly
across your hips, not on your waist.
If the lap belt is located too high on
your waist, it may increase the
chance of injury in the event of a
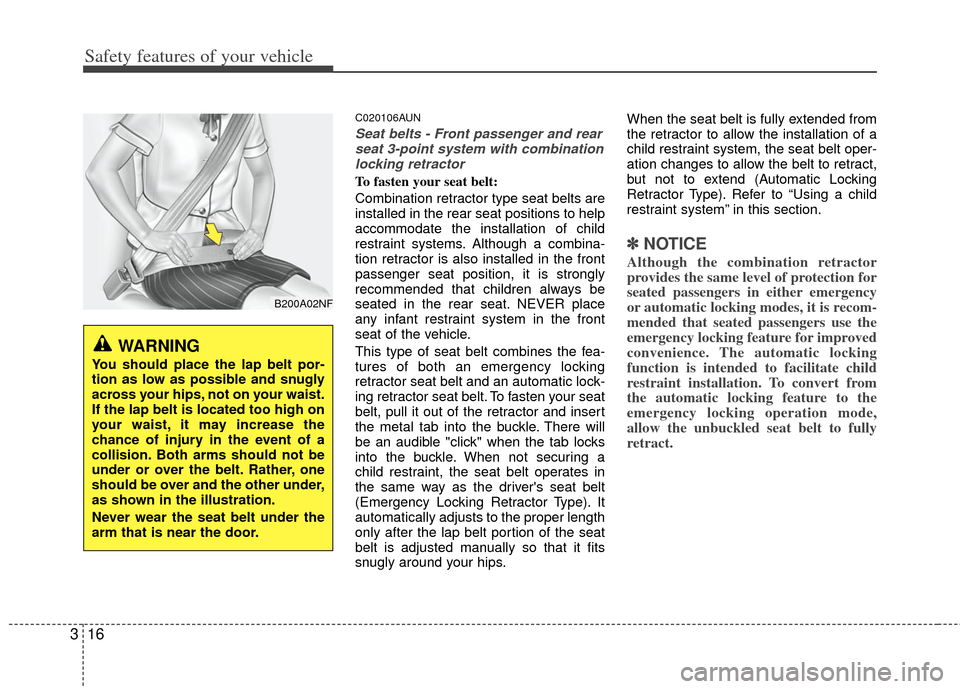
collision. Both arms should not be
under or over the belt. Rather, one
should be over and the other under,
as shown in the illustration.
Never wear the seat belt under the
arm that is near the door.
Page 40 of 356
327
Safety features of your vehicle
C030100AHM-EU
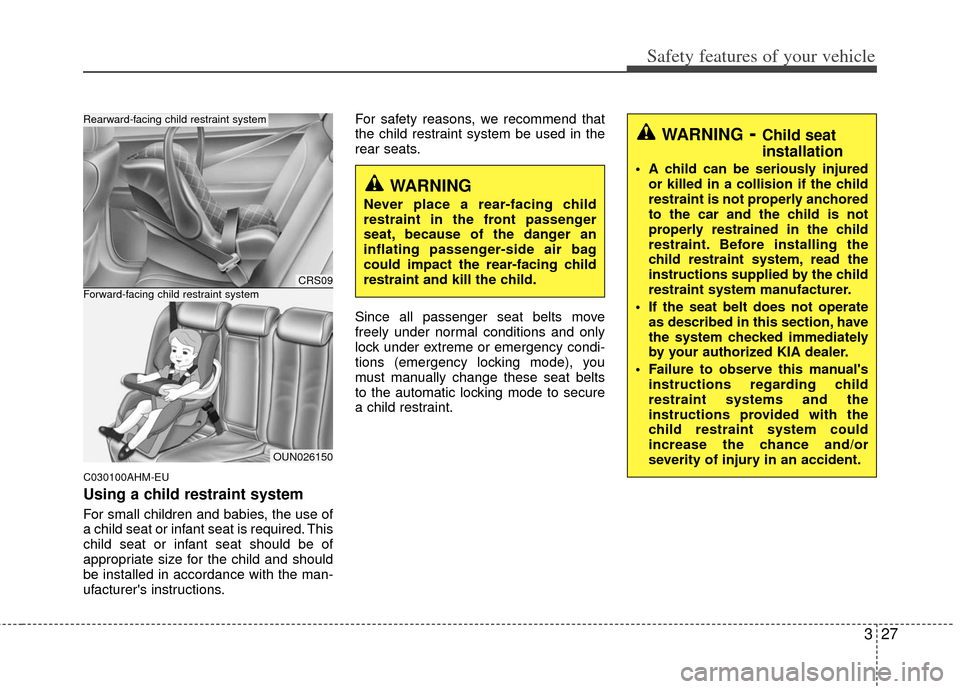
Using a child restraint system
For small children and babies, the use of
a child seat or infant seat is required. This
child seat or infant seat should be of
appropriate size for the child and should
be installed in accordance with the man-
ufacturer's instructions.For safety reasons, we recommend that
the child restraint system be used in the
rear seats.
Since all passenger seat belts move
freely under normal conditions and only
lock under extreme or emergency condi-
tions (emergency locking mode), you
must manually change these seat belts
to the automatic locking mode to secure
a child restraint.
CRS09
OUN026150
Forward-facing child restraint system
Rearward-facing child restraint system
WARNING
Never place a rear-facing child
restraint in the front passenger
seat, because of the danger an
inflating passenger-side air bag
could impact the rear-facing child
restraint and kill the child.
WARNING- Child seat
installation
A child can be seriously injured
or killed in a collision if the child
restraint is not properly anchored
to the car and the child is not
properly restrained in the child
restraint. Before installing the
child restraint system, read the
instructions supplied by the child
restraint system manufacturer.
If the seat belt does not operate as described in this section, have
the system checked immediately
by your authorized KIA dealer.
Failure to observe this manual's instructions regarding child
restraint systems and the
instructions provided with the
child restraint system could
increase the chance and/or
severity of injury in an accident.
Page 112 of 356
Features of your vehicle
40
4
D150204BHM-EE
Fuel gauge
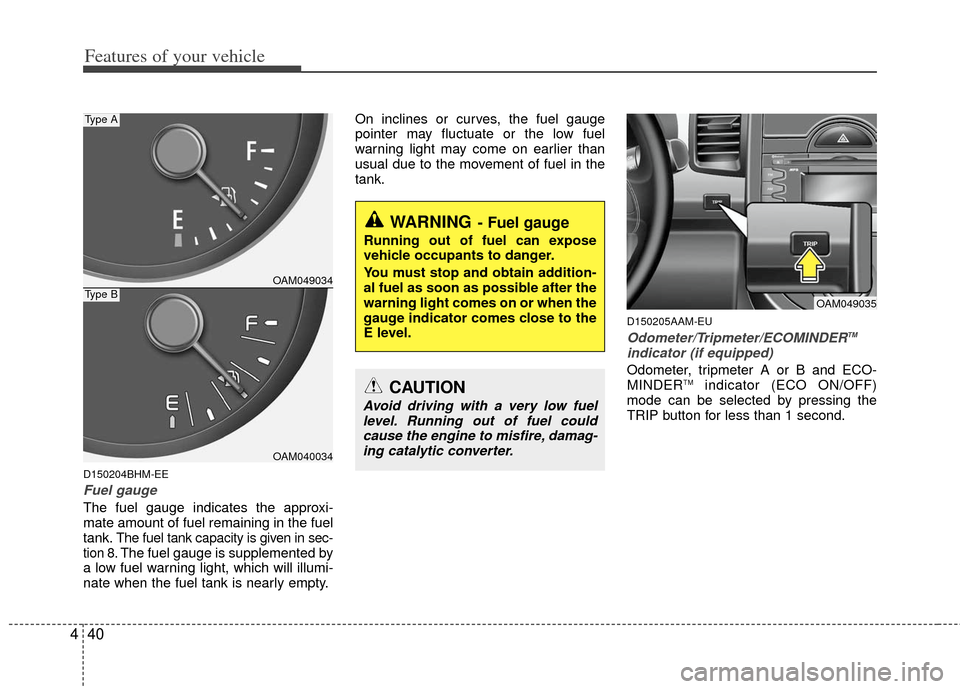
The fuel gauge indicates the approxi-
mate amount of fuel remaining in the fuel
tank.
The fuel tank capacity is given in sec-
tion 8.The fuel gauge is supplemented by
a low fuel warning light, which will illumi-
nate when the fuel tank is nearly empty. On inclines or curves, the fuel gauge
pointer may fluctuate or the low fuel
warning light may come on earlier than
usual due to the movement of fuel in the
tank.
D150205AAM-EU
Odometer/Tripmeter/ECOMINDERTM
indicator (if equipped)
Odometer, tripmeter A or B and ECO-
MINDERTMindicator (ECO ON/OFF)
mode can be selected by pressing the
TRIP button for less than 1 second.
OAM049035
WARNING- Fuel gauge
Running out of fuel can expose
vehicle occupants to danger.
You must stop and obtain addition-
al fuel as soon as possible after the
warning light comes on or when the
gauge indicator comes close to the
E level.
CAUTION
Avoid driving with a very low fuel level. Running out of fuel couldcause the engine to misfire, damag- ing catalytic converter.
OAM049034
OAM040034
Type A
Type B
Page 113 of 356
441
Features of your vehicle
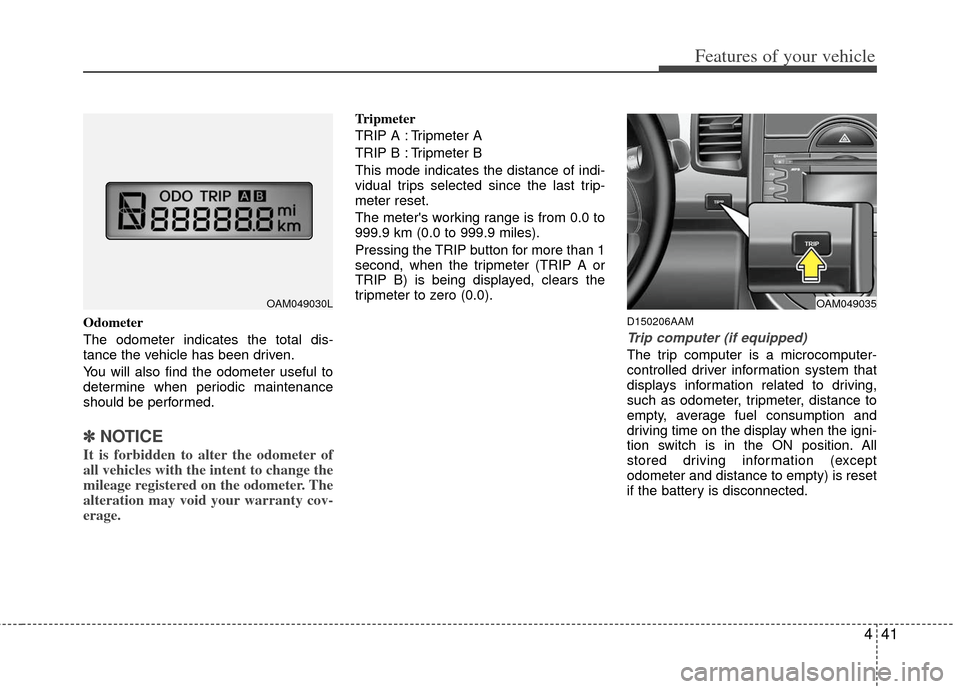
Odometer
The odometer indicates the total dis-
tance the vehicle has been driven.
You will also find the odometer useful to
determine when periodic maintenance
should be performed.
✽ ✽NOTICE
It is forbidden to alter the odometer of
all vehicles with the intent to change the
mileage registered on the odometer. The
alteration may void your warranty cov-
erage.
Tripmeter
TRIP A : Tripmeter A
TRIP B : Tripmeter B
This mode indicates the distance of indi-
vidual trips selected since the last trip-
meter reset.
The meter's working range is from 0.0 to
999.9 km (0.0 to 999.9 miles).
Pressing the TRIP button for more than 1
second, when the tripmeter (TRIP A or
TRIP B) is being displayed, clears the
tripmeter to zero (0.0).
D150206AAM
Trip computer (if equipped)
The trip computer is a microcomputer-
controlled driver information system that
displays information related to driving,
such as odometer, tripmeter, distance to
empty, average fuel consumption and
driving time on the display when the igni-
tion switch is in the ON position. All
stored driving information (except
odometer and distance to empty) is reset
if the battery is disconnected.
OAM049030LOAM049035
Page 114 of 356
Features of your vehicle
42
4
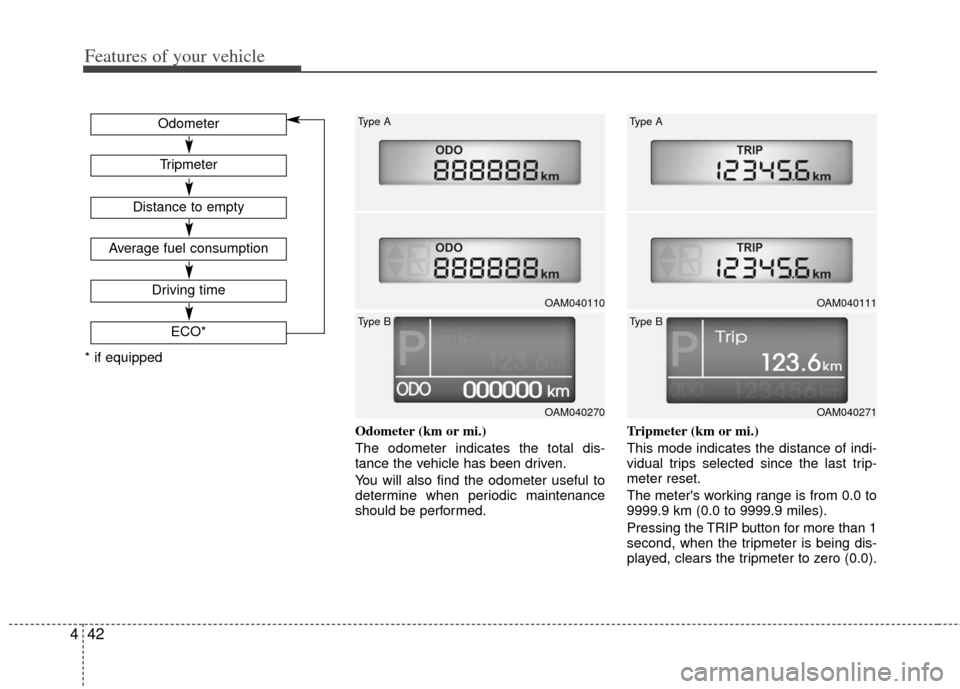
Odometer (km or mi.)
The odometer indicates the total dis-
tance the vehicle has been driven.
You will also find the odometer useful to
determine when periodic maintenance
should be performed. Tripmeter (km or mi.)
This mode indicates the distance of indi-
vidual trips selected since the last trip-
meter reset.
The meter's working range is from 0.0 to
9999.9 km (0.0 to 9999.9 miles).
Pressing the TRIP button for more than 1
second, when the tripmeter is being dis-
played, clears the tripmeter to zero (0.0).
ECO*
Tripmeter
Odometer
Distance to empty
Average fuel consumption
Driving time
* if equipped
OAM040110
Type A
OAM040270
Type B
OAM040111
Type A
OAM040271
Type B
Page 115 of 356

443
Features of your vehicle
Distance to empty
(km or mi.)
This mode indicates the estimated dis-
tance to empty based on the current fuel
in the fuel tank and the amount of fuel
delivered to the engine. When the
remaining distance is below 50 km (30
miles), “---” will be displayed and the dis-
tance to empty indicator will blink.
The meter’s working range is from 50 to
1500 km (30 to 1500 miles).Average fuel consumption
(l/100 km or MPG)
This mode calculates the average fuel
consumption from the total fuel used and
the distance since the last average con-
sumption reset. The total fuel used is cal-
culated from the fuel consumption input.
For an accurate calculation, drive more
than 50 m (0.03 miles).
Pressing the TRIP button for more than 1
second, when the average fuel consump-
tion is being displayed, clears the average
fuel consumption to zero (--.-).Driving time
This mode indicates the total time trav-
eled since the last driving time reset.
Even if the vehicle is not in motion, the
driving time keeps going while the engine
is running.
The meter’s working range is from
00:00~99:59.
Pressing the TRIP button for more than 1
second, when the driving time is being
displayed, clears the driving time to zero
(00:00).
OAM040112LOAM040114LOAM040116L
Type A Type A Type A
OAM040272
Type BOAM040274
Type BOAM040276
Type B