2011 KIA Soul reset
[x] Cancel search: resetPage 17 of 356
Safety features of your vehicle
43
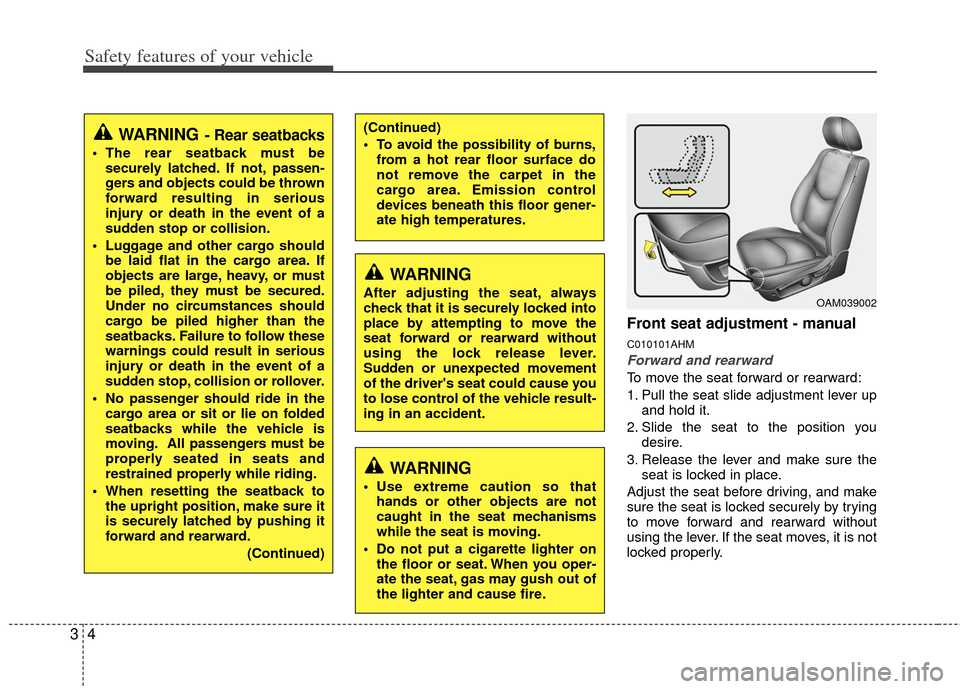
Front seat adjustment - manual
C010101AHM
Forward and rearward
To move the seat forward or rearward:
1. Pull the seat slide adjustment lever upand hold it.
2. Slide the seat to the position you desire.
3. Release the lever and make sure the seat is locked in place.
Adjust the seat before driving, and make
sure the seat is locked securely by trying
to move forward and rearward without
using the lever. If the seat moves, it is not
locked properly.
(Continued)
To avoid the possibility of burns, from a hot rear floor surface do
not remove the carpet in the
cargo area. Emission control
devices beneath this floor gener-
ate high temperatures.WARNING- Rear seatbacks
The rear seatback must besecurely latched. If not, passen-
gers and objects could be thrown
forward resulting in serious
injury or death in the event of a
sudden stop or collision.
Luggage and other cargo should be laid flat in the cargo area. If
objects are large, heavy, or must
be piled, they must be secured.
Under no circumstances should
cargo be piled higher than the
seatbacks. Failure to follow these
warnings could result in serious
injury or death in the event of a
sudden stop, collision or rollover.
No passenger should ride in the cargo area or sit or lie on folded
seatbacks while the vehicle is
moving. All passengers must be
properly seated in seats and
restrained properly while riding.
When resetting the seatback to the upright position, make sure it
is securely latched by pushing it
forward and rearward.
(Continued)
WARNING
After adjusting the seat, always
check that it is securely locked into
place by attempting to move the
seat forward or rearward without
using the lock release lever.
Sudden or unexpected movement
of the driver's seat could cause you
to lose control of the vehicle result-
ing in an accident.OAM039002
WARNING
Use extreme caution so thathands or other objects are not
caught in the seat mechanisms
while the seat is moving.
Do not put a cigarette lighter on the floor or seat. When you oper-
ate the seat, gas may gush out of
the lighter and cause fire.
Page 102 of 356
Features of your vehicle
30
4
D110500AAM-EE
Resetting the sunroof
Whenever the vehicle battery is discon-
nected or discharged, you must reset
your sunroof system as follows:
1. Turn the ignition switch to the ON
position.
2. According to the position of the sun- roof, do the following.
1) In case the sunroof is closed com-pletely or tilted:
Push the sunroof control lever
upward until the sunroof tilts com-
pletely upward.
2) In case the sunroof is open: Push the sunroof control lever for-
ward until the sunroof closes com-
pletely. Push the sunroof control
lever upward until the sunroof tilts
completely upward.
3. Release the sunroof control lever.
4. Push the sunroof control lever upward (for about 10 seconds) until the sun-
roof has returned to the original tilt
position after it is raised a little higher
than the maximum tilt position. Then,
release the lever. 5. Push the sunroof control lever upward
(for about 6 seconds) until the sunroof
operates as follows;
TILT DOWN → SLIDE OPEN →
SLIDE CLOSED
Then release the lever.
When this is complete, the sunroof sys-
tem has been reset.
Page 113 of 356
441
Features of your vehicle
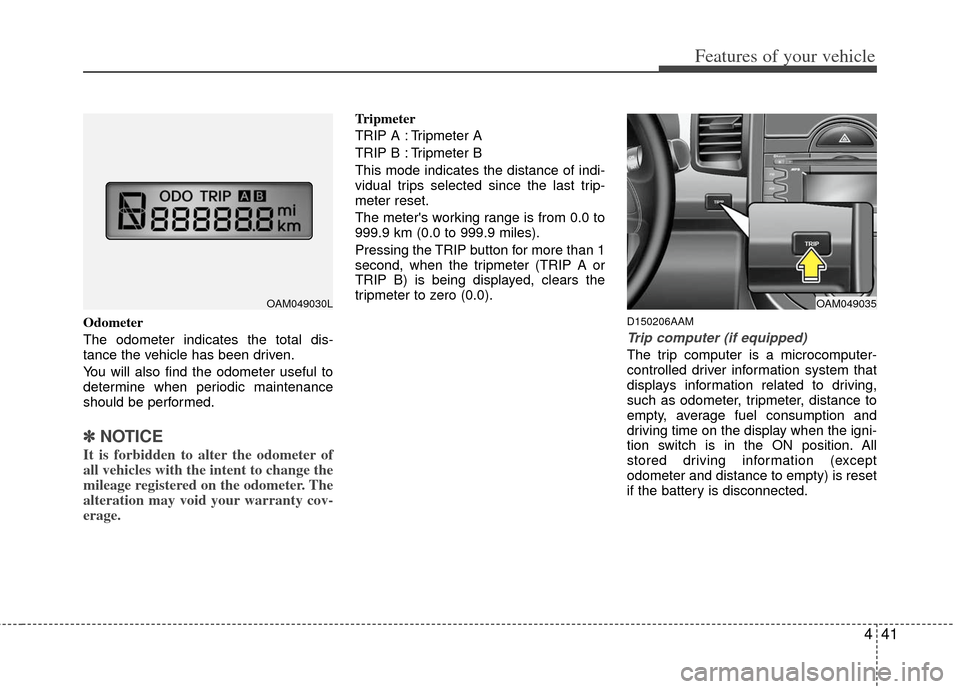
Odometer
The odometer indicates the total dis-
tance the vehicle has been driven.
You will also find the odometer useful to
determine when periodic maintenance
should be performed.
✽ ✽NOTICE
It is forbidden to alter the odometer of
all vehicles with the intent to change the
mileage registered on the odometer. The
alteration may void your warranty cov-
erage.
Tripmeter
TRIP A : Tripmeter A
TRIP B : Tripmeter B
This mode indicates the distance of indi-
vidual trips selected since the last trip-
meter reset.
The meter's working range is from 0.0 to
999.9 km (0.0 to 999.9 miles).
Pressing the TRIP button for more than 1
second, when the tripmeter (TRIP A or
TRIP B) is being displayed, clears the
tripmeter to zero (0.0).
D150206AAM
Trip computer (if equipped)
The trip computer is a microcomputer-
controlled driver information system that
displays information related to driving,
such as odometer, tripmeter, distance to
empty, average fuel consumption and
driving time on the display when the igni-
tion switch is in the ON position. All
stored driving information (except
odometer and distance to empty) is reset
if the battery is disconnected.
OAM049030LOAM049035
Page 114 of 356
Features of your vehicle
42
4
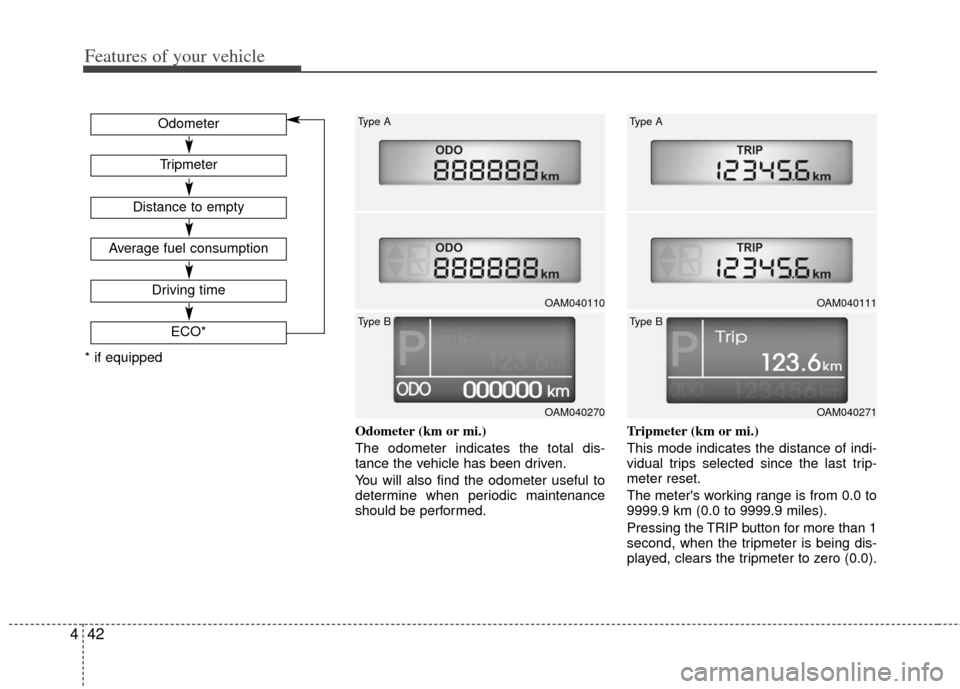
Odometer (km or mi.)
The odometer indicates the total dis-
tance the vehicle has been driven.
You will also find the odometer useful to
determine when periodic maintenance
should be performed. Tripmeter (km or mi.)
This mode indicates the distance of indi-
vidual trips selected since the last trip-
meter reset.
The meter's working range is from 0.0 to
9999.9 km (0.0 to 9999.9 miles).
Pressing the TRIP button for more than 1
second, when the tripmeter is being dis-
played, clears the tripmeter to zero (0.0).
ECO*
Tripmeter
Odometer
Distance to empty
Average fuel consumption
Driving time
* if equipped
OAM040110
Type A
OAM040270
Type B
OAM040111
Type A
OAM040271
Type B
Page 115 of 356

443
Features of your vehicle
Distance to empty
(km or mi.)
This mode indicates the estimated dis-
tance to empty based on the current fuel
in the fuel tank and the amount of fuel
delivered to the engine. When the
remaining distance is below 50 km (30
miles), “---” will be displayed and the dis-
tance to empty indicator will blink.
The meter’s working range is from 50 to
1500 km (30 to 1500 miles).Average fuel consumption
(l/100 km or MPG)
This mode calculates the average fuel
consumption from the total fuel used and
the distance since the last average con-
sumption reset. The total fuel used is cal-
culated from the fuel consumption input.
For an accurate calculation, drive more
than 50 m (0.03 miles).
Pressing the TRIP button for more than 1
second, when the average fuel consump-
tion is being displayed, clears the average
fuel consumption to zero (--.-).Driving time
This mode indicates the total time trav-
eled since the last driving time reset.
Even if the vehicle is not in motion, the
driving time keeps going while the engine
is running.
The meter’s working range is from
00:00~99:59.
Pressing the TRIP button for more than 1
second, when the driving time is being
displayed, clears the driving time to zero
(00:00).
OAM040112LOAM040114LOAM040116L
Type A Type A Type A
OAM040272
Type BOAM040274
Type BOAM040276
Type B
Page 153 of 356
481
Features of your vehicle
Temperature conversion
If the battery has been discharged or dis-
connected, the temperature mode dis-
play will reset to Centigrade.
This is normal condition. You can switch
the temperature mode between
Centigrade to Fahrenheit as follows;
While depressing the AUTO button,
depress the OFF button for 3 seconds or
more. The display will change from
Centigrade to Fahrenheit, or from
Fahrenheit to Centigrade.
D240203AFD
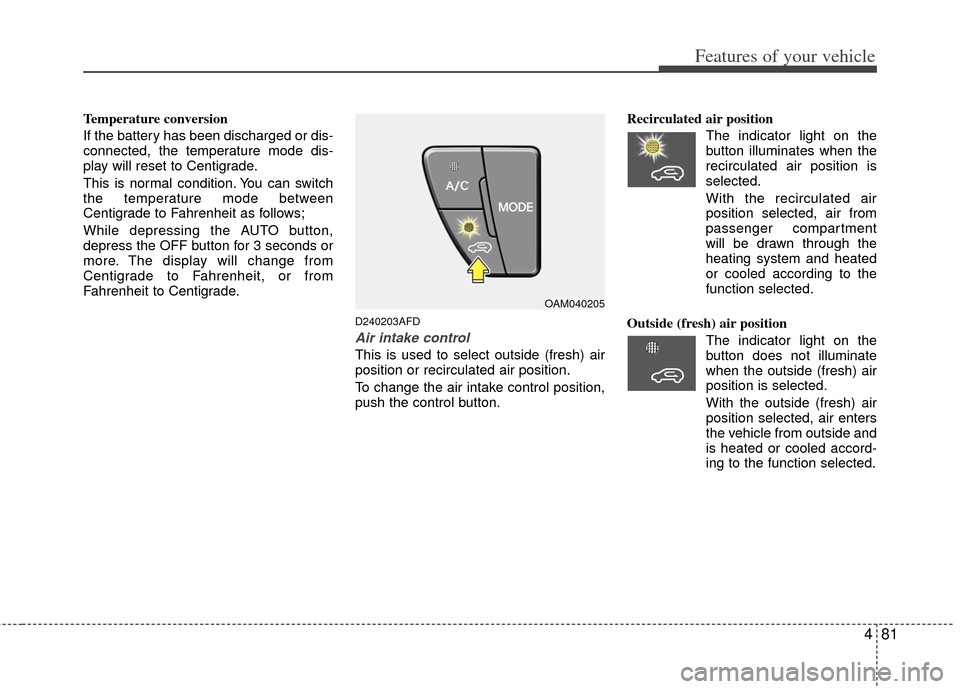
Air intake control
This is used to select outside (fresh) air
position or recirculated air position.
To change the air intake control position,
push the control button.Recirculated air position
The indicator light on the
button illuminates when the
recirculated air position is
selected.
With the recirculated air position selected, air from
passenger compartment
will be drawn through the
heating system and heated
or cooled according to the
function selected.
Outside (fresh) air position The indicator light on the
button does not illuminate
when the outside (fresh) air
position is selected.
With the outside (fresh) air
position selected, air enters
the vehicle from outside and
is heated or cooled accord-
ing to the function selected.
OAM040205
Page 158 of 356
Features of your vehicle
86
4
D250300AUN-U1
Defogging logic
To reduce the possibility of fogging up
the inside of the windshield, the air intake
or air conditioning are controlled auto-
matically according to certain conditions
such as or position. To cancel or
return to the defogging logic, do the fol-
lowing.
D250301AUN
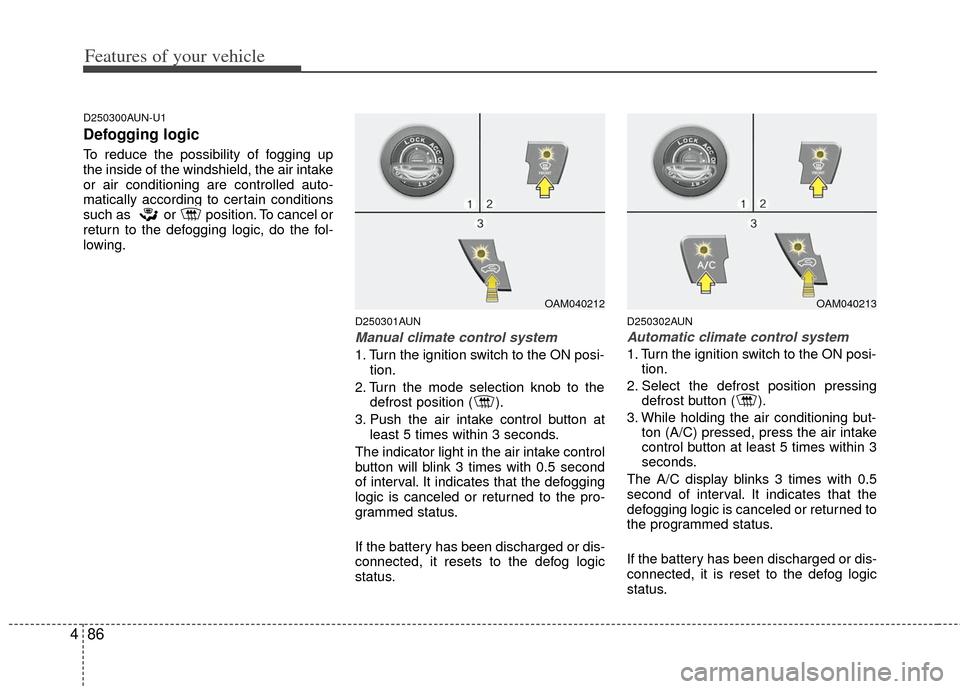
Manual climate control system
1. Turn the ignition switch to the ON posi-
tion.
2. Turn the mode selection knob to the defrost position ( ).
3. Push the air intake control button at least 5 times within 3 seconds.
The indicator light in the air intake control
button will blink 3 times with 0.5 second
of interval. It indicates that the defogging
logic is canceled or returned to the pro-
grammed status.
If the battery has been discharged or dis-
connected, it resets to the defog logic
status.
D250302AUN
Automatic climate control system
1. Turn the ignition switch to the ON posi- tion.
2. Select the defrost position pressing defrost button ( ).
3. While holding the air conditioning but- ton (A/C) pressed, press the air intake
control button at least 5 times within 3
seconds.
The A/C display blinks 3 times with 0.5
second of interval. It indicates that the
defogging logic is canceled or returned to
the programmed status.
If the battery has been discharged or dis-
connected, it is reset to the defog logic
status.
OAM040212OAM040213
Page 167 of 356
495
Features of your vehicle
D300200BUN-AM
Audio remote control
(if equipped)
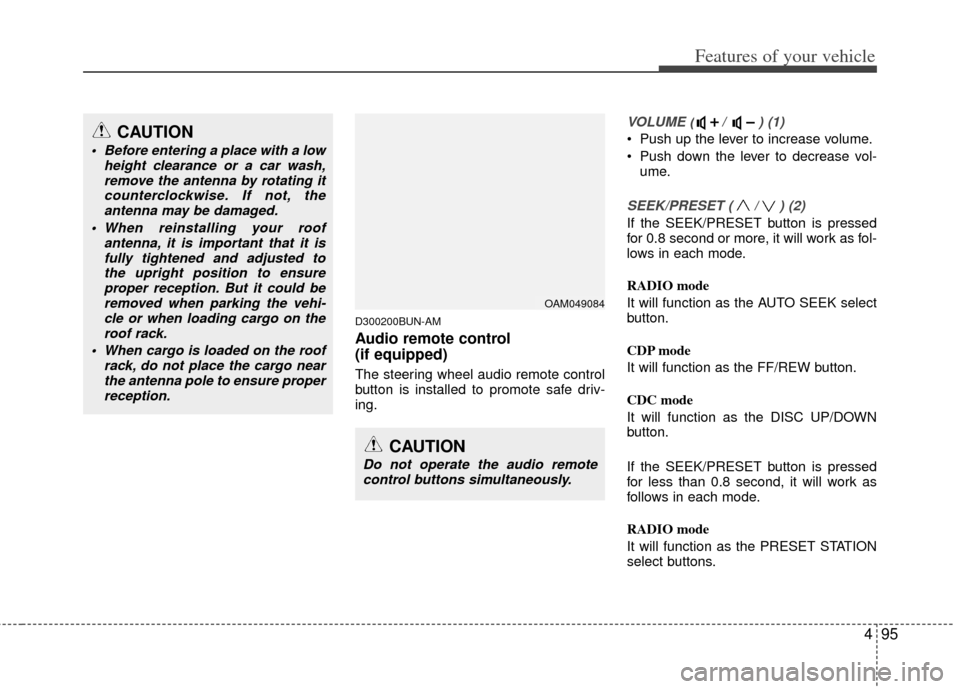
The steering wheel audio remote control
button is installed to promote safe driv-
ing.
VOLUME ( / ) (1)
• Push up the lever to increase volume.
Push down the lever to decrease vol-ume.
SEEK/PRESET ( / ) (2)
If the SEEK/PRESET button is pressed
for 0.8 second or more, it will work as fol-
lows in each mode.
RADIO mode
It will function as the AUTO SEEK select
button.
CDP mode
It will function as the FF/REW button.
CDC mode
It will function as the DISC UP/DOWN
button.
If the SEEK/PRESET button is pressed
for less than 0.8 second, it will work as
follows in each mode.
RADIO mode
It will function as the PRESET STATION
select buttons.
OAM049084
CAUTION
Do not operate the audio remotecontrol buttons simultaneously.
CAUTION
Before entering a place with a low height clearance or a car wash,remove the antenna by rotating itcounterclockwise. If not, theantenna may be damaged.
When reinstalling your roof antenna, it is important that it isfully tightened and adjusted tothe upright position to ensureproper reception. But it could beremoved when parking the vehi-cle or when loading cargo on theroof rack.
When cargo is loaded on the roof rack, do not place the cargo nearthe antenna pole to ensure properreception.