2011 INFINITI QX56 steering wheel adjustment
[x] Cancel search: steering wheel adjustmentPage 1069 of 5598
![INFINITI QX56 2011 Factory Service Manual
DAS-104
< ECU DIAGNOSIS INFORMATION >[DCA]
ICC SENSOR
ICC SENSOR
Reference ValueINFOID:0000000006228056
VALUES ON THE DIAGNOSIS TOOL
TERMINAL LAYOUT
PHYSICAL VALUES
Monitor item Condition Value/Statu INFINITI QX56 2011 Factory Service Manual
DAS-104
< ECU DIAGNOSIS INFORMATION >[DCA]
ICC SENSOR
ICC SENSOR
Reference ValueINFOID:0000000006228056
VALUES ON THE DIAGNOSIS TOOL
TERMINAL LAYOUT
PHYSICAL VALUES
Monitor item Condition Value/Statu](/manual-img/42/57033/w960_57033-1068.png)
DAS-104
< ECU DIAGNOSIS INFORMATION >[DCA]
ICC SENSOR
ICC SENSOR
Reference ValueINFOID:0000000006228056
VALUES ON THE DIAGNOSIS TOOL
TERMINAL LAYOUT
PHYSICAL VALUES
Monitor item Condition Value/Status
VHCL SPEED SE While driving Value of vehicle
speed signal
(wheel speed)
YAW RATE While driving Vehicle stopped 0.0
Vehicle turning right Positive value
Vehicle turning left Negative value
PWR SUP MONI Ignition switch ON Power supply
voltage value of ICC sensor
DISTANCE Drive the vehicle and activate
the vehicle-to-vehicle distance
control mode When a vehicle ahead is detected
Displays the dis-
tance from the
preceding vehi- cle
When a vehicle ahead is not detected 0.0
RELATIVE SPD Drive the vehicle and activate
the vehicle-to-vehicle distance
control mode When a vehicle ahead is detected
Displays the rel-
ative speed
When a vehicle ahead is not detected 0.0
LASER OFFSET NOTE:
The item is indicated, but not used
—
LASER HEIGHT NOTE:
The item is indicated, but not used —
STEERING ANGLE Ignition switch ON When setting the steering wheel in straight-ahead posi-
tion
0.0
When turning the steering wheel 90 ° rightward +90
When turning the steering wheel 90 ° leftward -90
STRG ANGLE
SPEED Ignition switch ON At the time of turning the steering wheel Steering wheel
turning speed is
displayed
L/R ADJUST Ignition switch ON At the completion of laser beam adjustment Horizontal cor-
rection value is
displayed
U/D ADJUST Ignition switch ON At the completion of laser beam adjustment Vertical correc-
tion value is dis-
played
JPOIA0105ZZ
Revision: 2010 May2011 QX56
Page 1213 of 5598
![INFINITI QX56 2011 Factory Service Manual
DAS-248
< ECU DIAGNOSIS INFORMATION >[FCW]
ICC SENSOR
ICC SENSOR
Reference ValueINFOID:0000000006228180
VALUES ON THE DIAGNOSIS TOOL
TERMINAL LAYOUT
PHYSICAL VALUES
Monitor item Condition Value/Statu INFINITI QX56 2011 Factory Service Manual
DAS-248
< ECU DIAGNOSIS INFORMATION >[FCW]
ICC SENSOR
ICC SENSOR
Reference ValueINFOID:0000000006228180
VALUES ON THE DIAGNOSIS TOOL
TERMINAL LAYOUT
PHYSICAL VALUES
Monitor item Condition Value/Statu](/manual-img/42/57033/w960_57033-1212.png)
DAS-248
< ECU DIAGNOSIS INFORMATION >[FCW]
ICC SENSOR
ICC SENSOR
Reference ValueINFOID:0000000006228180
VALUES ON THE DIAGNOSIS TOOL
TERMINAL LAYOUT
PHYSICAL VALUES
Monitor item Condition Value/Status
VHCL SPEED SE While driving Value of vehicle
speed signal
(wheel speed)
YAW RATE While driving Vehicle stopped 0.0
Vehicle turning right Positive value
Vehicle turning left Negative value
PWR SUP MONI Ignition switch ON Power supply
voltage value of ICC sensor
DISTANCE Drive the vehicle and activate
the vehicle-to-vehicle distance
control mode When a vehicle ahead is detected
Displays the dis-
tance from the
preceding vehi- cle
When a vehicle ahead is not detected 0.0
RELATIVE SPD Drive the vehicle and activate
the vehicle-to-vehicle distance
control mode When a vehicle ahead is detected
Displays the rel-
ative speed
When a vehicle ahead is not detected 0.0
LASER OFFSET NOTE:
The item is indicated, but not used
—
LASER HEIGHT NOTE:
The item is indicated, but not used —
STEERING ANGLE Ignition switch ON When setting the steering wheel in straight-ahead posi-
tion
0.0
When turning the steering wheel 90 ° rightward +90
When turning the steering wheel 90 ° leftward -90
STRG ANGLE
SPEED Ignition switch ON At the time of turning the steering wheel Steering wheel
turning speed is
displayed
L/R ADJUST Ignition switch ON At the completion of laser beam adjustment Horizontal cor-
rection value is
displayed
U/D ADJUST Ignition switch ON At the completion of laser beam adjustment Vertical correc-
tion value is dis-
played
JPOIA0105ZZ
Revision: 2010 May2011 QX56
Page 1545 of 5598

PRECAUTIONSDLK-9
< PRECAUTION >
C
DE
F
G H
I
J
L
M A
B
DLK
N
O P
5. When the repair work is completed, re-connect both battery cables. With the brake pedal released, turn
the push-button ignition switch from ACC position to ON position, then to LOCK position. (The steering
wheel will lock when the push-button ignition switch is turned to LOCK position.)
6. Perform self-diagnosis check of a ll control units using CONSULT-III.
Precautions For Xenon Headlamp ServiceINFOID:0000000006225830
WARNING:
Comply with the follow ing warnings to prevent any serious accident.
Disconnect the battery cable (neg ative terminal) or the power supply fuse before installing, remov-
ing, or touching the xenon headlamp (bulb included). The xenon headlamp contains high-voltage
generated parts.
Never work with wet hands.
Check the xenon headlamp ON-OFF status after assem bling it to the vehicle. Never turn the xenon
headlamp ON in other conditions. Connect th e power supply to the vehicle-side connector.
(Turning it ON outside the lamp case m ay cause fire or visual impairments.)
Never touch the bulb glass immediately afte r turning it OFF. It is extremely hot.
CAUTION:
Comply with the follow ing cautions to prevent an y error and malfunction.
Install the xenon bulb securely. (I nsufficient bulb socket installation may melt the bulb, the connec-
tor, the housing, etc. by high-vol tage leakage or corona discharge.)
Never perform HID circuit inspection with a tester.
Never touch the xenon bulb glass with ha nds. Never put oil and grease on it.
Dispose of the used xenon bulb after p acking it in thick vinyl without breaking it.
Never wipe out dirt and cont amination with organic solven t (thinner, gasoline, etc.).
WorkINFOID:0000000006225831
After removing and installing the opening/closing parts, be sure to carry out fitting adjustments to check their
operational.
Check the lubrication level, damage, and wear of each part. If necessary, grease or replace it.
Revision: 2010 May2011 QX56
Page 1956 of 5598
![INFINITI QX56 2011 Factory Service Manual
DLN-154
< SYMPTOM DIAGNOSIS >[FRONT FINAL DRIVE: R180A]
NOISE, VIBRATION AND HARSHNESS
(NVH) TROUBLESHOOTING
SYMPTOM DIAGNOSIS
NOISE, VIBRATION AND HARSHNESS (NVH) TROUBLESHOOTING
NVH Troubleshootin INFINITI QX56 2011 Factory Service Manual
DLN-154
< SYMPTOM DIAGNOSIS >[FRONT FINAL DRIVE: R180A]
NOISE, VIBRATION AND HARSHNESS
(NVH) TROUBLESHOOTING
SYMPTOM DIAGNOSIS
NOISE, VIBRATION AND HARSHNESS (NVH) TROUBLESHOOTING
NVH Troubleshootin](/manual-img/42/57033/w960_57033-1955.png)
DLN-154
< SYMPTOM DIAGNOSIS >[FRONT FINAL DRIVE: R180A]
NOISE, VIBRATION AND HARSHNESS
(NVH) TROUBLESHOOTING
SYMPTOM DIAGNOSIS
NOISE, VIBRATION AND HARSHNESS (NVH) TROUBLESHOOTING
NVH Troubleshooting ChartINFOID:0000000006222377
Use the chart below to help you find the cause of the symptom. If necessa ry, repair or replace these parts.
×: ApplicableReference
DLN-174, "
Inspection
"
DLN-171, "
Adjustment
"
DLN-174, "
Inspection
"
DLN-171, "
Adjustment
"
DLN-171, "
Adjustment
"
DLN-155, "
Inspection
"
NVH of FRONT PROPELLER SHAFT in this section.
NVH of REAR PROPELLER SHAFT in this section.
NVH in FAX, RAX, FSU and RSU sections.
NVH in WT section.
NVH in WT section.
NVH in FAX and RAX section.
NVH in BR section.
NVH in ST section.
Possible cause and SUSPECTED PARTS
Gear tooth rough
Gear contact improper
Tooth surfaces worn
Backlash incorrect
Companion flange excessive runout
Gear oil improper
PROPELLER SHAFT
AXLE AND SUSPENSION
TIRE
ROAD WHEEL
DRIVE SHAFT
BRAKE
STEERING
Symptom Noise
×××××××××××××
Revision: 2010 May2011 QX56
Page 1994 of 5598
![INFINITI QX56 2011 Factory Service Manual
DLN-192
< SYMPTOM DIAGNOSIS >[REAR FINAL DRIVE: R230]
NOISE, VIBRATION AND HARSHNESS
(NVH) TROUBLESHOOTING
SYMPTOM DIAGNOSIS
NOISE, VIBRATION AND HARSHNESS (NVH) TROUBLESHOOTING
NVH Troubleshooting INFINITI QX56 2011 Factory Service Manual
DLN-192
< SYMPTOM DIAGNOSIS >[REAR FINAL DRIVE: R230]
NOISE, VIBRATION AND HARSHNESS
(NVH) TROUBLESHOOTING
SYMPTOM DIAGNOSIS
NOISE, VIBRATION AND HARSHNESS (NVH) TROUBLESHOOTING
NVH Troubleshooting](/manual-img/42/57033/w960_57033-1993.png)
DLN-192
< SYMPTOM DIAGNOSIS >[REAR FINAL DRIVE: R230]
NOISE, VIBRATION AND HARSHNESS
(NVH) TROUBLESHOOTING
SYMPTOM DIAGNOSIS
NOISE, VIBRATION AND HARSHNESS (NVH) TROUBLESHOOTING
NVH Troubleshooting ChartINFOID:0000000006222410
Use the chart below to find the cause of the symp tom. If necessary, repair or replace these parts.
×: ApplicableReference page
DLN-215, "
Inspection
"
DLN-210, "
Adjustment
"
DLN-215, "
Inspection
"
DLN-210, "
Adjustment
"
DLN-210, "
Adjustment
"
DLN-193, "
Inspection
"
NVH of FRONT PROPELLER SHAFT in this section.
NVH of REAR PROPELLER SHAFT in this section.
NVH in FAX, RAX, and RSU sections.
NVH in WT section.
NVH in WT section.
NVH in RAX section.
NVH in BR section.
NVH in ST section.
Possible cause and SUSPECTED PARTS
Gear tooth rough
Gear contact improper
Tooth surfaces worn
Backlash incorrect
Companion flange excessive runout
Gear oil improper
PROPELLER SHAFT
AXLE AND SUSPENSION
TIRES
ROAD WHEEL
DRIVE SHAFT
BRAKES
STEERING
Symptom Noise
×××××××××××××
Revision: 2010 May2011 QX56
Page 2563 of 5598

EM-1
ENGINE
C
DE
F
G H
I
J
K L
M
SECTION EM
A
EM
N
O P
CONTENTS
ENGINE MECHANICAL
PRECAUTION ................ ...............................3
PRECAUTIONS .............................................. .....3
Precaution for Procedure without Cowl Top Cover ......3
Precaution for Supplemental Restraint System
(SRS) "AIR BAG" and "SEAT BELT PRE-TEN-
SIONER" ...................................................................
3
Precaution Necessary for Steering Wheel Rota-
tion after Battery Disconnect .....................................
3
Precaution for Drain Engine Coolant and Engine
Oil ..............................................................................
4
Precaution for Disconnecting Fuel Piping .................4
Precaution for Handling High Pressure Fuel Sys-
tem ............................................................................
4
Precaution for Removal and Disassembly ................4
Precaution for Inspection, Repair and Replace-
ment ..........................................................................
4
Precaution for Assembly and Installation ..................4
Parts Requiring Angle Tightening .............................5
Precaution for Liquid Gasket .....................................5
Definitions of Bank Names ........................................6
PREPARATION ............................................7
PREPARATION .............................................. .....7
Special Service Tool ........................................... ......7
Commercial Service Tool ..........................................9
BASIC INSPECTION ...................................12
CAMSHAFT VALVE CLEARANCE ............... ....12
Inspection ............................................................ ....12
COMPRESSION PRESSURE ............................16
Inspection ............................................................ ....16
SYMPTOM DIAGNOSIS ..............................18
NOISE, VIBRATION AND HARSHNESS
(NVH) TROUBLESHOOTING ........................ ....
18
NVH Troubleshooting - Engine Noise .............. ....18
Use the Chart Below to Help You Find the C
ause of the Symptom ........................................ ....
19
PERIODIC MAINTENANCE ........................20
DRIVE BELTS ...................................................20
Exploded View ..................................................... ....20
Checking ..................................................................20
Tension Adjustment ................................................20
Removal and Installation .........................................20
Inspection ................................................................21
AIR CLEANER FILTER .....................................22
Exploded View .........................................................22
Removal and Installation .........................................22
SPARK PLUG ...................................................23
Exploded View .........................................................23
Removal and Installation .........................................23
Inspection ................................................................24
REMOVAL AND INSTALLATION ...............25
ENGINE COVER ...............................................25
Exploded View ..................................................... ....25
Removal and Installation .........................................25
DRIVE BELT AUTO TENSIONER AND IDLER
PULLEY .............................................................
26
Exploded View .........................................................26
Removal and Installation .........................................26
AIR CLEANER AND AIR DUCT .......................27
Exploded View .........................................................27
Removal and Installation .........................................27
Inspection ................................................................28
IGNITION COIL .................................................29
Exploded View .........................................................29
Removal and Installation .........................................29
INTAKE MANIFOLD .........................................30
Exploded View .........................................................30
Revision: 2010 May2011 QX56
Page 2859 of 5598

EXT-4
< PRECAUTION >
PRECAUTIONS
5. When the repair work is completed, re-connect both battery cables. With the brake pedal released, turn
the push-button ignition switch from ACC position to ON position, then to LOCK position. (The steering
wheel will lock when the push-button igniti on switch is turned to LOCK position.)
6. Perform self-diagnosis check of all control units using CONSULT-III.
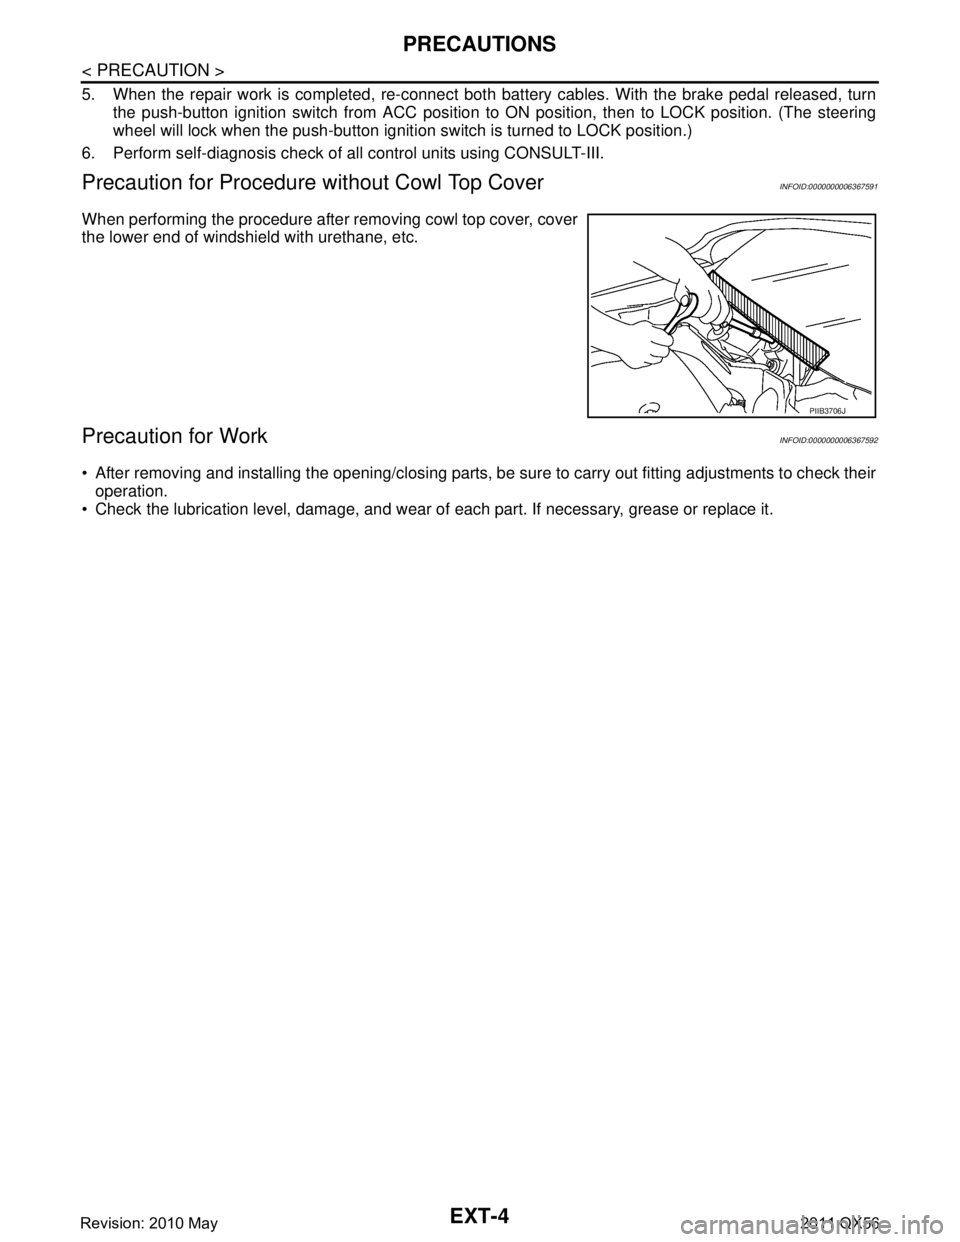
Precaution for Procedure without Cowl Top CoverINFOID:0000000006367591
When performing the procedure after removing cowl top cover, cover
the lower end of windshield with urethane, etc.
Precaution for WorkINFOID:0000000006367592
After removing and installing the opening/closing parts, be sure to carry out fitting adjustments to check their
operation.
Check the lubrication level, damage, and wear of each part. If necessary, grease or replace it.
PIIB3706J
Revision: 2010 May2011 QX56
Page 2928 of 5598
![INFINITI QX56 2011 Factory Service Manual
FAX-28
< REMOVAL AND INSTALLATION >[4WD]
FRONT DRIVE SHAFT
Inspection
INFOID:0000000006225406
INSPECTION AFTER REMOVAL
Move joint up/down, left/right, and in the axial directi ons. Check for motion INFINITI QX56 2011 Factory Service Manual
FAX-28
< REMOVAL AND INSTALLATION >[4WD]
FRONT DRIVE SHAFT
Inspection
INFOID:0000000006225406
INSPECTION AFTER REMOVAL
Move joint up/down, left/right, and in the axial directi ons. Check for motion](/manual-img/42/57033/w960_57033-2927.png)
FAX-28
< REMOVAL AND INSTALLATION >[4WD]
FRONT DRIVE SHAFT
Inspection
INFOID:0000000006225406
INSPECTION AFTER REMOVAL
Move joint up/down, left/right, and in the axial directi ons. Check for motion that is not smooth and for signifi-
cant looseness.
Check boot for cracks, damage, and leakage of grease.
Disassemble drive shaft and exchange malfunctioning part if there is a non-standard condition.
INSPECTION AFTER DISASSEMBLY
Shaft
Check shaft for runout, cracks, or ot her damage. Replace it if necessary.
Joint Sub-Assembly (Wheel Side)
Check the following items, replace the parts if necessary.
Joint sub-assembly for rough rotation and excessive axial looseness.
The inside of the joint sub-assembly for entry of foreign material.
Joint sub-assembly for compression scars, cra cks, and fractures inside of joint sub-assembly.
Replace joint sub-assembly if there are any non-standard conditions of components.
Housing (Final Drive side)
Replace housing if there is scratching or wear of housing roller contact surface.
INSPECTION AFTER INSTALLATION
1. Check wheel sensor harness for proper connection. Refer to BRC-134, "FRONT WHEEL SENSOR :
Exploded View".
2. Check the wheel alignment. Refer to FSU-7, "
Inspection".
3. Adjust neutral position of steering angle sensor. Refer to BRC-64, "
Work Procedure".
4. Adjust levelizer adjustment of height sensor. Refer to EXL-61, "
LEVELIZER ADJUSTMENT : Special
Repair Requirement".
SDIA1163J
Revision: 2010 May2011 QX56