Page 119 of 419

441
Features of your vehicle
D140100AUN
Inside rearview mirror
Adjust the rearview mirror to center on
the view through the rear window. Make
this adjustment before you start driving.D140101AUN
Day/night rearview mirror
Make this adjustment before you start
driving and while the day/night lever is in
the day position.
Pull the day/night lever toward you to
reduce glare from the headlights of vehi-
cles behind you during night driving.
Remember that you lose some rearviewclarity in the night position.
D140102AUN
Electric chromic mirror (ECM) (if equipped)
The electric rearview mirror automatical- ly controls the glare from the headlights
of the car behind you in nighttime or low
light driving conditions. The sensormounted in the mirror senses the light
level around the vehicle, and automati-cally controls the headlight glare from
vehicles behind you.
When the engine is running, the glare is
automatically controlled by the sensor
mounted in the rearview mirror.
Whenever the shift lever is shifted into
reverse (R), the mirror will automatically
go to the brightest setting in order to
improve the drivers view behind the vehi-
cle.
MIRRORS
WARNING -
Rear visibility
Do not place objects in the rear
seat or cargo area which would
interfere with your vision through
the rear window.
OEN046032
CAUTION
When cleaning the mirror, use a paper towel or similar materialdampened with glass cleaner. Donot spray glass cleaner directly on the mirror as that may cause the liq-
uid cleaner to enter the mirror hous- ing.
Day
Night
procarmanuals.com
Page 128 of 419
Features of your vehicle
50
4
D150100AUN Instrument panel illumination
When the vehicle’s parking lights or headlights are on, rotate the illumination
control knob to adjust the brightness of
the instrument panel illumination. Gauges
D150201AUN
Speedometer
The speedometer indicates the forward
speed of the vehicle.
The speedometer is calibrated in miles
per hour and/or kilometers per hour.
OEN046181L
Type B
Type A
Type C
OEN046042
OEN046217
OEN046216
procarmanuals.com
Page 151 of 419

473
Features of your vehicle
D190100AUN
Battery saver function
The purpose of this feature is to pre-vent the battery from being dis-
charged. The system automatically
turns off the parking lights when the
driver removes the ignition key and
opens the driver-side door.
With this feature, the parking lights will be turned off automatically if the driver
parks on the side of road at night.
If necessary, to keep the lights on
when the ignition key is removed, per-
form the following:
1) Open the driver-side door.
2) Turn the parking lights OFF and ON again using the light switch on the
steering column. D190300AEN Rescue mode function (if equipped)
If your vehicle has any problem on the
vehicle network system, the headlights
(low beam) turn on automatically with the
ignition switch in the ON position even
though the headlight switch is not turned
on. At this time, the emergency lighting is
not turned off when the headlight switch
is turned off.
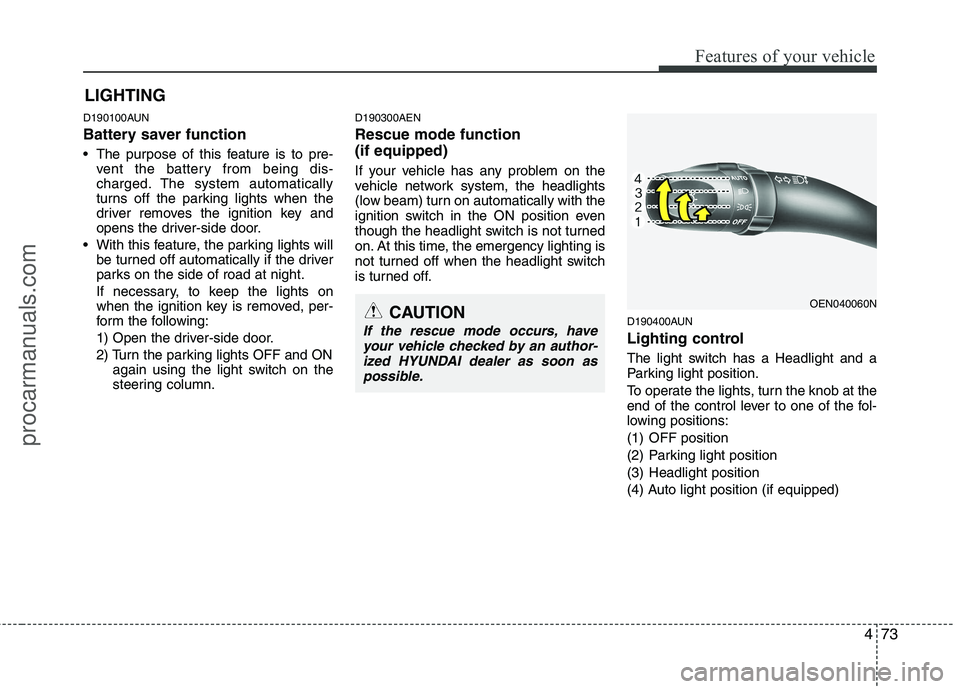
D190400AUN
Lighting control
The light switch has a Headlight and a
Parking light position.
To operate the lights, turn the knob at the
end of the control lever to one of the fol-
lowing positions:
(1) OFF position
(2) Parking light position
(3) Headlight position
(4) Auto light position (if equipped)
LIGHTING
CAUTION
If the rescue mode occurs, have
your vehicle checked by an author-
ized HYUNDAI dealer as soon as possible.
OEN040060N
procarmanuals.com
Page 152 of 419
Features of your vehicle
74
4
D190401AUN
Parking light position ( )
When the light switch is in the parking light position (1st position), the tail, posi-
tion, license and instrument panel lightsare ON. D190402AUN
Headlight position ( )
When the light switch is in the headlight position (2nd position), the head, tail,
position, license and instrument panellights are ON.
✽✽
NOTICE
The ignition switch must be in the ON
position to turn on the headlights.
D190403AUN
Auto light position (if equipped)
When the light switch is in the AUTO light position, the taillights and headlights will
be turned ON or OFF automaticallydepending on the amount of light outside
the vehicle.
OEN040062OEN040061OEN040063
procarmanuals.com
Page 153 of 419
475
Features of your vehicle
D190500AUN High beam operation
To turn on the high beam headlights,
push the lever away from you. Pull it back
for low beams. The high beam indicator will light when
the headlight high beams are switchedon.
To prevent the battery from being dis-
charged, do not leave the lights on for aprolonged time while the engine is not
running.To flash the headlights, pull the lever
towards you. It will return to the normal
(low beam) position when released. The
headlight switch does not need to be on
to use this flashing feature.
CAUTION
Never place anything over sensor
(1) located on the instrument
panel. This will ensure betterauto-light system control.
Don’t clean the sensor using a window cleaner. The cleaner may
leave a light film which could interfere with sensor operation.
If your vehicle has window tint or other types of metallic coating onthe front windshield, the Auto
light system may not work prop-erly.
OEN040065OEN040064
procarmanuals.com
Page 155 of 419

477
Features of your vehicle
D190800AUN
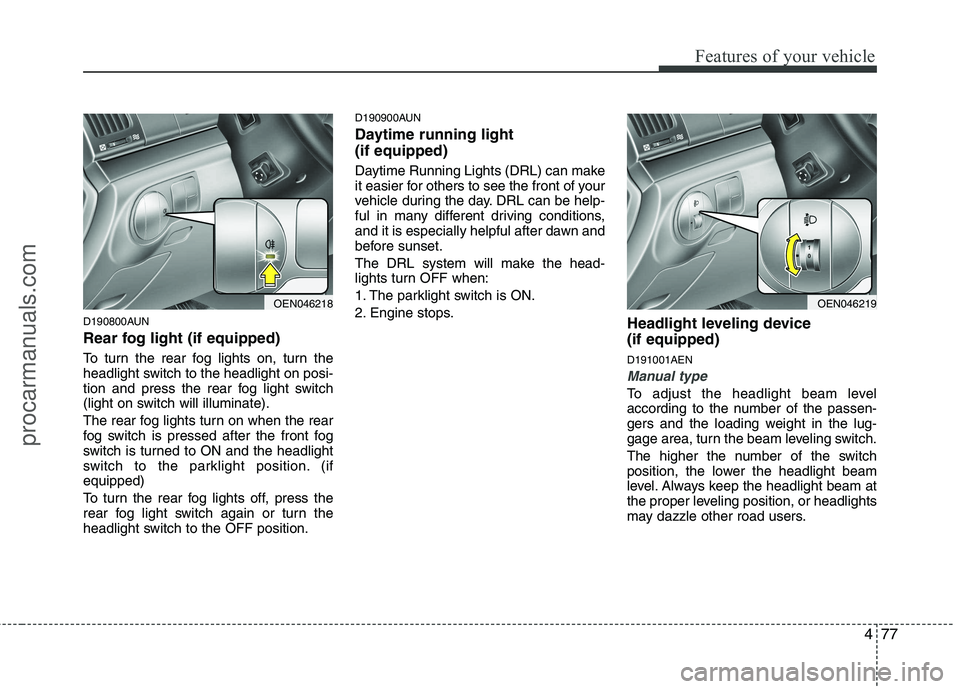
Rear fog light (if equipped)
To turn the rear fog lights on, turn the
headlight switch to the headlight on posi-
tion and press the rear fog light switch
(light on switch will illuminate).
The rear fog lights turn on when the rear
fog switch is pressed after the front fog
switch is turned to ON and the headlight
switch to the parklight position. (ifequipped)
To turn the rear fog lights off, press the
rear fog light switch again or turn the
headlight switch to the OFF position.D190900AUN
Daytime running light (if equipped)
Daytime Running Lights (DRL) can make
it easier for others to see the front of your
vehicle during the day. DRL can be help-
ful in many different driving conditions,
and it is especially helpful after dawn and
before sunset.
The DRL system will make the head-
lights turn OFF when:
1. The parklight switch is ON.
2. Engine stops.
Headlight leveling device (if equipped) D191001AEN
Manual type
To adjust the headlight beam level
according to the number of the passen-
gers and the loading weight in the lug-
gage area, turn the beam leveling switch.
The higher the number of the switch
position, the lower the headlight beam
level. Always keep the headlight beam at
the proper leveling position, or headlights
may dazzle other road users.
OEN046218OEN046219
procarmanuals.com
Page 156 of 419

Features of your vehicle
78
4
Listed below are the examples of proper
switch settings. For loading conditions
other than those listed below, adjust the
switch position so that the beam level
may be the nearest as the conditionobtained according to the list. D191002AENAutomatic type
It is automatically adjusted the headlight
beam level according to the number of
the passengers and the loading weight inthe luggage area.
And it offers the proper headlight beam
under the various conditions.
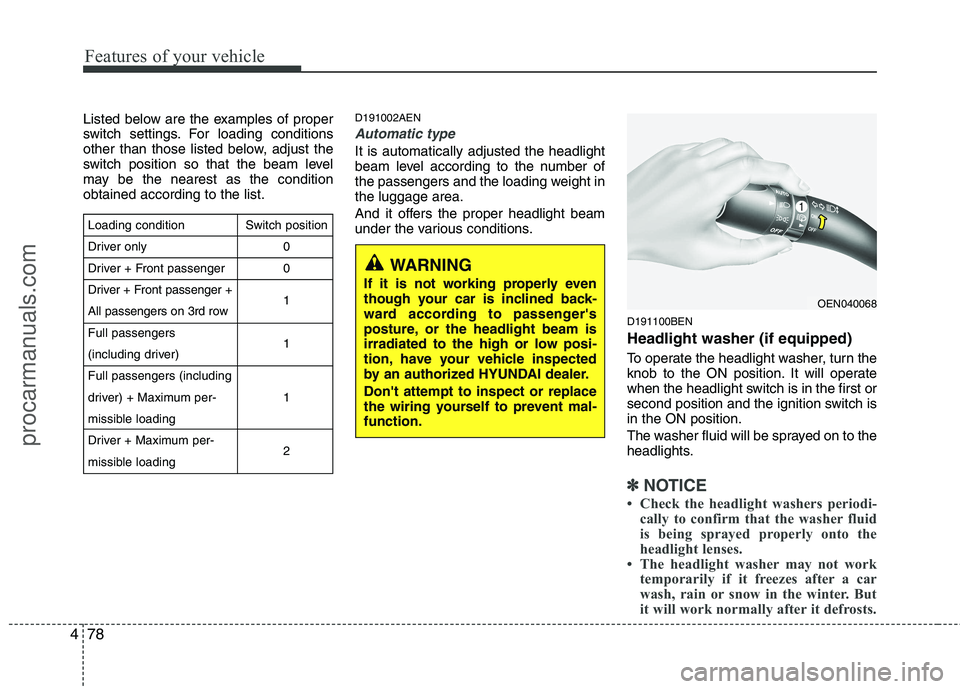
D191100BEN Headlight washer (if equipped)
To operate the headlight washer, turn the
knob to the ON position. It will operate
when the headlight switch is in the first or
second position and the ignition switch isin the ON position.
The washer fluid will be sprayed on to the
headlights.
✽✽NOTICE
Check the headlight washers periodi- cally to confirm that the washer fluid
is being sprayed properly onto the
headlight lenses.
The headlight washer may not work
temporarily if it freezes after a car
wash, rain or snow in the winter. But
it will work normally after it defrosts.
OEN040068
WARNING
If it is not working properly even
though your car is inclined back-
ward according to passenger's
posture, or the headlight beam is
irradiated to the high or low posi-
tion, have your vehicle inspected
by an authorized HYUNDAI dealer. Don't attempt to inspect or replace
the wiring yourself to prevent mal-function.
Loading condition
Driver only
Driver + Front passenger
Driver + Front passenger +
All passengers on 3rd rowFull passengers
(including driver)Full passengers (including
driver) + Maximum per-
missible loading
Driver + Maximum per-
missible loading Switch position
00 1 1 1 2
procarmanuals.com
Page 165 of 419
487
Features of your vehicle
D210400AEN
Door courtesy lamp (if equipped)
The door courtesy lamp comes ON when
the door is opened to assist entering or
exiting the vehicle. It also serves as a
warning to passing vehicles that the vehi-cle door is open.D210500AUN
Glove box lamp (if equipped)
The glove box lamp comes on when the
glove box is opened.
The parking lights or headlights must be
ON for the glove box lamp to function.
D210600AUN
Vanity mirror lamp (if equipped)
Opening the lid of the vanity mirror will
automatically turn on the mirror light.
OEN048080OEN046081OEN046188
procarmanuals.com