2011 HYUNDAI VERACRUZ tailgate
[x] Cancel search: tailgatePage 100 of 419
Features of your vehicle
22
4
Also, the tailgate can be opened or
closed manually by pressing the tail-
gate handle switch and pulling the han-
dle up or pushing the tailgate down-
ward.
✽✽
NOTICE
Close the tailgate, and keep the power
ON/OFF button in the OFF (not
depressed) position before washing the
vehicle in an automatic car wash.
D070404BEN-EE
Power tailgate operation
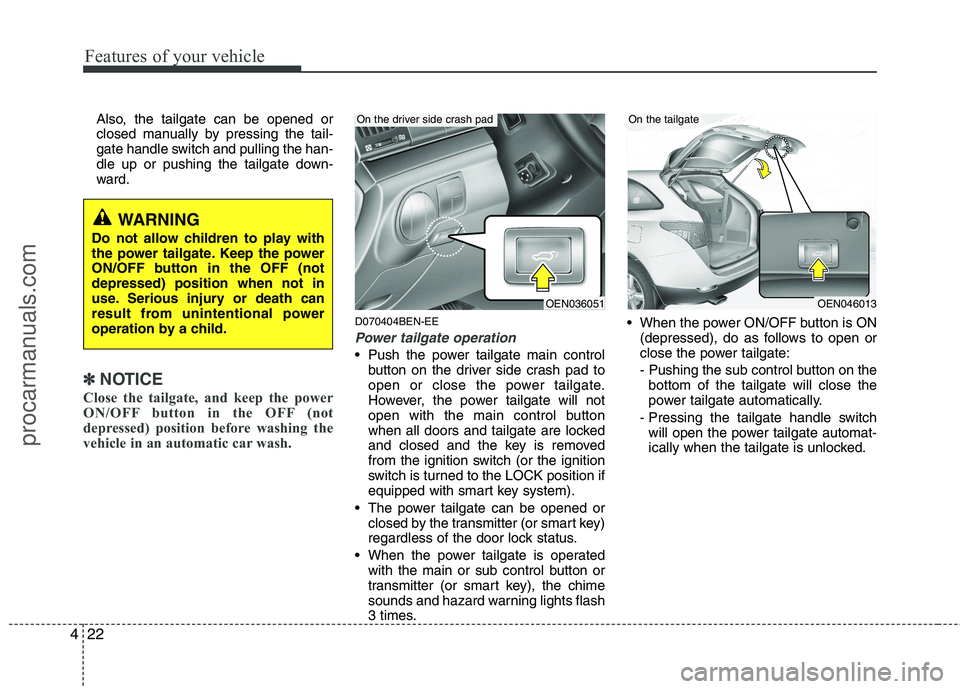
Push the power tailgate main control button on the driver side crash pad to
open or close the power tailgate.
However, the power tailgate will not
open with the main control button
when all doors and tailgate are locked
and closed and the key is removed
from the ignition switch (or the ignition
switch is turned to the LOCK position if
equipped with smart key system).
The power tailgate can be opened or closed by the transmitter (or smart key)
regardless of the door lock status.
When the power tailgate is operated with the main or sub control button or
transmitter (or smart key), the chime
sounds and hazard warning lights flash
3 times. When the power ON/OFF button is ON
(depressed), do as follows to open or
close the power tailgate:
- Pushing the sub control button on thebottom of the tailgate will close the
power tailgate automatically.
- Pressing the tailgate handle switch will open the power tailgate automat-
ically when the tailgate is unlocked.
OEN036051
On the driver side crash pad
OEN046013
On the tailgate
WARNING
Do not allow children to play with
the power tailgate. Keep the power
ON/OFF button in the OFF (notdepressed) position when not in
use. Serious injury or death can
result from unintentional power
operation by a child.
procarmanuals.com
Page 101 of 419
423
Features of your vehicle
When the power ON/OFF button isOFF (not depressed), the power tail- gate can not be controlled with the sub
control button or tailgate handle switch,
and if the sub control button is pushed,
the chime sounds once.
However, the tailgate may be opened
manually by pressing the tailgate han-
dle switch and lifting the tailgate
upward. The tailgate may be manually
closed by pushing the tailgate down-
ward.
If the power tailgate is not closed andlatched completely after power closing
operation, the chime sounds 3 times.
If the power tailgate is operated while the tailgate is in partially opened posi-
tion (less than 10 degrees), the tailgate
is automatically opened fully.
If the power tailgate is operated while the tailgate is in half-opened position
(more than 10 degrees), the tailgate is
automatically closed completely. If the power tailgate is operated again
while the tailgate is closing, the tailgate
is automatically opened fully.
If the power tailgate is operated again while the tailgate is opening, the tail-gate is automatically closed complete-
ly. However, if the power tailgate con-
trol button is pressed again when the
tailgate is open less than 10 degrees,
the tailgate will continue to open.
Power tailgate non-opening conditions
The power tailgate will not open auto-
matically, but will close under the follow-
ing conditions. If the main or sub control
button is pushed for power opening oper-
ation, the chime sounds once.
When the ignition switch is in the ON position,
1. Vehicle is moving above 5 km/h (3 mph).
2. The gearshift lever is not in P (Park).
WARNING
Even though the power ON/OFF
button is in the OFF (not
depressed) position, the tailgate
will still be propelled upward by
mechanical force if the tailgate is
manually opened more than 10
degrees beyond the fully closed
position. In addition, if the tailgate
is manually closed to the second-
ary latch position, the tailgate will
be electrically moved to the fully
latched position. Make sure that
face, arms, hands, and other
obstructions are safely out of the
way before operating the tailgate.
WARNING
Make sure there are no people or
objects around the tailgate before
operating the power tailgate. Wait
until the tailgate is open fully and
stopped before loading or unload-
ing cargo or passengers from the
vehicle.
WARNING
Make sure the tailgate is closed
firmly before driving. If the tailgate
is open, you will draw dangerous
exhaust fumes into your vehicle
which can cause serious injury or
death to vehicle occupants.
procarmanuals.com
Page 141 of 419
463
Features of your vehicle
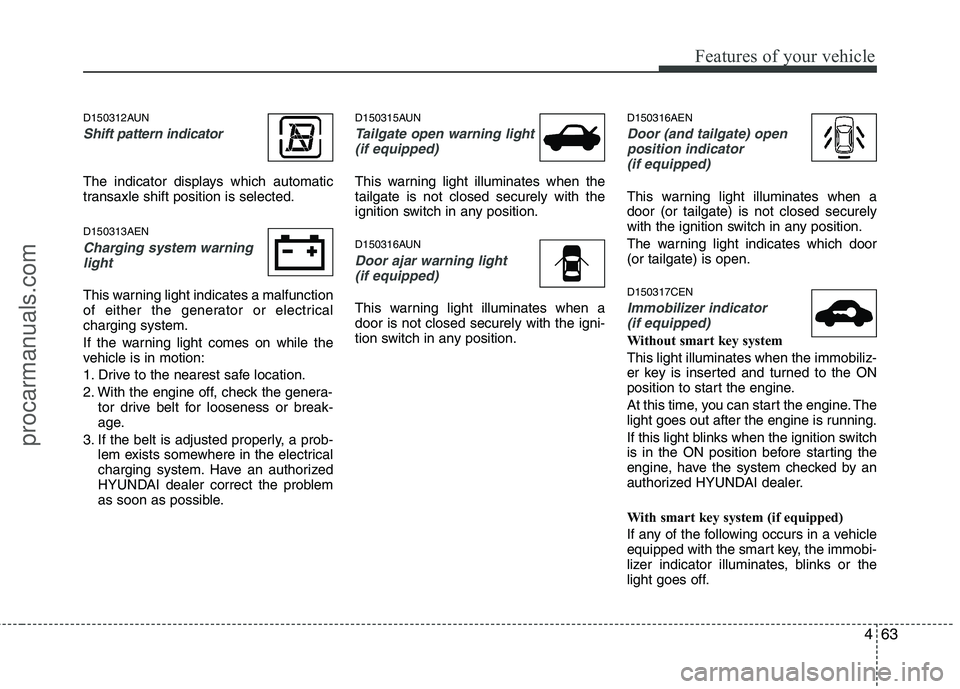
D150312AUN
Shift pattern indicator
The indicator displays which automatic
transaxle shift position is selected. D150313AEN
Charging system warninglight
This warning light indicates a malfunction
of either the generator or electricalcharging system.
If the warning light comes on while the
vehicle is in motion:
1. Drive to the nearest safe location.
2. With the engine off, check the genera- tor drive belt for looseness or break-
age.
3. If the belt is adjusted properly, a prob- lem exists somewhere in the electrical
charging system. Have an authorized
HYUNDAI dealer correct the problem
as soon as possible. D150315AUN
Tailgate open warning light
(if equipped)
This warning light illuminates when the tailgate is not closed securely with the
ignition switch in any position.
D150316AUN
Door ajar warning light(if equipped)
This warning light illuminates when a door is not closed securely with the igni-
tion switch in any position. D150316AEN
Door (and tailgate) open
position indicator
(if equipped)
This warning light illuminates when a door (or tailgate) is not closed securely
with the ignition switch in any position.
The warning light indicates which door (or tailgate) is open. D150317CEN
Immobilizer indicator (if equipped)
Without smart key system This light illuminates when the immobiliz-
er key is inserted and turned to the ON
position to start the engine.
At this time, you can start the engine. The
light goes out after the engine is running.
If this light blinks when the ignition switch
is in the ON position before starting the
engine, have the system checked by an
authorized HYUNDAI dealer.
With smart key system (if equipped)
If any of the following occurs in a vehicle
equipped with the smart key, the immobi-
lizer indicator illuminates, blinks or the
light goes off.
procarmanuals.com
Page 164 of 419
Features of your vehicle
86
4
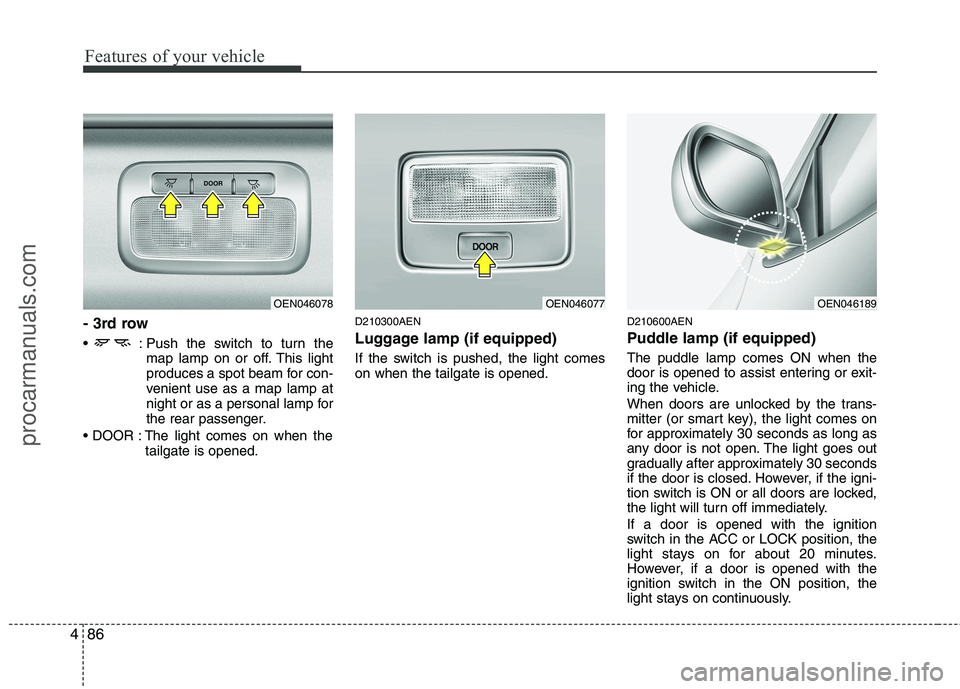
- 3rd row
: Push the switch to turn the
map lamp on or off. This light
produces a spot beam for con-
venient use as a map lamp at
night or as a personal lamp for
the rear passenger.
The light comes on when the tailgate is opened. D210300AEN
Luggage lamp (if equipped)
If the switch is pushed, the light comes on when the tailgate is opened.
D210600AEN
Puddle lamp (if equipped) The puddle lamp comes ON when the
door is opened to assist entering or exit-
ing the vehicle.
When doors are unlocked by the trans-
mitter (or smart key), the light comes on
for approximately 30 seconds as long as
any door is not open. The light goes out
gradually after approximately 30 seconds
if the door is closed. However, if the igni-
tion switch is ON or all doors are locked,
the light will turn off immediately. If a door is opened with the ignition
switch in the ACC or LOCK position, the
light stays on for about 20 minutes.
However, if a door is opened with the
ignition switch in the ON position, the
light stays on continuously.
OEN046077OEN046189OEN046078
procarmanuals.com
Page 239 of 419
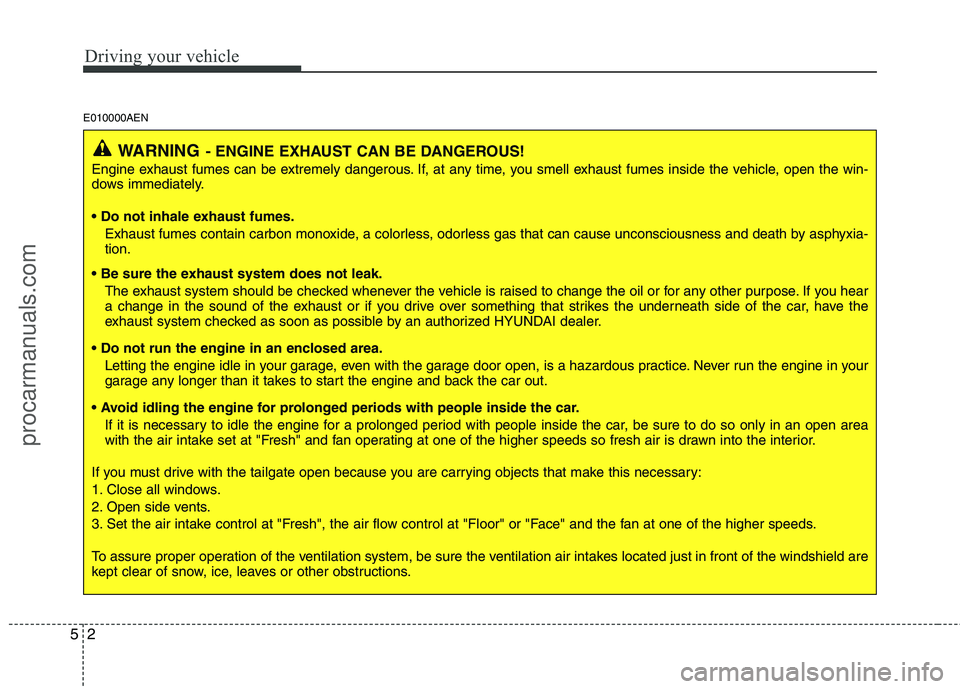
Driving your vehicle
2
5
E010000AEN
WARNING - ENGINE EXHAUST CAN BE DANGEROUS!
Engine exhaust fumes can be extremely dangerous. If, at any time, you smell exhaust fumes inside the vehicle, open the win-
dows immediately.
• Do not inhale exhaust fumes. Exhaust fumes contain carbon monoxide, a colorless, odorless gas that can cause unconsciousness and death by asphyxia- tion.
The exhaust system should be checked whenever the vehicle is raised to change the oil or for any other purpose. If you hear
a change in the sound of the exhaust or if you drive over something that strikes the underneath side of the car, have the
exhaust system checked as soon as possible by an authorized HYUNDAI dealer.
Letting the engine idle in your garage, even with the garage door open, is a hazardous practice. Never run the engine in your
garage any longer than it takes to start the engine and back the car out.
If it is necessary to idle the engine for a prolonged period with people inside the car, be sure to do so only in an open area
with the air intake set at "Fresh" and fan operating at one of the higher speeds so fresh air is drawn into the interior.
If you must drive with the tailgate open because you are carrying objects that make this necessary:
1. Close all windows.
2. Open side vents.
3. Set the air intake control at "Fresh", the air flow control at "Floor" or "Face" and the fan at one of the higher speeds.
To assure proper operation of the ventilation system, be sure the ventilation air intakes located just in front of the windshie ld are
kept clear of snow, ice, leaves or other obstructions.
procarmanuals.com
Page 304 of 419

613
What to do in an emergency
F070200AEN
Removing and storing the spare tire
Your spare tire is stored underneath
your vehicle, directly below the cargoarea.
To remove the spare tire:
1. Open the tailgate.
2. Find the plastic hex bolt cover andremove the cover. 3. Use the wheel lug nut wrench to
loosen the bolt enough to lower
the spare tire.
Turn the wrench counterclockwise until the spare tire reaches the
ground.
OEN067002L-1OEN067003
(Continued)
Be sure to use the correctfront and rear jacking posi-
tions on the vehicle; never
use the bumpers or any other
part of the vehicle for jack
support.
The vehicle can easily roll off the jack causing serious
injury or death. No person
should place any portion of
their body under a vehicle that
is supported only by a jack;
use vehicle support stands.
Do not start or run the engine while the vehicle is on the
jack.
Do not allow anyone to remain in the vehicle while it is on the
jack.
Make sure any children pres- ent are in a secure place away
from the road and from the
vehicle to be raised with the
jack.
procarmanuals.com
Page 313 of 419

What to do in an emergency
22
6
When towing your vehicle in an emer- gency without wheel dollies :
1. Set the ignition switch in the ACC posi-
tion.
2. Place the transaxle shift lever in N (Neutral).
3. Release the parking brake.
F080200AUN
Removable towing hook (rear) (if equipped)
1. Open the tailgate, and remove the tow-ing hook from the tool case.
2. Remove the hole cover pressing the lower part of the cover on the rear
bumper. 3. Install the towing hook by turning it
clockwise into the hole until it is fullysecured.
4. Remove the towing hook and install the cover after use.
CAUTION
Failure to place the transaxle shift
lever in N (Neutral) may cause inter-nal damage to the transaxle.
OEN066010OEN066011
procarmanuals.com
Page 363 of 419

Maintenance
46
7
G190400AEN
Removing the battery
1. Remove the nut (1) and disconnect the
battery cable from the negative termi-
nal of the battery.
2. Remove the nuts (2, 3) and disconnect the battery cable from the positive ter-
minal of the battery.
3. Remove the battery.
4. Reinstall the battery in the reverse order of removal. G190300AEN Reset items
Items should be reset after the battery
has been discharged or the battery hasbeen disconnected.
Power tailgate (See section 4)
Auto up/down window (See section 4)
Sunroof (See section 4)
Driver position memory system
(See section 4)
Trip computer (See section 4)
Climate control system (See section 4)
Clock (See section 4)
Audio (See section 4)
OEN076052
WARNING
Before performing maintenance or recharging the battery, turn off all accessories and stop the
engine.
The negative battery cable must be removed first and installed
last when the battery is discon-nected.
procarmanuals.com