Page 112 of 386

Features of your vehicle
38 4
Inside rearview mirror
Adjust the rearview mirror so that the
center view through the rear window is
seen. Make this adjustment before you
start driving.
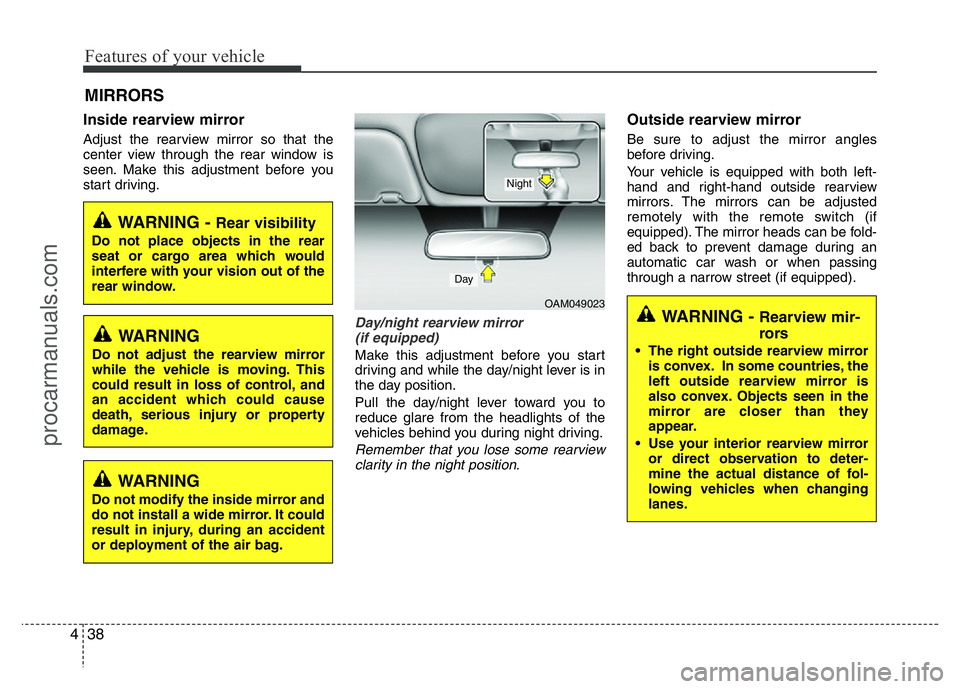
Day/night rearview mirror
(if equipped)
Make this adjustment before you start
driving and while the day/night lever is in
the day position.
Pull the day/night lever toward you to
reduce glare from the headlights of the
vehicles behind you during night driving.
Remember that you lose some rearview
clarity in the night position.
Outside rearview mirror
Be sure to adjust the mirror angles
before driving.
Your vehicle is equipped with both left-
hand and right-hand outside rearview
mirrors. The mirrors can be adjusted
remotely with the remote switch (if
equipped). The mirror heads can be fold-
ed back to prevent damage during an
automatic car wash or when passing
through a narrow street (if equipped).
MIRRORS
OAM049023
Day
Night
WARNING - Rear visibility
Do not place objects in the rear
seat or cargo area which would
interfere with your vision out of the
rear window.
WARNING
Do not adjust the rearview mirror
while the vehicle is moving. This
could result in loss of control, and
an accident which could cause
death, serious injury or property
damage.
WARNING
Do not modify the inside mirror and
do not install a wide mirror. It could
result in injury, during an accident
or deployment of the air bag.
WARNING - Rearview mir-
rors
• The right outside rearview mirror
is convex. In some countries, the
left outside rearview mirror is
also convex. Objects seen in the
mirror are closer than they
appear.
• Use your interior rearview mirror
or direct observation to deter-
mine the actual distance of fol-
lowing vehicles when changing
lanes.
procarmanuals.com
Page 118 of 386
Features of your vehicle
44 4
Instrument panel illumination
(if equipped)
Press the illumination control switch to
adjust the instrument panel illumination
intensity. For instrument cluster type A,
the vehicle’s parking lights or headlights
should be on to adjust the instrument
panel illumination.
Gauges
Speedometer
The speedometer indicates the forward
speed of the vehicle.
The speedometer is calibrated in kilome-
ters per hour and/or miles per hour.
OFS040038
OFS042040E ■Type B ■Type A
■Type COFS042039L
OFS042039E
procarmanuals.com
Page 129 of 386

455
Features of your vehicle
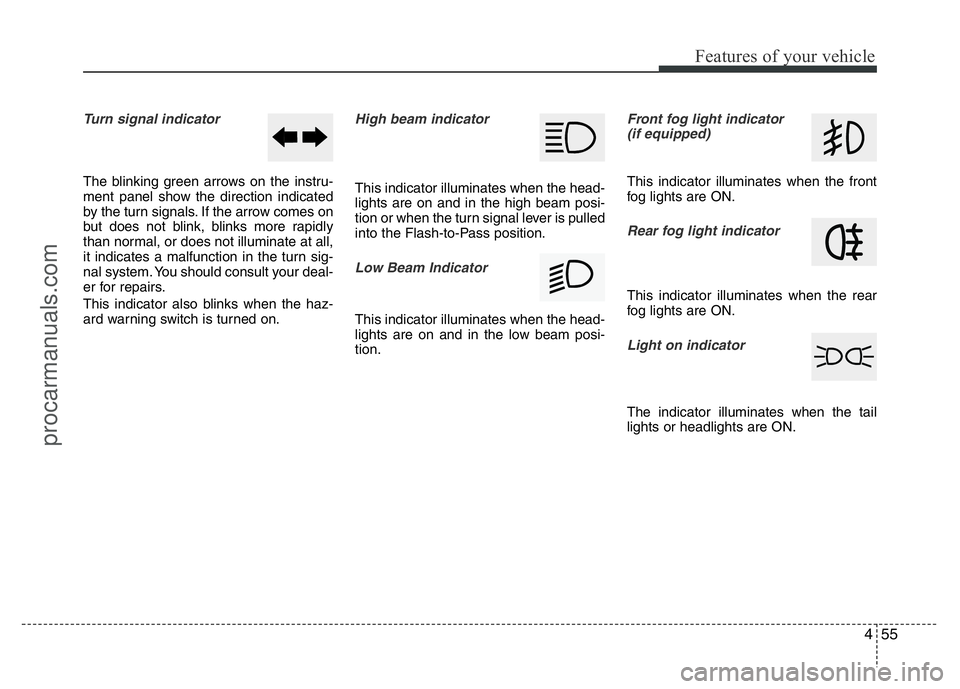
Turn signal indicator
The blinking green arrows on the instru-
ment panel show the direction indicated
by the turn signals. If the arrow comes on
but does not blink, blinks more rapidly
than normal, or does not illuminate at all,
it indicates a malfunction in the turn sig-
nal system. You should consult your deal-
er for repairs.
This indicator also blinks when the haz-
ard warning switch is turned on.
High beam indicator
This indicator illuminates when the head-
lights are on and in the high beam posi-
tion or when the turn signal lever is pulled
into the Flash-to-Pass position.
Low Beam Indicator
This indicator illuminates when the head-
lights are on and in the low beam posi-
tion.
Front fog light indicator
(if equipped)
This indicator illuminates when the front
fog lights are ON.
Rear fog light indicator
This indicator illuminates when the rear
fog lights are ON.
Light on indicator
The indicator illuminates when the tail
lights or headlights are ON.
procarmanuals.com
Page 148 of 386

Features of your vehicle
74 4
Battery saver function
• The purpose of this feature is to pre-
vent the battery from being dis-
charged. The system automatically
turns off the parking lights when the
driver removes the ignition key and
opens the driver-side door.
• With this feature, the parking lights will
turn off automatically if the driver parks
on the side of road at night.
If necessary, to keep the lights on
when the ignition key is removed, per-
form the following:
1) Open the driver-side door.
2) Turn the parking lights OFF and ON
again using the light switch on the
steering column.
Headlight escort function
(if equipped)
If you turn the ignition switch to the ACC
or OFF position with the headlights ON,
the headlights (and/or tail lights) remain
on for about 20 minutes. However, with
the engine off if the driver’s door is
opened and closed, the headlights
(and/or tail lights) are turned off after 30
seconds.
The headlights (and/or tail lights) can be
turned off by pressing the lock button on
the transmitter (or smart key) twice or
turning the light switch to the OFF or
Auto position.
However, if you turn the light switch to the
Auto position when it is dark outside, the
headlights will not be turned off.
Headlight welcome function
(if equipped)
When the headlight switch is in the ON or
AUTO position and all doors (and tail-
gate) are closed and locked, if you press
the door unlock button on the transmitter
(or smart key), the headlights will come
on for about 15 seconds.
If the headlight switch is in the AUTO
position, the function can only operate at
night.
At this time, if you press the door unlock
button again or door lock button on the
transmitter (or smart key), the headlights
will turn off immediately.
LIGHTING
CAUTION
If the driver gets out of the vehicle
through other doors (except driver's
door), the battery saver function
does not operate and the headlight
escort function does not turn off
automatically. Therefore, It causes
the battery to be discharged. In this
case, make sure to turn off the lamp
before getting out of the vehicle.
procarmanuals.com
Page 149 of 386
475
Features of your vehicle
Lighting control
The light switch has a Headlight and a
Parking light position.
To operate the lights, turn the knob at the
end of the control lever to one of the fol-
lowing positions:
(1) Off position
(2) Parking light position
(3) Headlight position
(4) Auto light position (if equipped)
Parking light position ( )
When the light switch is in the parking
light position (1st position), the tail posi-
tion, license and instrument panel lights
will turn ON.
Headlight position ( )
When the light switch is in the headlight
position (2nd position), the head, tail,
position, license and instrument panel
lights are ON.
✽NOTICE
The ignition switch must be in the ON
position to turn on the headlights.
OED040806
OBK049045
■Type A
■Type B
OED040046
OAM049041
■Type A
■Type B
OED040800
OAM049042
■Type A
■Type B
procarmanuals.com
Page 150 of 386

Features of your vehicle
76 4
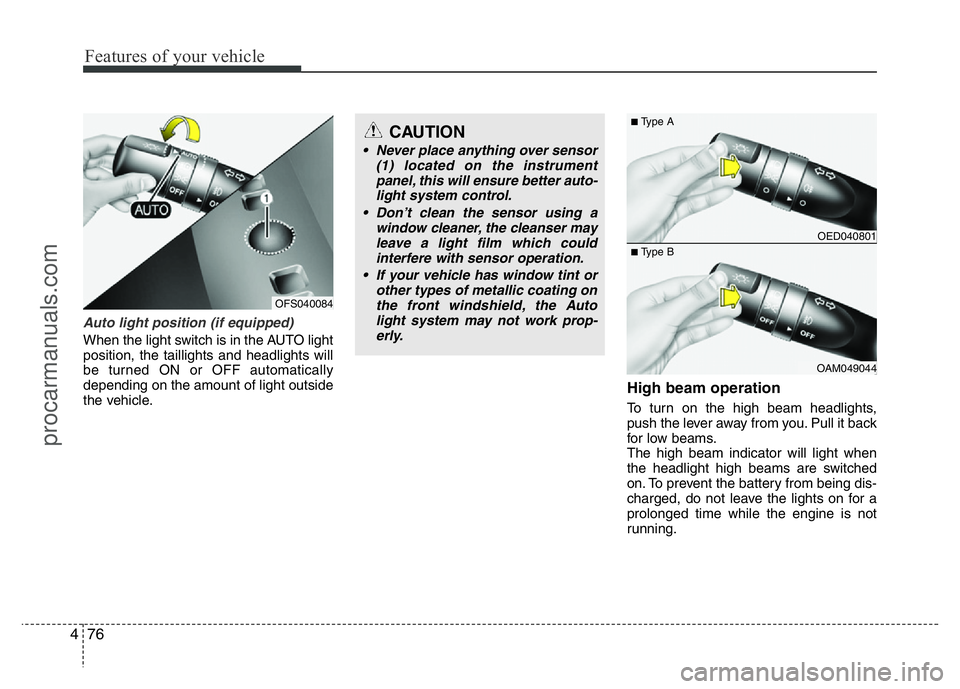
Auto light position (if equipped)
When the light switch is in the AUTO light
position, the taillights and headlights will
be turned ON or OFF automatically
depending on the amount of light outside
the vehicle.
High beam operation
To turn on the high beam headlights,
push the lever away from you. Pull it back
for low beams.
The high beam indicator will light when
the headlight high beams are switched
on. To prevent the battery from being dis-
charged, do not leave the lights on for a
prolonged time while the engine is not
running.
CAUTION
• Never place anything over sensor
(1) located on the instrument
panel, this will ensure better auto-
light system control.
• Don’t clean the sensor using a
window cleaner, the cleanser may
leave a light film which could
interfere with sensor operation.
• If your vehicle has window tint or
other types of metallic coating on
the front windshield, the Auto
light system may not work prop-
erly.
OED040801
OAM049044
■Type A
■Type B
OFS040084
procarmanuals.com
Page 151 of 386
477
Features of your vehicle
To flash the headlights, pull the lever
towards you. It will return to the normal
(low beam) position when released. The
headlight switch does not need to be on
to use this flashing feature.
Turn signals and lane change sig-
nals
The ignition switch must be on for the
turn signals to function. To turn on the
turn signals, move the lever up or down
(A). The green arrow indicators on the
instrument panel indicate which turn sig-
nal is operating. They will self-cancel
after a turn is completed.
OED040802
OAM049043
■Type A
■Type B
OED040804
OAM049045
■Type A
■Type B
WARNING
Do not use high beam when there
are other vehicles. Using high
beam could obstruct the other dri-
ver's vision.
procarmanuals.com
Page 154 of 386
Features of your vehicle
80 4
Headlight leveling device
(if equipped)
To adjust the headlight beam level
according to the number of the passen-
gers and loading weight in the luggage
area, turn the beam leveling switch.
The higher the number of the switch
position, the lower the headlight beam
level. Always keep the headlight beam at
the proper leveling position, or headlights
may dazzle other road users.
Listed below are the examples of proper
switch settings. For loading conditions
other than those listed below, adjust the
switch position so that the beam level
may be the nearest as the condition
obtained according to the list.
OFS042139L
Loading condition Switch position
Driver only 0
Driver + Front passenger 0
Full passengers
(including driver)1
Full passengers (including
driver) + Maximum permis-
sible loading2
Driver + Maximum permis-
sible loading 3
procarmanuals.com