2011 Hyundai H-100 Truck ECO mode
[x] Cancel search: ECO modePage 15 of 211
1
FEATURES OF YOUR HYUNDAI
3BREAKING IN YOUR NEW HYUNDAI
B010F01A-AAT Operation in Foreign Countries If you are going to drive your Hyundai in another country, be sure to:
o Observe all regulations regarding registration and insurance.
o Determine that acceptable fuel is available. B020B01HR-GAT During the First 1,000 Km (600 Miles) No formal "break-in" procedure is re- quired with your new Hyundai. How-ever, you can contribute to the eco- nomical operation and durability of your Hyundai by observing the followingrecommendations during the first 1,000 km (600 miles).
o While driving, keep your engine
speed (rpm, or revolutions per minute) between 2,000 rpm and 4,000rpm.
o While driving, keep under three quar-
ters of maximum speed.
o Use moderate acceleration. Don't start, depress the accelerator pedalfully.
o For the first 300 km (200 miles), try to avoid hard stops.
o Don't lug the engine (in other words, don't drive so slowly in too-high a gear that the engine "bucks": shift to a lower gear).
CAUTION:
o Never use any fuel, whether diesel or B7 biodiesel or otherwise, thatfails to meet the latest petroleumindustry specification.
o Never use any fuel additives or
treatments that are not recom-mended or approved by the ve- hicle manufacturer.
! o Whether going fast or slow, vary your
speed from time to time.
o Don't let the engine idle longer than 3 minutes at one time.
o Don't tow a trailer during the first
1,000 km (600 miles) of operation.
o Do not exceed loading limits. B030A01P-GAT Before Operation Precautions for New Vehicle The performance and life of a vehicle depend largely on how the vehicle is handled when new.To maintain the parts smoothly and sustain high performance for a long time to come, be sure to observe thefollowing points. Make sure that your vehicle does not miss the first 5,000 km inspections. After the first 5,000 km of driving, take your vehicle to your nearest service shop for inspection.
Repair or replacement of worn or dam- aged components due to the use of non approved fuels will not be covered by the manufactures warranty.
Page 48 of 211
1FEATURES OF YOUR HYUNDAI
36
B350D01O-GAT Windshield Washer Operation To use the windshield washer, pull the wiper/washer lever toward the steering wheel. When the washer lever is oper-ated, the wipers automatically make two passes across the windshield. The washer continues to operate untilthe lever is released. NOTE:
o Do not operate the washer morethan 15 seconds at a time or when the fluid reservoir is empty.
o In icy or freezing weather, be sure
the wiper blades are not frozen tothe glass prior to operating the wipers.
o In areas where water freezes in winter, use windshield washerantifreeze.
B350C02O-AAT Adjustable Intermittent Wiper Operation To use the intermittent wiper feature, place the wiper switch (1) in the "INT (- --)" position.With the switch in this position, the interval between wipes can be varied from approximately 1 to 18 seconds byturning the interval adjuster barrel.
B350B01O-GAT Windshield wiper Operates as follows when the ignition switch is turned ON.
( or MIST) : For a single wiping
cycle, push the lever upward and release it with the lever in the OFF (0) position. The wip-ers will operate continuously if the lever is pushed upward and held.
OFF (0) : Wiper is not in operation
INT (---) : Wiper operates intermittently at the same wiping intervals. Use this mode in a light rain or mist. To vary the speed set- ting, turn the speed controlknob. (If installed)
LO (1) : Normal wiper speedHI (2) : Fast wiper speed NOTE: To prevent damage to the wiper sys-
tem, do not attempt to wipe away heavy accumulations of snow or ice.Accumulated snow and ice should be removed manually. If there is only a light layer of snow or ice, operate theheater in the defrost mode to melt the snow or ice before using the wiper.
Page 51 of 211
1
FEATURES OF YOUR HYUNDAI
39TICKET HOLDER
B590A01HR-GAT (If Installed)
For your convenience, it may be used for holding a tollgate ticket or a card. OHR028104
CAUTION:
Do not clean the inner side of therear window glass with an abrasive type of glass cleaner or use a scraper to remove foreign deposits from theinner surface of the glass as this may cause damage to the defroster ele- ments. NOTE: The engine must be running for the rear window defroster to operate.
!
DIGITAL CLOCK
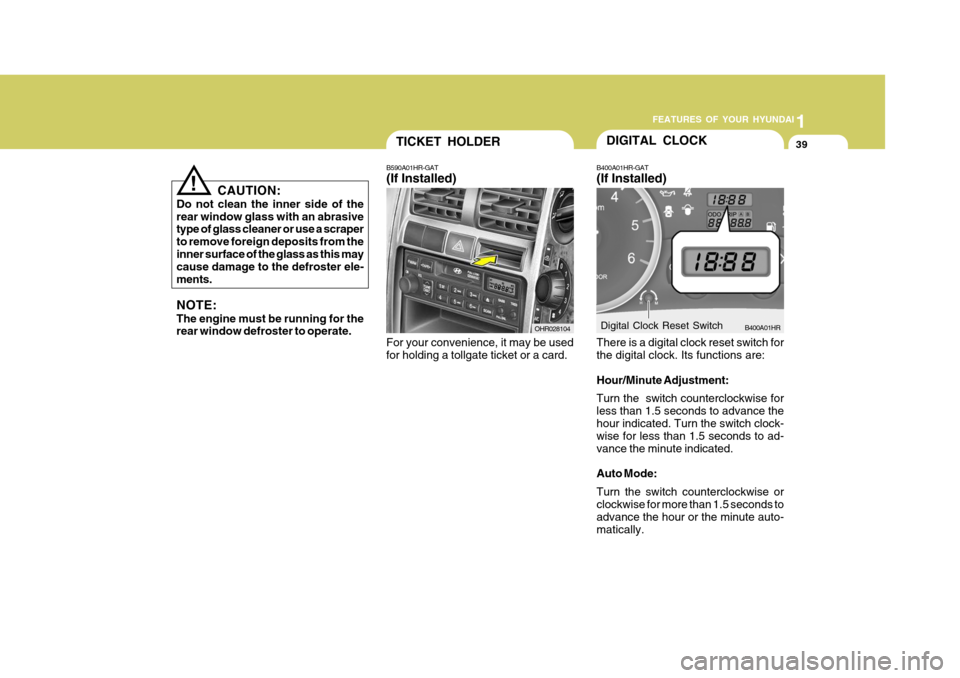
B400A01HR-GAT (If Installed) There is a digital clock reset switch for the digital clock. Its functions are: Hour/Minute Adjustment: Turn the switch counterclockwise for less than 1.5 seconds to advance thehour indicated. Turn the switch clock- wise for less than 1.5 seconds to ad- vance the minute indicated. Auto Mode: Turn the switch counterclockwise or clockwise for more than 1.5 seconds to advance the hour or the minute auto-matically. B400A01HR
Digital Clock Reset Switch
Page 69 of 211
1
FEATURES OF YOUR HYUNDAI
57
With the "Fresh" mode selected, air enters the vehicle from the outside andis heated or cooled according to the function selected. With the "Recirculation" mode selected, air from within the passenger compart- ment will be drawn through the heatingsystem and heated or cooled according to the function selected. NOTE: It should be noted that prolonged operation of the heating in "Recircu- lation" mode ( ) will give rise to fogging of the windshield and sidewindows and the air within the pas- senger compartment will become stale. In addition, prolonged use ofthe air conditioning with the "Recir- culation" mode ( ) selected may result in the air within the passengercompartment becoming excessively dry.
B670C01E-AAT Air Intake Control
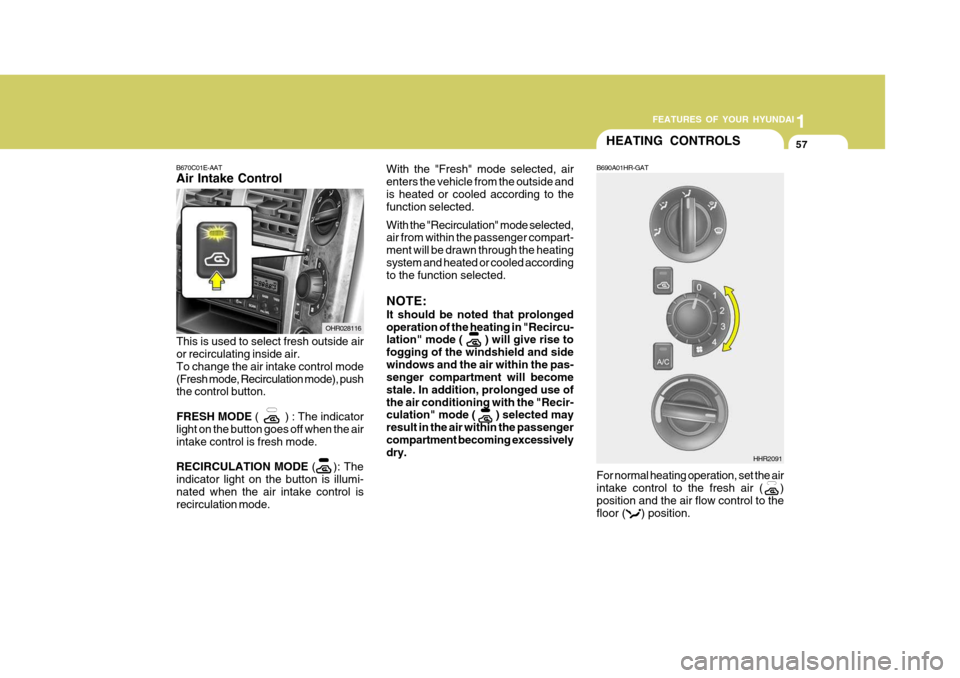
This is used to select fresh outside air or recirculating inside air. To change the air intake control mode(Fresh mode, Recirculation mode), push the control button. FRESH MODE ( ) : The indicator
light on the button goes off when the air intake control is fresh mode. RECIRCULATION MODE ( ): The
indicator light on the button is illumi- nated when the air intake control is recirculation mode. OHR028116B690A01HR-GAT For normal heating operation, set the air intake control to the fresh air ( ) position and the air flow control to thefloor ( ) position.
HHR2091
HEATING CONTROLS
Page 80 of 211
1FEATURES OF YOUR HYUNDAI
68
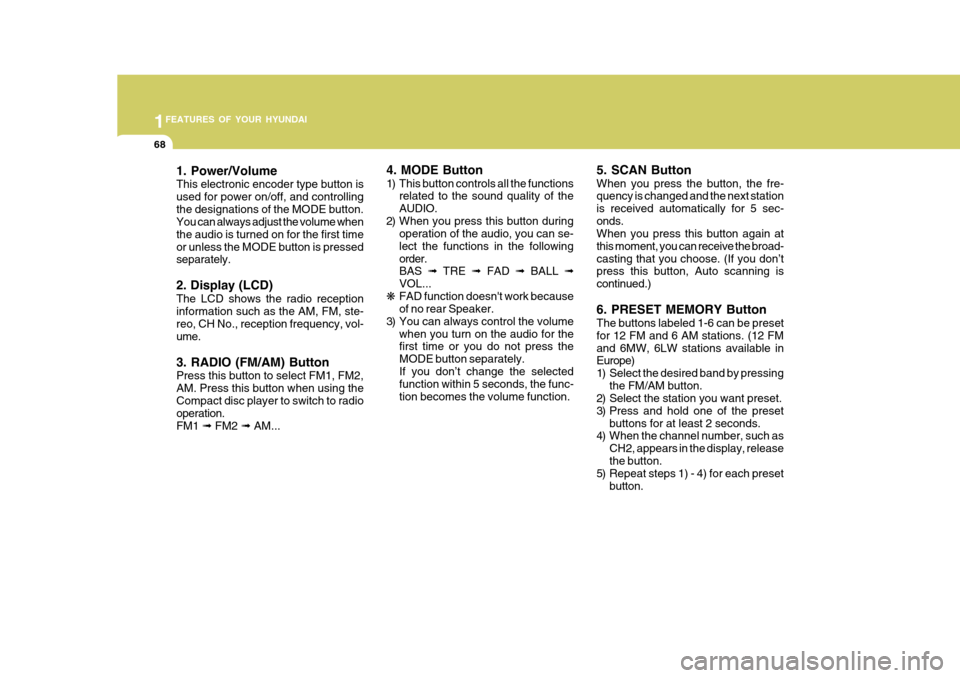
1. Power/Volume This electronic encoder type button is used for power on/off, and controllingthe designations of the MODE button. You can always adjust the volume when the audio is turned on for the first timeor unless the MODE button is pressed separately. 2. Display (LCD) The LCD shows the radio reception information such as the AM, FM, ste- reo, CH No., reception frequency, vol- ume. 3. RADIO (FM/AM) Button Press this button to select FM1, FM2, AM. Press this button when using theCompact disc player to switch to radio operation. FM1 ➟ FM2 ➟ AM... 4. MODE Button
1) This button controls all the functions
related to the sound quality of the AUDIO.
2) When you press this button during operation of the audio, you can se-lect the functions in the followingorder. BAS ➟ TRE ➟ FAD ➟ BALL ➟
VOL...
❋ FAD function doesn't work becauseof no rear Speaker.
3) You can always control the volume when you turn on the audio for thefirst time or you do not press the MODE button separately.If you don’t change the selected function within 5 seconds, the func- tion becomes the volume function. 5. SCAN Button When you press the button, the fre- quency is changed and the next station is received automatically for 5 sec-onds. When you press this button again at this moment, you can receive the broad-casting that you choose. (If you don’t press this button, Auto scanning is continued.) 6. PRESET MEMORY Button The buttons labeled 1-6 can be preset for 12 FM and 6 AM stations. (12 FMand 6MW, 6LW stations available in Europe)
1) Select the desired band by pressing
the FM/AM button.
2) Select the station you want preset.
3) Press and hold one of the preset
buttons for at least 2 seconds.
4) When the channel number, such as
CH2, appears in the display, releasethe button.
5) Repeat steps 1) - 4) for each preset
button.
Page 83 of 211
1
FEATURES OF YOUR HYUNDAI
71
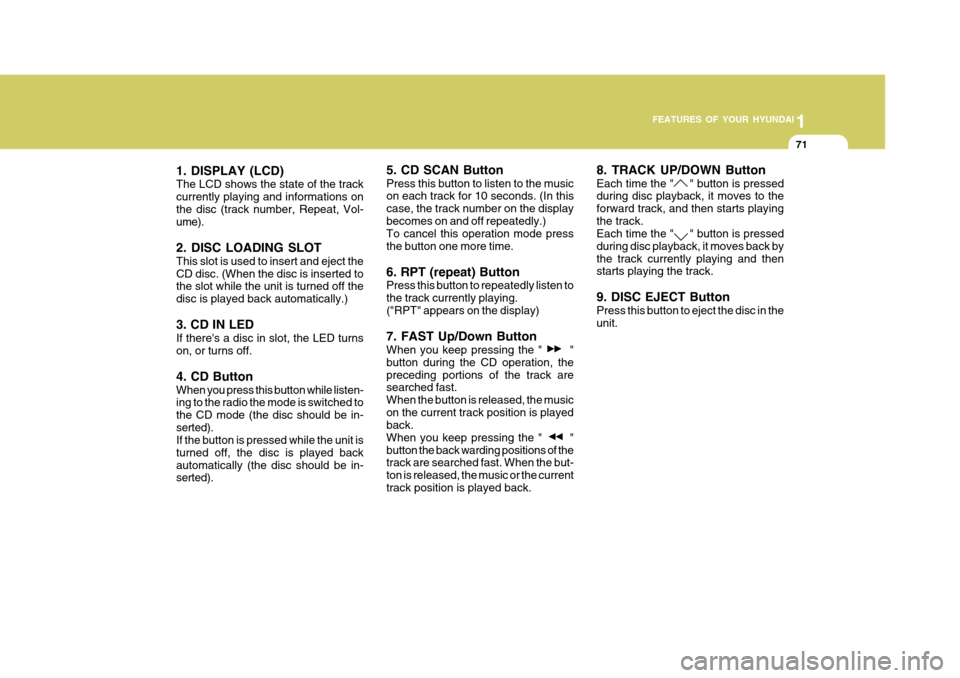
1. DISPLAY (LCD) The LCD shows the state of the track currently playing and informations onthe disc (track number, Repeat, Vol- ume). 2. DISC LOADING SLOT This slot is used to insert and eject the CD disc. (When the disc is inserted to the slot while the unit is turned off the disc is played back automatically.) 3. CD IN LED If there's a disc in slot, the LED turns on, or turns off. 4. CD Button When you press this button while listen- ing to the radio the mode is switched to the CD mode (the disc should be in-serted). If the button is pressed while the unit is turned off, the disc is played backautomatically (the disc should be in- serted). 5. CD SCAN Button Press this button to listen to the music on each track for 10 seconds. (In this case, the track number on the displaybecomes on and off repeatedly.) To cancel this operation mode press the button one more time. 6. RPT (repeat) Button Press this button to repeatedly listen to the track currently playing.("RPT" appears on the display) 7. FAST Up/Down Button When you keep pressing the " " button during the CD operation, thepreceding portions of the track are searched fast. When the button is released, the musicon the current track position is played back. When you keep pressing the " "button the back warding positions of the track are searched fast. When the but- ton is released, the music or the currenttrack position is played back.8. TRACK UP/DOWN Button Each time the " " button is pressed during disc playback, it moves to the forward track, and then starts playingthe track. Each time the " " button is pressed during disc playback, it moves back bythe track currently playing and then starts playing the track. 9. DISC EJECT Button Press this button to eject the disc in the unit.
Page 86 of 211

1FEATURES OF YOUR HYUNDAI
74
K220B01HR-GAT
1. POWER ON-OFF/VOLUMEControl Knob
The radio unit may be operated when the ignition key is in the "ACC" or "ON"position. Rotate the knob clockwise to switch the radio unit on and to increase the volume.The LCD shows the radio frequency in the radio mode. Turn the knob counter- clockwise to reduce the volume and toswitch the radio unit off. BAL (Balance) Control Knob Pull and turn the control knob clockwise to emphasize right speaker sound (left speaker sound will be attenuated). When the control knob is turned counterclock-wise, left speaker sound will be empha- sized (right speaker sound will be at- tenuated).After adjusting the balance, push the knob again to use the other function. SCAN Knob When the scan knob is pressed, the frequency will increase and the receiv-able stations will be tuned in one after another, receiving each station for 5 seconds. To stop scanning, press thescan knob again.
2. TUNE (manual) Select Button Press the ( ) side or ( ) side to increase or to decrease the frequency. With the button held down for 1 secondor more, the stop signal (broadcasting radio wave) is ignored and channel selection continues. SEEK Operation (Automatic Channel Selection) Press the TUNE select button for 1 second or more. When the ( ) side ispressed, the unit will automatically tune to the next higher frequency and when the ( ) side is pressed, it will automati-cally tune to the next lower frequency. 3. BAND Selector Pressing the button changes the AM, FM1 and FM2 bands. The modeselected is displayed on LCD. Each press of the button changes the display as follows;
FM1 � FM2 � AM � FM1
4. BASS Control Knob Press to pop the knob out and turn to the left or right for the desired bass tone. TREBLE Control Knob Pull the bass control knob further out. Turn to the left or right for the desiredtreble tone.
5. PRESET STATION Select But- tons
Six (6) stations for AM, FM1 and FM2 respectively can be preset in the elec- tronic memory circuit on this unit.
FM AM
Page 91 of 211

1
FEATURES OF YOUR HYUNDAI
79
FM/AM
K240B01HR-GAT
1. POWER ON-OFF Control
Knob
The radio unit may be operated when the ignition key is in the "ACC" or "ON"position. Press the knob to switch the power on. The LCD shows the radio frequency in the radio mode or the tapedirection indicator in the tape mode. To switch the power off, press the knob again. VOLUME Control Rotate the knob clockwise to increase the volume and turn the knob counter-clockwise to reduce the volume. 2. BAND Selector Pressing the button changes the AM, FM1 and FM2 bands. The mode selected is displayed on LCD.Each press of button changes the dis- play as follows; FM1 � FM2 � AM � FM1 3. LCD LCD shows the following informations; Band of FM1/FM2/AM frequency, pre-set channel number, ST in case of FM stereo. 4. TREB (Treble) Control Knob Press to pop the knob out and turn to the left or right for the desired trebletone. 5. TUNE (Manual) Select Button Press the ( ) side or ( ) side to increase or to decrease the frequency. Press either button and hold down to continu- ously scroll. Release button once thedesired station is reached. SEEK Operation (Automatic Channel Selection) Press the TUNE select button 0.5 sec or more. Releasing it will automatically tune to the next available station with a beep sound. When the ( ) side is pressed longer than0.5 second, releasing will automaticallytune to the next higher frequency and when the ( ) side is pressed longer than 0.5 second and releasing will automati-cally tune to the next lower frequency.
6. PRESET STATION Select But-
tons
Six (6) stations for AM, FM1 and FM2 respectively can be preset in the elec- tronic memory circuit on this unit. HOW TO PRESET STATIONS Six AM and twelve FM stations may be programmed into the memory of the radio. Then, by simply pressing theband select button and/or one of the six station select buttons, you may recall any of these stations instantly. To pro-gram the stations, follow these steps:
o Press band selector to set the band for AM, FM1, or FM2.
o Select the desired station to be stored
by seek or manual tuning.
o Determine the preset station select button you wish to use to access that station.