2011 Hyundai Accent window
[x] Cancel search: windowPage 9 of 232
F9
CAUTION:
When installing a container of liquid air freshener inside the vehicle, do not place it near the instrument cluster nor on the instrument panel pad surface. If there is any leakage from the air freshener onto these areas (Instrument cluster, instrument panel pad or air ventilator), it may damage these parts. If the liquid from air freshener does leak onto these areas, wash them withwater immediately.
!
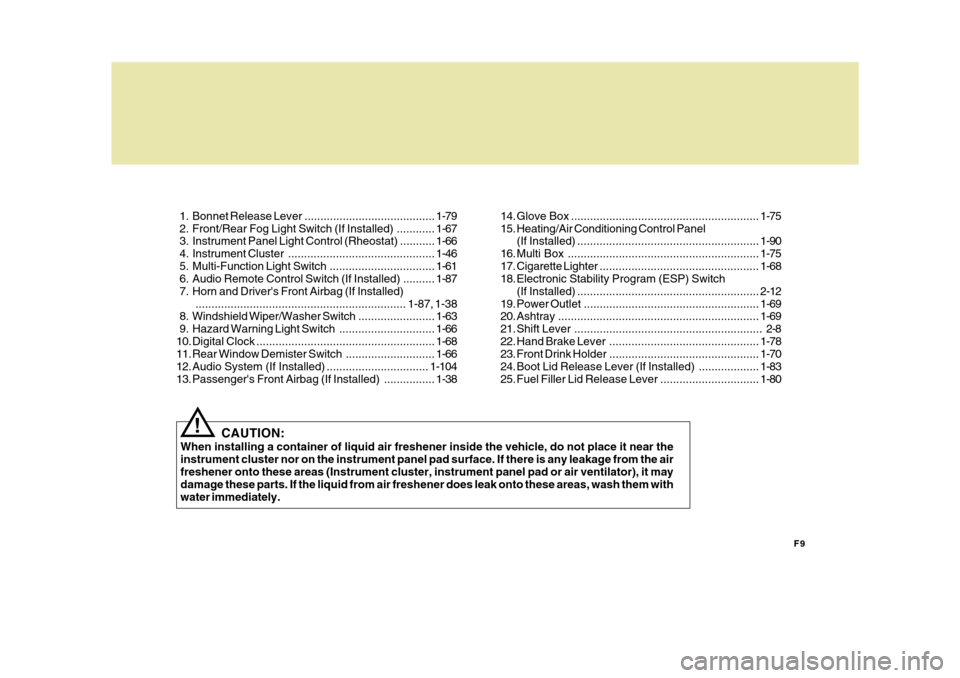
1. Bonnet Release Lever .........................................
1-79
2. Front/Rear Fog Light Switch (If Installed) ............ 1-67
3. Instrument Panel Light Control (Rheostat) ........... 1-66
4. Instrument Cluster.............................................. 1-46
5. Multi-Function Light Switch................................. 1-61
6. Audio Remote Control Switch (If Installed) .......... 1-87
7. Horn and Driver's Front Airbag (If Installed) .................................................................. 1-87, 1-38
8. Windshield W iper/Washer Switch ........................1-63
9. Hazard Warning Light Switch.............................. 1-66
10. Digital Clock ........................................................ 1-68
11. Rear Window Demist er Switch ............................ 1-66
12. Audio System (If Installed) ................................ 1-104
13. Passenger's Front Airbag (If Installed) ................1-3814. Glove Box ...........................................................
1-75
15. Heating/Air Conditioning Control Panel (If Installed) ......................................................... 1-90
16. Multi Box ............................................................ 1-75
17. Cigarette Lighter .................................................. 1-68
18. Electronic Stability Program (ESP) Switch
(If Installed) ......................................................... 2-12
19. Power Outlet ....................................................... 1-69
20. Ashtray ............................................................... 1-69
21. Shift Lever ........................................................... 2-8
22. Hand Brake Lever ............................................... 1-78
23. Front Drink Holder ............................................... 1-70
24. Boot Lid Release Lever (If Installed) ................... 1-83
25. Fuel Filler Lid Release Lever ...............................1-80
Page 12 of 232
FEATURES OF YOUR HYUNDAI
1
1
Fuel Recommendations ................................................ 1-2
Running in Your New Hyundai ..................................... 1-3
Immobiliser System ...................................................... 1-3
Door Locks ................................................................... 1-5
Theft-Alarm System ...................................................... 1-8Window Glass............................................................. 1-11
Seats ........................................................................... 1-13
Seat Belts .................................................................... 1-22
Child Restraint System ................................................ 1-28
Supplemental Restraint (AIRBAG) System .................1-37
Instrument Cluster and Indicator Lights .......................1-46
Warning and Indicator Lights....................................... 1-50
Trip Computer .............................................................. 1-58
Multi-Function Light Sw itch .......................................... 1-61
Windshield Wiper/Washer Switch ................................1-63
Sunroof ........................................................................ 1-70
Mirror ........................................................................... 1-75
Bonnet Release ........................................................... 1-79
Heating and Cooling Control .......... ..............................1-89
Stereo Sound System ................................................. 1-99
Antenna ..................................................................... 1-103
Audio System ............................................................ 1-104
Page 17 of 232
1FEATURES OF YOUR HYUNDAI
6
!
OMC025006R
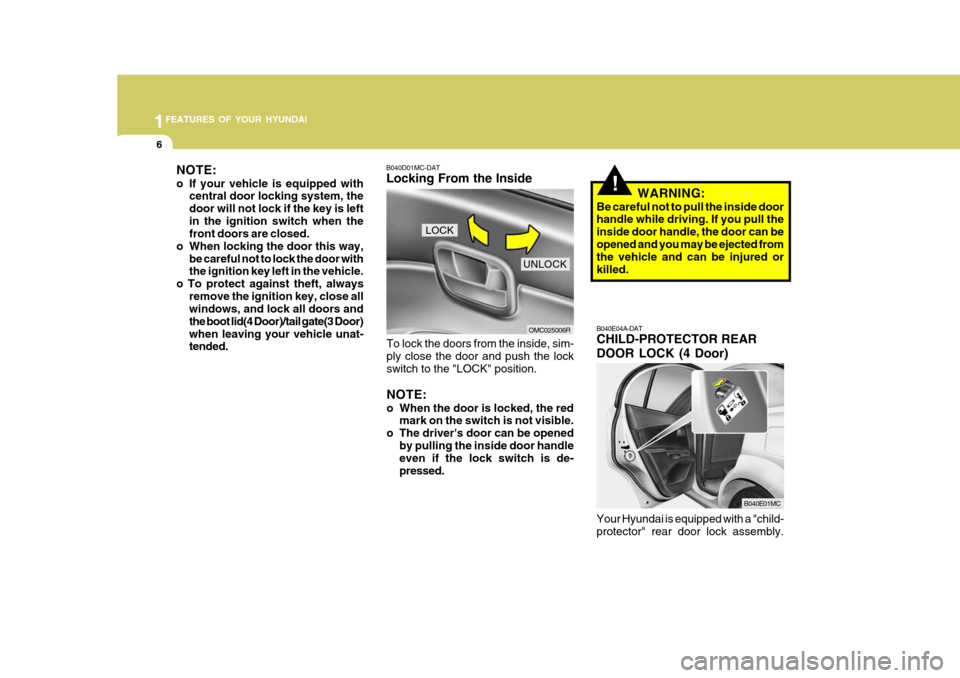
B040D01MC-DAT Locking From the Inside
To lock the doors from the inside, sim- ply close the door and push the lock switch to the "LOCK" position. NOTE:
o When the door is locked, the red mark on the switch is not visible.
o The driver's door can be opened by pulling the inside door handle even if the lock switch is de- pressed. B040E04A-DAT CHILD-PROTECTOR REAR DOOR LOCK (4 Door) Your Hyundai is equipped with a "child- protector" rear door lock assembly.
NOTE:
o If your vehicle is equipped with
central door locking system, the door will not lock if the key is leftin the ignition switch when the front doors are closed.
o When locking the door this way, be careful not to lock the door withthe ignition key left in the vehicle.
o To protect against theft, always remove the ignition key, close allwindows, and lock all doors and the boot lid(4 Door)/tail gate(3 Door)when leaving your vehicle unat- tended.
LOCK
UNLOCK
B040E01MC
WARNING:
Be careful not to pull the inside door handle while driving. If you pull the inside door handle, the door can beopened and you may be ejected from the vehicle and can be injured or killed.
Page 22 of 232
1
FEATURES OF YOUR HYUNDAI
11
!
WINDOW GLASS
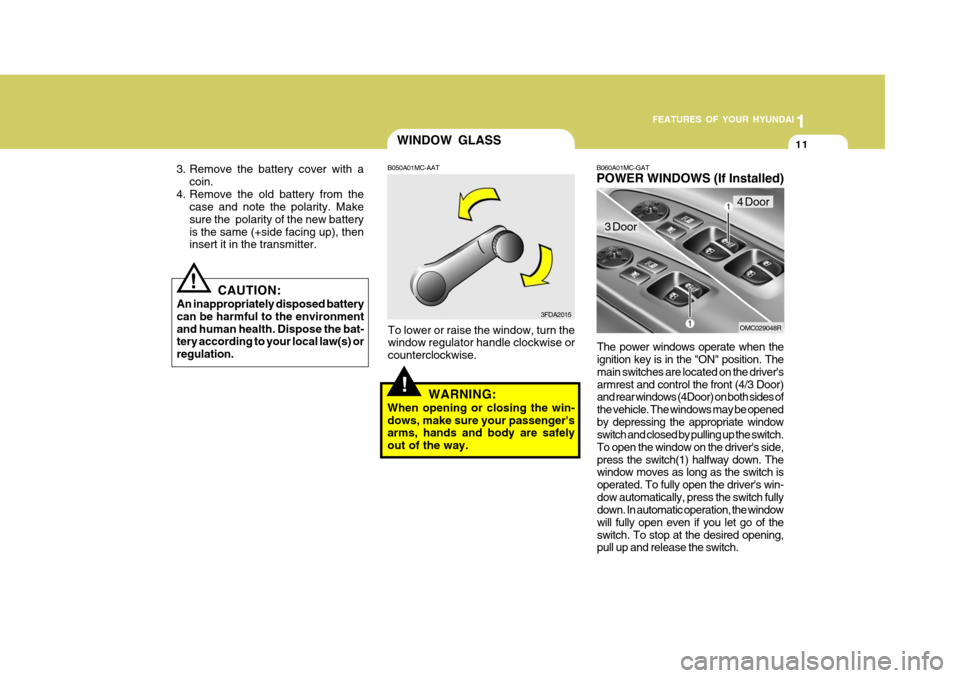
B050A01MC-AAT
To lower or raise the window, turn the window regulator handle clockwise or counterclockwise. WARNING:
When opening or closing the win-dows, make sure your passenger's arms, hands and body are safely out of the way.
3. Remove the battery cover with a
coin.
4. Remove the old battery from the case and note the polarity. Makesure the polarity of the new batteryis the same (+side facing up), then insert it in the transmitter.
3FDA2015
CAUTION:
An inappropriately disposed battery can be harmful to the environmentand human health. Dispose the bat- tery according to your local law(s) or regulation.
! B060A01MC-GAT POWER WINDOWS (If Installed)
The power windows operate when the ignition key is in the "ON" position. The main switches are located on the driver's
armrest and control the front (4/3 Door)
and rear windows (4Door) on both sides of the vehicle. The windows may be openedby depressing the appropriate window switch and closed by pulling up the switch. To open the window on the driver's side,press the switch(1) halfway down. The window moves as long as the switch is operated. To fully open the driver's win-dow automatically, press the switch fully down. In automatic operation, the window will fully open even if you let go of theswitch. To stop at the desired opening, pull up and release the switch.
3 Door
4 Door
OMC029048R
Page 23 of 232
1FEATURES OF YOUR HYUNDAI
12
!WARNING:
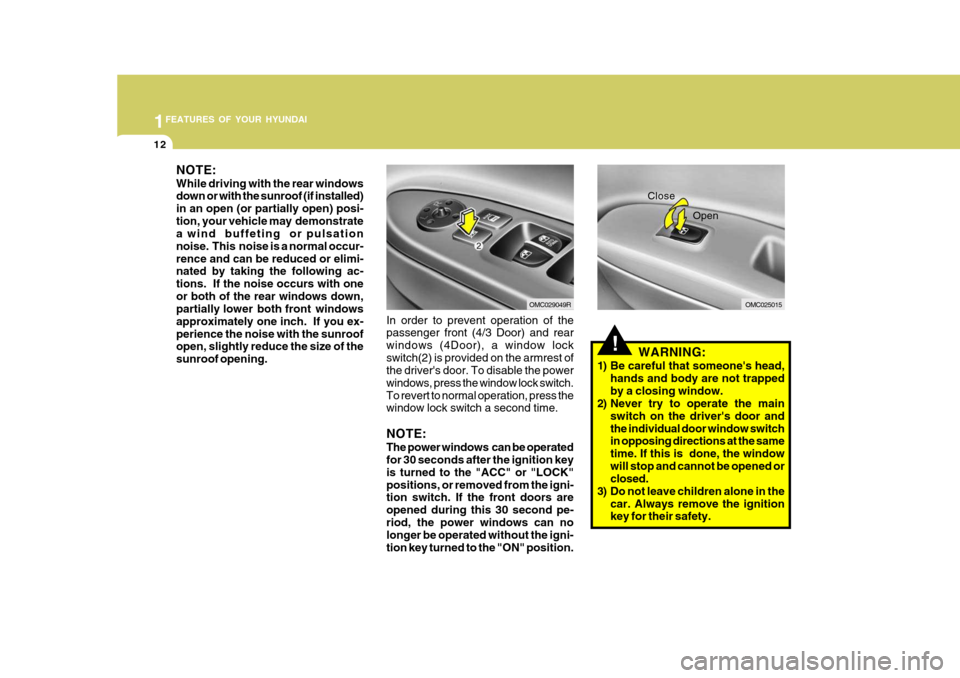
1) Be careful that someone's head, hands and body are not trapped by a closing window.
2) Never try to operate the main
switch on the driver's door andthe individual door window switch in opposing directions at the same time. If this is done, the windowwill stop and cannot be opened or closed.
3) Do not leave children alone in the car. Always remove the ignitionkey for their safety.
OMC025015
Close
Open
In order to prevent operation of the passenger front (4/3 Door) and rear windows (4Door), a window lockswitch(2) is provided on the armrest of the driver's door. To disable the power windows, press the window lock switch.To revert to normal operation, press the window lock switch a second time. NOTE: The power windows can be operated for 30 seconds after the ignition key is turned to the "ACC" or "LOCK"positions, or removed from the igni- tion switch. If the front doors are opened during this 30 second pe-riod, the power windows can no longer be operated without the igni- tion key turned to the "ON" position.OMC029049R
NOTE: While driving with the rear windows down or with the sunroof (if installed) in an open (or partially open) posi-
tion, your vehicle may demonstrate
a wind buffeting or pulsation
noise. This noise is a normal occur-rence and can be reduced or elimi- nated by taking the following ac-
tions. If the noise occurs with oneor both of the rear windows down,
partially lower both front windows
approximately one inch. If you ex-perience the noise with the sunroof open, slightly reduce the size of the sunroof opening.
Page 54 of 232
1
FEATURES OF YOUR HYUNDAI
43
!
o Do not install any accessories or
children’s toys in the Curtain Airbag deployment zones, as this may impair the operation of the system or throw parts of them intothe vehicle cabin causing injury to occupants if the system is de- ployed.
o To maintain the integrity of the Curtain Airbag system, any work,removal or installation of theairbag and associated compo- nents (such as roof lining and side trims) should only be performedby a qualified vehicle repairer.
WARNING:
o Before installing child restraints, always refer to "Child RestraintSystem" section to ensure correct installation and that occupant pro- tection is maximised.
o Make sure that the occupant does
not have any body parts (head,arms & legs) protruding outside the restraining system. If an inflat- ing airbag was to strike an infantor child, it may cause serious in- jury.
o Ensure the opening for the Cur- tain Airbag System remains unob-structed at all times, so that the airbags can inflate properly ifneeded.
Important Safety Notes for Cur- tain Airbag Systems Following are a number of safety points concerning this system which shouldalways be observed to ensure risk of injury is reduced in an accident.
o The built in coat hooks should
only be used for light weight cloth- ing, ensure that pockets are free of any heavy or sharp objects. When using coat hooks, do not hangclothes on coat hangers.
o The space between the occupant
and the curtain airbag must neverbe occupied by children, passen- gers or pets. Occupants should never lean out or have any parts oftheir body protruding from the window whilst the engine is run- ning.
o Do not move the sun visor out to cover the side window if there isan item attached to it such asgarage door remote control, pens, air fresheners or the like. These objects may cause injury if theCurtain Airbag is deployed.
o Do not install sun blinds to the
rear doors, these must not ob-struct or impair the airbag in any way.
Page 74 of 232
1
FEATURES OF YOUR HYUNDAI
63WINDSHIELD WIPER/WASHER SWITCH
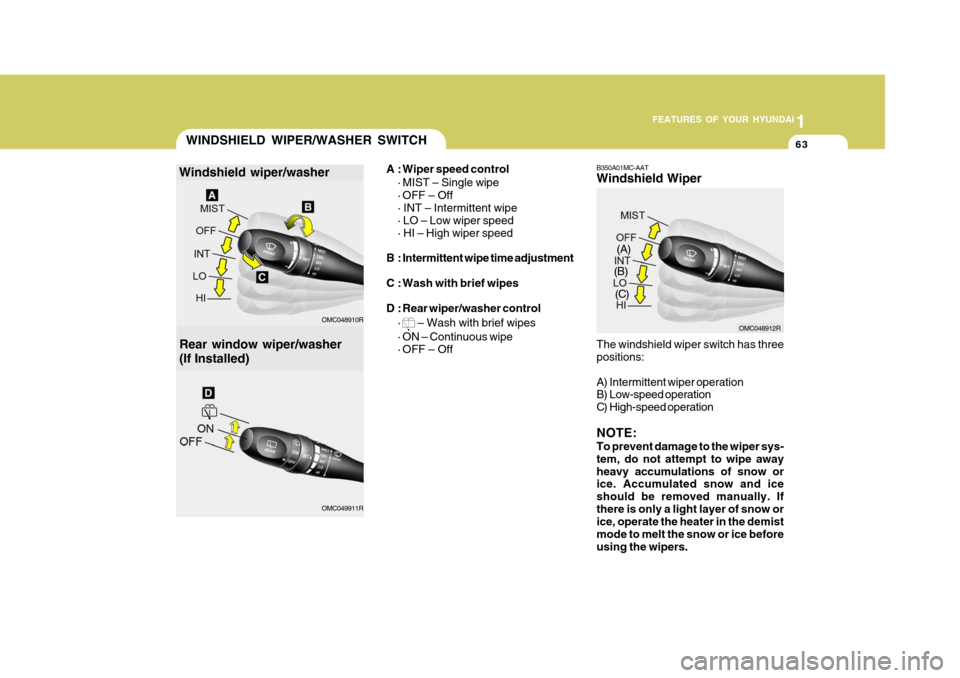
Rear window wiper/washer (If Installed) A : Wiper speed control
· MIST – Single wipe
· OFF – Off · INT – Intermittent wipe · LO – Low wiper speed · HI – High wiper speed
B : Intermittent wipe time adjustment
C : Wash with brief wipes
D : Rear wiper/washer control ·
– Wash with brief wipes
· ON – Continuous wipe
· OFF – Off
Windshield wiper/washerOMC048910R OMC049911R B350A01MC-AAT Windshield Wiper The windshield wiper switch has three positions:
A) Intermittent wiper operation
B) Low-speed operation
C) High-speed operation NOTE: To prevent damage to the wiper sys- tem, do not attempt to wipe awayheavy accumulations of snow or ice. Accumulated snow and ice should be removed manually. Ifthere is only a light layer of snow or ice, operate the heater in the demist mode to melt the snow or ice beforeusing the wipers.OMC048912R
(A)
(B)
(C)
Page 76 of 232
1
FEATURES OF YOUR HYUNDAI
65
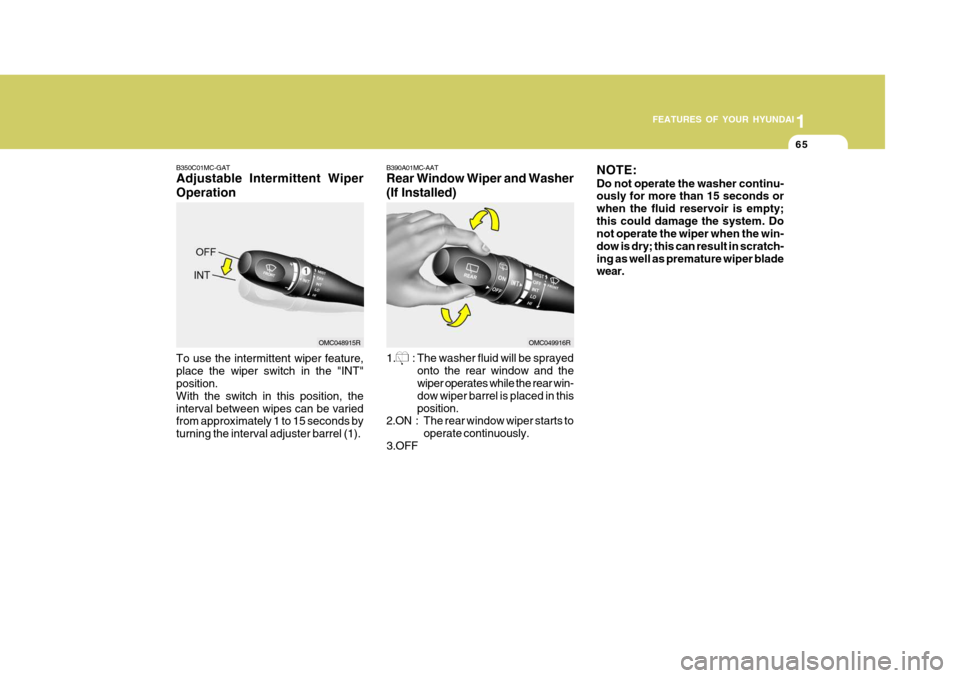
B350C01MC-GAT Adjustable Intermittent Wiper Operation To use the intermittent wiper feature, place the wiper switch in the "INT" position. With the switch in this position, theinterval between wipes can be varied from approximately 1 to 15 seconds by turning the interval adjuster barrel (1).
OMC048915R B390A01MC-AAT Rear Window Wiper and Washer (If Installed)
1.
: The washer fluid will be sprayed onto the rear window and the wiper operates while the rear win- dow wiper barrel is placed in thisposition.
2.ON : The rear window wiper starts tooperate continuously.
3.OFF
OMC049916R NOTE: Do not operate the washer continu- ously for more than 15 seconds or when the fluid reservoir is empty;this could damage the system. Do not operate the wiper when the win- dow is dry; this can result in scratch-ing as well as premature wiper blade wear.