2011 Hyundai Accent window
[x] Cancel search: windowPage 129 of 232

2 DRIVING YOUR HYUNDAI
2
C010A01MC-DAT
WARNING: ENGINE EXHAUST CAN BE DANGEROUS!
Engine exhaust fumes can be extremely dangerous. If, at any time, you smell exhaust fumes inside the vehicle, open the windows immediately. o Do not inhale exhaust fumes. Exhaust fumes contain carbon monoxide, a colourless, odourless gas that can cause unconsciousness and death by asphyxiation. o Be sure the exhaust system does not leak. The exhaust system should be checked whenever the vehicle is raised to change the oil or for any other purpose. If you hear a change in the sound of the exhaust or if you drive over something that strikes the underside of the car, have the exhaust system checked as soon as possible. o Do not run the engine in an enclosed area. Letting the engine idle in your garage, even with the garage door open, is a hazardous practice. Never run the engine in your garage any longer than it takes to start the engine and back the car out. o Avoid idling the engine for prolonged periods with people inside the car. If it is necessary to idle the engine for a prolonged period with people inside the car, be sure to do so only in an open area with the air intake set at "Fresh" and fan operating at one of the higher speeds so fresh air is drawninto the interior. If you must drive with the boot lid / tail gate open because you are carrying objects that make this necessary be sure to:
1. Close all windows.
2. Open side vents.
3. Set the air intake control at "Fresh", the air flow control at "Floor" or "Face" and the fan at one of the higher speeds.
To assure proper operation of the ventilation system, keep the ventilation air intakes located just in front of the windshield clear of snow, ice, leaves or other obstructions.
!
Page 130 of 232

2
DRIVING YOUR HYUNDAI
3
2
DRIVING YOUR HYUNDAI
3TO START THE ENGINEBEFORE STARTING THE EN- GINE
C020A03S-DAT Before you start the engine, you should always:
1. Look around the vehicle to be sure
there are no flat tyres, puddles of oil or water or other indications of pos- sible trouble.
2. After entering the car, check to be
sure the hand brake is engaged.
3. Check that all windows, and lights
are clean.
4. Check that the interior and exterior mirrors are clean and in position.
5. Check your seat, seatback and head- rest to be sure they are in their properpositions.
6. Lock all the doors.
7. Fasten your seat belt and be sure that all other occupants have fas-tened theirs.
8. Turn off all lights and accessories that are not needed.
9. When you turn the ignition switch to "ON", check that all appropriate warn- ing lights are operating and that you have sufficient fuel.
10.Check the operation of warning lights and all bulbs when key is in the "ON"position. C030A01A-AAT COMBINATION IGNITION SWITCH
o If your Hyundai is equipped with a
manual transaxle, place the shift lever in neutral and depress the clutch pedal fully.
o If your Hyundai has an automatic
transaxle, place the shift lever in "P"(park).
o To start the engine, insert the igni- tion key and turn it to the "START"position. Release it as soon as the engine starts. Do not hold the key inthe "START" position for more than 15 seconds.
NOTE:
o For safety, the engine will not start if the clutch pedal is not depressed fully (Manual Transaxle) or the shift lever is not in "P" or "N" Position(Automatic Transaxle).
o The ignition key cannot be turned
from "ACC" position to "LOCK"position unless the shift lever is in the "P" (Park) position or the negative battery terminal is dis-connected from the battery. (For Automatic Transaxle)
!WARNING:
o Always wear appropriate shoes when operating your vehicle. Unsuitable shoes (high heels, skiboots, etc.) may interfere with your ability to use the brake and accel- erator pedal, and the clutch (ifinstalled).
o When you intend to park or stop
the vehicle with the engine on, becareful not to depress the accel- erator pedal for a long period of time. It may overheat the engine orexhaust system and cause fire.
Page 147 of 232

2 DRIVING YOUR HYUNDAI
20
C160K01A-DAT Carry Emergency Equipment Depending on the severity of the weather where you drive your car, you should carry appropriate emergency equipment. Some of the items youmay want to carry include tyre chains, tow straps or chains, flashlight, emer- gency flares, sand, a shovel, jumpercables, a window scraper, gloves, ground cloth, overalls, a blanket, etc.
C160J01A-AAT Don't Let Ice and Snow Accumu- late Underneath Under some conditions, snow and ice can build up under the fenders andinterfere with the steering. When driv- ing in severe winter conditions where this may happen, you should periodi-cally check underneath the car to be sure the movement of the front wheels and the steering components are notobstructed.
C160G01A-DAT To Keep Locks from Freezing To keep the locks from freezing, squirt an approved de-icer fluid or glycerineinto the key opening. If a lock is cov- ered with ice, squirt it with an approved de-icing fluid to remove the ice. If thelock is frozen internally, you may be able to thaw it out by using a heated key. Handle the heated key with careto avoid injury. NOTE: The proper temperature for using the immobiliser key is from -40°C to 80°C. If you heat the immobiliser key over 80°C to open a frozen lock, itmay cause damage to the transpon- der in its head. C160H01A-DAT Use Approved Anti-Freeze in Window Washer System To keep the water in the window washer system from freezing, add an approvedanti-freeze solution in accordance with instructions on the container. Window washer anti-freeze is available fromHyundai dealers and most auto parts outlets. Do not use engine coolant or other types of anti-freeze as thesemay damage the paint finish. C160I01A-DAT Don't Let Your Hand Brake Freeze Under some conditions your hand brake can freeze in the engaged posi- tion. This is most likely to happen when there is an accumulation of snow or icearound or near the rear brakes or if the brakes are wet. If there is a risk the hand brake may freeze, apply it onlytemporarily while you put the gear selector lever in "P" (automatic) or in first or reverse gear (manual transaxle)and block the rear wheels so the car cannot roll. Then release the hand brake.
Page 170 of 232

4
CORROSION PREVENTION AND APPEARANCE CARE
5
4
CORROSION PREVENTION AND APPEARANCE CARE
5
E030B01A-DAT Spot Cleaning Don't use petrol, strong solvents or corrosive cleaning agents. These can damage the finish of the car. To remove road tar, use turpentine on a clean, softcloth or commercially available bug and tar remover. Be gentle. To remove dead insects or tree sap,use warm water and mild soap or car- washing solution. Soak the spot and rub gently. If the paint has lost itsluster, use a commercial car-cleaning polish. E030C01A-AAT Polishing and Waxing Always wash and dry the car before polishing or waxing or using a combi-nation cleaner and wax. Use a good quality commercial product and follow the manufacturer's directions on thecontainer. Polish and wax the bright trim pieces as well as the paint.
! CAUTION:
OJB037800
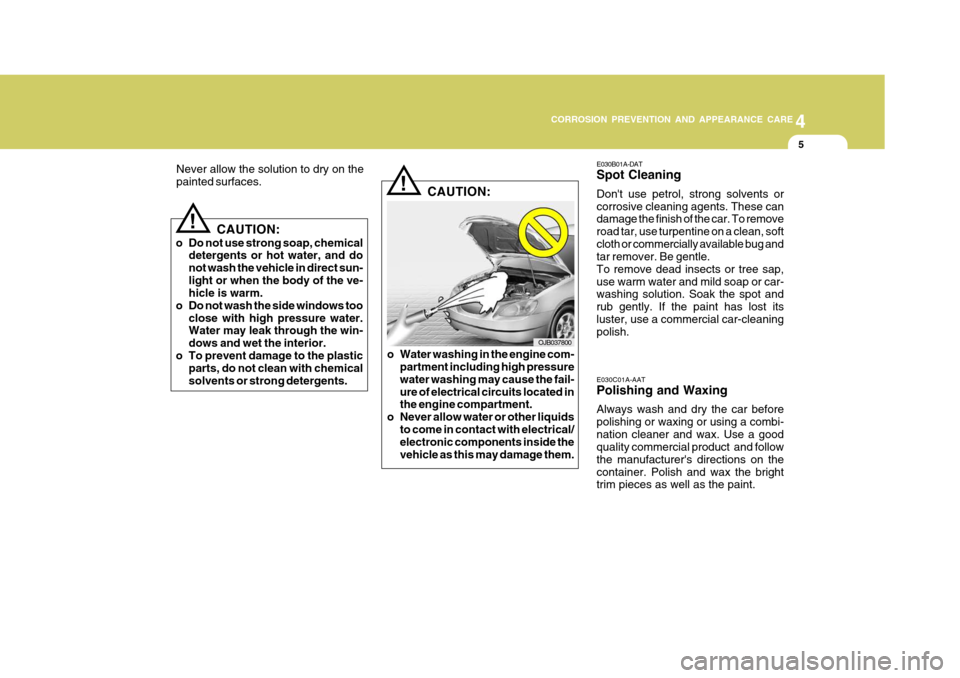
o Water washing in the engine com- partment including high pressure water washing may cause the fail-ure of electrical circuits located in the engine compartment.
o Never allow water or other liquids
to come in contact with electrical/electronic components inside the vehicle as this may damage them.
Never allow the solution to dry on thepainted surfaces.
!
CAUTION:
o Do not use strong soap, chemical detergents or hot water, and do not wash the vehicle in direct sun-light or when the body of the ve- hicle is warm.
o Do not wash the side windows too
close with high pressure water.Water may leak through the win- dows and wet the interior.
o To prevent damage to the plastic parts, do not clean with chemicalsolvents or strong detergents.
Page 172 of 232

4
CORROSION PREVENTION AND APPEARANCE CARE
7
4
CORROSION PREVENTION AND APPEARANCE CARE
7ANY QUESTIONS?
E040E01S-DAT Cleaning the Windows You may use any household window cleaner on the windows. However, when cleaning the inside of the rear windowbe careful not to damage the rear win- dow defroster wiring. When cleaning rear windows wipe along the defrosterbars rather than across. E050A01A-AAT If you have any questions about the care of your car, consult your Hyundai dealer.
E040D01A-AAT Cleaning the Seat Belts To clean the seat belts, use a cloth or sponge with mild soap or detergentand warm water. Do not use strong detergents, dye, bleach or abrasive materials on the seat belts as this mayweaken the fabric. While cleaning the belts, inspect them for excessive wear, cuts, fraying orother signs of damage and replace them if necessary.
E040C01A-AAT Cleaning the Carpets Use a foam-type carpet cleaner. Clean- ers of this type are available in aerosolcans in liquid form or powder. Read the instructions and follow them exactly. Using a vacuum cleaner with the ap-propriate attachment, remove as much dirt from the carpets as possible. Apply the foam following the manufacturer'sdirections, then rub in overlapping circles. Do not add water. These clean- ers work best when the carpet is keptas dry as possible.
! CAUTION:
When cleaning leather products (steering wheel, seats etc.), use neu- tral detergents or low alcohol con-tent solutions. If you use high alco- hol content solutions or acid/alka- line detergents, the color of the leathermay fade or the surface may get stripped off.
Page 212 of 232

6
DO-IT-YOURSELF MAINTENANCE
31
G200E01MC-GAT Inner Panel
G200E01MCFUSE RATING
25A 25A 10A 25A10A 10A15A 25A 10A 10A 20A10A 10A 30A 25A 10A 10A15A 10A 10A CIRCUIT PROTECTED
Driver Power Window Switch, Assist Power Window Switch,Rear Power Window Switch RH Driver Power Window Switch, Rear Power Window Switch LHPower Outside Mirror & Mirror Folding Switch, Digital Clock,Audio Cigarette Lighter, Power Outlet Head Lamp LHECM, Driver Power Outside Mirror & Mirror Folding Motor,Assist Power Outside Mirror & Mirror Folding Motor, PCM, Rear Defogger Switch Multi-function Switch, Rear Wiper MotorMulti-function Switch, Front Wiper Motor Rear Combination Lamp LH, License Lamp LH(3DOOR),Head Lamp LH, DRL Control ModuleHead Lamp Leveling Switch, Head Lamp Leveling Actuator,Fuel Filter Heater Relay(Diesel), Front Fog Relay Driver Seat Warmer Switch, Assist Seat Warmer Switch
Active Interior & Humidity Sensor, A/C Control Module, BCM, Blower Relay, SunroofMotor, PTC Heater Relay #2, #3(Diesel) Rear Combination Lamp RH, License Lamp RH(3DOOR),Head Lamp RH, License Lamp(4DOOR), Shunt ConnectorBCM, Rear Defogger AMP Head Lamp RH, Instrument Cluster, DRL Control Module
Hazard Relay, Hazard Switch SRS Control Module
PAB Cut Off SwitchRear Combination Lamp, Rear Fog Lamp Switch, BCM
P/WDW RH
P/WDW LH AUDIO
C/LIGHTER H/LP (LH)
HTD MIRR
RR WIPER FR WIPER
TAIL LP (LH)
IGN
HTD SEAT BLOWER
TAIL LP (RH) HTD GLASS AMP
H/LP (RH) HAZARD
A/BAG
SNSR
RR FOG LP
FUSE
Page 213 of 232

6 DO-IT-YOURSELF MAINTENANCE
32
FUSE RATING10A 20A10A 10A 15A 10A10A 20A 10A 15A 10A 15A 10A10A 10A 10A 10A CIRCUIT PROTECTED
Front Fog Lamp Switch, Front Fog Lamp LH, Front Fog Lamp RH,BCM Sunroof Motor Hazard SwitchOver Driver Switch, TCM(Diesel), Pulse Generator 'A'(Diesel),Pulse Generator
'B'(Diesel), Vehicle Speed Sensor
Data Link Connector, Stop Lamp Switch, P/WDW Relay,Multipurpose CheckConnector Instrument Cluster ECM, PCM, EPS Control Module, Mass Air Flow Sensor(Diesel), Fuel FilterWarning Switch(Diesel) Driver Door Lock Actuator, Assist Door Lock Actuator, BCM,Rear Door Lock
Actuator LH, Rear Door Lock Actuator RH,Driver Power Window Switch, TailGate Lock Actuator Start Relay BCM, Instrument Cluster, Generator, DRL Control ModuleIgnition Coil #1, #2, #3, #4, CondenserAudio
Luggage Lamp, Room Lamp, Vanity Lamp Switch, Digital Clock,Overhead Consol Lamp, A/C Control Module, Instrument Cluster, Rear Parking Assist Buzzer, Door Warning Switch, BCM ESP Switch, Steering Angle Sensor, ABS Control Module,ESP Module,Multipurpose Check Connector
Back-up Lamp Switch, Transaxle Range Switch DRL Control ModulePower Outside Mirror & Mirror Folding Switch
FR FOG LP S/ROOF
T/SIG LP
TCU
STOP LP
A/BAG IND ECU
C/DR LOCK START
CLUSTER IGN COIL AUDIO
(Power Connector)
MULT B/UP
(Power Connector)
ABS
B/UP LP DRL
FOLD'G
FUSE
Page 231 of 232

10INDEX
4
K
Key .............................................................................. 1-4If you lose y our keys ............................................. 3-13
Positions ................................................................... 2-4
Keyless Entry System .............................................. 1-10
L
Lubrication Chart .......................................................... 9-4
Luggage Net .............................................................. 1-84
MMaintenance Intervals Explanation of scheduled maintenance items .......... 5-7Maintenance under severe usage conditions ............ 5-6
Regular servici ng ...................................................... 5-4
Service requirements ................................................ 5-2
Mirrors
Day/night inside rearview .. ......................................1-77
Outside rearview mirror .. ......................................... 1-75
Multi Box ................................................................... 1-75
Multi-Function Light Switch ........................................ 1-61
Headlight switch ..................................................... 1-61
High-beam and low-beam switch ............................1-62
Lane change si gnal ................................................. 1-61
Parking light auto cut ............................................. 1-62
Passing sw itch ....................................................... 1-62
Turn signal operation .............................................. 1-61
O
Odometer/ Trip Odometer ....... ...................................1-57PPower Outlet
.............................................................. 1-69
Power Steering Fluid Level ....... .................................6-21
Power Windows ......................................................... 1-11
R Rear Parking Assist System ..................................... 2-14
Rear Seat .................................................................. 1-16
Adjusting seatback angle ....................................... 1-16
Folding rear seatbacks .... .......................................1-17
Rear Window Demister Switch .................................. 1-66
Running In Your New Hyundai ..................................... 1-3
SSeats ......................................................................... 1-13
Front seat ............................................................... 1-14
Rear seat ................................................................ 1-17
Rear seat entry ....................................................... 1-17
Seat Belts ................................................................. 1-22
3-Point system ....................................................... 1-24
Adjustable height .................................................... 1-23
Adjusting your seat belt .......................................... 1-25
Pre-tensioner seat belt .... .......................................1-35
Spectacle C ase ......................................................... 1-74
Speedometer ............................................................. 1-56
Starting ........................................................................ 2-5
Steering Wheel Tilt Lever .......................................... 1-87
Stereo Sound System ............................................... 1-99
Sun Visor ................................................................... 1-85
Sunroof ...................................................................... 1-70